










UV DTF is a UV-cured, two-film transfer applied with pressure to hard surfaces, and modern UV systems trace back more than five decades to late-1960s experimentation. It isn't the same process as heat-pressed DTF for apparel.
You may be standing at the workbench with a logo that looks perfect on screen but has nowhere sensible to go. A customer wants it on a powder-coated tumbler, a glass jar, and a laptop lid. Your regular DTF setup handles shirts and other fabric beautifully, yet it needs a different answer for rigid goods.
That answer is UV DTF, a laminated decal made for hard, generally nonporous surfaces. The print cures with ultraviolet light, then a pressure-sensitive adhesive layer carries the design onto the object. There's no heat press and no textile powder step. What matters most isn't whether the decal looks cured. It's whether the film wets, bonds, and survives the way the finished product will be used.
What UV DTF Transfers Are and Why They Exist
The customer's three products look different, but they share an important trait: they're rigid. A tumbler doesn't stretch like a shirt, a glass jar doesn't accept a heat-pressed transfer in the same way fabric does, and a laptop lid may be damaged by unnecessary heat. Regular DTF is built around flexible textiles. UV DTF fills the hard-goods gap.
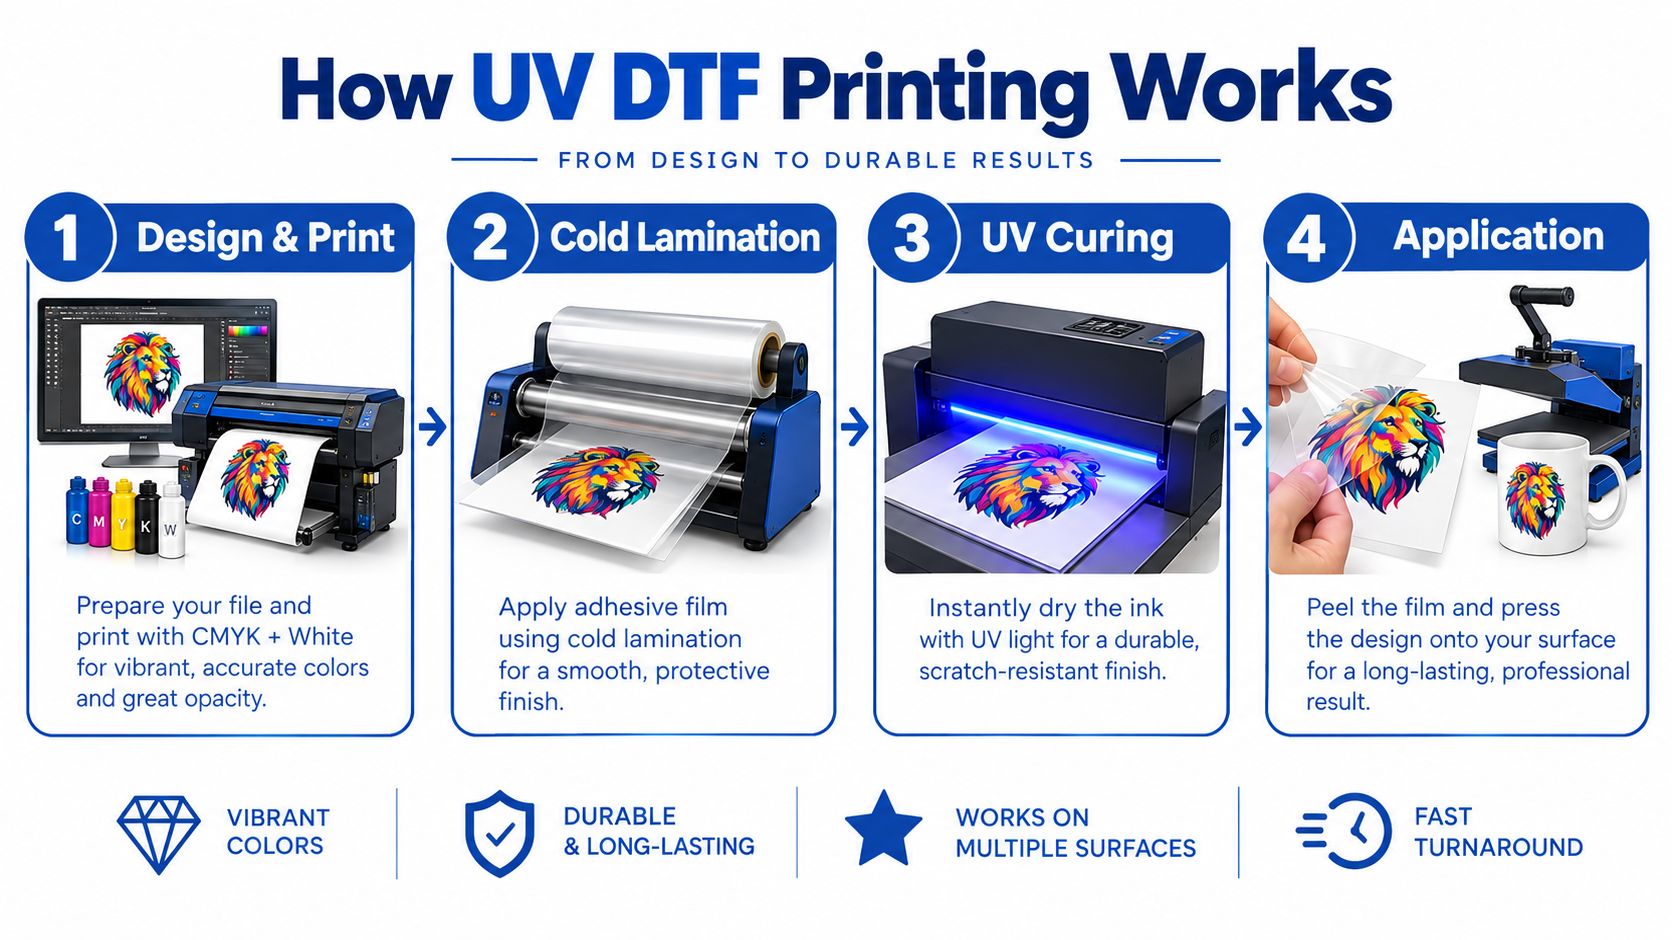
In plain language, UV DTF is a laminated decal that you press onto a hard object. A UV printer places ink on a printable film, cures the ink with UV light, and combines the finished image with a clear adhesive film. You position the transfer, press it firmly, and remove the carrier film. The result can carry fine details, white underprint, rich color, and a raised or glossy varnish finish without cutting and weeding each color.
The technology grew from the wider development of ultraviolet-curable printing. Early photopolymerization experiments in printing inks began in the late 1960s, Sun Chemical reportedly patented UV-curable inks in 1969, commercial UV systems appeared in narrow-web flexographic printing during the 1980s, and UV inks became established on plastic films during the 1990s. The ink cures when ultraviolet radiation activates photoinitiators, changing liquid ink into a solid layer in fractions of a second. This technical history of UV printing explains why the process can handle nonporous materials such as glass, metal, wood, plastic, leather, and ceramics.
Practical rule: UV DTF is a hard-surface transfer, not a heat-applied shirt graphic.
That distinction explains why UV DTF exists alongside conventional DTF rather than replacing it. Apparel needs a flexible graphic that moves with the garment. Hard goods need a surface-applied graphic that conforms to a rigid or slightly curved object. Tumblers, bottles, acrylic displays, coated metal signs, phone cases, and decorative ceramics are natural candidates, but each surface still needs testing.
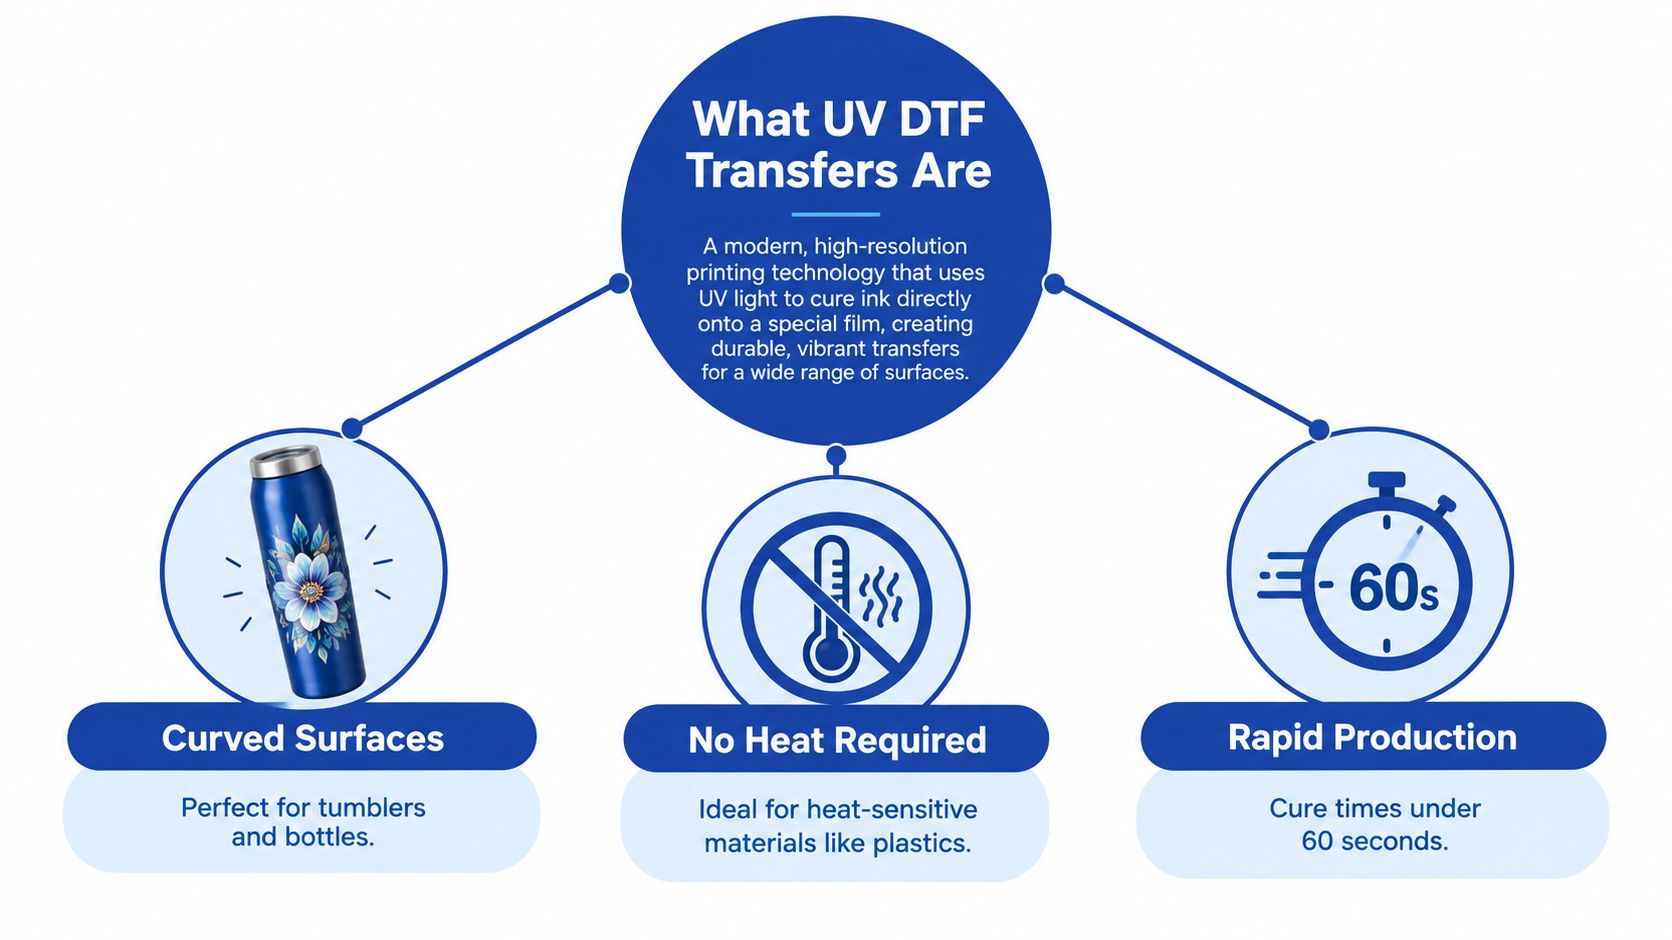
The simplest explanation to remember is this: UV DTF is a pressure-applied, laminated decal for hard goods. Conventional DTF is a heat-applied transfer for fabric. A fuller overview of UV DTF transfers and their applications can help you match the process to the object before you order.
How the UV DTF Printing Process Works Step by Step
A UV DTF job begins with two films, not one. The printable film receives the artwork. The second film, often called the adhesive or transfer film, is laminated over the design so the finished image can leave its carrier and bond to the target surface.
Step 1, prepare and print the artwork
The operator prepares the file in a raster or vector design program and sends it through the printer's RIP software. The printer commonly lays down a white ink layer, CMYK color, and sometimes varnish. White keeps colors visible on dark or transparent objects, while varnish can add gloss, texture, or a raised visual effect.
The printer deposits the image in reverse on the printable film. That reversal matters because the side that looks backward during production becomes the readable side after transfer.
Step 2, cure the ink with UV light
LED-UV lamps cure the ink as it prints. One technical process description specifies LED-UV curing around 365 nm, irradiance in the 400–1,200 mW/cm² range, and an adjustable dwell range of 0.5–3.0 seconds, although those settings are equipment-specific and require validation. The UV DTF process description from Pack Print Matrix also identifies a pressure-sensitive acrylic adhesive layer of approximately 25–35 µm.
Curing isn't just a matter of choosing the highest setting. Too little UV dose can leave residual uncured material and reduce abrasion or chemical resistance. Too much can make the cured ink or film stack brittle.
Step 3, laminate the adhesive film
After printing, the second film is laminated over the cured design. This is a cold, pressure-based lamination step, not the powder-and-heat sequence used for garment DTF. The adhesive film protects the print while giving the design a way to transfer from its carrier onto a compatible object.
An operator should monitor lamp output, film speed, exposure distance, and film condition from batch to batch. Nominal machine settings don't guarantee identical results when film, ink, or environmental conditions change.
Step 4, apply the transfer
Clean and dry the object first. Position the transfer carefully, press from the center outward, and use a squeegee or firm applicator to remove air pockets. Curved and textured objects require particular care because incomplete pressure contact creates weak points.
Peel the carrier slowly and inspect the transfer as it releases. If parts remain on the carrier, lay it back down, press that area again, and test the result rather than shipping a questionable item. A practical workflow should include a crosshatch or peel check after application and repeat testing after moisture, cleaners, and moderate rubbing.
For a visual walkthrough of the equipment and workflow, see this guide to the UV DTF printer process.
UV DTF vs Conventional DTF for Apparel
The shared letters cause most of the confusion. Both processes print an image onto film, but the ink system, adhesive, curing method, target material, and application method are different.
Conventional DTF uses water-based pigment ink on PET film. Adhesive powder is applied to the back of the print and cured with heat, then a heat press transfers the image to cotton, polyester, blends, and other textiles. The finished graphic must flex and tolerate laundering.
UV DTF uses UV-curable ink on a printable film. A separate adhesive film is laminated over the cured artwork, and the finished transfer is pressed onto a rigid or semi-rigid surface. It belongs on hard goods, not on a shirt that needs to stretch and wash.
UV DTF vs Conventional DTF at a Glance
| Criterion | UV DTF | Conventional DTF |
|---|---|---|
| Target surface | Hard, generally nonporous goods | Fabric and garments |
| Ink system | UV-curable ink | Water-based pigment ink |
| Adhesive | Laminated adhesive film | Adhesive powder |
| Curing | UV light during printing | Heat curing and heat pressing |
| Application | Peel and pressure application | Heat press or iron |
| Typical products | Tumblers, glass, acrylic, rigid plastic, coated metal | Shirts, hoodies, totes, hats, and other textiles |
| Finish and behavior | Often glossy, raised, or varnished, with a surface decal feel | Flexible transfer that moves with fabric |
| Main production question | Will the adhesive wet and hold on this substrate? | Will the transfer stretch, press, and wash correctly? |
The quick rule is simple: if the job bends, stretches, or goes in the wash, choose conventional DTF. If it's rigid and decorative, UV DTF may fit. Even then, “hard surface” isn't enough by itself. A low-energy plastic can reject the adhesive while smooth glass may bond well, so the substrate still needs a test.
Best Use Cases for UV DTF Stickers and Decals
UV DTF works best when the object is hard, smooth, and primarily decorative. The right product map starts with the material, then adds the customer's handling and cleaning expectations.
Drinkware and coated surfaces
Tumblers, bottles, jars, and coated metal drinkware are common candidates. Wipe away oil, dust, and residue, then apply with firm, even pressure around the curve. The usual failure point is the edge, especially where the transfer crosses a tight radius or a textured powder coat.
For a customer ordering branded drinkware, approve a physical sample before producing a larger run. A logo that looks excellent on a flat proof can lift at the edge on a curved object.
Glass, acrylic, and ceramic
Smooth glass and acrylic can provide a clean, bright base for detailed graphics. Ceramic mugs and tiles are also useful for decorative work, but their glaze, texture, and cleaning method can change the result. Clean the surface thoroughly and test both adhesion and the customer's intended care routine.
Food, skin, and child-contact products deserve a separate safety decision. A transfer that adheres well isn't automatically suitable for direct food contact or repeated skin contact.
Metal signage and rigid plastics
Powder-coated metal signs, tool cases, phone cases, and rigid promotional products can carry colorful branding without a heat press. Plastics need closer attention: PVC, ABS, and polystyrene may accept suitable ink chemistry more readily, while olefinic plastics such as polyethylene and polypropylene often need corona or flame treatment to improve wetting and adhesion. Technical guidance on UV ink adhesion and surface energy explains why surface treatment can matter more than visual cure.
The projects that belong elsewhere
A flexible shirt belongs in conventional DTF. Large wall graphics and vehicle wraps may suit vinyl. Polyester garments and coated sublimation blanks belong in a sublimation workflow. UV DTF can be useful for a small product label or decorative panel, but it isn't a universal replacement for every decorating process.
Choose by use, not by appearance: hard and decorative is the sweet spot. Flexible, heat-set, or food-contact work requires extra caution or another method.
Durability, Wash Testing, and Care Expectations
“Permanent” is too vague to guide production. A transfer can fail at the edge while its color remains perfect, crack on a curve while the adhesive still holds, fade under exposure, or soften under an aggressive cleaner. Those are different failures and need different tests.
Adhesion starts at the surface
UV DTF adhesion depends heavily on surface energy and ink or adhesive wetting, not only on how strongly the ink cured. Contamination, a low-energy plastic, a coating, or inadequate pressure can leave discontinuities at the interface. Moisture and abrasion then find those weak areas and begin edge lift.
Classify each new substrate before quoting a large order. Clean and test untreated glass, metal, acrylic, and rigid plastics separately. If a low-energy plastic shows lifting or incomplete bonding, test an appropriate surface treatment rather than just increasing cure strength.
Match the test to the failure
- Edge lifting: Apply a small sample, press the perimeter carefully, then perform a peel or crosshatch test. If the edge releases, investigate cleaning, surface treatment, pressure, and curvature.
- Cracking: Check whether the design crosses a tight curve or textured area. Test a smaller graphic, change its placement, or use an object with a gentler radius.
- Color or gloss change: Expose a sample to the actual cleaners, moisture, and handling expected by the customer. Don't substitute a visual cure check for a use test.
- Chemical attack: Test the intended cleaning product on a spare sample. Water resistance and resistance to a strong cleaner are separate claims.
Dishwasher use, temperature swings, abrasion, and frequent handling should be treated as specific test conditions, not assumed benefits. Document what passed and what failed, then use that result in the care instructions.
For many decorative products, a sensible care label says to hand wash gently, avoid abrasive pads and harsh cleaners, and avoid soaking unless the sample has passed that condition. For food-contact products, consult the specific ink, film, adhesive, and product manufacturer documentation. EuPIA's safe-handling guidance for UV and EB inks highlights reactive acrylates, possible irritation or sensitization, ventilation, gloves, eye protection, and UV exposure controls. Fully cured doesn't automatically mean food-contact safe.
Ordering Tips, File Prep, and Gang Sheet Strategy
A reliable UV DTF order starts before the artwork reaches the printer. Ask where the design will sit, how large it needs to be, whether it crosses a curve, and how the finished item will be cleaned. A flat logo with a generous safe area is easier to apply than a detailed graphic that runs directly into a narrow edge.
Prepare the file for the object
Use the printer's requested color workflow, and ask how it handles RGB files, CMYK conversion, white underlayers, and varnish. Keep small type and fine details away from the trim or contour. A clean transparent background prevents unwanted boxes, while sufficient resolution preserves edges through printing and lamination.
Confirm the final dimensions in the object's actual application area. A design that looks balanced on a screen may feel oversized on a small bottle or become difficult to position around a tumbler seam.
Nest artwork before printing
A gang sheet places multiple separate graphics on one film sheet. That lets the printer use more of the available printable area instead of producing every design separately. Large-format printing guidance reports that intelligent nesting can reduce media waste by approximately 15–30% compared with individual jobs, depending on sheet size, spacing, cut paths, and graphic shapes. This guide to large-format nesting explains the material-efficiency logic.
For ease of use, Lion DTF's Auto-build gang sheet builder can arrange uploaded artwork automatically. That helps reduce layout work and can lower film cost per transfer when several graphics share a sheet. Use consistent naming, group designs by substrate or customer, and leave enough space for clean separation.
Plan the order around the deadline
For a rush job, confirm artwork approval, transfer size, pickup or shipping method, and substrate availability before promising a delivery time. A relaxed order gives you room to run a sample, especially when the customer has not used the material before.
Keep one approved sample with the order record. It becomes the reference for color, placement, edge behavior, and care language when the next batch arrives.
More practical guidance on UV DTF gang sheet preparation can help turn a collection of small graphics into a production-ready layout.
Troubleshooting Common UV DTF Problems
When a transfer fails, start with the object, not the artwork. The most useful diagnostic order is substrate, pressure, cure, then contamination, because a perfect file cannot compensate for a surface the adhesive can't wet.
Edge lifting on coated metal
A powder-coated tumbler or sign may look clean while still carrying oils, polish, or a coating with poor surface energy. Clean a test area, allow it to dry fully, apply consistent pressure, and compare it with an untreated sample. If lifting continues, test a compatible surface treatment or alter the graphic placement so it doesn't cross a sharp transition.
Cloudy or under-cured areas
Cloudiness, tackiness, or weak rub resistance can point to insufficient UV dose, excessive speed, incorrect exposure distance, or a film problem. Check lamp output and film condition, then validate the adjustment with a rub and adhesion test. Don't solve every cure problem by increasing intensity, because excessive dose can create brittleness.
Sticky adhesive after application
A sticky feel may come from exposed adhesive, incomplete transfer, contamination, or a film stack that hasn't been laminated correctly. Press the transfer again with even coverage and inspect whether the carrier released completely. If the adhesive remains exposed around the design, tighten the artwork contour or review the lamination setup.
Cracking on curves
A rigid decal has limited tolerance for a tight radius. Cracking can appear when a large graphic is forced around a narrow curve or when pressure is uneven. Test a smaller design, split the placement, or select a gentler surface. Curved application should be approved with a physical sample, not judged only from a flat proof.
A white underlayer that looks dirty
White ink should help color remain visible, but a dirty-looking underlayer may indicate contamination, insufficient opacity, or an unsuitable film and color workflow. Compare a clean white test patch, check the file's white-channel settings, and inspect the printable film before changing the design.
Finish every new job with a short quality routine:
- Clean and dry the substrate.
- Press evenly from the center outward.
- Peel slowly and inspect the edges.
- Test adhesion with crosshatch or peel methods.
- Repeat after moisture or rubbing when the product will face those conditions.
Putting It All Together
Start with the object, not the machine. Identify the hard surface, classify its energy and coating, consider how the customer will handle and clean it, then test the exact film and adhesive combination before quoting at scale.
Use UV DTF when the product is rigid and decorative. Use conventional DTF when the graphic must flex with fabric. For production, prepare clean artwork, arrange multiple designs with an Auto-build gang sheet builder, approve a physical sample, and record the pass or fail result for that substrate.
Build a small sample board with glass, metal, acrylic, coated plastic, and the most difficult surface you expect to sell. That board, plus a simple peel, crosshatch, moisture, and abrasion test matrix, will protect both your margins and your customer promises far better than a blanket claim of permanence.
Lion DTF Transfers offers UV DTF stickers and cup wraps for smooth hard surfaces, along with custom gang sheet ordering for prepared artwork. Visit Lion DTF Transfers to upload a design, arrange transfers efficiently, and start your next substrate test with a production-ready option.