


When you’re aiming for professional results, winging it on sizing just won't cut it. A solid DTF sizing chart is your best friend, giving you the standard dimensions for common placements like a 10" x 10" full front design or a classic 4-inch left chest logo. Using a trusted guide makes sure your graphics are perfectly proportioned for adult t-shirts, hoodies, and youth apparel, saving you from expensive printing mistakes.
Your Quick Reference DTF Sizing Chart
Getting a professional look with Direct-to-Film transfers starts with nailing the size. A design that’s too big can completely overwhelm a garment, but one that's too small just gets lost. This quick reference chart is here to give you the foundational measurements you need to make the right call, fast.
The DTF world has pretty much settled on a few standard dimensions, with 9" x 11" and 10" x 10" being two of the most popular go-to sizes. These are workhorses for full front and back prints on tees and hoodies, giving you a reliable baseline for any custom apparel project. You can dig deeper into these DTF print dimensions and their applications to see how they fit different jobs.
Common Placements and Standard Sizes
To help streamline your workflow, we’ve put together the industry-standard sizes for the most common print locations. Think of these as your starting point—you can always tweak them based on the specific garment or the complexity of your design.
- Left Chest Logo: Usually lands between 3.5 to 4.5 inches wide. This is the sweet spot for corporate branding or more subtle designs on polos and t-shirts.
- Full Front/Back (Adult): Standard designs are typically 10 to 12 inches wide. This size makes a strong visual impact without wrapping awkwardly around the sides of the shirt.
- Youth Garments: It's all about proportion. Scale those adult designs down to 7 to 9 inches wide for youth tees to keep things looking right.
- Sleeve Prints: Designs on long sleeves often measure 2.5 to 3.5 inches wide and can run up to 12 inches long, depending on the look you're going for.
Pro Tip: Before you commit, print your design on regular paper and place it on the garment. This simple mock-up is a game-changer for visually confirming the scale and position before you press the final transfer.
Quick DTF Sizing and Placement Reference
For an even faster lookup, this table summarizes the most common placements and their recommended DTF transfer sizes. It's a great tool to keep handy when you're planning out your next print run.
| Placement Area | Common Apparel | Recommended Size (Inches) | Recommended Size (CM) |
|---|---|---|---|
| Left/Right Chest | T-Shirts, Polos, Hoodies | 3.5" – 4.5" W | 8.9 – 11.4 cm W |
| Full Front/Back (Adult) | T-Shirts, Hoodies, Jackets | 10" – 12" W | 25.4 – 30.5 cm W |
| Full Front/Back (Youth) | T-Shirts, Hoodies | 7" – 9" W | 17.8 – 22.9 cm W |
| Long Sleeve | Long Sleeve T-Shirts | 2.5" – 3.5" W, up to 12" L | 6.4 – 8.9 cm W, up to 30.5 cm L |
| Short Sleeve (Bicep) | T-Shirts, Polos | 3" – 3.5" W | 7.6 – 8.9 cm W |
| Back Tag / Neck Label | T-Shirts, Hoodies | 2" – 3" W | 5.1 – 7.6 cm W |
| Hoodie (Front Pocket) | Hoodies | 4" – 5" W | 10.2 – 12.7 cm W |
| Pants (Thigh/Leg) | Sweatpants, Shorts | 4" – 6" W | 10.2 – 15.2 cm W |
Use these numbers as your guide, but always remember to measure the actual garment to ensure a perfect fit, especially when working with different brands or styles.
For anyone looking to maximize efficiency and cut down on costs, check out our Auto-build gang sheet builder. It’s designed to automatically arrange multiple designs—like a batch of chest logos and a few full-size prints—onto a single sheet. The tool optimizes your film usage, making your projects more affordable and a whole lot easier to manage.
Mastering DTF Sizing and Placement Principles
A quick reference chart gives you the numbers, but mastering the principles behind them is what really elevates your work. Choosing the right transfer size isn’t just about following a guide; it’s about understanding the relationship between the design, the garment, and the person who will wear it. A static DTF sizing chart can't possibly account for every variable.
Key factors like garment size, fabric type, and design complexity have to influence your decision. Think about it: a standard 10-inch design that looks bold and balanced on an XL t-shirt will completely overwhelm a size Small, appearing clunky and unprofessional. Likewise, a highly detailed graphic might need to be larger just to ensure its elements are clear and legible from a distance.
Adjusting for Fabric and Fit
The material of the garment also plays a huge role. Stretchy fabrics, like the ones you find in athletic wear, can slightly distort a design when they're worn. You might need to adjust your sizing or placement to compensate for that stretch.
On the other hand, structured materials like heavy cotton hoodies offer a more stable canvas. This allows for larger and more intricate prints without the risk of the design warping when it’s worn.
Below is a simple visual guide showing how different apparel types call for their own unique sizing considerations.
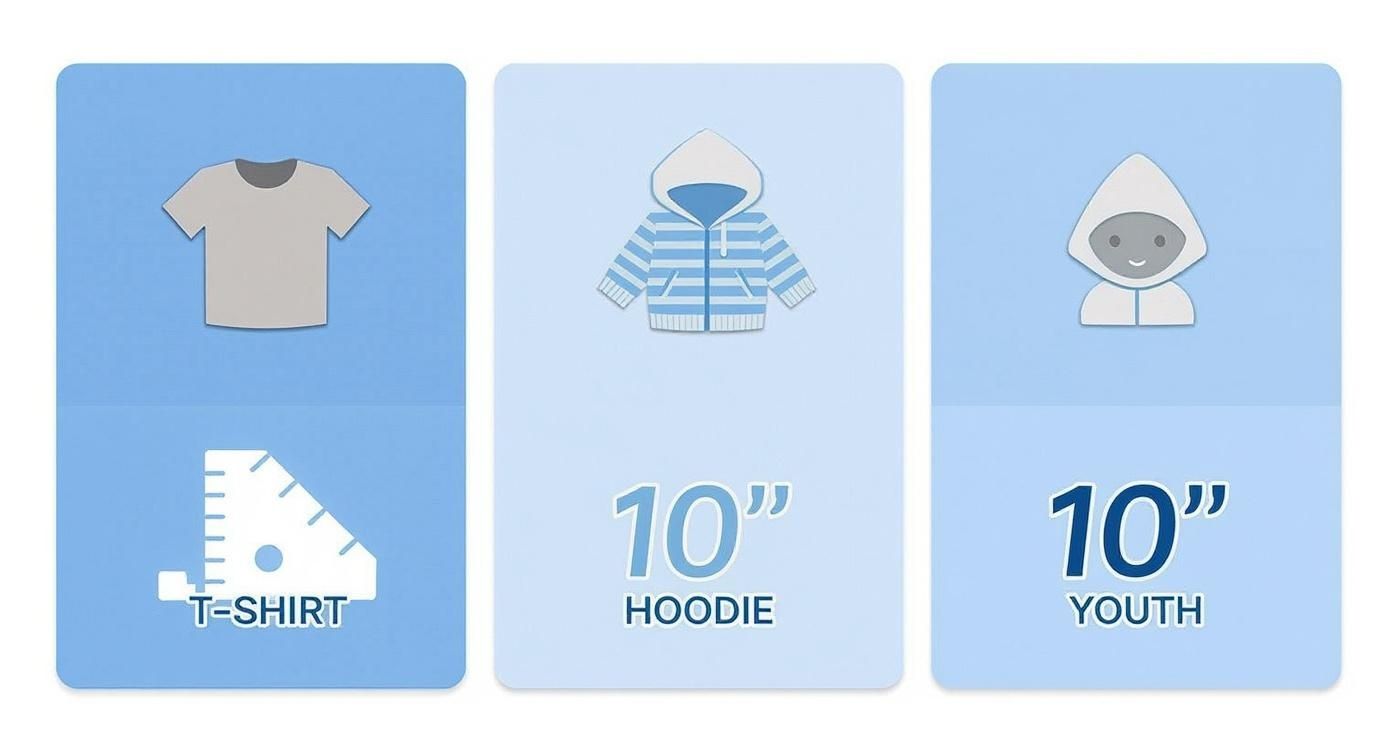
This just goes to show that even common items like t-shirts, hoodies, and youth apparel require distinct approaches to sizing if you want a professional finish. Getting a feel for these nuances is what separates the pros from the beginners.
Key Takeaway: Always consider the final context. A simple but game-changing trick is to print a paper template of your design and place it on the actual garment. This step lets you visually confirm proportion and placement before you commit to a full press, saving you from costly mistakes down the line.
By combining reference charts with these core principles, you can confidently size transfers for any project you take on. And for maximum efficiency, our Auto-build gang sheet builder is the perfect tool. It helps you organize various design sizes onto a single sheet, making it incredibly cost-effective to produce different prints for multiple garment types all at once.
Detailed Sizing Charts for Adult and Youth Apparel
While general rules of thumb are great for getting started, nailing that professional, consistent look across every single garment comes down to specific measurements. This breakdown gives you precise sizing and placement recommendations for the most common adult, youth, and even toddler items. Think of this as your go-to DTF sizing chart for hitting the mark every time, whether you're pressing t-shirts, hoodies, or onesies.
Consistency is everything, especially when you're cranking out a big order with a mix of sizes. A simple but effective trick is to always measure down from the collar to set a uniform vertical placement point across the entire batch. For a deeper dive into this, our guide on t-shirt design sizes and professional placement tips is the perfect companion to these charts.
Sizing for Adult Garments
Adult apparel gives you the biggest canvas, but it also comes with the most size variation. A design that looks perfect on a size Small can get totally lost on a 2XL. The table below offers a straightforward, scalable approach for standard and oversized adult garments, from basic tees to hoodies.
Here's a quick reference guide to get your adult garment placements just right.
Adult Garment DTF Placement and Size Guide
| Garment Area | Standard T-Shirt Size (S-XL) | Oversized/Hoodie Size (L-3XL) | Placement Tip |
|---|---|---|---|
| Full Front | 10" - 11.5" W | 11.5" - 12.5" W | Place top of design 3" - 3.5" below the collar. |
| Full Back | 11" - 12" W | 12" - 13.5" W | Place top of design 4" - 5" below the collar. |
| Left Chest | 3.5" - 4.5" W | 4" - 5" W | Align vertically with the outside of the collar. |
| Long Sleeve | 3" W x 11" L | 3.5" W x 12" L | Position 1" - 1.5" above the cuff. |
Using these measurements as a baseline will help you produce consistent, high-quality results that look great on any size.
Sizing for Youth and Toddler Apparel
Scaling down your designs for smaller garments is all about getting the proportions right. A youth design shouldn't just be a slightly smaller adult version; it needs to be noticeably smaller to maintain the right visual balance. Toddler and infant items, like onesies, obviously require the smallest transfers to fit their limited print area.
Crucial Tip: Always pre-press your garment for 3-5 seconds before placing the transfer. This removes any moisture and wrinkles, creating a smooth, flat surface that ensures a flawless and durable application every time.
Here are the standard recommendations to keep in your back pocket:
-
Youth T-Shirts (Sizes S-L):
- Full Front/Back: 8" - 9" wide.
- Left Chest: 3" - 3.5" wide.
-
Toddler T-Shirts (Sizes 2T-4T):
- Full Front/Back: 5" - 6" wide.
-
Infant Onesies (Newborn-24M):
- Full Front: 4" - 5" wide.
By using these charts, you can standardize your process for every apparel project that comes your way. For maximum efficiency, our Auto-build gang sheet builder is a game-changer. It lets you combine all these different sizes onto a single film, making it incredibly cost-effective to print for adults, youth, and toddlers all in one go.
Sizing Your Designs for Hats and Accessories
Moving beyond t-shirts and hoodies is a great way to expand your product line, but accessories come with their own set of rules. Items like hats, tote bags, and can coolers have unique shapes and much smaller print areas, so you can't just shrink down a t-shirt graphic and expect it to work. A design that looks perfect on a flat tee will warp and distort on a hat's curved surface if you don't size it correctly from the start.
When you nail the sizing for these smaller canvases, you can turn everyday items into premium, high-profit products. The secret is to measure the available flat surface area on the item and then adjust your design's proportions to fit that space perfectly. It makes the final product look intentional and professional, not like an afterthought.
Common Accessory Sizing Guide
With accessories, there’s very little room for error. Being off by even half an inch can throw off the entire look. Here are some solid, field-tested starting points for the most popular items we see come through the shop:
- Hats (Front Panel): The sweet spot is typically 2.5 to 3 inches high and no more than 4.5 inches wide. Pushing it any wider risks the design wrapping into the seams or getting distorted by the hat's curve.
- Tote Bags: These are basically wearable posters, often giving you a generous 10 x 12 inch canvas to work with. But always measure the specific bag you're using, because sizes can vary a lot between suppliers.
- Can Coolers (Koozies): You're working with a tiny space here, usually around 3 x 3 inches. Simple, bold designs are your best bet to make sure they're readable and have some punch.
- Aprons (Chest Area): For a logo or graphic on an apron's chest, a width between 7 to 10 inches usually looks balanced and is easily visible.
Expert Tip: Before you commit to pressing, do a simple paper test for curved items like hats. Print your design to scale, cut it out, and tape it onto the hat. This quick check gives you a real-world preview of how the design will sit and can save you from wasting a perfectly good transfer and hat.
This is where planning your gang sheets really pays off. You can combine a dozen hat designs with a few large tote bag prints and fill in the gaps with koozie logos. Our Auto-build gang sheet builder makes this ridiculously efficient and cost-effective. Just upload all your different-sized files, and the tool automatically arranges them to use every possible inch of film, which brings your cost-per-print way down.
How to Maximize Value with DTF Gang Sheets
Once you've nailed down your sizing chart, the next question is always: "How do I print these as cheaply as possible?" This is where DTF gang sheets become your best friend. Instead of printing every design on its own little film, a gang sheet lets you pack multiple graphics onto one large transfer sheet, which seriously drops your cost per print.
This method is just plain efficient. Let's say you've got an order for full-front adult tees, some left chest logos for hoodies, and a few sleeve hits. By arranging all of them on a single sheet, you’re paying for the film just once—not for each individual transfer. This strategy cuts out wasted material and makes sure you get value out of every square inch.
Arranging Designs for Optimal Efficiency
The real secret to a great gang sheet is a smart layout. Sure, you can manually drag and drop your designs in software like Adobe Illustrator or Canva, but that can get tedious and almost always leaves usable space on the table. The goal is to nest smaller designs—think neck tags, pocket logos, or even small branding hits—into the gaps around your larger graphics.
It’s a bit like playing Tetris with your artwork. By rotating and fitting all your different transfer sizes together, you can often sneak in extra designs for future jobs for virtually no extra cost. For a complete walkthrough on how to do this like a pro, check out our detailed guide on creating and optimizing DTF gang sheets to pick up some advanced layout tricks.
Streamlining the Process with Automation
Manually building a perfectly optimized gang sheet takes time and a good eye for spatial arrangement. A much faster and more reliable approach is to use a tool built specifically for this job. Automation takes out the guesswork and ensures you're not leaving money behind.
This is exactly why our Auto-build gang sheet builder is such a game-changer. We designed it for one purpose: to be as easy and cost-effective as possible.
Just upload all your individual artwork files, no matter their size. The software automatically arranges them into the tightest layout possible. It not only saves you a ton of time but guarantees you get the most out of your film.
Here’s a look at what a well-organized gang sheet can look like, with different logos and icons packed in to minimize waste.
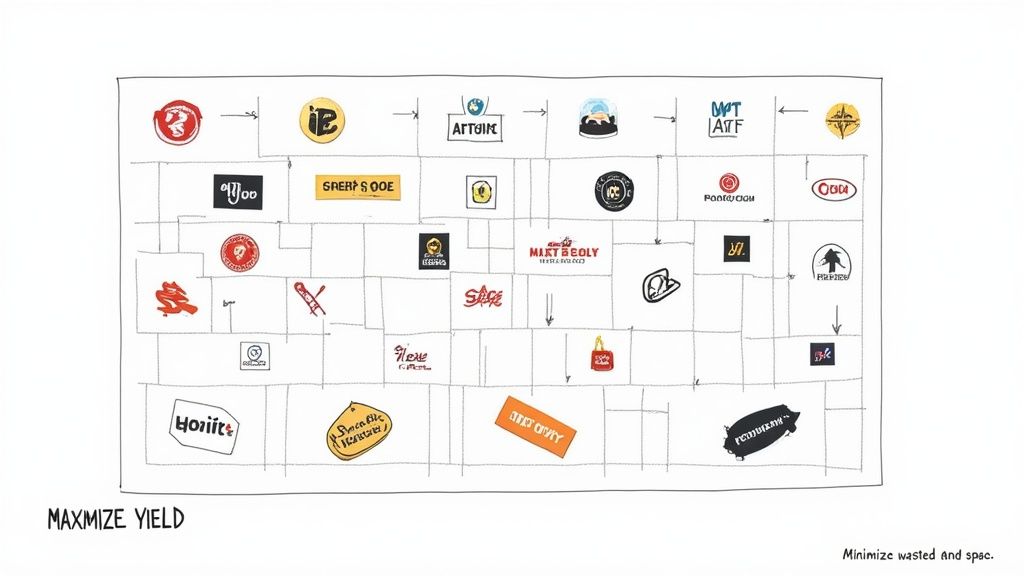
This automated nesting makes sure every inch of the transfer sheet is put to work, making your print runs more profitable and efficient than ever. You just upload your art, and the builder figures out the most cost-effective arrangement for you.
A perfectly sized design means nothing if the application is sloppy. The heat pressing stage is where all your careful planning with DTF sizing charts comes to life, creating a professional-quality garment that lasts. How you press is just as critical as how you size.
The whole process starts before your transfer even touches the fabric. You absolutely have to pre-press your garment for 3-5 seconds. This quick step is a game-changer; it zaps out any hidden moisture and smooths away wrinkles, giving you a perfectly flat canvas for the transfer to bond to.
Skipping the pre-press is one of the most common mistakes we see, and it almost always leads to a weak bond and peeling after just a few washes. Seriously, don't skip it.
Achieving Perfect Placement and Pressure
A professional look comes down to alignment. A slightly crooked design can ruin an otherwise perfect shirt. To nail the placement every single time, try one of these simple methods:
- Folding Technique: Just fold the shirt in half vertically and give it a quick, light press. This creates a temporary center crease you can use to align the middle of your transfer perfectly.
- Rulers and Guides: Grab a t-shirt alignment tool or even a simple ruler. Measuring from the collar and side seams ensures your placement is consistent across every single item in an order.
Once you’ve got it lined up, your heat press settings are what make or break the transfer. Different fabrics need different temperatures and pressures to get that perfect bond without scorching the material. For a full breakdown, check out our detailed guide on the best heat press settings for DTF, where we cover everything from standard cotton to those tricky polyester blends.
Key Takeaway: Consistent pressure is just as important as the right temperature. Make sure your heat press is calibrated to apply even pressure across the entire design. This prevents corners from lifting and guarantees a solid, uniform bond that will stand the test of time.
By mastering these fundamental pressing techniques, you can make sure every transfer—no matter the size—is applied perfectly. And for maximum value, don't forget to organize all your different sizes using our Auto-build gang sheet builder. It lets you print multiple designs at once, making your workflow both efficient and cost-effective.
Frequently Asked Questions About DTF Sizing
Even with the best size charts in hand, you're bound to run into questions when you're dealing with unique garments or just trying to make your workflow a little smoother. We get it. Here are the most common sizing questions we hear from printers like you, with straight-to-the-point answers to help you get it right every time.
Think of a solid DTF sizing chart as your starting point. Knowing when and how to bend the rules is what really takes your prints to the next level.
How Do I Adjust Sizing for Plus-Size Garments?
When you’re working with plus-size apparel (2XL and up), a standard 10 or 11-inch transfer can look way too small. It just throws the whole look off. A good rule of thumb is to bump up your design width to at least 12 inches for a 2XL or 3XL shirt.
But honestly, the absolute best way to nail the size is to print a paper template of your design first. Lay it right on the garment. This simple trick lets you see exactly how it will look before you commit to ordering your DTF transfers, guaranteeing a pro-level finish.
What Is the Easiest Way to Make a DTF Gang Sheet?
Manually arranging designs in your software works, but it’s a huge time sink and almost always leaves expensive film space on the table. The most efficient, foolproof way to build a gang sheet is with an automated tool.
Our Auto-build gang sheet builder was designed for exactly this. You just upload your artwork, and the tool automatically nests all the images to pack in as much as possible. It saves you time, cuts down on waste, and gets you the most bang for your buck on every single sheet.
Can I Use the Same Transfer Size for a T-Shirt and a Hoodie?
You often can, but the placement is what really matters. A standard 10-inch transfer might look great on both a Large t-shirt and a Large hoodie. On the hoodie, though, you have to place the design much higher up to clear the front pocket, which completely changes the visual balance.
Important Note: For zip-up hoodies, a single front design is a no-go. You’ll have to split your graphic into two separate transfers to press on either side of the zipper. Always, always measure the actual flat print area on any garment before you finalize your transfer size.
What Is the Standard DTF Size for a Left Chest Logo?
For a left chest logo, the industry standard is somewhere between 3.5 to 4.5 inches wide. The perfect size really depends on the logo’s shape and the garment it’s going on.
As a general guide, stick closer to 3.5 inches for smaller shirts (S-M). On larger sizes like an XL or 2XL, a 4 to 4.5-inch logo usually feels more balanced. For placement, aim for about 7-9 inches down from the shoulder seam and roughly 4 inches over from the center line.
At Lion DTF Transfers, we make getting the perfect size simple. Whether you're filling a sheet with a dozen different logos or just need one massive back piece, our tools are built to make your process efficient and affordable.
Build your next project with our Auto-build gang sheet builder and see how easy professional-quality printing can be.