


Think of a DTF gang sheet as the smartest way to lay out your designs for printing. Instead of printing just one graphic on a single piece of film, a gang sheet lets you group multiple designs onto one big roll. This simple move maximizes every last square inch of material, which means less waste and lower costs for you.
What Exactly Are DTF Gang Sheets
Imagine you have a big sheet of dough and a bunch of cookie cutters. You wouldn't just press one cutter right in the middle, would you? Of course not. You'd fit as many shapes as you possibly could, side-by-side, to make sure no dough goes to waste. That's exactly how a DTF gang sheet works. It’s an efficient, money-saving approach that bundles—or "gangs"—multiple images onto a single sheet of specialized PET film.
This is the process that unlocks professional-quality custom apparel for everyone. Whether you're a small business owner, an Etsy seller, or a large-scale print shop, the gang sheet is a game-changer.
From Digital File to Press-Ready Transfer
The idea is straightforward, but the tech behind it is pretty powerful. Here’s a quick look at how your digital designs become physical transfers, ready for your heat press:
- Arrangement: First, all your designs are arranged digitally on a large layout. This can be a mix of anything—different logos, various sizes, and unique graphics all on the same sheet.
- Printing: A specialized printer gets to work, applying a layer of vibrant, water-based DTF inks directly onto the PET film. The crucial last step is printing a white ink base, which is what makes the colors really pop on any garment, light or dark.
- Adhesive Application: The printed film then gets coated with a thermoplastic adhesive powder. This powder is engineered to stick only to the wet ink, nowhere else.
- Curing: Finally, the sheet passes through a curing unit. The heat melts the powder, creating a durable, flexible adhesive layer on the back of every design.
When your DTF gang sheet arrives, it’s a fully prepared roll of transfers. All that's left for you to do is cut out each design and press it onto your chosen garment with a heat press. It’s a workflow that makes producing custom apparel incredibly efficient.
The real magic of the gang sheet is combining different jobs into a single print run. You can print ten chest logos, five sleeve designs, and twenty custom neck tags all at once, paying only for the space you use—not a separate setup fee for each individual design.
To give you a clearer picture, let's break down the essential components that make this process work.
Key DTF Gang Sheet Concepts at a Glance
This table sums up the fundamental terms you'll encounter when working with DTF gang sheets. Think of it as a quick reference guide to get you up to speed.
| Component | Description | Role in the Process |
|---|---|---|
| PET Film | The special carrier sheet where designs are printed. It's heat-resistant and provides a stable base. | Acts as the temporary substrate holding the ink and adhesive until heat pressing. |
| DTF Ink | Water-based pigment inks (CMYK + White) designed for fabric. The white ink creates an opaque base. | Forms the vibrant, full-color graphic that will be transferred to the garment. |
| Adhesive Powder | A fine, hot-melt polyurethane powder that sticks to wet DTF ink. | Becomes the bonding agent that permanently fuses the design to the fabric fibers. |
| Curing Unit | A heating element or oven that melts the adhesive powder into a smooth, even layer. | Prepares the transfer for application by creating a stable, ready-to-press design. |
| RIP Software | Raster Image Processor software that controls ink levels, color profiles, and white ink placement. | Translates your digital file into precise printing instructions for the DTF printer. |
Understanding these core elements helps demystify the process and shows how each part contributes to a high-quality, durable final product.
Why This Method Is Taking Over
The demand for custom apparel and merchandise is exploding, and it’s driving massive growth in the printing world. The global Direct to Film (DTF) printing market was valued at about USD 2.72 billion in 2024 and is expected to hit around USD 4.59 billion by 2032. This boom is happening for a reason—it’s all thanks to the efficiency and quality DTF technology delivers. You can learn more about the growth of the DTF printing market on 360iResearch.com. For any business looking to scale, this is the way to go.
To make things even easier, our Auto-build gang sheet builder is designed for maximum ease of use and cost-effectiveness. It automatically arranges your uploaded designs to fill every inch of film, cutting out waste and guaranteeing you get the most out of your order without needing any fancy design software.
The Real Advantages of Printing in Bulk
Switching to DTF gang sheets isn't just a technical choice—it's a business move that directly hits your bottom line and ramps up your production capacity. When you group multiple designs onto one sheet, you unlock a ton of advantages that printing single images just can't touch. It really all boils down to three things: saving money, moving faster, and incredible versatility.
Think of it like ordering pizza for a big party. You wouldn't order ten individual small pizzas—it would be way more expensive and a hassle. You'd get a few extra-large ones instead. A gang sheet applies that exact same logic to your printing workflow, making sure you get the most value out of every single square inch.
Unlocking Serious Cost Savings
The biggest and most obvious win with DTF gang sheets is the huge drop in your cost-per-print. With old-school methods, you're constantly dealing with waste—unused film, extra ink, and discarded powder that surrounds one small design. Gang sheets pretty much wipe out that waste by packing the entire area with graphics.
That efficiency translates directly into more money in your pocket. Instead of paying for all that empty space around a single logo, you’re paying for a sheet that’s loaded with designs you can actually sell. This slashes your material costs, which means you can pump up your profit margins on every item you create.
For any apparel business trying to scale up, keeping costs in check is everything. You can actually learn more about growing smart in our guide on how to grow your printing t-shirt business with DTF transfers. Getting your print runs dialed in with gang sheets is a massive first step on that path.
The concept is simple: the more designs you cram onto a single sheet, the less you pay for each individual transfer. This bulk-printing model is what allows small businesses and independent creators to compete with larger operations on price without sacrificing quality.
To make things even easier and more cost-effective, our Auto-build gang sheet builder automatically arranges your designs to maximize every inch of the film. It takes all the guesswork out of the process, ensuring you get the absolute best value without needing to be a design wizard.
Unmatched Versatility on a Single Sheet
DTF gang sheets give you a level of flexibility that’s tough to get with any other method. You aren't stuck printing a dozen copies of the exact same design. Instead, one single sheet can become a complete toolkit for a whole range of different projects.
Just think about what that opens up. On one sheet, you can easily combine:
- Different Sizes: Print large logos for the front of adult hoodies right next to small chest logos for kids' tees.
- Various Designs: Knock out multiple customer orders at once by ganging all their different graphics together.
- Branding Elements: Throw in custom neck tags, sleeve logos, and pocket designs right alongside your main graphics to create a fully branded product line from a single print run.
This versatility is a total game-changer for anyone handling diverse or custom orders. Instead of setting up a separate print job for every little design variation, you can consolidate everything into one efficient run. Of course, when you're planning big projects to maximize savings, you need to manage all your materials. For example, you might also need to know how to calculate fabric yardage to make sure you have enough blank apparel for your bulk transfer order.
Supercharge Your Production Speed
Finally, you can't ignore the impact on your workflow and production speed. Printing designs one by one is a slow, tedious process that creates major bottlenecks in your shop. With DTF gang sheets, you can prep dozens—or even hundreds—of transfers all at once.
This bulk preparation means that when it's time to get pressing, you have a stack of transfers ready to go. You can move from one garment to the next without the constant stop-and-start delays of single-image printing. This streamlined process massively increases your output, letting you finish bigger orders in a fraction of the time. For any growing business, time is money, and that efficiency boost is priceless.
How to Build Your Perfect Gang Sheet
Putting together a killer gang sheet is where you really start to see the cost-saving magic of DTF. You’ve got two main ways to go about it: the old-school, hands-on route using design software, or the ridiculously simple automated builder path. Both get you to the same place, but one is built for speed and the other gives design pros total control.
No matter which way you go, the goal is the same: cram as many designs as you can onto your sheet to slash the cost of each individual transfer. A well-built sheet is the difference between a good deal and a great one.
The Manual Approach for Design Software Pros
If you’re already comfortable in programs like Adobe Photoshop, Illustrator, or Canva, building your dtf gang sheets yourself is a solid option. This method gives you complete control over every little detail, but you have to nail a few technical specs to make sure your prints come out perfectly.
You’ll start by creating a new canvas with the exact dimensions of the gang sheet you plan to order—say, 22x24 inches. Then, you just start dropping in your individual designs and arranging them like you’re playing Tetris.
For prints that look sharp and professional, follow these rules religiously:
- 300 DPI Resolution: Your main canvas and every single design you import must be at least 300 Dots Per Inch (DPI). This is non-negotiable for crisp, clean lines. Anything less will look blurry or pixelated.
- Transparent Background: Every design file has to have a transparent background. PNG files are your best friend here. If you upload a JPG with a white background, guess what? That white box is getting printed.
- Leave Cutting Space: Don't jam your designs right up against each other. Leave a small gap—about a quarter of an inch is good—around each graphic. This gives you room to actually cut them apart without slicing into another design.
If you're a Canva user, we've got you covered. We put together a guide that walks you through the whole setup. Check out our detailed instructions on how to create a DTF gang sheet in Canva.
The Easy Way: The Lion DTF Auto-Build Gang Sheet Builder
The manual method is great for designers, but we wanted something faster and easier for everyone else. That’s exactly why we built the Lion DTF Auto-build gang sheet builder. This tool takes all the technical headaches and guesswork out of the equation for maximum ease of use and cost-effectiveness.
The process couldn't be simpler:
- Pick the gang sheet size you want.
- Upload all of your design files (remember, PNGs with transparent backgrounds!).
- Sit back and let the builder do its thing.
In just a few seconds, our software analyzes your files and automatically arranges them into the most efficient layout possible. It maximizes every single square inch of the film so you don't have to.
The builder gives you a clear visual of your finished sheet and calculates the price on the spot, so you know you're getting the absolute best value without needing any fancy software or design skills. It’s the fastest way to get a perfectly optimized gang sheet, whether you’re a seasoned pro or just getting started.
Understanding Your Technical Options
To get professional-grade results from your DTF gang sheets, you have to choose the right materials for the job. Diving into the technical details might seem a little overwhelming at first, but it’s actually pretty straightforward. Making smart choices about size, film type, and materials is what separates a good print from a great one.
Think of it like choosing the right tools for a project. You wouldn't use a tiny brush to paint a whole wall. The same logic applies here—matching the sheet size to your production needs is the first step toward efficiency and saving some serious cash.
Choosing the Right Gang Sheet Size
The size of your gang sheet directly impacts how many designs you can cram on there and, ultimately, your cost per print. While you can find a few different sizes out there, two have really become the industry standards for their flexibility.
- The 22x24 Inch Sheet: This is the perfect all-rounder. It's a fantastic choice for smaller batches, one-off custom orders, or for testing a new collection of designs without committing to a massive print run.
- The 22x60 Inch Sheet: When you're ready to scale up, this is your workhorse. This larger format is built for high-volume orders, letting you fit dozens of logos, full-size graphics, and branding elements onto a single sheet. This is how you really start to bring your cost-per-image down.
Our Auto-build gang sheet builder makes this even easier. It lets you see exactly how your designs fit on different sheet sizes, helping you visualize which option offers the most bang for your buck before you even think about hitting "order."
Cold Peel vs Hot Peel: A Critical Decision
After you’ve picked a size, your next choice is the type of transfer film. The two main players are cold peel and hot peel, and the difference is all about when you remove the film after pressing the design. One isn't necessarily better than the other, but they create different results and fit different workflows.
The peel method you choose affects not only your production speed but also the final texture and finish of the print. This single choice can define the look and feel of your finished garment.
Let's break down the key differences to help you figure out which one is right for your projects.
Comparing Cold Peel and Hot Peel DTF Film
This table compares the key characteristics of cold peel and hot peel films to help you decide which is best for your needs.
| Feature | Cold Peel Film | Hot Peel Film |
|---|---|---|
| Peeling Process | Film is removed after the transfer has cooled down. | Film is removed immediately while the transfer is hot. |
| Final Finish | Typically results in a smoother, matte finish. | Often produces a slightly glossier, vibrant finish. |
| Ease of Use | More forgiving for beginners; less risk of errors. | Requires more technique and speed for a clean peel. |
| Production Speed | Slower, as it requires a cooling period. | Significantly faster, ideal for high-volume runs. |
| Best For | Detailed designs and achieving a premium feel. | Rapid production and maximizing output efficiency. |
Here at Lion DTF, we specialize in premium hot peel transfers because they let our customers work faster and more efficiently. But knowing both options helps you appreciate how different technologies can serve your creative goals. If you're curious about how DTF stacks up against other methods, our complete breakdown of DTF vs DTG printing gives you even more context.
Ultimately, the best technical options are the ones that line up with what you're trying to do, whether that's getting a specific finish, cranking up your production speed, or just getting the absolute best value from your DTF gang sheets.
A Step-By-Step Guide To Application
Turning your freshly printed DTF gang sheets into killer finished apparel is where the real fun starts. With a solid heat press and the right technique, you can get professional-grade results that are both durable and pop with color. The process is pretty straightforward, but getting each step right is the key to a flawless finish.
Before you even think about heat, your first job is to prep your transfers. Carefully cut out each individual design from the larger gang sheet. A good tip is to leave a small border of film around the edges—it just makes them easier to handle and position on the garment without smudging the adhesive.
Prepping For a Perfect Press
The secret to a print that lasts starts way before the transfer ever touches the fabric. Moisture and wrinkles are your biggest enemies here. They can mess with the adhesive and lead to peeling or cracking down the line.
To avoid this, always do a pre-press. Just place your garment on the heat press and give it a quick press for 4-5 seconds at your target temperature. This simple step does two crucial things: it zaps any hidden moisture out of the fabric and smoothes out wrinkles, creating a perfectly flat, dry surface for your transfer. Once that's done, carefully place your DTF transfer on the garment, adhesive side down.
Heat Press Settings and The Peeling Process
With your transfer perfectly placed, it's time for the main event. While settings can vary a bit based on your heat press and fabric, a great starting point for most cotton and polyester blends is 240-280°F.
Apply firm, even pressure for a solid 10 seconds. Consistent pressure across the entire design is non-negotiable if you want the adhesive to bond correctly. Uneven pressure is a classic rookie mistake that leads to parts of the design not sticking. After the timer goes off, you get to the most satisfying part: the peel.
The infographic below shows the two ways you can go about peeling the film after pressing.
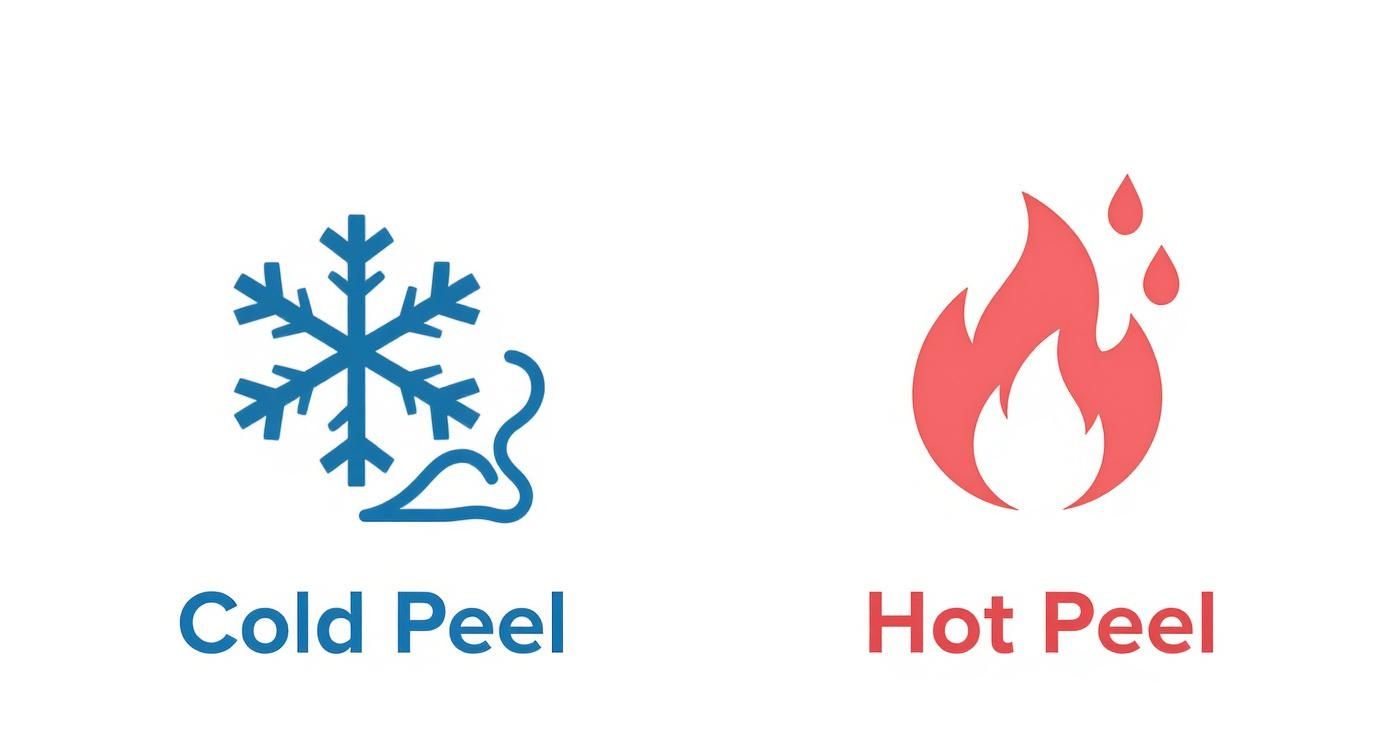
This choice between a cold peel and a hot peel makes a real difference in your workflow and the final feel of the print.
Pro Tip: For maximum durability, do one final press after you've peeled the film. Cover the exposed design with a Teflon sheet or parchment paper and press it again for another 4-5 seconds. This finishing touch really helps lock the ink into the fabric fibers, making it feel softer and hold up better in the wash.
From Design To Done
Following these steps ensures every garment you make looks professional and is built to last. Common mistakes like skipping the pre-press, using the wrong temperature, or pressing unevenly are easy to avoid with a little care.
The beauty of using DTF gang sheets is the efficiency it brings to your whole setup. You can cut out dozens of transfers from a single sheet and fly through a stack of shirts in no time. When you use our Auto-build gang sheet builder, you're not just squeezing the most designs onto a sheet to save money—you're also making sure you have a steady supply of transfers ready to press, keeping your production line moving without a hitch.
Caring for Your DTF Printed Apparel
One of the first questions we always get is, "How long will this print actually last?" The good news is, high-quality DTF transfers are incredibly tough. When they're applied right, these prints will often outlive the garment itself, holding onto their color and sharp details through dozens of wears and washes.
This kind of durability is a huge win for any apparel business. The prints have an impressive amount of stretch, moving with the fabric instead of fighting against it. This flexibility means they are highly resistant to cracking and peeling, making them a perfect choice for everything from everyday t-shirts to performance activewear that really gets put through its paces.
Simple Steps for Long-Lasting Prints
To make sure every garment looks fantastic for years to come, it's a great idea to give your customers some simple care instructions. The main goal is to protect the print's bond with the fabric. High heat and harsh chemicals are the two things you really want to avoid, as they can weaken the adhesive over time.
Here’s a straightforward wash care guide you can pass along:
- Turn Garment Inside Out: This is the single most effective step you can take. It minimizes friction, preventing the DTF print from rubbing against other items in the wash and preserving its surface from abrasion.
- Wash in Cold Water: Always stick to a cold wash cycle. Hot water can soften the adhesive, making the transfer more vulnerable to damage during the wash and spin cycles.
- Use a Mild Detergent: Harsh detergents, bleach, and especially fabric softeners can break down both the ink and the adhesive. A gentle, mild detergent is all you need to get the garment clean while keeping the print vibrant.
- Hang Dry or Tumble Dry Low: The absolute best method is to hang the garment to air dry. If you have to use a dryer, always use the lowest heat setting. High heat is the print's biggest enemy and will definitely compromise its lifespan.
Why Proper Care Matters
Following these simple steps helps guarantee that the quality you deliver on day one is still there for the long haul. This focus on durability is a big reason why the entire textile industry is embracing this technology so quickly.
Statistically, the DTF printing market is seeing some serious growth, with projected CAGR estimates between 5.8% to 6.75% for the forecast period of 2024 to 2032. That expansion is fueled by the demand for durable, high-quality custom apparel. You can read up on these market growth findings on GrandviewResearch.com.
Beyond the specifics of DTF, understanding the broader principles of garment care can be a real asset. You can find some great insights on general apparel preservation. By educating your customers, you’re not just protecting the quality of your work—you’re building trust and confidence in your brand.
Common Questions About DTF Gang Sheets
Even after you get the hang of DTF gang sheets, a few questions usually pop up right before you're ready to order. We get it. Let’s run through some of the most common ones we hear to make sure you feel totally confident hitting that "confirm" button.
Think of this as your final checklist. We want to make sure you have all the info you need right at your fingertips.
What Is the Best File Format for My Designs?
For the absolute best results, always upload your designs as PNG files with a transparent background. This is non-negotiable if you want clean prints. Using a transparent PNG ensures that only your actual design gets printed, without any weird white or colored boxes tagging along.
Just as important is the resolution. Your file must be saved at a minimum of 300 DPI (Dots Per Inch) to guarantee a sharp, crisp print. Anything less, and your beautiful design will end up looking pixelated and blurry on the final shirt.
Can I Mix Designs for Different Shirt Colors on One Sheet?
Yes, you absolutely can! This is one of the biggest perks of printing with DTF. Every single design we print gets a white ink underbase, which basically acts like a primer.
This white layer is the secret sauce that makes your colors pop, whether you’re pressing them onto a white, black, or bright red shirt. Go ahead and mix designs for your entire apparel line on a single gang sheet—they'll all come out looking great.
The versatility of DTF is a game-changer. You can put logos for dark hoodies right next to graphics for light-colored tees, all on the same sheet, and not have to worry about color issues. One print run can literally cover your entire inventory.
How Many Logos Can I Realistically Fit?
That all depends on two things: the size of your logos and the size of the gang sheet you order. To give you an idea, a standard 22x60 inch sheet could easily hold over 100 small chest logos (say, 3x3 inches each). Or, you could fit a mix of huge back graphics and smaller branding elements.
The best way to figure it out is to let a tool do the heavy lifting. Our Auto-build gang sheet builder was designed for exactly this. It kills the guesswork by automatically arranging your files to be as efficient as possible. It makes sure every square inch is used, which makes your prints incredibly cost-effective. For ease of use and maximum value, it's the best way to get started.
What Is the Typical Turnaround Time?
We know speed matters. Most of our DTF gang sheet orders are printed, packed, and shipped out within just 1–2 business days. And for those times when you're really in a jam, we offer expedited options like 24-hour printing and Next Day Air shipping to meet tight deadlines.
Ready to bring your designs to life with unmatched quality and efficiency? At Lion DTF, we make creating professional-grade apparel simple. Our vibrant, durable hot-peel transfers and easy-to-use gang sheet builder give you everything you need to succeed, whether you're running a business or just starting a creative project.