Nailing your heat press settings for DTF is the single most important step for creating vibrant, long-lasting custom apparel. For a solid starting point, most of our hot-peel transfers on cotton or blends press beautifully between 260-280°F for 10 seconds with medium to firm pressure.
Getting these three elements—temperature, time, and pressure—dialed in is what guarantees a perfect bond every single time.
Decoding the Core Pillars of DTF Pressing
Achieving a flawless DTF transfer isn't about guesswork; it's a science. The interplay between heat, time, and pressure is what transforms a printed film into a permanent part of the fabric. If you misjudge any one of these, you're risking faded colors, poor adhesion, or even a damaged shirt.
Think of it like baking a cake. Too little heat and it’s a gooey mess. Too much, and it's burnt. DTF works the same way. The heat press has to be hot enough to melt the adhesive powder on the back of the transfer, letting it liquefy and soak into the fabric's fibers. This process is the secret to a strong, lasting bond.
The Role of Temperature
Temperature is arguably the make-or-break variable here. Too low, and the adhesive won't melt completely. The result? A weak transfer that peels off after the first wash. Go too high, and you can scorch the garment—especially synthetics like polyester—or cause your vibrant inks to fade and lose their pop.
Why Time and Pressure Matter
Time is the second piece of the puzzle. The transfer needs enough dwell time under the heat for that melted adhesive to fully seep into and grab onto the fabric's weave. Cut this short, and you'll end up with a brittle design that cracks after being worn.
Pressure is the final, crucial element. It's the force that physically pushes the melted adhesive deep into the garment's fibers, ensuring a solid, even bond across the entire design. Without enough pressure, you’ll get patchy adhesion where some parts lift while others stick. Understanding this is key to avoiding common mistakes.
Key Takeaway: The goal isn't just to stick the transfer onto the shirt; it's to embed it into the fabric. Perfect heat press settings for DTF create a bond so strong that the design feels like part of the garment itself, ready to withstand dozens of washes.
A Starting Point for Common Fabrics
While every heat press has its own personality, there are trusted starting points for different materials. Getting this right hinges on tailoring your temperature, time, and pressure to the specific fabric you're working with.
For instance, cotton and its blends are pretty forgiving and handle heat well, while synthetics like polyester need a gentler touch to avoid melting or scorching. To help you get started, we've put together a quick reference guide. It's the perfect baseline, allowing you to make small tweaks based on your specific equipment and environment.
Quick Reference Heat Press Settings by Fabric Type
This chart gives you a reliable baseline to start from. Think of these as your go-to numbers, but always be ready to make small adjustments based on your specific heat press and the thickness of the garment.
| Fabric Type | Temperature Range °F | Press Time (Seconds) | Pressure Level |
|---|---|---|---|
| 100% Cotton | 280°F | 10 | Medium-Firm |
| Polyester | 240-250°F | 7-10 | Medium-Firm |
| 50/50 Blends | 270-280°F | 10 | Medium-Firm |
| Tri-Blends | 260-270°F | 10 | Medium-Firm |
After your first press, always perform a wash test on a sample garment to ensure your settings are locked in for maximum durability. That little bit of extra diligence up front saves a lot of headaches later.
The Pre-Press and Post-Press Routine Pros Swear By
A truly professional DTF print is defined by more than just the main press—it's perfected in the small, critical steps you take right before and after. Skipping these seemingly minor bookends is often what separates a beautiful, retail-quality garment from one that fails after a few washes.
For a durable print with a soft-hand feel, the pre-press and post-press are absolutely non-negotiable.
Think of your garment as a canvas. You wouldn't start a painting on a dirty, wrinkled surface, and the same logic applies here. Every fabric, even one straight from the box, holds invisible moisture and has tiny wrinkles that can easily ruin a transfer.
This infographic breaks down the fundamental process, highlighting the core settings you'll be managing during these steps.
As you can see, mastering the relationship between temperature, time, and pressure is the foundation for every stage of a successful DTF application.
The Essential Pre-Press Step
Before you even think about laying down your transfer, you have to pre-press the garment for 5-7 seconds at your target temperature. This quick step does two vital things: it zaps any trapped moisture from the fabric fibers and smooths out every last wrinkle.
So, why is this so important? Moisture creates steam under the heat press, which can prevent the DTF adhesive from bonding correctly to the fabric. This is one of the biggest culprits behind transfers peeling or cracking down the line. A perfectly flat surface also ensures pressure is distributed evenly across the entire design, preventing parts of the transfer from getting a weaker bond.
Pro Tip: If you're working in a humid environment, you might even extend your pre-press to 10 seconds. The goal is a completely dry and smooth foundation for your transfer.
Once the pre-press is done, you can confidently position your DTF design. Getting your designs ganged up perfectly is a huge time-saver here. When you use an Auto-build gang sheet builder, you can maximize every inch of film, which is both incredibly easy and cost-effective for any project size.
Locking It In with the Post-Press
After your main press and after you've peeled away the carrier film, the job isn't quite finished. The final step, known as the post-press or finishing press, is the secret to getting maximum durability and that coveted soft, matte finish.
This second press melts the ink and adhesive more deeply into the fabric's weave. It transforms the design from feeling like a layer sitting on top of the shirt to feeling like it's part of the shirt itself.
Here’s how to do it correctly:
- Cover the Design: Place a sheet of parchment paper, a Teflon sheet, or a finishing sheet over the exposed transfer.
- Press Again: Press the garment for another 5-10 seconds using the same temperature but with light to medium pressure.
This final touch not only locks in the design for ultimate wash-resistance but also helps knock down any initial shine, giving the print a premium, screen-printed appearance.
For detailed information on long-term care after pressing, check out our complete guide on pressing and shirt care instructions to ensure your creations last as long as possible.
Not every job is a simple cotton tee. Once you start working with performance wear, delicate blends, and synthetics, a one-size-fits-all approach to heat press settings for DTF transfers goes right out the window. Getting your settings dialed in for these tricky fabrics is the only way to avoid scorched materials, melted fibers, and those ugly press marks that ruin a perfectly good garment.
Successfully pressing on heat-sensitive materials like 100% polyester, tri-blends, or nylon demands a more delicate touch. The core principle is simple: lower the temperature and shorten the press time. This protects the fabric while still giving you a solid, durable bond.
Pressing on Polyester and Synthetics
Polyester is notorious for two things in the heat press world: scorching and dye migration. Scorching leaves a permanent, shiny box where the heat platen made contact. Dye migration is more subtle—heat causes the fabric's dye to turn into a gas and stain your DTF transfer, often turning crisp white ink into a dingy pink or gray.
To get around this, here’s what you do:
- Lower Your Temperature: Drop your heat press to the 240-250°F range. It’s hot enough to cure the adhesive but cool enough to prevent most scorching.
- Reduce Dwell Time: Press for just 7-10 seconds. Over-pressing is one of the main culprits behind dye migration.
- Use Medium Pressure: Too much pressure can flatten the fabric's fibers and cause that permanent press box. You want firm, even pressure—not a death grip.
Here’s a real-world example: You're pressing a white logo onto a red, 100% polyester jersey. If you use standard cotton settings (say, 280°F), you'll almost certainly see the red dye bleed into your white logo within days, turning it pink. But by dropping the heat to 240-250°F for 7-10 seconds, you sidestep that chemical reaction and keep your whites bright.
Handling Delicate Tri-Blends and Spandex
Tri-blends and fabrics with spandex are loved for their softness and stretch, but they absolutely hate high heat. Too much temperature can burn the delicate fibers, making them feel rough or even causing them to melt slightly. It's a quick way to ruin the garment.
For these materials, a gentle approach isn't optional.
- Start at the lowest recommended temperature for your transfers, often around 260-270°F.
- Use a very short press time of just 7-10 seconds.
- Always use a protective cover sheet, like Teflon or parchment paper, to create a buffer between the heat platen and the fabric.
Hot Peel vs. Cold Peel Transfers: What’s the Big Difference?
The fabric isn't the only variable. The type of DTF film you're using completely changes the pressing process. The two main types are hot peel and cold peel, and knowing how they work is critical for getting the finish and durability you want.
Technically speaking, the peel type dictates the ideal settings. Cold peel transfers generally need higher temps and longer press times to work. After pressing, you have to wait for the garment to cool down completely before peeling, which results in a classic matte finish. On the other hand, hot peel transfers are designed for lower temps (240°F to 280°F) and much shorter times (5 to 10 seconds), giving you a glossy or semi-gloss finish right off the press.
Here’s a more practical breakdown:
- Hot Peel Transfers Peeled Hot: These are all about speed and efficiency. You press the garment, and you can peel the film carrier away instantly while it's still hot. This is what we specialize in because it massively speeds up production. They often leave a slightly glossier finish at first, which settles into a soft matte after the final post-press.
- Hot Peel Transfers Peeled Cold: These require patience. After pressing, you must let the garment cool down completely—usually at least 60 seconds—before you can touch the film. Peel it too soon, and you’ll pull the entire design right off with it. Cold peel is known for producing a very flat, matte finish from the get-go.
The choice often comes down to your workflow and the aesthetic you're after. For high-volume shops, the time saved with hot peel transfers is a huge advantage. This efficiency gets even better when you have all your designs lined up on a single sheet. Our Auto-build gang sheet builder makes this incredibly simple, letting you maximize every inch of your film and every second of your press time.
Boost Your Efficiency with DTF Gang Sheets
In the fast-paced world of custom apparel, efficiency is everything. It’s the difference between a profitable run and a frustrating waste of time. While mastering your heat press settings for DTF is a huge piece of the puzzle, how you prep your files before they even hit the printer can totally transform your output and slash your material costs.
That's where DTF gang sheets become an absolute game-changer.
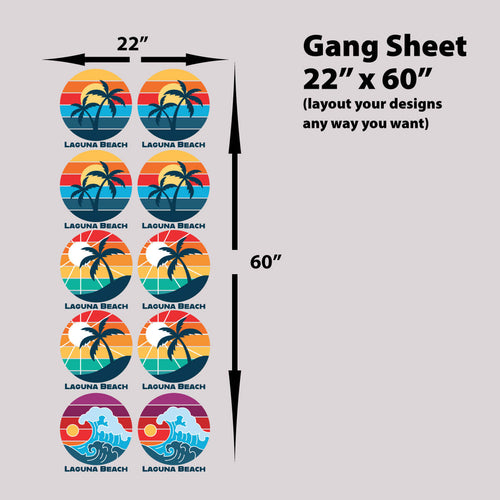
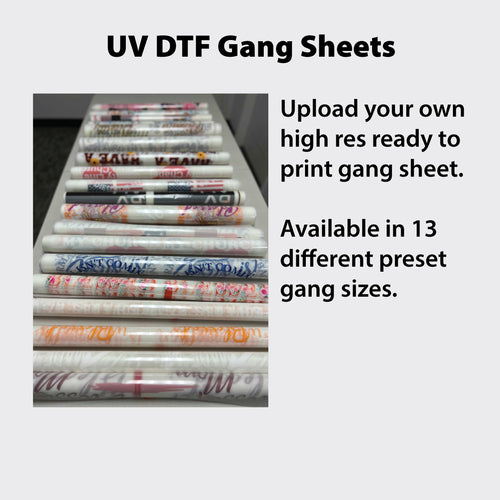
A gang sheet is just a large sheet of DTF film loaded up with multiple designs. Instead of printing and pressing a single logo, you can group an entire project's worth of graphics—front crests, sleeve prints, and full-back designs—all onto one sheet. This simple strategy has a massive impact, cutting down on both film costs and the time you spend managing individual prints.
The Power of Smart Design Placement
The old way of making a gang sheet meant manually arranging all your artwork in design software. It was tedious, to say the least. You’d spend ages carefully nesting each image, rotating and repositioning them, just trying to squeeze every last drop of value out of the film. Any blank space left over was literally money in the trash.
Modern tools have thankfully made that whole process obsolete. Automating the layout saves you hours of frustrating work and guarantees you’re getting the most out of every inch of film. By intelligently packing your artwork together, you fit more designs onto a single sheet, which directly lowers your cost per print.
Introducing the Auto-Build Gang Sheet Builder
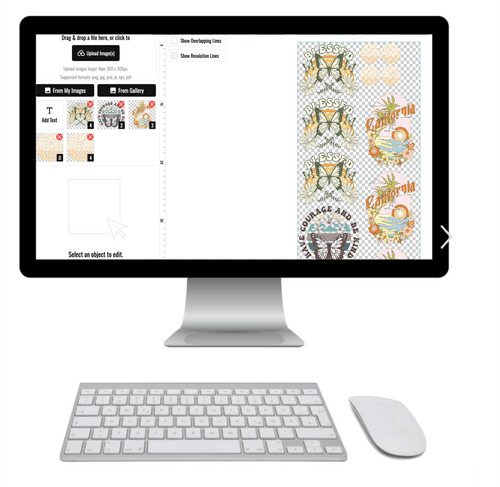
We developed our Auto-build gang sheet builder to make this process as painless and effective as possible. This tool takes what used to be a complex, manual task and turns it into a few simple clicks.
Our builder intelligently analyzes the designs you upload and arranges them to maximize every square inch of the film. It automatically rotates and nests your artwork to kill empty space, saving you both time and money. It’s a workhorse solution that’s perfect for any size operation, whether you're a one-person Etsy shop or a high-volume print house.
To see just how much you can optimize your setup, check out our guide on the benefits of DTF gang sheets.
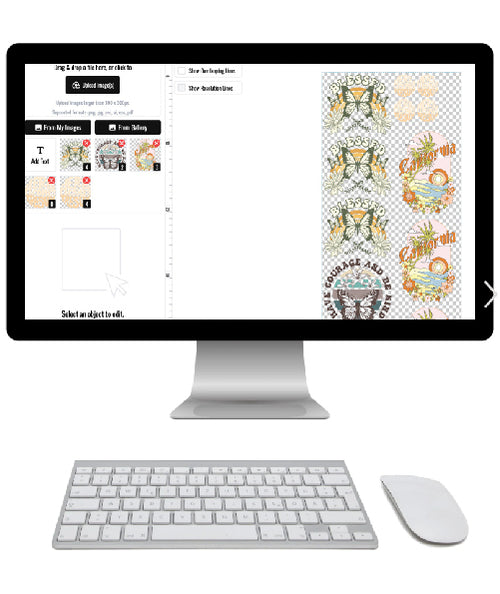
This screenshot gives you a peek at just how clean the interface is for uploading and arranging your designs.

The layout is designed to be intuitive, letting you easily manage your files and see the optimized sheet in real-time. You get full control without any of the manual grunt work.
A Quick Guide to Building Your Sheet
Using the builder is incredibly straightforward. We designed it so anyone can use it, even if you have zero graphic design experience. The goal is to get you from a folder of artwork to a print-ready file in minutes.
Here’s the breakdown:
- Upload Your Artwork: Just drag and drop all the designs for your project right into the builder. You can upload everything at once.
- Enter Quantities: Tell the builder how many of each design you need. It’ll automatically duplicate the images for you.
- Generate the Sheet: With one click, the tool does its thing. It calculates the most efficient layout, nests the images tightly, and creates your print-ready gang sheet.
The auto-build process takes the guesswork out of the equation and ensures you're not paying for unused film. That kind of efficiency is critical for keeping healthy profit margins, especially on big jobs with lots of different design elements.
When you combine optimized gang sheets with precise heat press settings, you create a powerful system for producing high-quality custom apparel—fast and cost-effectively. It lets you spend less time on tedious prep and more time on what actually grows your business.
Even with the perfect heat press settings for DTF, sometimes things just don't go as planned. A new batch of shirts, a humid day, or a different set of transfers can throw a wrench in your workflow. Think of this as your go-to guide for fixing the most common DTF pressing problems, helping you save garments and get back to producing top-quality gear.
Don't sweat it—most of these issues are easy fixes once you know what to look for. Let's dig into what you might run into and how to sort it out.
Your Transfer Is Peeling or Cracking After a Wash
This is probably one of the most frustrating things to see. The transfer looks flawless right off the press, but after one trip through the laundry, it's lifting, peeling, or cracking. This is almost always a sign that the DTF adhesive didn't get a solid grip on the fabric fibers.
More often than not, the culprit is one of three things:
- Not Enough Pressure: The press might feel tight, but if there isn't enough downward force, the adhesive just sits on top of the fabric instead of getting pushed into the weave.
- Heat Is Too Low: If your platen isn't hot enough, the adhesive powder won't fully melt. This creates a weak, brittle bond that's destined to fail.
- Skipping the Post-Press: That final 5-10 second press after you peel the film? It’s not optional. This is the step that truly locks the design into the fibers, giving it that soft feel and long-lasting durability.
To fix this, the first thing to try is increasing your pressure. If the problem persists, bump the temperature up by 5-10°F. And always, always do that final press.
That Annoying Faint Box Around Your Design
Ever peel a transfer and notice a faint, shiny outline around your artwork where the film edge used to be? This "adhesive box" or "press box" happens when a little bit of adhesive residue along the film's edge melts onto the garment.
It's most common on dark garments or heat-sensitive fabrics like polyester, but luckily, it's an easy fix. The solution is to simply trim your transfers closer to the design before you press them. Less blank film around your art means less area for that excess adhesive to cause trouble.
Using a tool like our Auto-build gang sheet builder can also help. By packing designs tightly together, it naturally reduces the wasted space on the film, making it simpler to cut out individual transfers without big, empty borders.
Pro Tip: For your post-press, using a quality Teflon sheet or a piece of parchment paper can help absorb or smooth out any minor residue, making that box even less noticeable.
Dealing with Color Shifting or Scorched Fabric
Pressing on 100% polyester or other synthetic fabrics comes with its own set of rules. If your crisp white design turns slightly pink on a red shirt, you're looking at dye migration. This occurs when high heat turns the fabric dye into a gas, which then stains your transfer ink. Scorching, on the other hand, is when the heat platen leaves a permanent shiny mark on the fabric itself.
Both problems have the same solution: turn down the heat.
- For polyester, drop your temperature into the 240-250°F range.
- Cut your press time down to 7-10 seconds.
- Always use a protective cover sheet to create a buffer between the platen and the garment.
This gentler approach keeps the fabric's dye from bleeding and prevents the synthetic fibers from melting, leaving you with a clean, vibrant transfer.
When a Transfer Feels Stiff and Plastic-Like
The whole point of DTF is to get a print that’s soft, flexible, and feels like it's part of the shirt. If your final product feels thick, stiff, or like a plastic shield, you've probably overdone it with the heat or pressure.
Over-pressing can essentially "cook" the transfer, making the ink and adhesive layers dense and hard. Too much pressure can also squash the ink outwards, creating a rigid edge around the design.
To get that amazing "soft hand" feel:
- Ease Up on the Pressure: Try backing off from firm to medium pressure, especially for the post-press.
- Shorten the Post-Press: The final press only needs 5-7 seconds. It's just enough to meld the design with the fabric, not over-cure it.
- Source Quality Transfers: Not all transfers are created equal. A high-quality transfer will use a thinner, more flexible adhesive layer that results in a naturally softer print from the get-go.
When you run into trouble, it helps to have a quick reference guide to diagnose the issue without having to guess. This table breaks down the most common problems and points you straight to the solution.
Common DTF Pressing Issues and Solutions
| Problem | Potential Cause | Recommended Solution |
|---|---|---|
| Transfer peeling after washing | Insufficient pressure, low temperature, or skipped post-press. | Increase pressure first. If needed, raise temp by 5-10°F. Always do a 5-10 second post-press. |
| Faint "box" around design | Excess adhesive from the film's edge melting onto the fabric. | Trim the transfer film closer to the design before pressing. Use a protective sheet for the post-press. |
| White ink looks pink/discolored | Dye migration from polyester fabric due to high heat. | Lower temperature to 240-250°F and shorten press time to 7-10 seconds. Use a cover sheet. |
| Shiny marks on the garment | Scorching from the heat platen being too hot for the fabric. | Reduce temperature, especially on synthetics. Always use a protective Teflon or parchment sheet. |
| Print feels stiff or like plastic | Too much heat or pressure, especially during the post-press. | Reduce pressure to medium. Shorten the post-press time to 5-7 seconds. |
| Edges of the transfer are lifting | Uneven pressure from the heat press platen. | Check your press for levelness. Increase pressure slightly. Ensure no seams or collars are on the platen. |
By methodically working through these common issues, you can fine-tune your process for different garments and ensure every single print meets a professional standard.
Got Questions About Your DTF Settings? We’ve Got Answers.
Even after you get the hang of DTF, a few questions always seem to pop up. Nailing your heat press settings for DTF is a hands-on process, so it’s totally normal to have some lingering doubts. Let's tackle the most common questions we hear from pressers, so you can move forward with confidence.
We'll cover everything from dreaded wash failures to why certain gear is non-negotiable, giving you the real-world insights to handle any project that comes your way.
Why Is My DTF Transfer Peeling After Washing?
This is the classic sign of a weak bond, and it usually boils down to three culprits: not enough pressure, the wrong temperature, or skipping that final post-press.
"Medium" pressure is subjective. What you really need is a firm, even clamp-down. If the transfer isn't fully embedded into the fabric's weave, it’s just sitting on top and is bound to lift. Also, check your temp—it might be too low for your specific film or fabric. Try bumping it up by 5-10°F to make sure the adhesive melts completely.
Most importantly, do not skip the post-press. After you peel the film, cover the design with parchment paper and hit it again for another 5-10 seconds. This final step is what truly locks the ink into the fibers, creating a bond that can stand up to the washing machine.
Can I Use a Cricut EasyPress or a Home Iron for DTF?
Look, for a one-off hobby project you don't care much about? Maybe. But for anything professional or that you plan to sell, we strongly advise against it.
DTF transfers demand consistent, even pressure across the entire design, which handheld devices just can't deliver. A real heat press ensures the adhesive melts and bonds uniformly from edge to edge. Using an EasyPress or a home iron almost guarantees uneven adhesion. You’ll end up with peeling edges or parts of the design washing out after the first wash.
For reliable, durable, and sellable results, a proper clamshell or swing-away heat press is essential. The investment pays for itself in saved materials and happy customers.
How Do I Know if I'm Using the Right Amount of Pressure?
Pressure is a "feel" you develop over time, but there are some clear signs to look for.
Too little pressure is the most common mistake. It leaves the design looking like it's just sitting on top of the fabric instead of becoming part of it. This is probably the number one reason transfers peel in the wash.
On the other hand, too much pressure can be just as bad, especially on synthetics. It can squish the ink out, making the colors look thin and faded. Even worse, it can leave a permanent, shiny "press box" on the garment that won't ever wash out.
The sweet spot is when the transfer is embedded perfectly into the fabric's weave. After the final press, you should be able to faintly see the texture of the fabric through the print. Always start with the manufacturer's recommendation, but do a test press on a scrap piece of the same material. That one simple test will save you countless headaches and ruined shirts.
Ready to create stunning, durable custom apparel with less hassle and more profit? At Lion DTF Transfers, we make it easy with our premium hot-peel transfers and innovative Auto-build gang sheet builder. Design, upload, and press with confidence. Check out our high-quality DTF transfers and see how we can help your business grow.

