


Picture a high-tech sticker that bonds permanently to almost any hard surface, leaving behind a design so crisp it looks like it was printed right onto the object. That's the magic of UV DTF transfers. This awesome method lets you apply intricate, full-color designs that are incredibly durable—all without needing a heat press.
Breaking Down The Technology Behind UV DTF Transfers
At its core, a UV DTF transfer—often referenced when discussing what are dtf transfers—is a pre-made, multi-layered decal that's ready to apply right out of the box. Unlike traditional fabric transfers that need heat to create a bond, this process uses UV-curable ink and a strong pressure-sensitive adhesive. It’s a total game-changer for customizing hard goods, turning everyday items into premium, branded products with very little effort.
This technology has really opened up a world of possibilities for small businesses, crafters, and anyone making promotional products. The ability to create professional-grade items on demand, without the hassle of weeding vinyl or the limits of screen printing on weirdly shaped objects, is a massive win. For maximum cost-effectiveness, you can even group multiple designs onto a single sheet using our Auto-build gang sheet builder.
The Anatomy of a UV DTF Transfer
Think of a UV DTF transfer as a perfectly engineered "decal sandwich." Every single layer has a specific job, working together to create a tough, vibrant graphic that sticks for good. The whole process is a clever mix of printing and chemistry that results in a finished, ready-to-apply product.
It's this layered structure that gives the final print its strength, punchy colors, and unique raised texture. The infographic below breaks down exactly how these layers come together to form the final transfer.
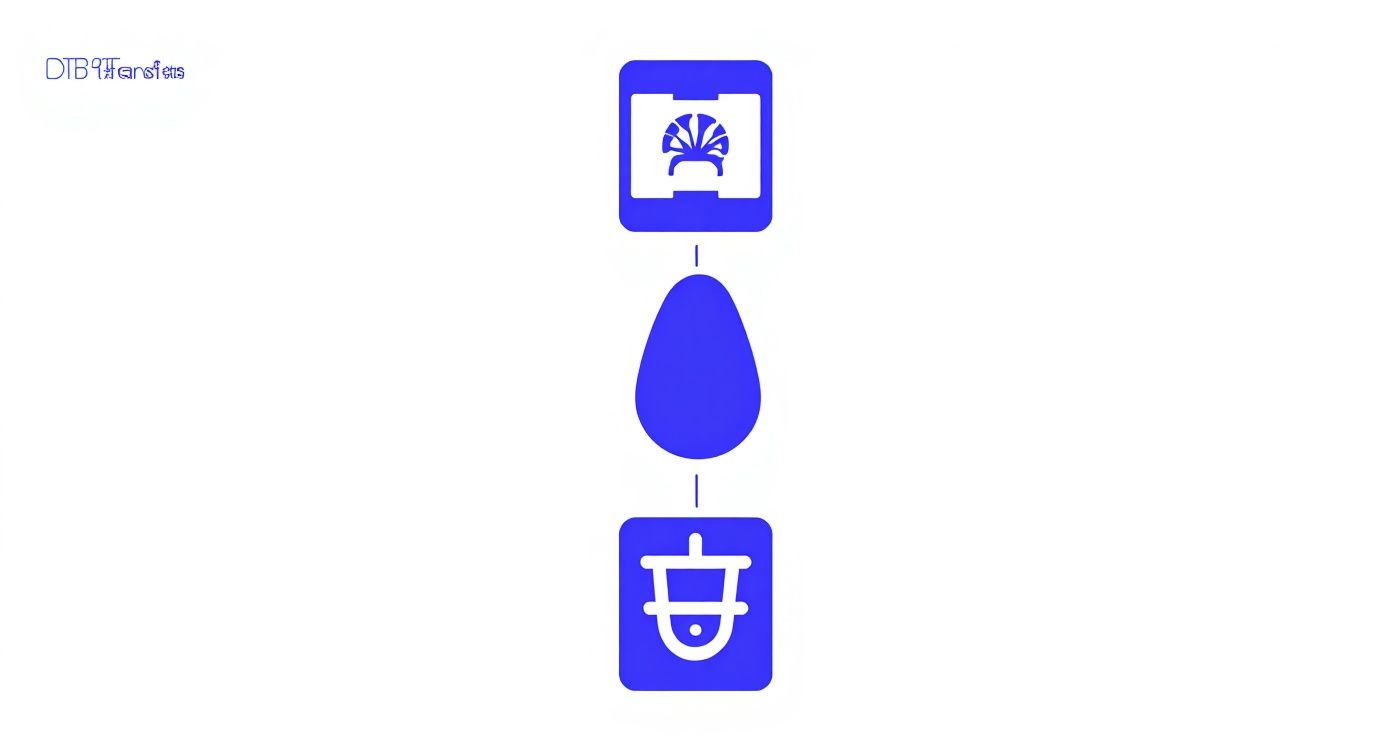
As you can see, the process builds everything up from a base film to the final adhesive. The ink and varnish layers get locked right in the middle, creating a seriously tough and permanent decal.
It all starts with printing onto a special "A-film." A UV printer lays down layers of ink—usually a white base, the full-color design (CMYK), and a final coat of clear varnish. As each layer is printed, powerful UV lamps instantly cure, or harden, the ink. This makes it solid and scratch-resistant from the get-go.
The real secret sauce here is the varnish layer. It’s not just for protection; it's what gives UV DTF transfers their signature glossy, slightly embossed finish, adding a tangible sense of quality you can actually feel.
After printing, an adhesive layer gets applied using a "B-film," which completes the decal sandwich. What you're left with is a finished transfer where the design, varnish, and adhesive are all one solid unit. You just peel it from the backing, press it firmly onto a hard surface, and pull off the top carrier film.
To help you see the differences more clearly, here's a quick breakdown of how UV DTF stacks up against the traditional DTF transfers you might be more familiar with.
UV DTF vs Traditional DTF At a Glance
| Feature | UV DTF Transfers | Traditional DTF Transfers |
|---|---|---|
| Primary Use | Hard, non-porous surfaces (glass, metal, plastic, wood) | Fabrics (cotton, polyester, blends) |
| Application Method | Peel-and-stick (pressure-sensitive adhesive) | Heat press required |
| Curing Process | Ink cured instantly by UV light during printing | Ink cured with a heat press during application |
| Final Feel | Slightly raised, glossy, embossed texture | Soft, flexible, matte finish integrated into the fabric |
| Adhesive Type | Strong pressure-sensitive adhesive | Heat-activated hot-melt powder |
| Durability | Excellent scratch and water resistance on hard goods | Excellent wash durability on garments |
While both are fantastic technologies, they are built for completely different jobs. Traditional DTF is your go-to for apparel, while UV DTF is the champion for hard goods and promotional items.
Streamlining Your Projects
The pre-made nature of these transfers makes ordering and applying them incredibly efficient. To get the most bang for your buck, you can fit dozens of different designs onto a single sheet. Our Auto-build gang sheet builder makes this a breeze, automatically arranging your uploaded artwork to fill up the entire printable area.
This tool is perfect for cranking out multiple logos, custom text, or a mix of graphics in one shot, which seriously lowers your cost per piece and simplifies your workflow. The final sheet shows up ready for you to just cut and apply, turning your ideas into finished products in minutes.
The Core Benefits of UV DTF Printing
The buzz around UV DTF transfers isn't just hype; it's a direct response to the massive advantages this technology gives creators and businesses. The benefits go way beyond convenience, offering a triple threat of insane durability, incredible visual quality, and versatility that older methods just can't touch. It's a game-changer that lets anyone create pro-level custom goods with surprising ease.
One of the biggest wins is the simple, heat-free application. You can forget about bulky, expensive heat presses. UV DTF transfers are applied with a straightforward 'peel and stick' approach, putting them in the hands of everyone from weekend hobbyists to large-scale print shops. This removes a huge barrier to entry and makes the whole production process a lot simpler.
Unbeatable Durability and Resilience
When you apply a UV DTF transfer, it's not just sitting on top of the surface—it's creating a permanent, rock-solid bond. The real magic happens during the UV curing process, where intense ultraviolet light instantly hardens the ink and varnish layers into a solid, almost plastic-like shield. This creates a finish that is incredibly tough and built to last.
The end result is a design that can stand up to serious wear and tear.
- Scratch-Resistant: That hardened varnish layer acts like armor, protecting the print underneath from scuffs, scrapes, and daily abuse.
- Waterproof: Once it's on, the transfer is totally waterproof. This makes it perfect for drinkware, outdoor gear, and anything else that might get wet.
- UV-Stable: The cured ink is highly resistant to fading from sunlight, keeping your designs vibrant and sharp even after prolonged exposure.
This kind of durability means the products you make will keep their premium look and feel for years, which says a lot about the quality of your brand or craft.
Stunning Visuals and Tactile Quality
UV DTF printing is famous for its ability to produce photorealistic images with brilliant, deep colors. The process allows for ridiculously fine details, crisp lines, and smooth gradients that other methods struggle to achieve on hard surfaces. The white ink underbase makes sure colors are bright and punchy, even when applied to dark or transparent items like tinted glass or black plastic.
But the appeal isn't just visual. That varnish layer adds a distinct, tangible quality to the final product.
By layering the varnish during printing, you can create some really unique embossed or 3D textured effects. This gives the design a premium, raised feel that you can not only see but also touch, adding a whole new level of sophistication to your products.
Incredible Versatility Across Materials
Maybe the most powerful benefit of UV DTF transfers is their ability to stick to an almost unbelievable range of hard, non-porous materials. This throws the door wide open for customization, letting you brand or personalize items that were once difficult or impossible to print on directly.
This versatility lets you expand your product line without breaking a sweat. You can use the exact same transfer design across a whole range of different items, keeping your branding consistent. To make things even more efficient, our Auto-build gang sheet builder lets you upload multiple designs and automatically fits them onto a single sheet to maximize every inch of space. This drastically cuts down your cost per print, making it super cost-effective to produce a diverse lineup of custom products from just one sheet.
Here are just a few examples of surfaces that work great:
- Glass and Ceramics (mugs, tumblers, windows)
- Metals (stainless steel, aluminum, brass)
- Plastics (acrylic, PVC, phone cases)
- Wood (sealed or painted)
- Leatherette and much more
Your Step-by-Step Application Guide
Applying a UV DTF transfer is a surprisingly straightforward process that gives you a professional, permanent finish without any heavy-duty equipment. Think of it less like an industrial job and more like a high-stakes craft project—precision is everything. With just a bit of prep and a steady hand, you can get a flawless result that looks like it was printed right onto the surface.
The whole secret to making it stick for good comes down to two things: a squeaky-clean surface and firm, even pressure. This is what helps that powerful adhesive create a solid, unbreakable bond with whatever you're customizing. The steps are simple, and once you get the hang of it, you'll be able to customize all sorts of hard goods in minutes.
Preparing for a Perfect Application
Before you do anything else, the single most important step is prepping your surface. Any little bit of dust, oil from your fingers, or residue will get in the way of the adhesive, leading to peeling or bubbling later on. A perfectly clean surface is the foundation for a design that lasts.
- Clean the Surface Thoroughly: Grab some isopropyl alcohol and a lint-free cloth and wipe down the entire area where the transfer will go. This gets rid of fingerprints, grease, and any other gunk you can't see. Make sure the surface is 100% dry before you continue.
- Position Your Design: Take a moment to figure out exactly where you want the transfer to go. Once it touches down, that adhesive grabs on tight, and trying to reposition it will likely ruin the decal. If you need perfect alignment, don't be afraid to use a ruler or measuring tape.
Pro Tip: For round or curved items like tumblers and mugs, try the "hinge method." Just place a piece of painter's tape across the middle of the transfer to hold it in place. This lets you apply one half at a time, giving you way more control and helping you avoid wrinkles.
The Application Process in Four Steps
Okay, surface is clean and your placement is locked in. Now for the fun part. The key here is to take your time—don't rush it. A slow, deliberate approach will always give you the best results.
- Peel the Backing: Carefully peel the white paper backing away from the clear film. The design and adhesive should stay completely stuck to the clear sheet.
- Apply and Press: Lay one edge of the transfer onto the surface, then slowly smooth it down, working your way from the center out. This is the best way to push out any air bubbles before they get trapped.
- Squeegee Firmly: Using a squeegee or even a credit card, rub firmly over the entire design. You need to apply some real pressure here, especially around the edges. This step is what really activates the pressure-sensitive adhesive and makes sure every last bit of your design is bonded to the surface.
- Remove the Carrier Film: This is the moment of truth. Start at a corner and slowly peel the clear carrier film away from your design. Keep the film low and pull it back on itself at a sharp angle. If you see any part of the design lifting up, just lay the film back down, squeegee that spot again with more pressure, and then continue peeling.
Once the film is off, your vibrant, tough-as-nails design is good to go. For a more detailed walkthrough with extra tips, check out our complete guide to UV DTF sticker application.
And a quick tip to get more bang for your buck: remember to use our Auto-build gang sheet builder on your next project. It lets you fit multiple designs onto one sheet, which seriously lowers your cost per print. Finally, let the transfer cure for at least 24 hours before any heavy use or washing. This gives the adhesive time to reach its maximum strength.
Real-World Uses and Creative Ideas
Theory is one thing, but the real power of UV DTF transfers comes to life when you see them in action. This technology isn't just some technical process; it's a creative key that unlocks a ton of possibilities for personalizing and branding hard surfaces. It gives everyone—from Etsy sellers and marketing agencies to weekend hobbyists—the power to create high-value, durable, customized products with surprising ease.
Imagine knocking out a run of branded promo items with intricate, full-color logos that won't scratch or peel off after just a few uses. That’s exactly where UV DTF shines, turning ordinary objects into powerful marketing tools or cherished personalized gifts. The applications are pretty much as vast as your imagination.
Elevating Promotional Products and Branding
For any business, brand consistency is everything. UV DTF transfers make it dead simple to apply sharp, vibrant logos and designs to a huge range of promo merch, ensuring a professional look across the board. This method goes way beyond basic one-color prints, letting you use complex, photorealistic graphics that actually make a brand stick.
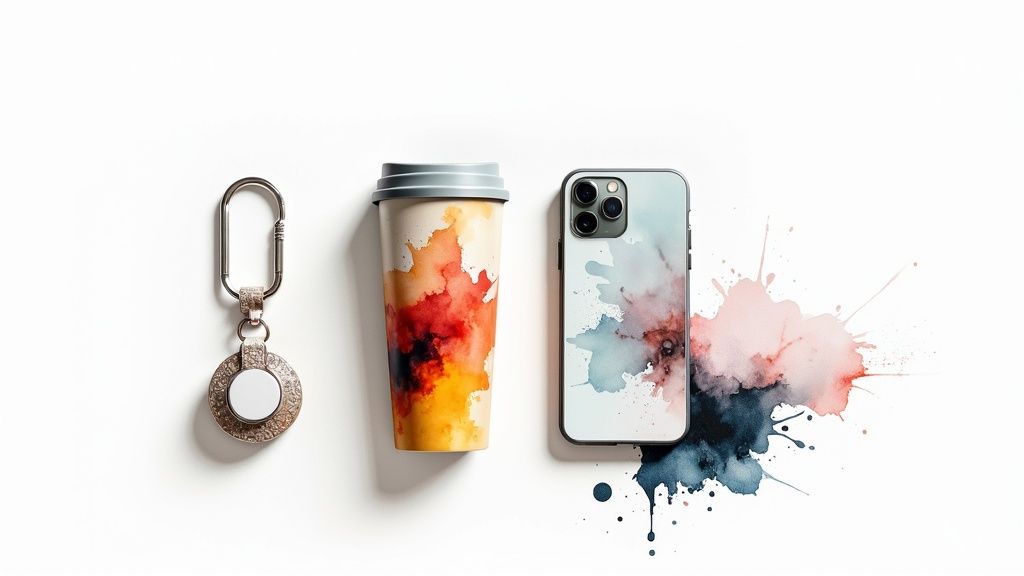
- Branded Drinkware: Easily apply detailed logos to tumblers, coffee mugs, and water bottles. The waterproof and scratch-resistant finish means the branding will hold up to daily abuse.
- Custom Corporate Gifts: Create premium gift sets by adding logos to things like pens, notebooks, and wireless chargers, giving them a high-end, cohesive feel.
- Event Merchandise: Produce unique swag for events, like keychains, coasters, or small awards, with designs that capture the vibe of the occasion.
Powering Small Businesses and Crafters
The accessibility of UV DTF has been a game-changer for small business owners, especially those hustling on platforms like Etsy. It lets creators offer a diverse catalog of personalized hard goods without needing to invest in expensive, bulky equipment. The peel-and-stick application means anyone can achieve a factory-quality finish right from their workshop or home studio.
This growing accessibility is reflected in the market's explosive growth. The global UV DTF transfers market was valued at roughly US$ 215 million in 2024 and is on track to hit US$ 442 million by 2031. This surge is all thanks to the rising demand for durable, on-demand customization. You can read more about these market projections to see where the industry is headed.
For small-scale creators, efficiency is the name of the game. Our Auto-build gang sheet builder is designed to maximize your cost-effectiveness. By arranging multiple designs—whether for different customers or various products—onto a single sheet, you seriously cut down your cost per transfer. That means better profit margins on every single item you sell.
From Personal Gadgets to Industrial Labels
The versatility of UV DTF goes way beyond typical merchandise. Its tough-as-nails nature makes it a perfect fit for a surprising range of practical and creative jobs.
- Personalizing Electronics: Add unique art to phone cases, laptops, gaming consoles, and headphones. The transfers conform well to slight curves and create a permanent, protective layer over the design.
- Custom Signage: Craft professional-looking indoor signs for offices, retail stores, or events. The vibrant colors and glossy finish produce eye-catching results on acrylic, wood, or metal.
- Durable Equipment Labeling: In industrial settings, UV DTF can be used to create long-lasting labels for tools and machinery that can withstand harsh environments without fading or peeling off.
How To Order Using Our Gang Sheet Builder
Getting your hands on custom UV DTF transfers shouldn't be complicated or break the bank. The smartest way to get quality, speed, and affordability all in one shot is to maximize the value of every single print run. That’s exactly why we built our Auto-Build Gang Sheet Builder—a simple tool designed to help you get more bang for your buck by seriously lowering your cost per print.
The idea behind it is simple. Instead of ordering transfers one by one, a gang sheet lets you group a bunch of different designs onto a single large sheet. You can mix logos, text, and totally different pieces of art all in the same print run. By printing them together, you cut out wasted space and make the whole process more efficient, which opens up professional-grade printing for any budget.
What Is a Gang Sheet and Why Is It So Cost-Effective?
Think of a gang sheet as a carpool for your designs. Rather than each design taking its own separate, expensive trip through the printer, you pack them all into one vehicle—the sheet—and just pay for a single ride. That efficiency is the secret to making your projects more profitable.
This approach is a game-changer for anyone who needs a variety of transfers. Maybe you’re a small business owner creating merch, an Etsy seller with a dozen different sticker designs, or just a hobbyist making personalized gifts. The gang sheet makes sure you aren't paying for blank, unused material. A full sheet often costs only a little more than a few small, individual transfers, so the more you can fit, the lower your price per piece drops.
The real beauty of our Auto-build gang sheet builder is that it takes all the guesswork out of the equation. You don’t need any fancy design software or technical skills to perfectly arrange your files. The tool does all the heavy lifting for you, locking in maximum space and minimum cost.
A Simple Walkthrough of the Builder
We designed the builder to be incredibly straightforward, letting you go from a folder of art files to a print-ready sheet in just a few minutes. The whole thing is drag-and-drop, so it feels natural and gives you total control without any confusing steps.
Here’s how easy it is to create your sheet:
- Select Your Sheet Size: First, pick the dimensions for the gang sheet you need. We have several sizes to fit projects big and small.
- Upload Your Artwork: Next, upload all the different design files you want to print. The builder handles common file types like PNGs, keeping things smooth.
- Arrange Your Designs: This is where the magic happens. Just drag your uploaded images onto the digital canvas. You can resize, rotate, and even duplicate designs right inside the builder to get the exact quantities you need.
- Auto-Build for Optimal Spacing: Once your designs are on the canvas, our tool can automatically nest them together. It intelligently arranges the images to squeeze out every bit of empty space, guaranteeing you fit as many transfers as possible.
- Review and Order: Finally, give your finished sheet a quick once-over to make sure it’s perfect. When you’re happy with it, just add it to your cart and check out.
The Benefits of Using Our Builder
This tool doesn’t just save you money; it saves you a ton of time and headaches. By handling the tedious job of arranging files, it lets you get back to what you do best—creating awesome products.
- No Design Software Needed: Forget about spending hours in Photoshop or Illustrator trying to manually tile your designs. Our builder brings professional layout tools to everyone.
- Maximize Every Inch: The auto-build feature makes sure you get the absolute best value by packing your sheet tight and driving down the cost of each transfer.
- Total Creative Control: Easily mix and match different logos, sizes, and graphics for all kinds of products on one convenient sheet.
Ready to see just how simple and cost-effective ordering UV DTF transfers can be? Head over and build your own custom gang sheet today to take full control of your printing projects.
Troubleshooting Common Application Issues
https://www.youtube.com/embed/nrPLGL0OVbQ
Even when the process seems simple, getting that perfect, permanent bond with a UV DTF transfer can have a bit of a learning curve. Don't worry, though. The occasional hiccup is totally normal, and this guide will walk you through how to fix common issues so every project comes out looking clean and professional.
Most problems boil down to one of three things: how you prep the surface, the pressure you use during application, or your peeling technique. Get these three steps down, and you’ll be turning out flawless results on everything from glass tumblers to metal keychains.
Solving Transfer Adhesion Problems
So, you go to peel back the clear carrier film, and parts of your design start lifting right along with it. It’s a common frustration, and it’s almost always a sign that the adhesive didn't get a good grip on the surface.
Nine times out of ten, the culprit is a surface that wasn't prepped correctly. Any little bit of dust, fingerprint oil, or leftover cleaning residue creates a barrier that stops the adhesive from doing its job.
- The Problem: The transfer lifts up when you remove the carrier film.
- The Cause: The surface probably wasn't cleaned well with isopropyl alcohol, or it might not have been completely dry before you started.
- The Solution: Before you do anything else, give the surface a solid wipe-down with high-percentage isopropyl alcohol and a lint-free cloth. Let it air dry completely. If a design still lifts while peeling, just lay the film back down, give that spot some firm pressure with a squeegee, and try peeling again—but this time, go extra slow.
A clean, dry, non-porous surface is everything. Seriously. Skipping this first step is the number one reason transfers fail. Treat your prep work like it’s the most important part of the job, because it is.
Eliminating Bubbles and Edge Peeling
Another headache is finding tiny air bubbles trapped under the transfer or, worse, seeing the edges of the design start to peel up after you’re done. Both of these issues usually come down to your technique during the pressing and peeling stages. Bubbles mean trapped air, and lifting edges mean you pulled the film off too fast.
To keep bubbles from forming, start applying the transfer from one side and smoothly press it down, pushing the air out as you go. When it comes to lifting edges, patience is your best friend. While applying to hard goods is a different beast than fabric, the core principles of careful technique still apply. You can actually pick up some useful pointers in our guide on pressing DTF transfers on T-shirts, which really drives home the importance of a steady hand.
For the best results, grab a squeegee and apply firm, even pressure across the whole design, giving the edges a little extra attention. When it’s time to peel, pull the clear film back slowly and at a sharp, low angle against the surface. This reduces the strain on the design's edges and helps them stay locked down where they belong.
Got Questions? We've Got Answers.
Jumping into a new printing method always brings up a few questions. To help you get comfortable with UV DTF transfers, here are some quick, straightforward answers to the questions we hear most often from our customers.
Can I Use UV DTF Transfers on T-Shirts or Fabric?
Short answer: Nope. UV DTF transfers are built specifically for hard, non-porous surfaces like glass, metal, plastic, and wood. Their varnish-like finish and super-strong adhesive just aren't designed to flex with textiles.
For anything apparel-related, you'll want to stick with traditional DTF (Direct-to-Film) transfers. They're made to bond with fabric and handle all the stretching and washing that comes with it.
Do I Need a Heat Press for Application?
Absolutely not, and this is one of the biggest perks! UV DTF is a 'peel-and-stick' game. There's no heat, no special equipment, just pure and simple application.
All you have to do is clean the surface, stick down the transfer, rub it firmly to lock in the bond, and peel away the clear carrier film. It's that easy. For cost-effective ordering, our Auto-build gang sheet builder lets you easily fit multiple designs on one sheet.
How Durable Are These Transfers Once Applied?
They are incredibly tough. The UV-cured ink creates a permanent, rock-solid layer that holds its own against scratches, water, and sunlight. When you apply them to a clean, properly prepped surface, they create a bond that’s built to last through daily wear and tear.
For items that see a lot of action, like drinkware, we recommend hand-washing to keep the print looking sharp for as long as possible.
The real secret to durability comes down to the application. Taking the time to clean the surface and apply firm, even pressure is the key to getting a permanent, professional-looking bond that won't give up.
Are the Transfers Dishwasher or Microwave Safe?
We strongly advise against putting items with UV DTF transfers in the dishwasher or microwave. The intense heat, harsh detergents, and high-pressure water jets in a dishwasher can weaken the adhesive and damage the print over time.
To keep your custom items vibrant and intact, always opt for hand-washing.
Ready to create some stunning, durable designs? At Lion DTF, our UV DTF transfers are the perfect tool for bringing your vision to life on any hard surface. For the best value, check out our easy-to-use Auto-build gang sheet builder to fit all your designs onto a single sheet, saving you material and money.