



Three weeks before graduation, the senior committee has a budget, a class of 150, and a vote scheduled for a shirt nobody has designed yet. One student sketched a mascot on a napkin. Another wants the year in giant block numerals. The printer needs a file, the principal needs a proof, and the treasurer needs a price that doesn't move after the order is placed.
That gap between a concept and a print file is where most senior class shirts design projects go wrong. The look you vote on and the file you send to production are two different things, and the second one decides your print area, your color count, and your cost per shirt. A design that looks sharp on a phone screen can show up as a 72 DPI JPEG that prints soft and muddy on a heather gray tee.
Committees routinely spend an hour arguing about fonts and then order a 12 inch chest print that swallows the front of a youth medium. The eight concepts below hold up on a real garment. Each one comes with the file specs, minimum text heights, and batching approach that let you compare cost per shirt instead of comparing pictures.
1. Class Year Varsity Letter Stack: Build It with Lion DTF's Auto-Build Gang Sheet Builder for Easy, Cost-Effective Orders
A varsity stack is the safest senior shirt you can print. The graduation year sits in heavy block numerals across the chest, the class name arcs beneath it, and two school colors do the rest. It borrows the letterman jacket look, which is why it stays in a drawer rotation long after graduation instead of becoming a one-day shirt.
The format has real pedigree. The Penn Libraries timeline of Hey Day traces the ceremony to 1916, when it began as a formal Moving-Up Day built on a senior Class Day tradition that started in 1889, and records that by 1925 students had moved away from daily caps and gowns in favor of distinctive class clothing. In the 1980s juniors wore red-and-blue class T-shirts made for the event, and by the early 2000s red tees, canes, and straw hats marked the cohort on sight. Three elements carry that recognition, and they still drive most school spirit wear designs: a graduating-class identifier, the school colors, and one visual motif tied to a shared event.
Set the Height Before You Pick the Font
Keep the year at least 10 to 12 inches tall for a full-front print. Under 8 inches it disappears on an adult 2XL and looks lost on a youth medium. Send the stack as a vector file if you have one; block type scales cleanly and stays sharp at every size in the run.
- One front graphic, one decision. Stack the year and class name as a single piece of art so nobody reopens the layout argument at proof time.
- Check the school palette against the blank. Navy ink on a navy tee reads as a smudge in photos, so build a light-shirt and a dark-shirt colorway.
- Put the sleeve mark on the same sheet. A 3 to 3.5 inch sleeve print costs almost nothing extra when it shares the sheet with the front.
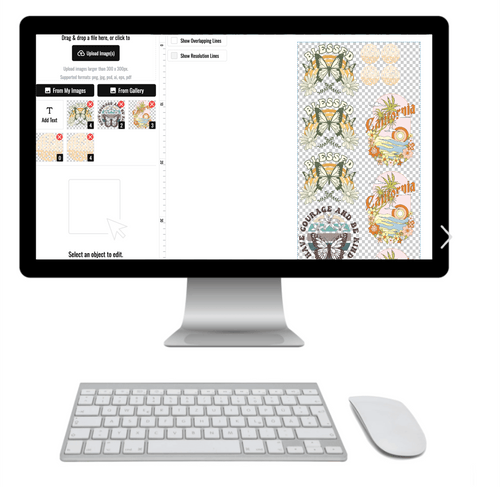
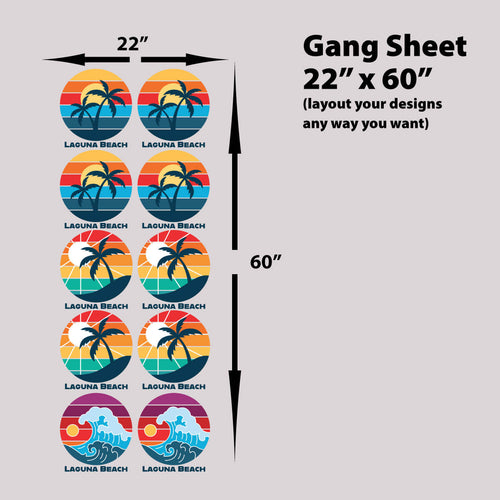
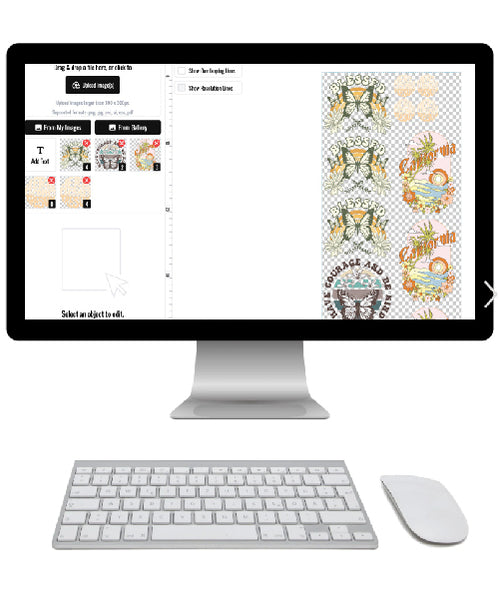
Cost behavior matters more than the mockup. Pattern making, marker preparation, machine setup, and sampling are fixed costs that barely move as quantity rises, and a bulk apparel price-break analysis from Collective Studio places meaningful volume breaks around 300, 500, 1,000, and 3,000 pieces per style and color. A class of 150 never reaches the first break, so adding a second colorway to chase a discount buys leftover inventory, not savings. Combine the front and sleeve art on one gang sheet with Lion DTF's online gang sheet builder, where you upload each image, size it, set the quantity, and click apply. The same design prints in different sizes, so the youth mediums and the coach's 2XL share one order and one setup.
2. Retro Sunset Class Crest: Create It in the Auto-Build Gang Sheet Builder for Budget-Friendly Senior Shirts
A crest with a sunset behind it sells because it looks like something a class would keep. Two or three gradient bands, a mountain or skyline silhouette, the class year in an arc along the bottom, and the school name riding the top curve. You can print it in full color on a dark blank and it still reads as a badge rather than a poster.

The thing that sinks crest designs isn't the art, it's the seal. A crest feels institutional, so committees lift the school seal or a wordmark and drop it into the artwork. Trademark protection covers names, slogans, and logos, and the USPTO trademark registration toolkit lists those as the standard trademark categories. Your class artwork and the school's protected identifiers are two separate things. Ask the district or athletic department for approved files or written authorization, use only the version you're permitted to use, and keep that documentation before anything goes to production.
Specs That Keep Gradients Clean
- Submit 300 DPI at final print size. Gradients band visibly when a file is built at 150 DPI and scaled up, and DTF transfers reproduce that banding faithfully.
- Keep border text at least 0.25 inches tall. Arc text shrinks faster than straight text at the curve, so the smallest letters on the crest set your legibility floor.
- Build one crest, size it twice. Adult front print at 10 to 11 inches, youth at 7 to 8 inches, both from the same vector file.
Practical rule: if the crest needs an official seal to feel legitimate, redraw an original class symbol instead. A custom mark built from the school's colors and mascot silhouette carries the same weight and creates no permissions problem.
The workable use case is a class trip crest, or a club that wants matching totes alongside shirts. Put the adult and youth crest sizes side by side and the Auto-build gang sheet builder will pack them onto one sheet, so you pay for the artwork once and can compare cost per shirt across both size runs.
3. Minimalist Name Roll on the Back: Order Efficiently with Lion DTF's Auto-Build Gang Sheet Builder
150 surnames. Two columns. One deadline. That is the math behind a minimalist name roll, and it is why this layout keeps winning class votes: every senior's name goes on the back in small, evenly spaced type while the front stays nearly empty with a small crest or the year. For a class of 150, two columns at 10 to 12 point fit comfortably inside a 12 to 16 inch wide block, the widest you can go before names start wrapping toward the side seams.
Personalization is what students are voting for. A VistaPrint survey of 2,000 U.S. consumers found that 47% were willing to pay more for personalized apparel, with 51% calling logo design a key way to express themselves and 46% naming placement as important. The same survey puts T-shirts first among personalized items at 38%, ahead of hoodies at 28%, which fits this layout: a tee takes a flat name list cleanly while a hoodie pocket fights it.
Treat Names as Variable Data, Not Decoration
Set the roster in vector type, not a flattened image. Crisp letterforms survive resizing; rasterized names turn soft the moment the block scales between shirt sizes. Names are variable data, and variable data is where budgets leak. A wholesale pricing guide from Blank Style notes that individual names, extra print locations, size changes, and rush requirements add labor and production workload, so a larger garment count doesn't automatically lower the cost per usable shirt.
- Lock one font weight. Mixing bold and regular names makes the block look like a mistake rather than a design.
- Decide full name or surname early. Surnames only will fit a much larger roster, but the class has to agree before artwork starts, not after.
- Proof the longest name in the class. Hyphenated names break columns, and catching that at proof costs nothing.
Batching is what makes a name roll affordable. Put the front crest on the sheet once per size, then gang the name block variations so the repeated type prints in one run. For two or more designs, the online gang sheet builder is the most cost-effective order path: upload each image, size it to the print width you need, set the quantity, and click apply. Ordering transfers only? The Print Only route works the same way: upload the finished layout, select gang sheets, and the printed transfers ship back ready to press, so a 150-name order stays inside one printed run instead of several small ones.
4. Mascot Hero Graphic: Print Your School Mascot with Lion DTF's Auto-Build Gang Sheet Builder
The committee picks a snarling mascot illustration, the vote passes, and then the printer says the file can't be produced. That outcome is more common than a clean run. A full-color mascot in a dynamic pose still moves shirts: put the mark mid-sprint across the chest with the class motto beneath, or run the head on the front and the roster on the back. Detailed multi-color art with fine line work plays to DTF transfers, which hold gradients and thin strokes without a per-color setup.

Wootton High School seniors voted through Instagram for a Frank Ocean-inspired concept, the winning design turned out to be unprintable, and organizers substituted a basic template; students then said their opinions hadn't been respected and called the result something they wouldn't wear after graduation, as Wootton Common Sense reported. Contests that avoid that outcome set the rules before voting opens: original artwork only, no copyrighted imagery, and a design the whole class can wear.
Screen the Concepts Before the Vote
Run every submitted concept through the same preflight, then show voters only the approved mockups. Check copyright, print resolution, color count, garment color, budget, and whether your supplier can produce it.
- Confirm mascot permission in writing. Ask administration which version of the mark is approved and keep the email.
- Vectorize line art. Vector edges stay sharp when a 4 inch chest mark becomes an 11 inch back print, and Lion DTF Transfers offers vectorization if the source file is a blurry yearbook scan.
- Publish a change policy. If the winning entry can't be printed, state in advance what happens next so the class isn't surprised.
A vote only builds trust when every option on the ballot can actually be made. Pre-screening is the step that keeps a class proud of its pick.
Once the mascot and roster are approved, the front and back art belong on one sheet. In the Auto-build gang sheet builder, upload both images, size each to its placement, set the quantity, and click apply. For two or more designs, that's the most cost-effective way to order, and both placements ship in a single order. Then compare cost per shirt, not just the look of the winning art.
5. Memory Lane Photo Collage: Assemble It with Lion DTF's Auto-Build Gang Sheet Builder for Cost-Effective Printing
A collage is the design a class keeps in a drawer for twenty years. Four years of photos, a homecoming score, a championship banner, the freshman hallway, all arranged into one full-front or full-back print. It's emotional, and it's personal in a way a logo can't be.
Class garments have carried that weight for a long time. Colleges started standardizing academic dress in the late nineteenth century, and Mental Floss's history of graduation dress records that Princeton's Class of 1967 chose a distinctive blazer for its P-rade outfit rather than wearing its existing senior jacket, while senior "beer jackets" emerged before the late 1960s and became customary in that same parade by the early 1980s. The pattern is consistent: a garment belongs to the class when it looks like the school but feels like that specific group.
Build the Collage for Print, Not for Screen
- Use photos at 300 DPI at final print size. A phone photo printed at 2 inches wide needs roughly 600 pixels across, and most camera rolls clear that easily if you don't crop hard.
- Limit the collage to 6 to 9 images. Beyond that, each frame shrinks below an inch and the shirt reads as texture rather than memory.
- Keep every image in the same tonal range. Mixing flash-lit gym shots with golden-hour photos makes the print look accidental.
Start with the three photos the class would rescue in a fire, build the layout around them, then fill gaps.
Collage variations are where costs diverge, because a four-year timeline and a championship montage are different artwork. Our Auto-build gang sheet builder places multiple collage layouts on one sheet so you can print a dozen of each style instead of committing to 150 of one, and our guide to DTF gang sheets walks through how the layout math works.
6. Grad Cap and Diploma Icon Pattern: Layer It with Lion DTF's Auto-Build Gang Sheet Builder for Affordable Batch Orders
A repeating pattern of caps, diplomas, tassels, and stars is the easiest design on this list to produce well. Space the icons evenly, drop the class year into the center of the chest, and let the pattern run edge to edge on a full-front or all-over print. It's playful, it photographs well in group shots, and the file is small because you're tiling one square.
Ceremony rules still apply to anything worn during graduation week. Purdue University's commencement attire page requires candidates to wear official university-approved academic attire, specifies that tassel and hood colors represent the student's college or school, and permits cap decoration only when designs aren't offensive and don't obstruct the view of people behind. Read that as a design brief for the shirt too: confirm dress-code, branding, and event policies before you collect orders, and avoid anything that would need an apology later.
One Tile, Many Sizes
- Space icons at least 1 inch apart. Tighter spacing turns into noise once the pattern is scaled down for a youth small.
- Build a single repeat tile. One square that tiles cleanly is faster to fix than a hand-placed field of 60 icons.
- Plan the center lockup separately. The year sits in a clear zone, so it needs its own layer and its own contrast check.
The scale of this category is real. The global custom T-shirt printing market was valued at $5.2 billion in 2024, according to Grand View Research, which tells you how much of this work runs through small print shops and school orders rather than big retail.
Fill a sheet with several shirt sizes and pattern variations using our Auto-build gang sheet builder, and the setup cost spreads across the whole order instead of landing on the first shirt. For more spirit-wear formats that run on the same file setup, see our guide to custom T-shirts for schools.
7. Hometown Landmark Outline: Create It with Lion DTF's Auto-Build Gang Sheet Builder for Ease of Use
A single-color outline of the water tower, the bridge, or the courthouse square does something a mascot can't. It ties the class to the town, and it sells to parents and alumni who never wore a school logo in their lives. The layout is simple: line art in the center, class year beneath it in a clean sans-serif.
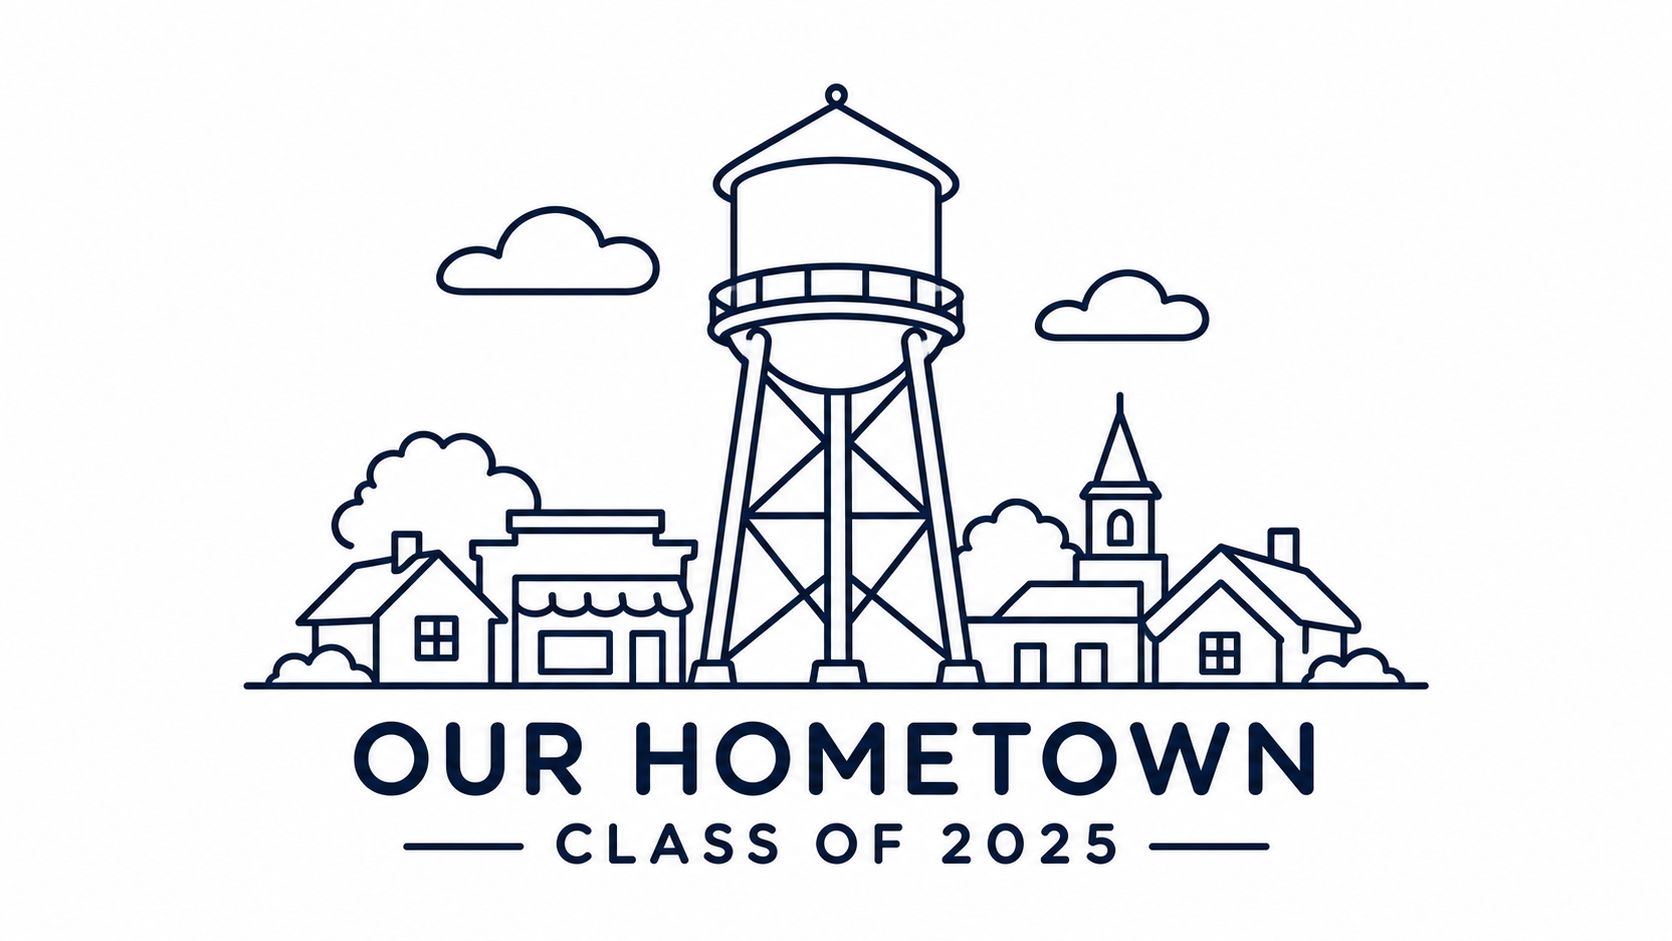
Hand this to most printers as a photo of a sketch and you'll get edges that look fuzzy at 10 inches wide. Convert the line art to vector first so it scales to any size without softening, and keep stroke weights consistent, because a mix of hairline and heavy strokes shows up as an accident rather than a style.
Make Thin Lines Survive a Dark Shirt
Line art is mostly white space, which means contrast decides whether the design works at all.
- Choose ink against the blank, not against a screen. A mid-gray line on a charcoal shirt disappears in the laundry room and on the field.
- Thicken strokes for textured garments. Heathered and fleece surfaces eat thin lines, so bump the stroke until it holds at arm's length.
- Set a minimum feature size. Nothing in the drawing should be thinner than the smallest text you'd accept, roughly a quarter inch on the finished print.
Test a press sample on the exact shirt color before the full run. A design that reads beautifully on white can vanish on forest green.
The natural version of this shirt puts the landmark on the front and the graduating names on the back, which means two art files per shirt. Our Auto-build gang sheet builder fits both prints on the same sheet, so the class orders one job instead of two, and the per-shirt cost stays visible the whole way through.
8. Inside-Joke Quote Tee: Print Your Class Saying with Lion DTF's Auto-Build Gang Sheet Builder for Cost-Effective Runs
Words are the cheapest design element you can print and the one most likely to get worn. A class motto, a teacher's catchphrase, a line only this year's seniors understand, set in heavy type across the chest. No gradients, no permissions, no photo resolution problems.
Typography is also where amateur files fall apart. A design review of type selection from Shopify breaks font choice into six factors, legibility, contrast, theme, licensing, print resolution, and pairing, and warns that ornate fonts become hard to read once they're reduced to a small print area. The same review recommends testing artwork at final physical size, checking it from several feet away, and using heavier weights on textured garments because thin strokes disappear against heather and fleece. WCAG contrast minimums give you a useful screening number even though they're written for screens: at least 4.5:1 for normal text and 3:1 for large text.
Six Words, One Weight, One Line
- Keep the phrase to six words or fewer. Longer lines force a smaller point size and the joke stops landing at reading distance.
- Use a bold sans-serif or slab for the main line. Save script and distressed type for a short accent word, never for the whole phrase.
- Skip thin outlines around small text. They close up on press and turn letters into blobs.
A quote tee is a poster test. If the phrase isn't readable from six feet away on the actual garment, the design isn't finished.
When a class wants three or four motto options, print small runs of each rather than betting everything on one phrase. Our Auto-build gang sheet builder puts several quote variations on one sheet so you can compare real cost per shirt across options before committing to a full run.
Senior Class Shirt Design Concepts at a Glance
| Item | Best For | Print Area | Color Setup |
|---|---|---|---|
| Class Year Varsity Letter Stack | Bold school spirit and team-style shirts | Full front or left chest | School colors; block lettering |
| Retro Sunset Class Crest | Nostalgic, reusable class identity | Crest on front; optional back name | Multi-color sunset gradient |
| Minimalist Name Roll on the Back | Including every senior in a clean design | Full back with small front logo or year | Usually single color |
| Mascot Hero Graphic | Celebrating school identity and mascot pride | Full front; optional sleeve or back accent | Full color with detailed artwork |
| Memory Lane Photo Collage | Personal keepsake shirts with class memories | Back or full front | Multiple photos and colors |
| Grad Cap and Diploma Icon Pattern | Playful graduation events and batch orders | Full front or all-over pattern | Single or multiple colors |
| Hometown Landmark Outline | Community pride and local identity | Small front or larger back | Single-color line art |
| Inside-Joke Quote Tee | Class mottos and personalized sayings | Front, back, or sleeve | Often single-color typography |
Turn Your Senior Shirt Into a Keepsake Worth Wearing
Pick the concept that matches the class, then lock the print specs before anyone collects money. The eight designs above all work, but they only work at the numbers that survive production: 300 DPI files at final print size, text at least 0.25 inches tall, one front graphic and one personalization zone, and a single gang sheet holding every size and variation.
Ordering designs together is where the savings live. A committee that runs the front mark, the sleeve print, and the name roll as three separate jobs pays three setup charges and three shipping costs. A committee that gangs them onto one sheet pays once and can see exactly what each shirt costs before the order closes. Build the full run in one sheet and compare cost per shirt, not just the look of the mockup.
Three checks catch most problems before they get expensive. Confirm mascot and seal permissions in writing, pre-screen every concept before the vote so the winning design is producible, and press one sample on the actual garment color before the full run. Each of those takes a day and saves a reprint.
The last check is sizing. A design sized for an adult large looks enormous on a youth extra-small, and detail built for a big shirt turns to mud when it shrinks. Ask for a youth-scaled version, not a shrunken one, and verify the smallest text after scaling. If your class is 150 students across youth medium to adult 3XL, that's five or six size runs of the same art, which is exactly the job a gang sheet is built for.
Then put a date on the calendar. Artwork approval is the step that slows most school orders, so set the proof deadline first and work backward to the vote. A class that approves art three weeks out has room to fix a contrast problem. A class that approves it three days out pays rush charges and takes whatever the press produces.
Lion DTF Transfers prints DTF transfers and gang sheets with orders shipping in 1 to 2 business days, which leaves room for a sample press before the full run. If the class wants help turning a sketch into production art, the Logo or Shirt Design service is $75.00.
Ready to stop guessing at cost per shirt? Lion DTF Transfers gives your class an online gang sheet builder where you upload the front mark, the name roll, and the sleeve print, size each one, set quantities by size, and see the whole run on a single sheet. You can also hand the job to us through the "We Build a Gang Sheet for You" service if the class would rather send one folder and let a designer handle the layout. Visit Lion DTF Transfers to price your senior class order and get the transfers printed in time for graduation week.