


Let's be real for a second: most school spirit wear is… forgettable. It gets worn once for the pep rally and then shoved to the back of the closet. But it doesn't have to be that way.
The best school spirit wear designs do more than just slap a mascot on a t-shirt. They capture a feeling, build a sense of community, and become something students and staff are genuinely proud to wear.
Beyond the Logo: How Great Spirit Wear Unites a School
This guide is for anyone tasked with creating apparel that people actually want to buy and wear, whether you're a PTO volunteer running a fundraiser or a print shop owner working with local schools. We're going to move past the generic clip art and dive into what it takes to create a powerful visual identity that fires up school pride.
Think of it this way: great spirit wear is a walking billboard for your school. It promotes unity at games, rallies, and community events. To make sure it's doing its job, it helps to see this as part of a bigger picture—an effective education marketing strategy that builds the school's brand from the ground up.
Creating Apparel With Lasting Impact
The secret to memorable spirit wear is a one-two punch of thoughtful design and high-quality production. We’ll walk through the entire process, focusing on the steps that make all the difference.
- Brainstorming concepts that feel authentic to your specific school culture.
- Preparing professional artwork that ensures a flawless, vibrant print every time.
- Using durable DTF transfers to bring your designs to life with brilliant, lasting color.
We'll also dig into some smart, cost-saving strategies. For instance, learning how to group designs for different teams and clubs onto a single order can slash your per-item cost, stretching your budget further than you thought possible.
This is your roadmap to making spirit wear a source of pride, not just another fundraiser item. We'll lean on modern tools and techniques that simplify everything, especially powerful software like an Auto-build gang sheet builder. It makes combining different designs for maximum efficiency and cost-effectiveness incredibly easy.
By the end, you'll have everything you need to create apparel that truly unites your community and leaves a lasting mark.
Developing a Design Concept That Connects
The real difference between spirit wear that gets shoved in the back of a closet and gear that becomes a go-to favorite? It all starts with the concept. A great design is so much more than a logo and school colors—it tells a story, sparks some emotion, and builds that feeling of being part of something bigger.
This is where you move beyond the generic and start creating a collection with some actual personality.
Your first move is to land on a core theme. Think of this as the North Star for all your creative decisions. Is this year all about celebrating a huge championship win? A theme like 'Victory' or 'Legacy' would be perfect. Or maybe the goal is to bring everyone together after a long break? Something like 'Unity' or 'Stronger Together' could really hit home.
A strong theme simplifies everything. When you're stuck debating a font or a color, just ask yourself: "Does this fit our 'Victory' theme?" That simple check keeps your entire line feeling cohesive and intentional.
Choosing Your Colors and Fonts
With a theme locked in, picking your colors becomes a lot more strategic. You’re not just stuck with the official school colors; you can build a modern palette around them.
Let's say your school colors are royal blue and gold. Instead of just stopping there, you could bring in a complementary neutral like a sharp charcoal grey or a clean, athletic heather. These simple additions can make your school spirit wear designs feel way more contemporary and wearable for everyone from students to parents and alumni.
Typography is just as crucial. The fonts you pick should match the vibe of your theme.
- For a 'Legacy' theme: You might lean into a classic, bold serif font that feels timeless and established.
- For a 'Victory' theme: A modern, athletic block font with sharp edges can scream strength and power.
- For a 'Unity' theme: A clean, rounded sans-serif font often feels more welcoming and inclusive.
The trick is to pick just two or three fonts that work well together and use them consistently. If you want to dive deeper into translating visual ideas onto fabric, it's also worth learning how to create embroidery designs, which brings a different texture and feel to apparel.
Breathing New Life into Your Mascot
The school mascot is usually the star of the show, but let’s be honest—sometimes it needs a little refresh. An outdated or poorly drawn mascot can make even the best apparel feel amateurish. You don't always need a complete overhaul; often, just modernizing the existing art is enough.
Consider creating a few different versions of your mascot to cover all your bases.
- A fierce, detailed version for the varsity football team's gear.
- A simplified, clean-line version perfect for academic clubs or staff polos.
- A playful, cartoonish version for elementary school apparel or fun community events.
Having this kind of versatility means your mascot can show up everywhere, creating a truly unified brand across the entire school community. This is more important than ever. The global school uniform market, which has a huge overlap with spirit wear, hit USD 18,000 million and is expected to climb to USD 26,000 million by 2030. That growth is fueled by over 1.5 billion students worldwide who want to feel like they belong.
Spirit Wear Design Element Checklist
Before you send anything off to print, running through a quick checklist ensures you haven't missed any key details. This table breaks down the essentials for a design that not only looks great but is also ready for production.
| Design Element | Key Considerations | Pro Tip |
|---|---|---|
| Theme | Is it clear, relevant, and inspiring? | "Victory 2024" is more specific and impactful than just "Champs." |
| Color Palette | Does it use school colors effectively with modern complements? | Add a neutral like grey or white to make colors pop and increase wearability. |
| Typography | Are fonts legible, on-theme, and used consistently (2-3 max)? | Test font readability from a distance, especially for athletic wear. |
| Mascot Art | Is the artwork clean, modern, and versatile for different uses? | Create simplified and detailed versions to fit various apparel styles. |
| Composition | Is the layout balanced, with a clear focal point? | Avoid clutter. Let key elements like the mascot or main text breathe. |
| Print-Readiness | Is the file a high-resolution vector format (AI, EPS, PDF)? | Vector files can be scaled to any size without losing quality. |
This simple check helps bridge the gap between a cool idea and a professional, finished product that people will be excited to wear.
Bringing It All Together for Production
Once you’ve refined your theme, colors, fonts, and mascot, you have a solid design concept. The next step is turning those ideas into files that are actually ready to be printed. If you're new to the technical side of things, our guide on how to create your own t-shirt designs is a great place to start.
As you finalize the collection, think about creating a small, tight set of designs instead of a dozen disconnected ones. A strong primary logo, a secondary text-based design, and a fun mascot-focused option give people choice while keeping the look consistent. This approach doesn't just strengthen your school’s brand—it also makes production a whole lot easier.
When you have multiple designs ready for different teams, clubs, or events, you can seriously cut down your costs. By grouping them all together, you can take advantage of tools like our Auto-build gang sheet builder. It makes getting all your transfers printed in one single, cost-effective run incredibly simple.
Preparing Your Artwork for Flawless DTF Printing
Getting the technical details right is what separates amateur spirit wear from professional-grade apparel. A great idea can fall flat if the digital file isn’t prepared correctly for Direct-to-Film (DTF) printing, and this is where a lot of people get tripped up.
Let's demystify the process and make sure your vision translates perfectly onto the final shirt.
First things first: you absolutely have to work with vector graphics. Files like AI (Adobe Illustrator), SVG, or EPS are your best friends here. Unlike pixel-based images (like JPEGs or PNGs) that get blurry and distorted when you try to make them bigger, vectors are built on mathematical paths. That means you can scale them from a tiny chest logo to a massive banner with zero loss of quality. Sharp, crisp lines every time.
This diagram shows how the creative phase flows right into the technical prep work.
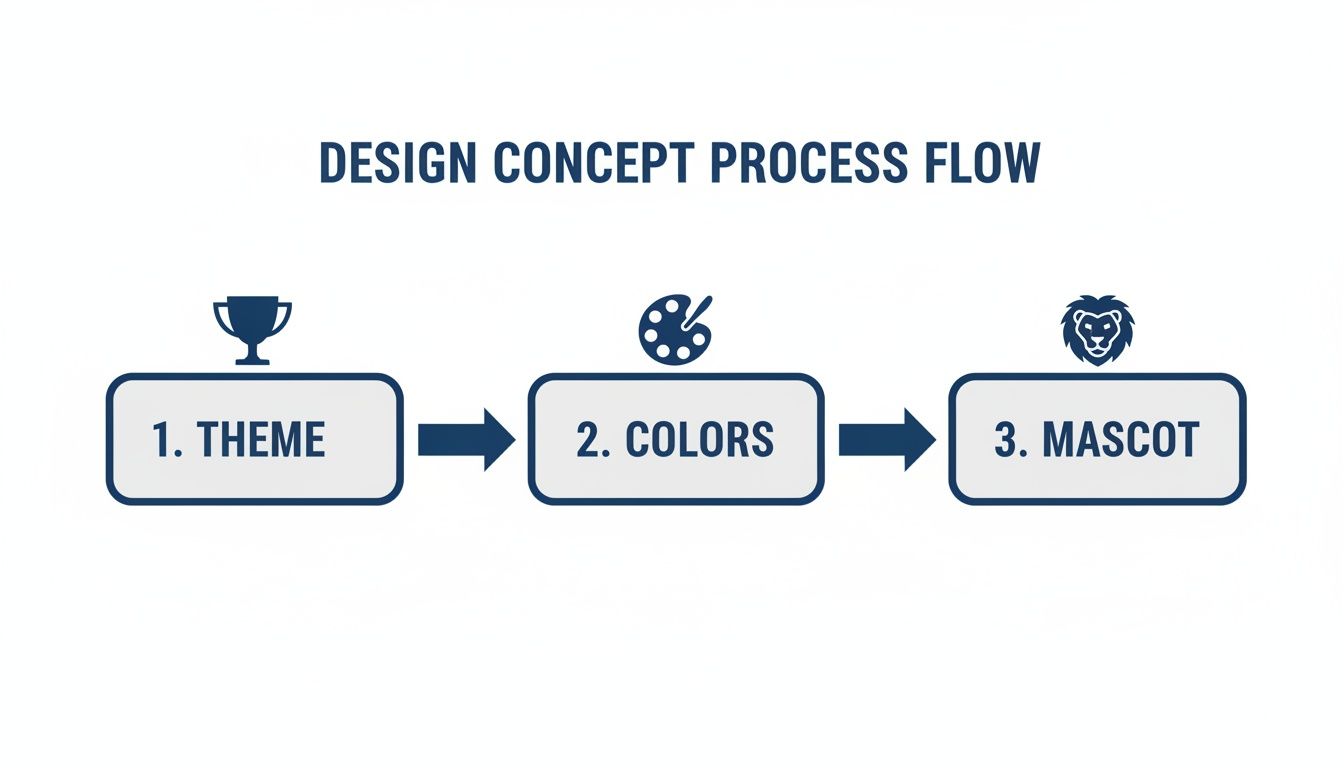
You can see how a solid theme, the right colors, and a polished mascot create the foundation. Only then do you move on to the file specs.
Key File Setup Requirements
Once your vector design is ready, a few technical settings are crucial for a perfect DTF transfer. Getting these right from the start will save you from costly reprints and frustrating delays.
- Transparent Background: This is non-negotiable. Your design file must have a transparent background. A DTF printer prints everything it sees, so if your file has a white background, you’ll get a big white box printed around your logo. Always save your final files in a format that supports transparency, like a PNG.
- Correct Color Profile: To get vibrant, accurate colors, set your design file’s color mode to CMYK (Cyan, Magenta, Yellow, Black). Your computer screen displays in RGB (Red, Green, Blue), but professional printers use CMYK. If you design in RGB, you're risking some nasty color shifts when the design is actually printed.
- Minimum Line Thickness: This is a detail that’s easy to miss but is absolutely vital for durability. Tiny lines or small, isolated elements don't have enough surface area for the adhesive to grab onto. They'll just peel off after a couple of washes. As a rule of thumb, we recommend a minimum line thickness of 0.018 inches (or about 1.3 points).
This might sound a little technical, but it’s a critical step for creating apparel that actually lasts. A design that peels and cracks reflects poorly on the school and defeats the whole purpose of creating quality spirit wear.
From Single Design to Smart Production
Okay, your artwork is polished and technically sound. But what if you have a dozen different designs for various teams, clubs, and school events? Ordering them all separately is a massive waste of time and money.
This is where smart planning comes in.
Instead of thinking about each design as its own order, you can combine them all onto one large sheet. To get a better sense of the possibilities, our guide on custom heat transfer designs explains how different graphics can be grouped for major efficiency gains. This approach will dramatically slash your per-item cost.
Let an Auto-Build Gang Sheet Builder Do the Work
Manually arranging dozens of different logos to fit perfectly onto a transfer sheet is a nightmare. It’s like playing a frustrating game of Tetris, trying to rotate, nest, and squeeze every design to minimize wasted space. Any empty area on that sheet is money down the drain.
This is exactly the problem our Auto-build gang sheet builder was designed to solve.
You just upload all your different vector files—the football team's helmet, the debate club’s motto, the elementary school’s fun run graphic—and the software does all the hard work. It automatically analyzes the shapes and sizes of each design and nests them together with maximum efficiency. It fits way more designs into less space than you could ever manage by hand.
This automated process doesn't just save you a ton of time; it directly cuts your printing costs. The more designs you can fit onto a single sheet, the lower your price-per-transfer gets. It’s the single best strategy for making your spirit wear budget go further, allowing you to outfit more groups without ever sacrificing quality.
Using Gang Sheets to Maximize Your Budget
Here’s the secret to making your spirit wear projects more affordable without sacrificing a single ounce of quality. If you're juggling orders for multiple teams, clubs, and school events, ordering each design separately is a surefire way to burn through your budget.
The solution is a production powerhouse called a gang sheet.
Think of it as a large, printable sheet. Instead of placing just one design on it, you can arrange dozens of different logos and graphics—football helmets, band logos, debate team mottos—all nested together. By printing them all at once on a single sheet, you slash your cost-per-print. It's the ultimate efficiency hack for creating amazing school spirit wear designs on a real-world budget.

This method lets you do more with your funds. You can offer a wider variety of designs, experiment with new ideas, or just pass those savings on to parents and students.
The Problem with Building Gang Sheets by Hand
Manually creating a gang sheet is like playing a frustrating game of Tetris with your most important designs. You have to meticulously rotate, resize, and nest each individual graphic to minimize any wasted space.
Every empty square inch on that sheet is money down the drain. The process isn't just tedious; it's also incredibly difficult to get perfect. It's nearly impossible for the human eye to find the absolute most efficient layout, meaning you often end up paying for unused material.
This inefficiency adds up fast, especially on large orders with diverse artwork.
Effortless Optimization with an Auto-Build Gang Sheet Tool
This is where technology completely changes the game. The Lion DTF Auto-build gang sheet builder is a tool designed to make this process effortless and mathematically perfect.
Instead of spending hours arranging files, you just upload all your prepared designs. The software takes over, analyzing the precise shape and dimensions of each graphic. In seconds, it automatically nests them together in the most compact arrangement possible, maximizing every bit of space on the sheet.
The difference is staggering. A sheet optimized by the auto-builder can often fit 15-20% more designs than a manually arranged one. For a large school order, that translates into significant savings and a much higher return on your investment.
This isn’t just about saving money; it’s about smart planning that lets you stretch your resources further. It frees you up from the tedious work so you can focus on what really matters—creating designs that ignite school pride. You can learn more about how to get the most out of this process in our deep dive on how DTF gang sheets work.
A Real-World School Spirit Wear Scenario
Let's put this into context. Imagine you're in charge of the fall spirit wear order for an entire school.
You need designs for:
- The Varsity Football team (a large back print)
- The Marching Band (a smaller chest logo)
- The Middle School Soccer Club (a sleeve logo)
- The PTO Fall Festival (a one-color event graphic)
- The Elementary School Fun Run (a colorful mascot design)
Instead of placing five separate orders, you upload all five print-ready files into the auto-builder. It instantly creates a single, optimized gang sheet ready for printing. This one action combines your orders, helps you reach bulk pricing tiers faster, and ensures you get the absolute lowest cost per transfer.
This efficiency is crucial in the school apparel market. Shirts are the undisputed king of spirit wear, serving as the main canvas for every school logo and event. In North America alone, the school uniform and apparel market accounted for over 40% of a USD 16,245.2 million industry, driven by schools using branded tees and polos to foster a stronger community. To learn more about these market trends, you can read the full research on school uniform market dynamics.
By using a gang sheet, you're adopting a professional production strategy that makes even the most complex, multi-team orders manageable and cost-effective.
Applying Your DTF Transfers for a Professional Finish
Your perfectly optimized gang sheet has arrived, and the designs look amazing. Now comes the best part—the hands-on, rewarding step of bringing your school spirit wear designs to life on the actual apparel. Applying the DTF transfer correctly is the final, make-or-break moment that guarantees a vibrant, durable, and professional finish.
This is where all your meticulous design prep really pays off. A flawless application turns a great concept into a tangible product that students and parents will be excited to wear. With the right technique, you’ll create spirit wear that not only looks incredible but also stands up to that 100+ wash durability promise.
Dialing in Your Heat Press Settings
Let's be clear: a quality heat press is non-negotiable for professional results. Unlike a home iron, a heat press delivers the consistent temperature and even pressure needed for the DTF adhesive to properly bond with the fabric fibers.
Getting the settings right is everything. While there are slight variations depending on the material, this is a solid starting point for the most common fabrics you'll encounter:
- Cotton & Cotton Blends: Press at 270-280°F for 10 seconds with medium to firm pressure.
- Polyester & Synthetics: Go a bit cooler. Lower the heat to 240-260°F and press for 7-10 seconds with medium pressure to avoid scorching the more delicate fabric.
- Tri-Blends: These require a gentle touch. Aim for around 260-270°F for 8-10 seconds.
I can't stress this enough: always do a test press on a scrap piece of fabric or an inside seam if you're working with a new garment type. This tiny step can save you from ruining an entire batch of shirts. It's a lesson you only want to learn once.
Pro Tip: Before you even think about placing your design, always pre-press the garment for 3-5 seconds. This quick step zaps any moisture and smooths out wrinkles, creating a perfectly flat surface for the transfer and ensuring a much stronger bond.
The Hot-Peel Advantage for Large Orders
One of the single biggest benefits of working with Lion DTF transfers is their hot-peel formulation. For large school spirit wear orders, this is an absolute game-changer.
With a hot-peel transfer, you remove the film immediately after the press opens, while the garment is still hot. This means you can move straight to the next shirt without waiting for anything to cool down. For a run of 100+ hoodies, this efficiency boost can literally cut your production time in half compared to cold-peel transfers, which force you to wait until each garment is cool to the touch. The ease of use is a massive plus, especially if you're working with volunteers or less experienced staff.
After the initial peel, I always recommend a quick second press. Just cover the design with a Teflon sheet or parchment paper and press for another 2-3 seconds. This final step locks the design deep into the fabric, enhancing its durability and giving it a softer, more matte finish that looks and feels premium.
Post-Press Care for Long-Lasting Designs
Your job isn't quite done when the shirt comes off the press. Giving parents and students simple care instructions is crucial for keeping that spirit wear looking great all year long. A little guidance goes a long way in preventing accidental damage and keeping the designs vibrant, wash after wash.
Here are the key instructions to share:
- Wait 24 Hours: Don't wash the garment for at least 24 hours after pressing. This gives the adhesive time to fully cure and set.
- Wash Inside Out: Always turn the garment inside out before washing in cold or warm water.
- Tumble Dry Low: Use a low heat setting on the dryer. For the absolute best results, hang it to dry.
- Avoid Direct Ironing: Never, ever iron directly on the printed design.
These simple steps protect the transfer's integrity and are critical for succeeding in the school apparel market. Primary schools represent a massive opportunity, accounting for over 45% of the global uniform market. With the total market expected to grow from USD 38.88 billion to USD 58.61 billion by 2031, driven by an enrollment boom of over one billion children, the demand for durable, well-made custom apparel is constant. You can discover more insights about the school apparel market and its powerful growth trends. By ensuring your products last, you build a reputation for quality that keeps schools coming back year after year.
Common Questions About School Spirit Wear Designs
Jumping into the world of custom apparel can feel like a maze, especially when you're aiming for top-notch school spirit wear designs. Let's cut through the noise and tackle some of the most common questions we hear every day. Think of this as your cheat sheet for getting professional-grade results every single time.
These are the real-world questions that pop up on almost every project, so let's get you some clear, practical answers.
What Is the Best File Format for School Spirit Wear Designs?
Always, always go with a vector format. Files like AI, EPS, or SVG are built using mathematical paths, not pixels, which is a game-changer for apparel. It means you can take that mascot logo from a tiny left-chest design to a massive banner for the gym, and it will never, ever get blurry or lose quality.
We can't stress this enough: vector files give you the cleanest, sharpest prints possible. If all you have is a raster file like a PNG or JPEG, don't worry. Our team can help get it vectorized and print-ready.
How Can I Save Money on Spirit Wear for Multiple School Teams?
This is where you can get really smart with your budget. The single most effective way to save money is by using a gang sheet. Instead of placing separate orders for the football team, the debate club, the band, and the student council, you combine all those different designs onto one large transfer sheet.
The secret to making your budget stretch further is simple: group as many different designs as you can into a single print run. This move dramatically lowers your cost per transfer and helps you hit bulk pricing tiers much faster.
Our Auto-build gang sheet builder was designed for exactly this. You just upload all your designs, and the software automatically nests them together to use every last inch of the sheet. It's the smartest way to cut down on waste and slash your costs without sacrificing variety or quality.
What Is the Difference Between Hot-Peel and Cold-Peel DTF Transfers?
The key difference is all in the timing—specifically, when you pull the transfer film off after pressing. We specialize in hot-peel transfers, which means you peel the film away immediately while the garment is still hot on the press. For big production runs, this is a massive time-saver.
Cold-peel transfers, on the other hand, force you to wait until the garment has cooled down completely before peeling. That might not sound like a big deal for one shirt, but when you're pressing hundreds of them for a big school event, that waiting time adds up fast. For speed and workflow efficiency, hot-peel is the clear winner.
Can I Just Use a Home Iron to Apply DTF Transfers?
We get this question a lot, and the answer is a hard no. A home iron is the quickest way to ruin a good transfer. The problem is that irons have hot spots and deliver totally inconsistent heat and uneven pressure.
This leads to poor adhesion, which is why you see designs cracking and peeling off after just a few washes. You also run a huge risk of scorching the shirt. For professional, durable results that will represent your school well and live up to the 100+ wash durability standard, a quality heat press is non-negotiable. It’s the only tool that can provide the consistent temperature and firm, even pressure needed for the transfer to properly bond with the fabric.
Ready to create spirit wear that's vibrant, durable, and budget-friendly? The Lion DTF Transfers Auto-build gang sheet builder is your ticket to maximizing designs and minimizing costs. Start building your custom gang sheet today and see how easy it is.