


Custom heat transfer designs are your ticket to turning plain apparel into something special, all starting from a simple digital file. The process is pretty straightforward: we print your artwork onto a special film, and then you use a heat press to apply it to the garment. It’s the magic behind so many of the crisp, colorful graphics you see on everything from boutique brand tees to local sports team uniforms.
Setting Up Your Digital File for Flawless Prints
Before your creative vision can come to life on a t-shirt, its fate is sealed inside your design software. Honestly, a properly prepared digital file is the single most important factor in getting professional, print-ready results. Nailing these fundamentals saves you time, prevents the headache of costly reprints, and ensures your final product looks as sharp as you imagined.
The demand for unique apparel is just exploding. The global custom t-shirt printing market is on track to hit an insane $18.32 billion by 2034, all because people want products that feel personal. This is a huge opportunity for creators who take the time to master the technical side of their craft.
Nail the Resolution and Color Mode
First up, let’s talk resolution. Your artwork absolutely must be created at 300 DPI (dots per inch). This isn't just a suggestion; it's the industry standard for high-quality printing. If you submit a 72 DPI image you snagged from a website, you’re going to get a blurry, pixelated mess that just screams amateur. Always, always start your canvas at 300 DPI.
Next is the color mode. Your screen shows colors in RGB (Red, Green, Blue), but our printers work in CMYK (Cyan, Magenta, Yellow, Black). Designing in RGB can cause some nasty surprises when your colors shift during printing. To get what you see, set your document’s color space to CMYK right from the start.
The Importance of a Transparent Background
For DTF (Direct-to-Film) transfers, a transparent background is non-negotiable. If your file has a white or colored background, the printer will see it as part of the design and print a solid box around your artwork. Not a good look. You have to save your final file as a PNG with transparency enabled.
Pro Tip: After you export your PNG, do a quick sanity check by opening the file again. A truly transparent background usually shows up with a gray-and-white checkerboard pattern in most image viewers. That’s how you know you did it right.
To make this crystal clear, here’s a quick-reference table with the essentials. Getting these right is half the battle.
Essential File Requirements for DTF Printing
| Specification | Requirement | Reasoning |
|---|---|---|
| Resolution | 300 DPI (Dots Per Inch) | Ensures the final print is sharp, clear, and free of pixelation. Industry standard for professional quality. |
| Color Mode | CMYK (Cyan, Magenta, Yellow, Black) | Matches the printer's ink set, preventing unexpected color shifts and ensuring accurate color reproduction. |
| Background | Transparent | Prevents the printer from creating an unwanted solid-colored box around your artwork. Critical for standalone graphics. |
| File Format | PNG (with transparency) | This format supports transparent backgrounds, which is essential for isolating your design on the garment. |
Sticking to these specs will get you a perfect print-ready file every single time. Once your designs are print-ready, our Auto-build gang sheet builder makes it easy and cost-effective to get them printed.
For more complex artwork, getting a perfectly clean, transparent background can be a real pain. If you're wrestling with it, don't sweat it. Consider using a professional service to clean it up for you. Our design vectorizing services can convert your artwork into a clean, infinitely scalable format with a perfect transparent background, ready for printing. It’s a small investment that guarantees a pro-level outcome.
Choosing the Right Tools for Your Artwork
The software you choose is where your creative ideas take shape, and it has a massive impact on the quality and flexibility of your final prints. Picking the right tool isn't just about what you're comfortable with; it's about matching the program's strengths to your artistic vision.
Getting a handle on the core difference between the two main types of graphics—raster and vector—is the secret to producing crisp, professional custom heat transfer designs every single time.

This choice directly affects how your art behaves when it's resized and sent to print. Let's break down which type of software is the right call for different kinds of projects.
Working with Raster Graphics
Most people are already familiar with raster graphics without even knowing it. These are your standard pixel-based images, like a photograph you took on your phone or a detailed digital painting.
Programs like Adobe Photoshop and Procreate are the undisputed champs of the raster world. They give you the power to create incredibly complex designs with intricate textures, subtle gradients, and painterly effects that feel organic and rich. If your t-shirt design is a photograph or a piece of detailed digital art, raster is absolutely the way to go.
The critical thing to remember with raster is its dependency on resolution. Since these images are made of a finite grid of pixels, blowing them up too much will cause them to lose quality and look blurry or jagged. This is exactly why we always stress starting with a 300 DPI canvas—you need to give the printer enough pixel data to work with for a sharp, clean result at the final size.
Real-World Scenario: Let's say you're designing a vibrant, full-color graphic of a wolf howling at the moon for a big print on the back of a shirt. All those details—the intricate fur, the glowing moon, the textured background—are perfect for a raster program like Photoshop. You'd build it at 300 DPI at the final print size from the very beginning, ensuring every last detail is captured perfectly.
The Power of Vector Graphics
Vector graphics operate on a completely different principle. Instead of being built from pixels, they're constructed from mathematical equations that define points, lines, and curves.
This is the home turf of software like Adobe Illustrator. The true magic of vector is its infinite scalability. You can take a vector logo and resize it from the size of a postage stamp to a giant billboard without losing a shred of quality. It will always be perfectly sharp and clean.
This makes vector the clear winner for logos, text-based designs, and any graphic that needs to be used in a bunch of different sizes. If a client needs their company logo on a left-chest print today and a massive banner tomorrow, a vector file isn't just a good idea—it's mandatory.
Comparing Raster and Vector Software
So, which one should you use for your next project? It really comes down to the artwork itself. Here’s a quick comparison to help you make the right call.
| Feature | Raster (Photoshop, Procreate) | Vector (Adobe Illustrator) |
|---|---|---|
| Best For | Photos, complex illustrations, painterly designs | Logos, text, icons, scalable graphics |
| Structure | Pixel-based grid | Mathematical paths and points |
| Scalability | Loses quality when enlarged | Infinitely scalable with no quality loss |
| File Types | PNG, JPG, TIFF | AI, EPS, SVG |
| Key Advantage | Rich, detailed color and texture | Crisp lines at any size, smaller file sizes |
In reality, many professional designers use both programs, often creating raster elements in Photoshop and then importing them into Illustrator to combine them with vector text and shapes. The most important thing is to understand the strengths of each and choose the right primary tool for the job.
No matter which software you land on, a well-organized workflow is your best friend. For instance, once your designs are ready, you can get way more value by arranging multiple pieces of artwork onto a single sheet. Our Auto-build gang sheet builder makes this ridiculously easy and cost-effective by automatically packing your files together, which drastically lowers your cost per print.
Using Gang Sheets to Maximize Your Value
If you're in the apparel printing game, you know efficiency is everything. That’s where gang sheets come in. They are hands-down the single best tool for boosting your output and cutting costs, completely changing how you order custom heat transfer designs.
Instead of buying your transfers one by one, a gang sheet lets you pack multiple designs onto one big sheet. This move alone dramatically drops your cost per print. You're no longer paying for each individual design but for the total printed area, making it a must-have strategy for anyone serious about running a smarter, more profitable operation. For ultimate ease of use, an Auto-build gang sheet builder can arrange all your designs for you, saving time and maximizing cost-effectiveness.
So, What Makes a Gang Sheet a Game-Changer?
Let’s get practical. Imagine you need 20 full-chest designs for an event, 30 smaller left-chest logos for some staff polos, and 50 tiny neck tag labels to brand everything. Ordering all of those separately would be a nightmare for your budget. A gang sheet lets you arrange all 100 of these designs onto a single sheet that you pay for just once.
This is where you start to see real value. The global heat transfer market is exploding—it hit around $550 million in 2023, largely because custom products are so accessible now. Smart methods like gang sheets are what allow smaller businesses to get a piece of that pie by keeping their production costs lean and competitive.
Here’s a look at our Auto-build gang sheet builder doing its thing, automatically slotting in designs to make the most of every inch.
Notice how tight the graphics are? Minimal wasted space means you're getting the absolute most prints for your money.
Let Technology Do the Heavy Lifting
Manually arranging dozens of files to fit perfectly on a sheet is like a frustrating game of Tetris that nobody wants to play. It's tedious, time-consuming, and easy to get wrong. That’s exactly why we built our Auto-build gang sheet builder. It takes all the guesswork and manual labor out of the equation by automatically organizing your uploaded files into the most efficient layout.
Our builder is smart. It nests different-sized designs, rotates them, and packs them in to kill as much empty space as possible. This doesn't just save you a ton of design time; it guarantees you're squeezing every bit of value from the transfer sheet you buy. It’s a huge win for busy creators.
Pro Tip: Always fill the gaps. Even after the auto-builder works its magic, you might spot some small empty areas. Don't let them go to waste! Drop in extra copies of your best-sellers, small logos for sleeves or neck tags, or even a QR code that links to your Instagram. Never pay for blank space.
Smart Strategies for Building Your Sheet
Putting together a great gang sheet is part art, part science. It’s all about planning ahead and thinking strategically about your inventory and upcoming orders.
Here are a few tips I've picked up to help you maximize your investment:
- Stock Up on Best-Sellers: Got a few designs that fly off the shelves? Throw extra copies onto every gang sheet you order. This keeps you stocked and ready to press, so you can fill orders instantly without waiting for a new transfer shipment.
- Combine Multiple Orders: If you're managing different projects or clients, consolidate all their designs onto one sheet. This is a perfect move for print shops or creators handling multiple brands, as it pools everyone's orders together and drives down the per-print cost across the board.
- Think in Categories: Try grouping similar designs. For instance, you could dedicate one sheet to all your left-chest logos and another to full-back graphics. It seems simple, but this makes cutting the transfers apart and organizing them for pressing so much easier.
By mastering gang sheets, you're no longer just ordering prints—you're strategically managing your production. It’s a core skill for building an efficient and profitable apparel business. For a deeper dive, check out our guide on understanding DTF transfer gang sheets.
Nailing Your Design Sizing and Placement
A killer design can completely fall flat if it’s the wrong size or slapped awkwardly onto the garment. Even a tiny shift can make a professional graphic look amateur. Getting sizing and placement right is the final, crucial step that turns great artwork into a polished, retail-ready product.
This isn’t just about pulling out a ruler; it's about developing an eye for visual weight and balance. A design that looks perfect on a medium t-shirt might get lost on a 3XL hoodie or completely overwhelm a youth small. The goal is to make the design look like it belongs on the garment, no matter the size or style.
Starting with Standard Placement Guidelines
While every garment is unique, there are some industry-standard measurements that work as a fantastic starting point. Following these guidelines helps ensure your custom heat transfer designs are positioned consistently and professionally every single time. For a classic full-front design on an adult tee, you’ll typically want to place the top of the design about three to four inches down from the collar.
This placement keeps the design from sitting too high and looking like it's floating, but also prevents it from ending up on the stomach. For those popular left-chest logos, the sweet spot is usually centered between the collar and the armpit seam.
A Pro's Rule of Thumb: Need to find the vertical center line of a shirt fast? Just fold it in half lengthwise and give it a quick press to create a temporary crease. Use that line to align your design perfectly before the final press so you know it's not off-kilter.
To give you a head start, here’s a quick reference chart for some of the most common apparel types we see.
Standard Heat Transfer Placement Guide
This table is a great cheat sheet for common design placements. Think of these as solid starting points—you can always adjust them slightly to fit a specific garment's cut or a unique design's shape.
| Placement Area | Adult T-Shirt (Avg. Size) | Youth T-Shirt (Avg. Size) | Left Chest Logo (Avg. Size) |
|---|---|---|---|
| Top of Design | 3-4 inches below the collar | 2-3 inches below the collar | Aligned with the bottom of the sleeve |
| Typical Width | 10-12 inches | 7-9 inches | 3-4 inches |
| Vertical Center | Centered on the chest | Centered on the chest | Centered between placket/collar and sleeve |
These measurements are trusted across the industry and will help you get that professional, consistent look customers expect.
Creating Realistic Mockups for a Flawless Finish
Once you've got your sizing and placement dialed in, creating a digital mockup is your best final check. This isn't just for showing clients a preview; it's your secret weapon for spotting potential issues before you press a single transfer. A quick mockup immediately reveals if a design is too big, too small, or just plain crooked.
You don't need fancy software for this. Simple tools like Canva or even just layering your transparent PNG over a shirt photo in a basic editor works wonders. This quick step helps you visualize the final product, confirm the scale, and ultimately, sell your apparel with total confidence.
Personalized apparel is a massive market, making up a whopping 42% of the demand in the heat transfer vinyl world, driven by both fashion and promotional printing. With North America contributing about 33% of the global market's revenue in 2022, it’s clear that people love unique, custom gear. You can learn more about the trends shaping the HTV market.
By perfecting your placement and using mockups, you tap directly into this demand by delivering a pro-level product that looks intentional. This attention to detail is what sets successful brands apart and keeps customers coming back. When you're ready to print, our Auto-build gang sheet builder makes it easy and cost-effective to produce multiple sizes of your perfected design, ensuring you have the right transfer for any garment.
Pressing Your Transfers for a Perfect Finish
So, you've designed some killer artwork, squeezed every penny of value out of our Auto-build gang sheet builder, and now you're holding a stack of professional custom heat transfer designs. Nice work. But the job isn't done yet—the final press is where the magic really happens. A perfect press is what turns a great design on film into a vibrant, durable piece of apparel that feels as good as it looks.
Success here boils down to three things: temperature, time, and pressure. Nailing this trio is non-negotiable if you want that soft-hand feel and a professional finish that stands up to whatever life (and the laundry) throws at it.
Prepping for a Perfect Application
Before you even think about laying down that transfer, you need to prep the garment. Trust me, this simple step sidesteps a ton of common headaches.
First up, always pre-press your shirt or hoodie for a quick 5-7 seconds. This zaps any hidden moisture out of the fabric—a known saboteur of transfer adhesive—and irons out any wrinkles, giving you a perfectly flat surface to work with.
Next, carefully position your DTF transfer on the garment. Once you're happy with how it looks, cover it with a Teflon sheet or a piece of parchment paper. This little barrier prevents the hot metal of your heat platen from making direct contact with the film, ensuring heat is spread evenly and stopping any ugly scorch marks.
This infographic breaks down the workflow for getting your designs ready for this stage.
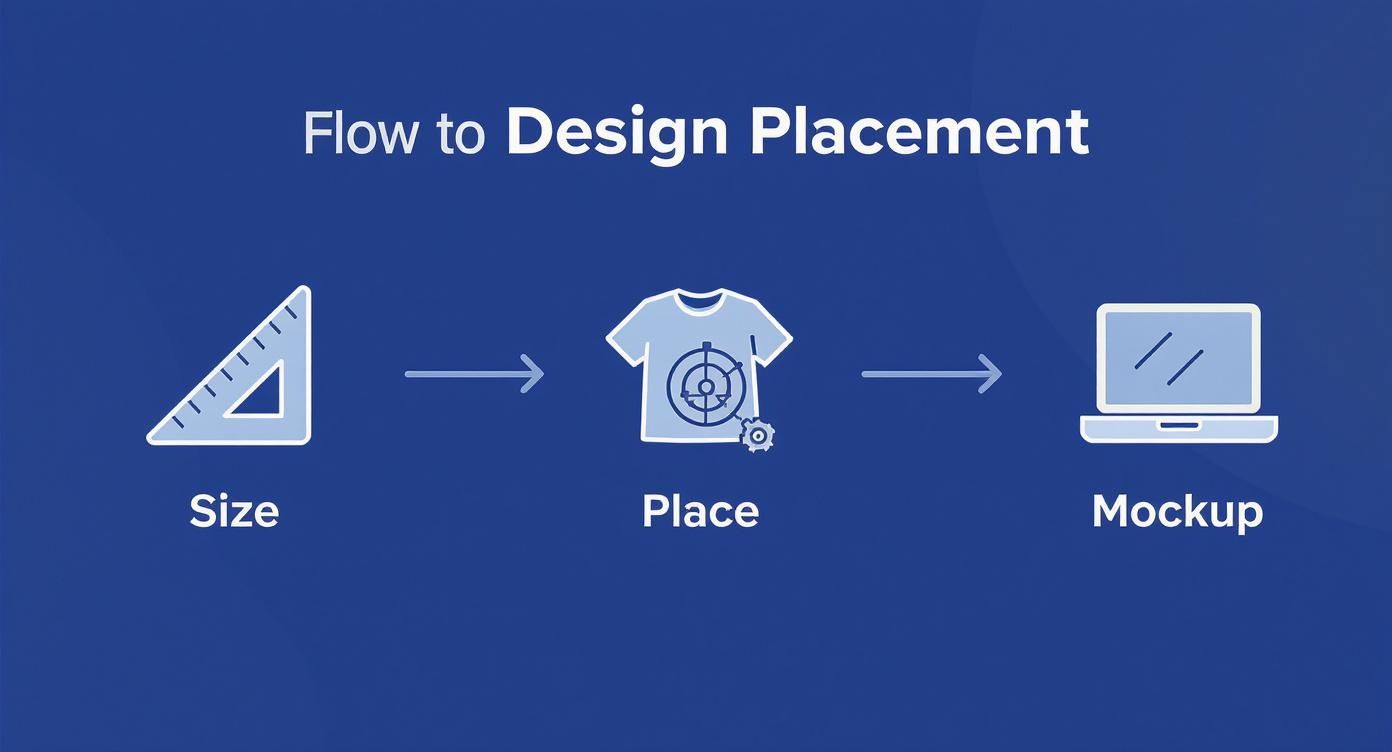
Thinking through the process from sizing to mockup saves you from misplacing a design on the press, which saves both time and materials.
Dialing in Your Heat Press Settings
Not all fabrics are created equal, and your heat press settings need to reflect that. Using the wrong temperature or time can scorch polyester or cause transfers to peel right off a cotton tee. Sticking to proven parameters is the key to consistency.
Here’s a quick-and-dirty guide for the most common materials we see:
- 100% Cotton & Cotton/Poly Blends: These are your workhorses and pretty forgiving. Set your temperature between 240-280°F and press for 10 seconds using medium to firm pressure.
- 100% Polyester & Tri-Blends: These fabrics are a bit more sensitive to heat. You’ll want to drop the temperature to 240-260°F and shorten the press time to 7-10 seconds to dodge scorch marks or dye migration.
Crucial Tip: Always—and I mean always—do a test press on a scrap piece of the same fabric or in a hidden spot on the garment. This quick check confirms your settings are dialed in before you commit to the real deal. It’s the difference between a perfect product and a costly mistake.
The Instant Hot Peel and Final Press
After the timer goes off, the peel is where it all comes together. Our DTF transfers are designed as a hot peel, which means you get to pull off that carrier film as soon as the press opens, while everything is still hot.
Peel the film back in one smooth, confident motion—think low and slow. Don't just yank it straight up, as that can lift parts of the design right off the shirt.
Once the film is gone, do a quick final press for 4-5 seconds. This second press is vital. It locks the design deep into the fabric fibers, seriously boosts its durability, and gives it that clean, matte finish everyone wants. And yes, use your protective sheet for this step, too.
For an even deeper dive, you can find more tips for beginners pressing DTF transfers on T-shirts in our dedicated guide.
Troubleshooting Common Pressing Problems
Even when you do everything right, issues can pop up. Knowing how to fix them on the fly is what separates the pros from the rookies. Here are a few common hurdles and how to clear them.
Common Pressing Issues and Their Solutions
| Problem | Likely Cause | Solution |
|---|---|---|
| Transfer Not Sticking | Not enough pressure or heat. | Crank your press pressure up to firm. If it still won't stick, bump the temperature by 5-10 degrees and try again. |
| Shiny "Box" Around Design | Too much pressure or heat. | Ease back on the pressure to medium. Double-check that your temperature isn't too high for the fabric. |
| Scorched or Discolored Fabric | The temperature is too high. | Lower the heat immediately. This is especially critical for polyester and other heat-sensitive materials. |
By following these steps—from prepping the garment to nailing the peel and final press—you can ensure every piece you create has a professional, long-lasting finish that truly represents the quality of your brand.
Common Questions About Heat Transfer Designs
When you're jumping into the world of custom heat transfer designs, a few questions always pop up. Getting them answered upfront is the key to dodging common mistakes, saving a bit of cash, and making apparel you’re actually proud to show off. Let’s tackle some of the most frequent ones we hear from creators.
What Is the Biggest Mistake to Avoid When Submitting a Design?
Hands down, the most common (and costly) error is uploading a low-resolution file. We see it all the time—files pulled from the web at 72 DPI that end up looking blurry and pixelated when printed. For that sharp, professional finish, your artwork must be at least 300 DPI at the size you want it printed.
The second biggest issue is forgetting to knock out the background. Our DTF printers are incredibly precise; they will print exactly what you send us. If your design file has a white background, you'll get a solid white box printed around your art. Always save your final design as a PNG with a completely transparent background. That way, only your graphic gets printed.
Can I Use a Photo from My Phone for a T-Shirt Design?
You technically can, but it’s a risky move. Modern phone cameras are impressive, but the photos they produce often fall short of the required 300 DPI resolution, especially when you need to blow them up for a full-chest print. They might just work for a very small chest logo if the picture was taken in perfect lighting with zero digital zoom.
For consistently great results, we always recommend using artwork created in proper design software. And whatever you do, never use a screenshot. They are automatically compressed to a low resolution (usually 72 DPI) and will give you a blurry, amateur-looking transfer every single time.
Key Takeaway: Think of your source file as the foundation of a house. If you start with a low-quality image, the end result is always going to suffer, no matter how good the printer or the press is.
How Does a Gang Sheet Builder Save Me Money?
Using a gang sheet builder is one of the smartest ways to keep your costs down. The logic is simple: you pay for the total area of the transfer sheet, not for each individual design you put on it.
For example, instead of ordering ten separate 3-inch logo transfers, you can cram dozens—or even hundreds—of them onto a single 22x60 inch sheet for one flat price. This approach absolutely tanks your cost-per-transfer, which is perfect for stocking up on your best-sellers or knocking out a big order.
Our Auto-build gang sheet builder takes this a step further. Just upload your designs, and it automatically arranges them to use every last square inch of the sheet. It eliminates wasted space, ensuring you get the absolute most bang for your buck. That kind of efficiency is what keeps your production costs low and your profit margins healthy.
How Can I Ensure My Colors Print Accurately?
Getting your colors right on the first try is all about starting in the correct color space. For the most predictable and vibrant results, you should always build your design files in CMYK. This mode directly mirrors the four-color ink process our printers use.
Your computer monitor and phone screen display colors in RGB, which has a much wider and brighter range of colors than any printer can physically reproduce. If you design in RGB, you're almost guaranteed to see a color shift when the file gets converted for printing. Those super-vibrant screen colors will often look duller on fabric.
While a perfect match between a backlit screen and a physical print is impossible, designing in CMYK with high-quality artwork gets you as close as you can possibly get. It's a non-negotiable step for maintaining brand consistency and making sure your customers get what they see online.
Ready to turn your ideas into flawless, vibrant prints? The team at Lion DTF Transfers makes it simple. Use our Auto-build gang sheet builder to maximize your value and get professional-quality custom heat transfer designs shipped in as little as one business day. Start your order today!