










You've got a dozen small apparel orders open, each with a different logo, name, or color combination. One customer needs a few team shirts, another wants a short merch run, and a third has sent artwork that doesn't fit neatly into any existing production batch. If every design gets its own setup, trimming session, and press routine, the work quickly eats the margin.
That's where Lion DTF transfers fit into a modern shop workflow. Instead of investing production time in every print stage, you can outsource the film transfer and keep the final application, quality check, and fulfillment in-house. The bigger opportunity isn't just printing on more fabrics. It's building a repeatable system around layout automation, consistent color, efficient pressing, and reliable ordering.
The Shift to Professional DTF Production
A small print shop often starts with manual production because manual production feels flexible. You print one design, cut it, press it, and move to the next order. That approach works while order volume is light. It becomes expensive when the queue contains many unrelated designs and every job requires separate handling.
A shop fulfilling custom names and numbers might spend more time organizing transfers than pressing garments. The same happens with e-commerce sellers running frequent small drops. Each order may be profitable on paper, but wasted film, idle press time, file preparation, and rework reduce the actual return.
Direct-to-film printing emerged commercially in the late 2010s, first gaining traction among small print shops and experimenters using modified equipment. Purpose-built machines and lower-cost converted systems helped move the process into mainstream apparel decoration during the 2020s, according to this history of DTF printing development.
Outsourcing the print stage
A professional transfer partner changes the production split. The provider handles the print stack, white ink, powder, curing, and film preparation. The decorator receives a ready-to-press transfer and concentrates on garment selection, placement, pressing, inspection, and shipping.
That arrangement makes particular sense when the shop handles:
- Short runs: Produce varied designs without setting up screens or maintaining a dedicated printer.
- Complex artwork: Apply detailed gradients, photographs, and multicolor graphics without separating artwork into screen-printing colors.
- Mixed garments: Use the same transfer workflow across cotton, polyester, and blends, subject to testing and proper pressing.
- Fragmented orders: Combine many small designs into organized production batches instead of treating every order as a separate print job.
The market's scale reflects how quickly this workflow has spread. Europe represented 36.0% of the overall DTF printing market in 2024, while dedicated DTF printers represented 45.0% of the market by type that year, according to Grand View Research's DTF market coverage. The same source estimates U.S. DTF revenue at USD 302.7 million in 2025, with a projection of USD 389.8 million by 2030.
Practical rule: Treat DTF as a production system, not just a transfer type. The printer matters, but layout, file preparation, pressing, inspection, and fulfillment decide whether the system earns money.
The operational advantage is straightforward. You can accept more design variation without adding a separate print setup for every customer. That's why professional DTF transfers are increasingly useful beside screen printing, embroidery, and DTG rather than only as a replacement for them.
Understanding the Direct-to-Film Process
DTF works as a layered production stack. The printer deposits water-based CMYK ink and a white underbase onto a coated PET film. Adhesive powder is applied to the wet print, then cured so the finished transfer can bond to a garment under heat and pressure.
The white layer does important work. On a dark shirt, transparent or light CMYK ink alone won't provide the opacity needed for strong color. The white underbase gives saturated artwork a foundation, while careful alignment and choke settings help prevent visible gaps around the edges of the design.
The production stack
The process usually follows this sequence:
- Prepare the artwork. Remove unintended backgrounds, confirm transparency, check fine details, and size the design for the garment. A file that looks acceptable on a monitor can still create problems if small elements disappear during printing.
- Print the color layers. The printer lays down CMYK ink according to the selected RIP profile and material combination.
- Apply the white underbase. The white layer supports opacity, especially when the transfer will be pressed onto dark or strongly colored fabric.
- Add adhesive powder. Powder adheres to the wet ink and forms the bonding layer between the printed design and the garment.
- Cure the transfer. The powder must be properly melted and distributed before the film is shipped or pressed.
- Press onto the garment. Heat and even pressure activate the adhesive and embed the transfer into the textile surface.
The printer, ink, film, powder, and RIP settings need to be treated as one controlled process. Guidance from Caldera's DTF color-management documentation recommends printing a standardized color chart on the actual production stack before creating ICC and RIP adjustments. That matters because changing film or ink can change the output even when the artwork file stays the same.
Why DTF fits mixed apparel
Screen printing remains efficient for large repeat orders with stable artwork, but it requires screens, separations, setup, and cleanup. DTG can produce detailed graphics directly on garments, yet fabric preparation and garment compatibility can affect the workflow. DTF transfers separate the printing stage from the garment stage, which gives decorators more flexibility.
That separation is useful for cotton, polyester, and blends, but it doesn't eliminate testing. Fabric stretch, surface texture, dye migration, seams, and heat sensitivity still influence the finished result. The transfer is only one part of the finished product.
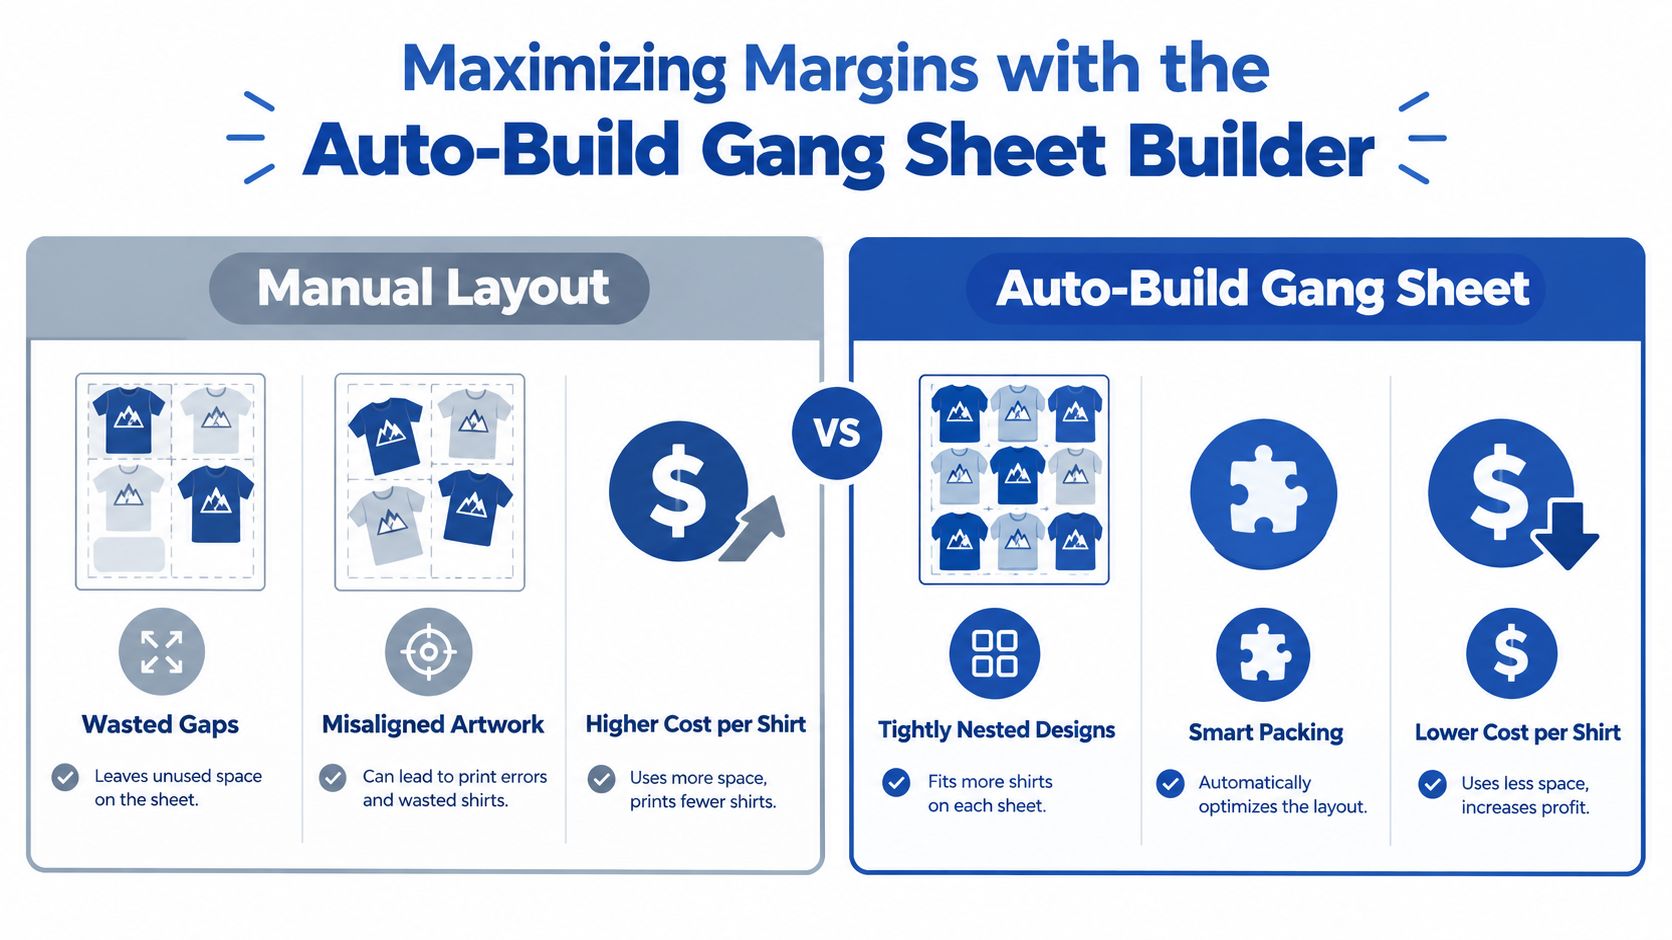
Maximizing Margins with the Auto-Build Gang Sheet Builder
A gang sheet turns scattered designs into one organized production surface. The financial logic is simple. DTF transfers are commonly priced by square inch, with independent pricing guides reporting small-volume retail rates around $0.05 to $0.10 per square inch and wholesale gang-sheet rates around $0.04 to $0.08 per square inch, as outlined in this DTF transfer pricing guide.
Blank space therefore becomes a direct cost. If a layout leaves large gaps between left-chest logos, names, or sleeve graphics, you're paying for film that produces no sellable transfer. Manual nesting can reduce that waste, but it also introduces another cost, your operator's time.
A reported example prices a 4 × 4 inch design at $1.12 and an 11 × 10 inch design at $7.70 at a rate of $0.07 per square inch. The exact order total depends on the provider, sheet format, and artwork, but the principle holds: efficient packing protects the cost assigned to every design.
How automatic packing changes the workflow
An auto-build gang sheet builder takes uploaded artwork and arranges it across one or more sheets. It can account for design dimensions, spacing, and print-quality checks, then export a print-ready file from the browser. The underlying mechanics are confirmed by open-source gang-sheet builder tooling, which demonstrates automatic packing, spacing estimation, validation, and export.
The useful change isn't only that the designs fit. It's that the operator doesn't need to solve the layout from scratch for every batch.
A practical workflow looks like this:
- Collect the artwork: Group the names, logos, numbers, and graphics that will be produced together.
- Upload the files: Keep each design identifiable so trimming and order fulfillment remain straightforward.
- Review the packing: Check spacing, orientation, scale, and the visual separation between designs.
- Approve the sheet: Export or submit the layout once the placement matches the production plan.
- Cut by job: Organize the printed designs into pressing batches before garments reach the heat press.
The auto-build gang sheet builder workflow is especially useful for teams, school orders, event apparel, and brand drops. Those jobs often contain many variations of a common design. Packing them together reduces repetitive file handling and makes the press operator's batch easier to manage.
Margin check: Calculate the usable transfer area, not just the total sheet area. A cheaper sheet with poor nesting can cost more per finished garment than a higher-priced sheet that uses the film efficiently.
Current production-cost guidance places ink, film, and powder at roughly $0.01 to $0.02 per square inch, which helps explain why layout optimization matters even before labor and garment costs are included, according to this DTF pricing strategy analysis. A builder can't fix weak pricing or poor order selection, but it can remove a preventable source of waste.
Durability and Color Accuracy in Real-World Conditions
A transfer can look excellent on the pressing table and still disappoint after repeated laundering. Durability depends on more than the ink formula. The substrate, stretch, wash count, detergent, drying temperature, press quality, pressure, and film behavior all affect the result.
Independent technical and academic coverage shows that DTF can perform strongly in wash testing, but results vary by fabric and method. One comparison study found DTF textiles among the more wash-resistant samples, while other testing reported black DTF prints lasting around 52 washes without fading and a QR-code study found good-to-excellent color fastness after five wash cycles, as summarized in this technical review of DTF durability.
What causes early failure
Premature peeling or cracking usually points to a process problem rather than a single universal weakness in DTF. Common causes include:
- Uneven pressure: Seams, collars, pockets, and zippers can lift part of the garment away from the platen.
- Insufficient heat or dwell: The adhesive may not fully activate across the design.
- Moisture in the garment: A damp textile can interfere with adhesion.
- Excessive stretch: A rigid or heavily inked design may experience more stress on elastic fabric.
- Aggressive laundering: High heat, harsh detergent, bleach, and abrasion can shorten the useful life of the print.
- Poor color control: An unprofiled printer and film combination can produce inconsistent saturation or a visible white edge.
Color accuracy starts before the press. The printer, ink, film, white underbase, choke, and RIP profile need to be calibrated together. The provider's CMYK color-conversion guidance is relevant when artwork contains brand colors, dark gradients, or saturated areas that need predictable reproduction.
Hot-peel and cold-peel films also create different production rhythms. Hot-peel film can be removed immediately after pressing, which supports faster handling, but technical specifications still emphasize a finishing or second press for hand feel and wash resistance. One manufacturer lists hot-peel strength at at least 2.8 N/cm and reports 50 machine washes at 40°C without peeling under specified testing conditions in its DTF transfer-film specifications.
Set customer expectations clearly
Don't promise that every print will perform identically on every garment. Test the actual blank, especially for stretchy performance fabric, textured fleece, or heat-sensitive polyester. Give customers practical care guidance, including washing inside out, avoiding harsh chemicals, and limiting high dryer heat.
That honest explanation protects the brand. A customer generally cares less about the technical name of the film than whether the design stays intact on the garment they bought.
Step-by-Step Pressing and Application Best Practices
A high-quality transfer still needs a controlled press. The operator has to manage garment preparation, alignment, temperature, pressure, peel timing, and finishing. Skipping one of those steps can create ghosting, incomplete adhesion, shine, or lifted edges.
The first requirement is a press that applies even heat and pressure across the design. A household iron creates hot and cool spots and makes uniform pressure difficult, so it's a poor choice for repeatable commercial work.
A repeatable application routine
- Prepare the workstation. Keep the press surface clean. Have a protective sheet, trimming tools, and a heat-resistant positioning aid available.
- Inspect the garment. Check for seams, zippers, moisture, lint, and wrinkles. Place the garment so the print area sits flat on the platen.
- Pre-press the fabric. A short pre-press removes moisture and smooths the application area. Don't let the shirt become overheated or distorted.
- Position the transfer. Use the garment's center line, collar, seams, or a placement template as alignment references. Secure the film if it shifts during closing.
- Press according to the transfer supplier's specification. Temperature, time, and pressure must match the film, adhesive, garment, and equipment. Don't copy a setting from a different material without testing.
- Peel at the correct stage. With hot-peel film, remove the carrier immediately after pressing while the transfer remains hot. Peel smoothly from one corner rather than lifting sharply upward.
- Finish with a second press. A protective sheet separates the finished design from the platen. The second press improves integration, hand feel, and wash resistance when the supplier specifies it.
For the full supplier-specific workflow, use the DTF pressing instructions alongside a test garment. Record the settings that work for each blank style so the next operator doesn't have to rediscover them.
The most common problems are diagnostic. A lifted edge often indicates uneven pressure or a seam beneath the design. Ghosting can come from film movement during pressing. A shiny box may indicate excessive heat or pressure on the fabric. If adhesion is incomplete, verify platen contact before just increasing pressure.
Press-room habit: Keep a small test piece from each new garment style. A short production test is cheaper than discovering a compatibility problem after a full order is pressed.
Here's a practical view of the sequence in motion:
After pressing, inspect the entire perimeter of the design. Look for lifted corners, incomplete white underbase coverage, film residue, and marks from seams or pockets. Then separate completed garments from pieces that need correction instead of allowing questionable items into packing.
Ordering Options and Dedicated Production Support
A transfer supplier becomes part of the production schedule the moment a shop stops printing everything internally. The useful question isn't only whether the provider can produce the artwork. It's whether the ordering process removes work from the operator's desk.
For some jobs, the right route is uploading print-ready files and specifying the desired design size. That works well when the shop has finished artwork and a clear garment plan. Other jobs benefit from ready-to-press collections, particularly when the seller wants to test a seasonal product or add a themed design without creating every graphic from scratch.
Choose the ordering method by job type
| Production need | Practical ordering route |
|---|---|
| Finished logo or brand artwork | Upload the print-ready file and confirm dimensions |
| Multiple small designs | Use the auto-build gang sheet builder |
| Urgent repeat order | Reorder an approved design with the existing specifications |
| Seasonal or niche merchandise | Select a ready-to-press collection |
| Incomplete artwork | Request design assistance or vectorization |
| Mixed customer files | Ask the provider to build and organize the sheet |
Support services matter most when the file is almost usable but not quite production-ready. Logo vectorization, shirt-design assistance, and a “We Build a Gang Sheet for You” option can remove the pre-production bottleneck that often delays a small order.
That support also changes staffing economics. A shop owner doesn't need every press operator to be an expert in transparent backgrounds, vector cleanup, nesting, and color preparation. The team can standardize what arrives at the press, then train operators around placement, pressing, inspection, and packing.
Build logistics into the promise
Don't advertise a turnaround time based only on press capacity. Include artwork approval, transfer production, shipping, garment receipt, pressing, quality control, and customer delivery. A provider that communicates clearly about file status and order readiness is more valuable than one that merely accepts uploads.
For emergency promotional orders, event merchandise, and team apparel, ask about available expedited production, pickup, and delivery options before promising the customer a date. Keep approved files and press notes organized so a repeat order doesn't restart the entire approval process.
The best workflow is often a hybrid. Let the transfer partner handle specialized printing and file preparation while the shop retains control over blank garments, application quality, packaging, and customer relationships. That combination adds capacity without requiring the shop to buy and maintain every piece of equipment used in the print stage.
Scaling Your Merch and Apparel Business
Scaling apparel production doesn't mean accepting every order and hoping the team keeps up. It means designing a workflow in which each additional order creates less administrative work than the one before it.
For a local sports team, that may mean grouping names and numbers into a single optimized sheet, then pressing garments in size order. For an e-commerce seller, it may mean preparing a small batch of designs, storing the transfers flat, and applying them only when orders arrive. A promotional agency may value dependable file handling and deadline coordination more than owning a DTF printer.
Use a simple operating model
Start with the jobs that benefit most from outsourced transfers:
- Variable artwork: Many designs, names, or numbers in one order.
- Short production runs: Too small to justify screen setup or internal print preparation.
- High-detail graphics: Artwork that needs gradients, photographic elements, or several colors.
- Deadline-driven work: Events and campaigns where a missed delivery creates more damage than a transfer premium.
- Test products: New designs that need market validation before inventory investment.
The auto-build gang sheet builder supports the margin side of the system by reducing layout waste and simplifying file preparation. Hot-peel application supports the labor side by reducing waiting between the press and film removal, provided the transfer's technical instructions are followed. Color profiling and garment testing support the quality side by limiting avoidable reprints.
The global scale of DTF also shows why shops are asking broader operational questions. Industry coverage reports more than 7.2 billion DTF prints produced globally in 2024, nearly 30% higher than the prior year, according to the market summary cited earlier. The process has moved beyond “can this design be printed?” Serious operators now need to ask how consistently, how efficiently, and with how little waste.
Create a short production checklist before integrating a new transfer supplier:
- Approve a test design on each important garment category.
- Save the successful press settings with the blank style.
- Group related orders into gang-sheet batches.
- Review every auto-built layout before approval.
- Inspect pressed garments before packing.
- Record reprints and identify whether the cause was artwork, film, fabric, or pressing.
That discipline lets a shop grow output without making quality control an afterthought. The transfer provider supplies capacity, but the shop still owns the customer experience.
Lion DTF Transfers offers custom hot-peel DTF transfers, gang sheets, ready-to-press designs, and file-support options for shops that want to keep pressing and fulfillment in-house. Use the Lion DTF Transfers workflow to organize artwork, optimize sheet layouts, and build a more efficient production line for custom apparel orders.
Email orders@LionDTF.com or Text or Call: 833-350-5466