










A customer has a hard plastic iPhone case, a favorite graphic, and a simple question: will a sticker still look good after weeks in a pocket? A print shop owner faces a harder version of the same problem. The design may look perfect in a mockup, but the wrong film, cut path, or adhesive can produce lifted corners, blocked camera openings, or a case that no longer works properly with MagSafe accessories.
Stickers for iPhone cases are not just smaller laptop stickers. The case material flexes, the surface may contain silicone or a soft-touch coating, and the customer handles it constantly. A practical product needs the right film, adhesive, dimensions, finish, and application method, not just sharp printing.
This guide focuses on what holds up, what fails, and how to prepare production-ready designs for different iPhone case models. It also covers the less obvious issue many sticker guides miss, MagSafe compatibility, and the role of an Auto-build gang sheet workflow in keeping small-batch production efficient.
Why iPhone Case Stickers Are a Real Product Category
A buyer comparing a sticker sheet with a custom printed case is usually weighing more than price. They want a low-commitment way to change the look of an existing case, test a logo, add a seasonal graphic, or personalize a phone without replacing the entire accessory. A seller, meanwhile, needs to know whether the same design can be produced reliably across hard plastic, TPU, silicone, and model-specific case shapes.
The audience is substantial because the product ecosystem is large and persistent. Counterpoint Research's Smartphone Installed Base Tracker data reported that the worldwide installed base of active smartphones grew by 2% in 2025, while replacement cycles approached four years. The same report indicated that nearly one in four active smartphones worldwide was an iPhone in 2025, and that Apple and Samsung together represented approximately 44% of active smartphones globally. Both companies had surpassed one billion active devices, the only manufacturers to reach that milestone.
Those figures don't measure sticker sales directly. They do show why a case-decoration business can target a durable installed base instead of relying only on new phone launches. When people keep the same phone for several years, a small visual refresh can be more attractive than buying another case or replacing the device.
The questions that decide whether a product works
A useful product range should answer four practical questions before the customer pays:
- Will it adhere: Hard polycarbonate is generally more predictable than silicone, rubberized coatings, textured finishes, and other low-energy surfaces.
- Will the case still function: Camera openings, buttons, speakers, charging areas, and magnetic alignment zones need deliberate clearance.
- Will the design survive handling: Pocket abrasion, corner flexing, heat, and repeated contact expose weak films quickly.
- Can the shop produce it profitably: Multiple models and designs need to share print space without creating cut-line collisions or excessive waste.
For an overview of the difference between decorative film and UV DTF application, the UV DTF sticker guide is a useful reference point. The central production lesson is simple: a visually impressive sticker isn't automatically a viable phone-case product. The substrate and the use case determine the result.
The Three Sticker Formats That Work on iPhone Cases
A customer may approve a glossy mockup, then reject the finished case when the transfer crowds the camera ring or interferes with a MagSafe wallet. Choose the format from the case material, artwork, and production method first. Each option solves a different problem, and none suits every case.
Pressure-sensitive vinyl
Vinyl remains the practical choice for flat color, lettering, logos, and simple illustrations. A conformable film in the approximate 0.18 to 0.25 mm range balances handling strength with flexibility, according to technical guidance on vinyl mobile skins and adhesion.
The usual adhesive is a pressure-sensitive acrylic system. It bonds through applied pressure and requires a clean, dry, room-temperature surface. Vinyl cuts cleanly, batches efficiently, and works in matte finishes that show fewer fingerprints than gloss. For production, it is the most forgiving starting point on smooth, rigid plastic.
Its limitation is movement. A design that crosses a sharp corner, button edge, or flexible textured area can lift while the printed face still looks good. Keep the artwork on the flat back when selling a standard matte-vinyl case decoration.
UV DTF transfers
UV DTF suits photorealistic artwork, gradients, small details, and glossy decorative effects. The transfer places the printed graphic on the case, producing an appearance closer to a directly printed surface than a basic sheet of adhesive film.
The finish has a more noticeable surface layer, so edge profile and placement need inspection. Leave clearance around camera rings, buttons, curved edges, and MagSafe accessory contact areas. A transfer that looks excellent in a centered mockup may create a high spot that catches during use or reduces reliable magnetic contact.
UV DTF also exposes application errors. Dust, oil, and uneven pressure can remain visible because the glossy finish emphasizes surface irregularities. Use it for detailed artwork where the visual result justifies the added application control.
Die-cut stickers
Die-cut stickers work for budget cartoon graphics, simple brand marks, labels, and low-commitment designs. Sell them on a sheet or as individual pieces when customers want to position the artwork themselves.
The face film and adhesive determine the result. Paper is unsuitable for regular handling or moisture. Vinyl die-cuts are a better fit, especially for clean outlines that stay on the flat face instead of wrapping around a corner. Model-specific sizing also matters. Build separate files for each iPhone case shape rather than scaling one design across models, because camera layouts and available flat space vary.
For multiple designs and models, use an Auto-build gang sheet workflow to place compatible artwork into shared print space. That reduces unused areas and makes small runs easier to price, but keep cut lines, model labels, and MagSafe-clear zones organized before sending the sheet to print.
| Format | Thickness | Adhesive | Print Method | Best Use |
|---|---|---|---|---|
| Pressure-sensitive vinyl | Conformable vinyl, approximately 0.18 to 0.25 mm | Pressure-sensitive acrylic | Solvent, latex, or compatible digital print process | Matte graphics, logos, flat color, everyday decoration |
| UV DTF transfer | Thin transfer construction selected for case and accessory clearance | Transfer adhesive system | UV-cured full-color print | Gradients, photos, detailed artwork, glossy effects |
| Die-cut sticker | Depends on face film and liner construction | Removable or permanent adhesive, as specified | Printed and kiss-cut or die-cut | Budget runs, cartoons, labels, brand marks |
Use matte vinyl for flat color, UV DTF for gradients and photos, and die-cut vinyl for budget runs. Test the finished format on the exact case material and model before listing it as a universal product.
Adhesion, Substrates, and How Stickers Fail on Cases
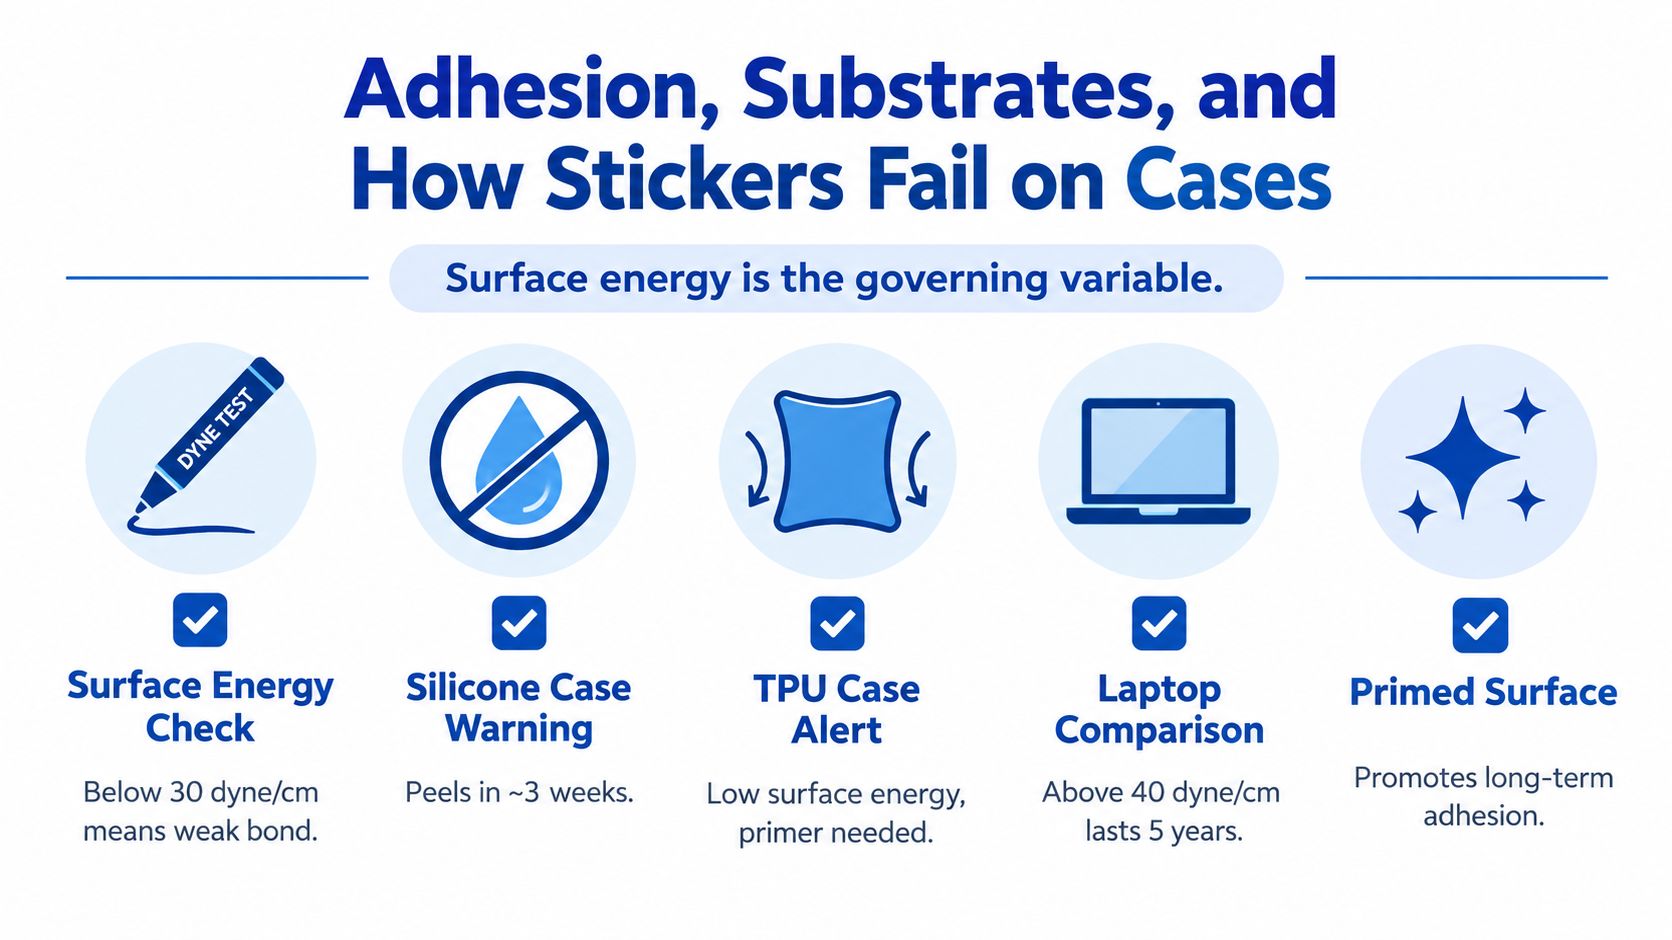
A sticker that holds on a laptop may peel from a silicone iPhone case. Adhesion depends on the substrate, finish, and contact area, not just the adhesive specified on the label. Silicone, rubberized coatings, textured surfaces, skin oils, and low-energy finishes all make bonding less predictable. Smooth, rigid polycarbonate generally provides the most consistent surface for case stickers.
Edge lift is the usual failure. As the case flexes, the sticker resists that movement, so its perimeter starts to separate. Dust and handling friction then work under the edge. Textured silicone increases the risk because the adhesive cannot contact the surface evenly. Clear TPU can create a visible outline or “ghost” effect, even when the sticker remains attached.
Practical rule: Treat each case material as a separate product substrate. Approve the exact sticker and case combination, rather than assuming one test applies to every model.
A production-focused preparation routine
Control preparation at the bench. Remove the phone from the case, clean the application area with a compatible lint-free cloth, and let the surface dry completely. Apple's case-cleaning guidance recommends removing the iPhone before cleaning a silicone, clear, or Beats case. It also warns against window cleaners, household cleaners, aerosol sprays, solvents, ammonia, abrasives, and cleaners containing hydrogen peroxide.
For pressure-sensitive adhesive, 3M's technical guidance identifies suitable cleaning solvents such as isopropyl alcohol and notes that surfaces below 5°C can prevent the adhesive from developing maximum contact strength. Keep the case clean, dry, and above room temperature during application.
Use this shop checklist:
- Remove the phone: Clean and apply the sticker with the device outside the case.
- Remove oils and dust: Use a compatible lint-free cleaning method, not household spray.
- Let the substrate dry: Moisture and residue reduce contact between adhesive and case.
- Apply with pressure: Burnish from the center outward, with extra pressure around the perimeter.
- Inspect the perimeter: Check for tunnels, wrinkles, lifted corners, and areas sitting over texture.
- Run a dwell test: Leave the finished combination for 24 hours, then flex the case and inspect for edge lift before approving production.
The adhesive also determines how cleanly a customer can remove the design. Graphic products may be ultra removable, removable with heat, removable with heat and chemicals, or not removable. Match that behavior to the product promise. A seasonal case graphic needs a different adhesive strategy from permanent branding.
Sizing, Layout, and MagSafe-Clear Design Rules
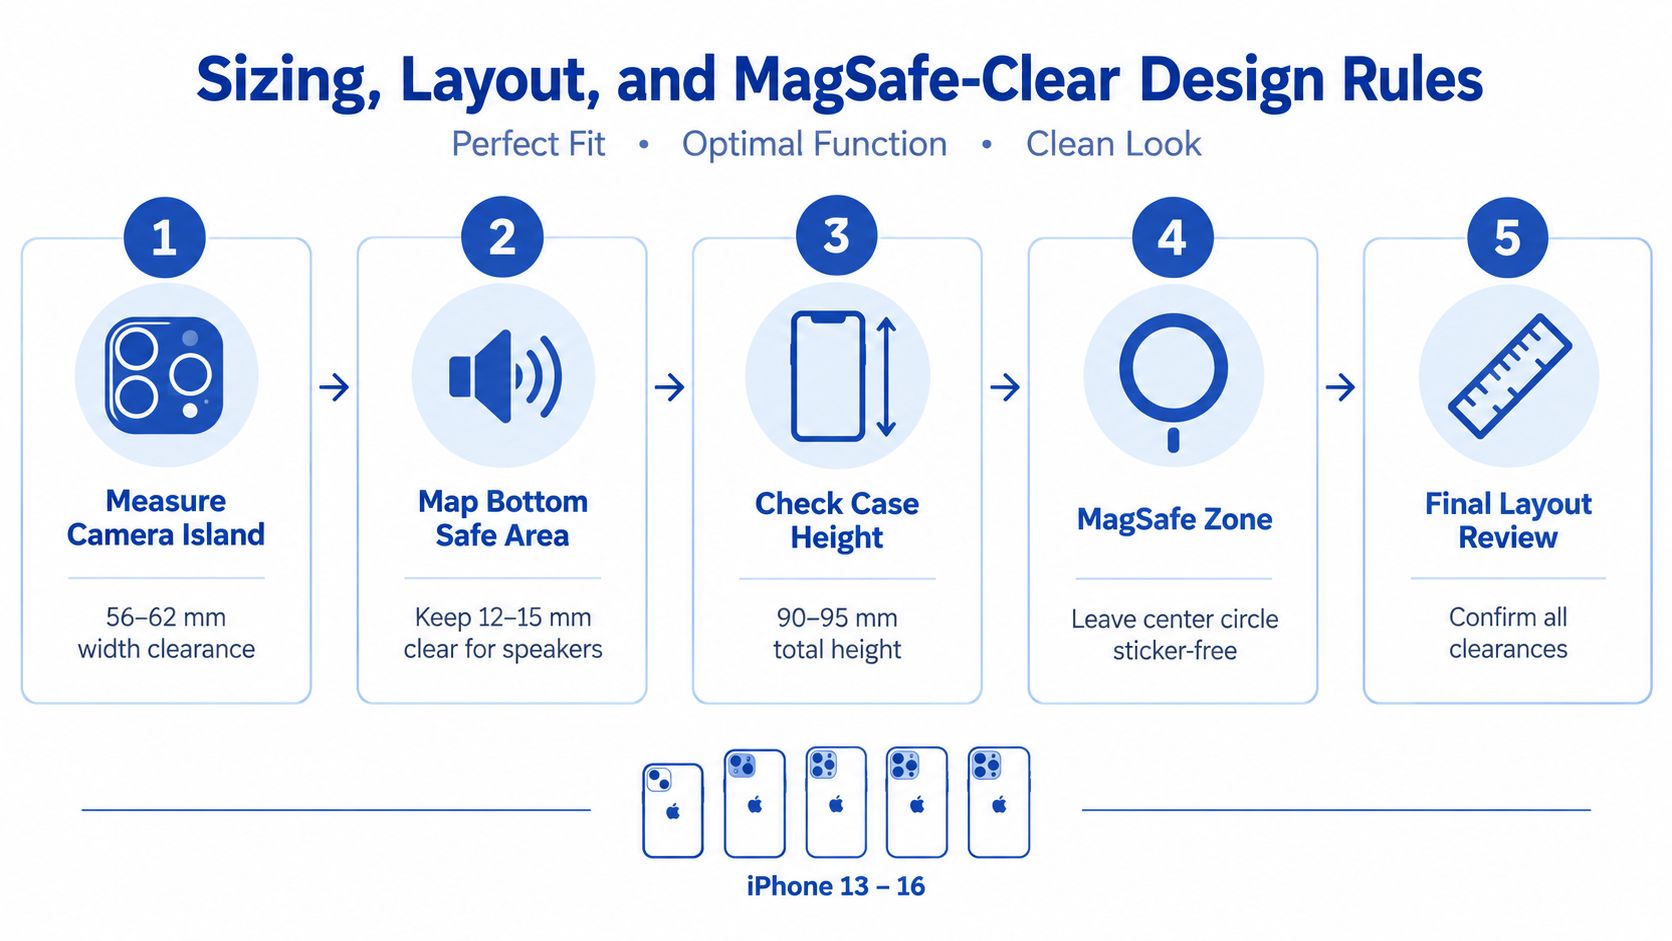
A case sticker should be measured from the case, not from an online phone specification. Camera bumps, raised lips, corner radii, button covers, and magnetic rings change the usable area. A design that fits a flat template may collide with a camera surround or fold over a corner once it reaches the physical case.
Start by creating a separate template for each case model. Mark the camera opening, speaker area, button zones, corner curvature, and any built-in magnetic ring. Don't use one generic “iPhone case” outline for multiple generations. A case for an iPhone 11 doesn't have the same built-in MagSafe compatibility as a case designed for iPhone 12 or later, as explained in Apple's MagSafe cases and sleeves documentation.
Keep the center functional
MagSafe cases and sleeves contain magnets that align the iPhone with chargers and battery packs. A full-back sticker can create a gap, add an uneven layer, or cover the case's magnetic alignment area. The safest layout is often a smaller decorative graphic, corner artwork, a camera-area accent, or a composition that leaves the center clear.
Don't make a generic “MagSafe-safe” claim without testing the actual design. Thickness, metallic content, placement, and surface flatness all matter. A sticker can be electrically harmless yet still make a wallet, stand, or car mount less reliable because the accessory sits farther from the magnetic array.
Use these layout controls for every model:
- Camera clearance: Keep the cut path away from raised camera rings and verify the physical opening against the finished case.
- Functional zones: Leave openings and operating areas clear instead of extending artwork to every edge.
- Corner behavior: Reduce the height or width of artwork that would have to fold over a curved TPU corner.
- Bleed and cut lines: Add a controlled bleed around artwork, then inspect the final cut path at production scale.
- Model labeling: Name files by phone model, case type, finished dimensions, and finish so a picker can't confuse similar outlines.
The Auto-build gang sheet builder helps organize separate sticker sizes and shapes on one sheet. That makes it practical to prepare distinct layouts for different iPhone case models while reducing unused print area. The builder should be treated as a production control, not a substitute for measuring the physical cases.
Applying and Removing Stickers Without Damage
Most application failures happen before the sticker reaches the case. Dust, skin oil, cleaning residue, cold plastic, and rushed positioning create problems that better artwork can't fix. The operator should prepare the case, position the transfer deliberately, and apply pressure evenly rather than trying to rescue a poor bond afterward.
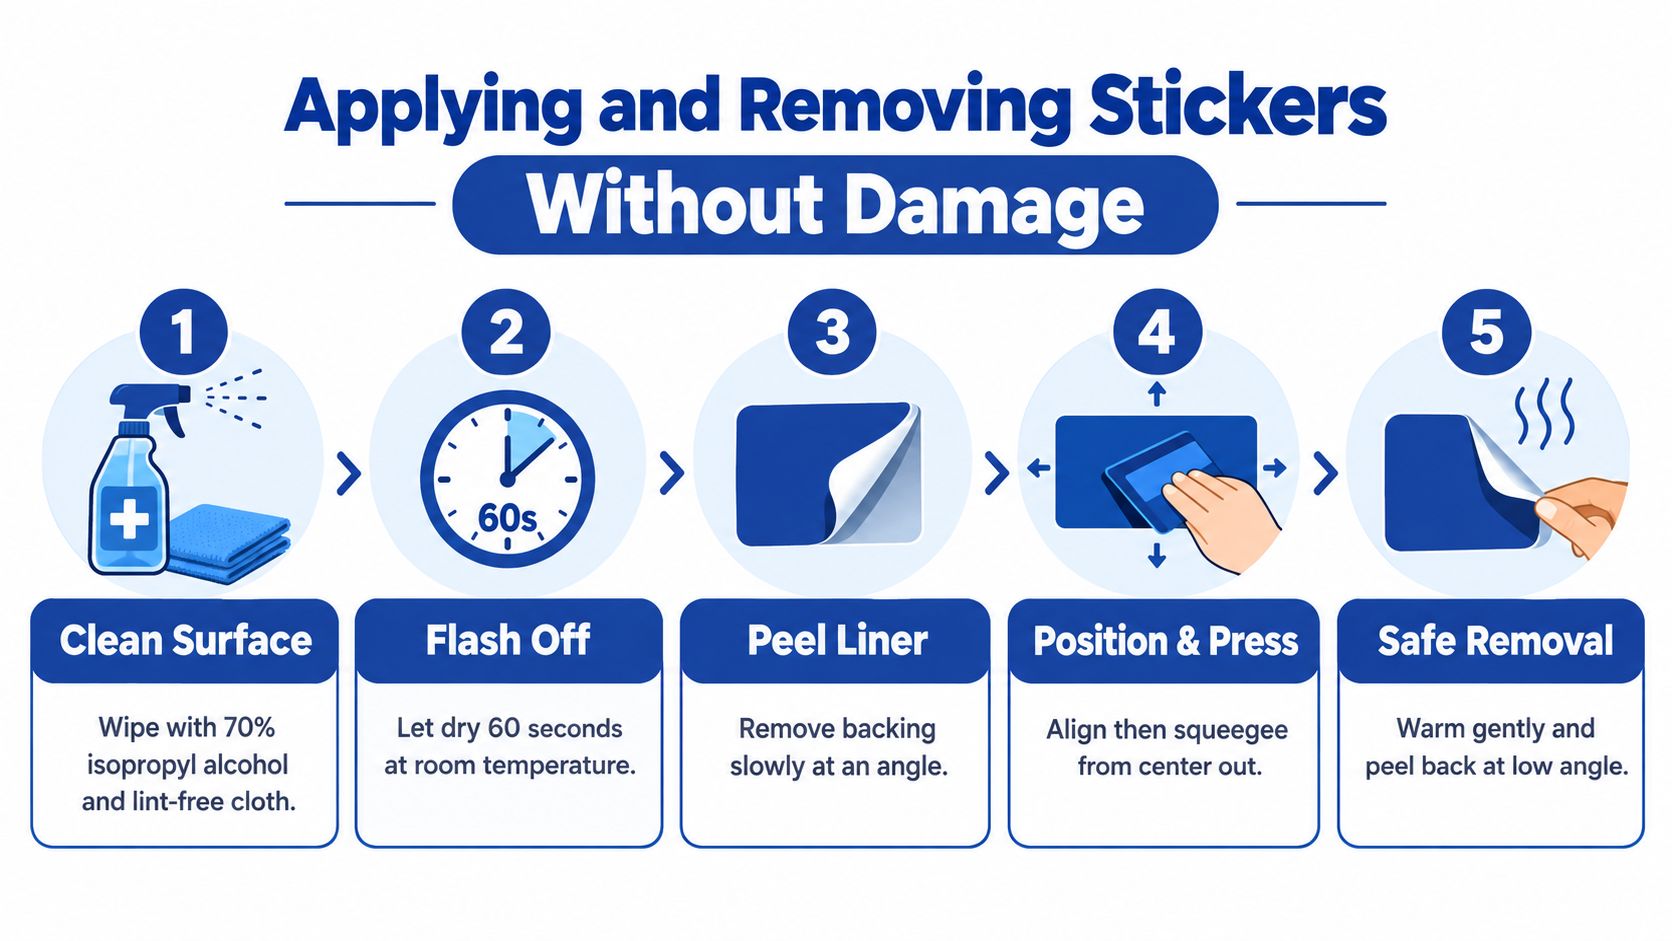
Remove the phone from the case and clean the surface with a compatible lint-free method. Let the case dry completely at room temperature. Apple warns against harsh household cleaners and solvents on several case materials, so a production line should use a documented cleaning process that has been tested on the actual substrate.
A controlled application sequence
Use a hinge when the design needs precise placement. Tape one edge temporarily, fold the sticker back, lower it gradually, and press from the hinge toward the opposite side. This gives the operator a chance to align the camera opening and outer margins before the full adhesive area makes contact.
For UV DTF, protect the printed topcoat during burnishing. A felt-wrapped squeegee or another non-abrasive applicator can help distribute pressure without scratching the surface. Work from the center toward the perimeter and pay special attention to narrow graphics, fine lettering, and corners.
Let the adhesive cure before putting the case into normal use. The provided technical guidance recommends a 24-hour dwell period for testing sticker-and-case combinations. A production operator should also expose samples to handling, pocket abrasion, corner flexing, and high-temperature conditions before making a durability claim.
For removal, peel slowly from a corner and keep the pull angle low. The 3M removal bulletin distinguishes products by how much heat or chemical assistance they require and notes that heat-removable products are expected to leave less than 10% adhesive residue under applicable conditions, while some heat-and-chemical-removable products may leave more than 30%.
A removable sticker is a material specification, not a customer-service promise. If the adhesive isn't rated for clean removal, don't market it as residue-free.
Gentle warmth can help soften adhesive, but don't overheat the case or phone. After removal, use the mildest compatible cleaning method first. Avoid acetone, nail polish remover, aggressive solvents, metal scrapers, and abrasive pads, particularly on soft-touch, clear, silicone, and leather surfaces.
For a visual reference on the press-and-peel process, see the UV DTF sticker application guide. The important distinction is that careful positioning and surface preparation matter just as much as the transfer itself.
MagSafe, Wireless Charging, and Durability Trade-Offs
MagSafe performance isn't determined by the word “sticker” alone. The result depends on where the sticker sits, how thick the finished layer is, whether it contains metal, and whether the surface remains flat. A decorative mark placed away from the magnetic alignment area is a different product from a full-back UV DTF design crossing the center of a MagSafe-compatible case.
The available guidance identifies height changes, metallic layers, and placement as possible causes of weaker magnetic coupling or charging interference, but it doesn't establish universal laboratory thresholds for ordinary decorative stickers. That makes broad claims risky. A seller should test the finished sticker on the intended case with the actual wallet, charger, stand, or car mount customers are likely to use.
The practical trade-off by format
Vinyl usually offers the lowest visual profile when the design is cut cleanly and kept away from the magnetic area. It works well for corner graphics, lettering, and small logos. Its main limitations are edge lift on difficult substrates and faster visible wear when the design receives constant pocket friction.
UV DTF delivers stronger detail and a more finished decorative surface, but its layer can be more noticeable at the edges. A design that crosses a magnetic ring may reduce attachment reliability by creating extra distance or an uneven surface. Metallic or foil-backed elements deserve separate testing rather than a general compatibility label.
Die-cut vinyl sits between a production sticker and a full printed-case treatment. It can be an economical choice for simple graphics, especially when the cut path keeps the design away from cameras, corners, and magnetic hardware. Paper-based versions should be reserved for light-use decoration rather than daily handling.
Durability also depends on exposure. The provided vinyl-weathering guidance reports that one sample group fell from elongation-at-break above 300% to about 40% after intense exposure, while another test reported approximately 12% tensile-strength loss after 800 hours of UV exposure. These results don't establish a universal lifespan for every sticker, but they do show why matte or UV-resistant films make more sense for outdoor merchandise and high-handling products.
A credible product listing should state the tested case material, film, application method, environmental exposure, and failure criterion. “MagSafe compatible” and “lasts forever” are not test results.
Designing, Batching, and Producing with a Gang Sheet Builder
A shop can lose more money through disorganized files than through the print price itself. iPhone case stickers often require several outlines for different models, finishes, camera shapes, and artwork sizes. If each design is sent as an isolated job, unused space and repeated setup quickly reduce the value of a small order.
The Auto-build gang sheet builder solves the layout problem by placing multiple finished sticker files onto one print sheet. Prepare each design at its actual finished size, add the required bleed and spacing, and check that the model-specific cut paths don't collide. The preview should show the complete sheet before it goes to production.
A repeatable batching workflow
Start with clean file names. Include the phone model, case material, design name, finished size, and format. A name such as iPhone15_HardCase_CoffeeLogo_UVDTF_Corner is easier to pick and audit than a sequence of generic exports.
Then verify the artwork itself:
- Confirm finished dimensions: Don't scale a sticker from a mockup without checking the physical case template.
- Separate cut paths: Camera cutouts, corner notches, and decorative outlines should remain distinct.
- Use consistent margins: Equal spacing makes weeding, handling, and quality inspection easier.
- Group recurring designs: Keep popular logos or seasonal graphics in a master sheet and change quantities only when needed.
- Preview the complete layout: Check orientation, gaps, bleed, and model labels before ordering.
The builder is especially useful when a seller offers one illustration in several formats. A corner accent, a smaller MagSafe-clear version, and a larger hard-case version can occupy the same sheet without forcing the shop to order each variation separately. That improves material utilization and reduces the chance that a single model variant becomes too expensive to stock.
For broader batching principles, the gang sheet builder workflow provides a useful production reference. The same discipline applies whether the final pieces are UV DTF transfers, printed vinyl, or die-cut stickers.
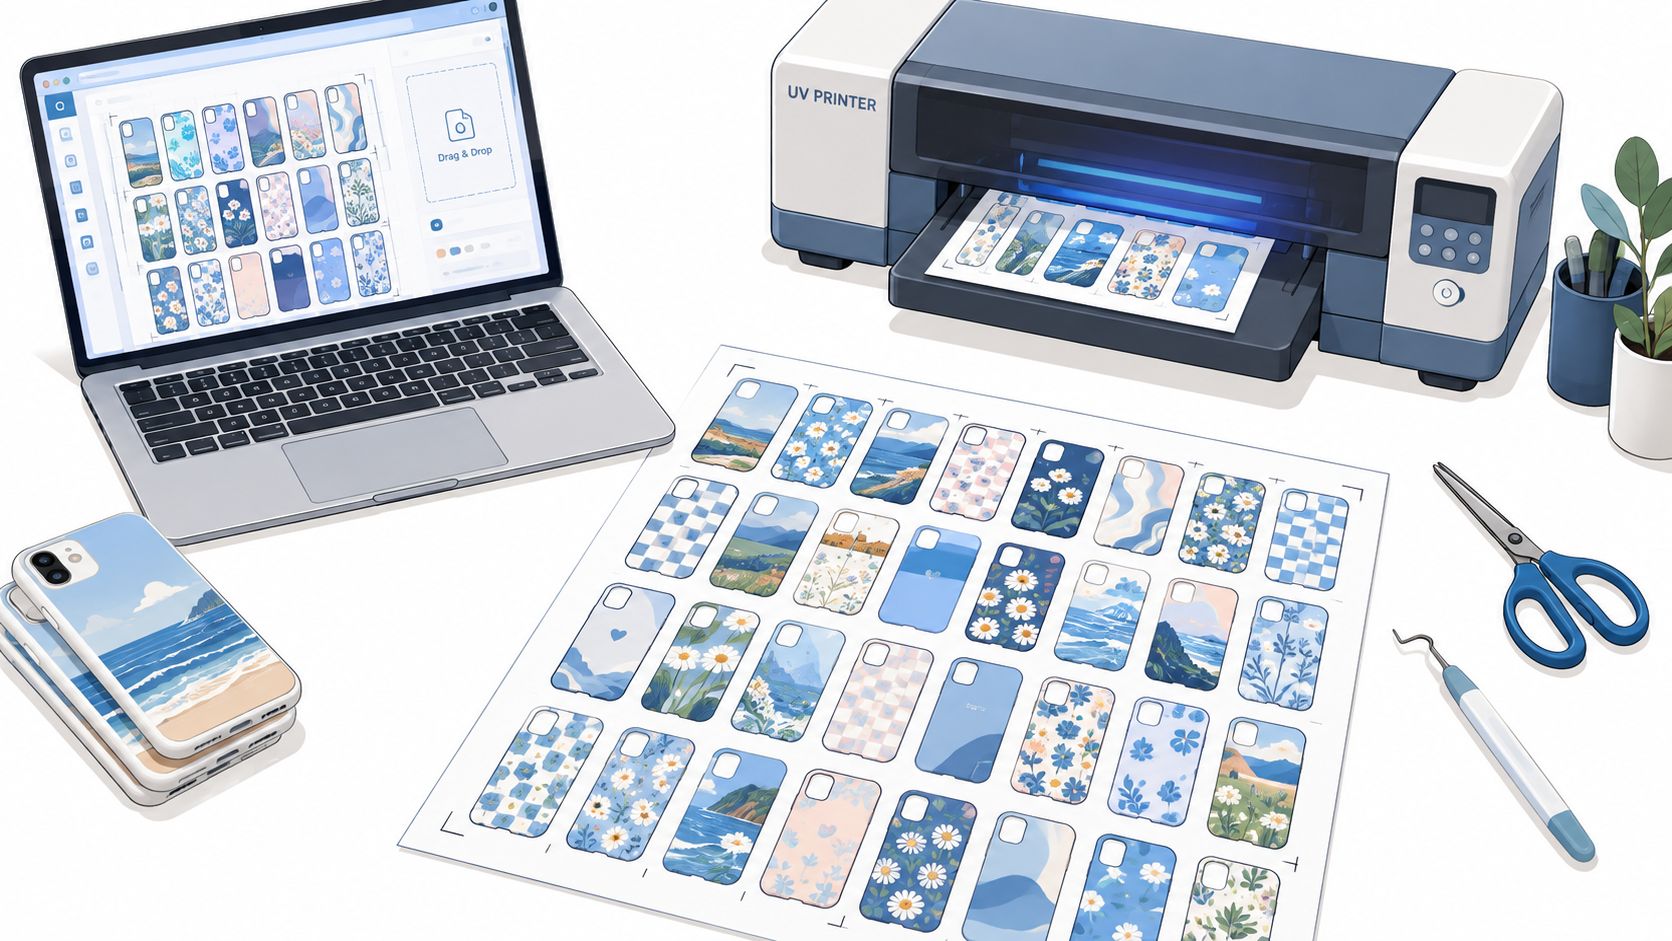
Before approving a master sheet, test one sticker on every important substrate. A clean gang-sheet layout can't compensate for an adhesive that fails on silicone or a graphic that blocks a magnetic alignment area. Batch the designs only after the physical combination has passed inspection.
Lion DTF Transfers offers UV DTF stickers, custom gang sheets, print-ready file uploads, and application resources for creators and small shops producing case graphics. Use the Lion DTF Transfers workflow to prepare model-specific designs, consolidate them with the Auto-build gang sheet builder, and order transfers suited to your next iPhone case run.