










You've just opened the press and the transfer looks perfect. Then the carrier comes off, an edge lifts, or the print develops a faint gloss across the garment. The machine showed the correct temperature, so the failure feels random. It usually isn't. The garment surface, pressure distribution, dwell time, and peel sequence may not have matched the number on the controller.
Learning how to press DTF transfers reliably means validating the whole process, not memorizing one temperature chart. The settings are starting points. The repeatable result comes from measuring what the garment experiences and recording what works for each fabric and transfer combination.
Understanding the Pressing Fundamentals
Every pressing job depends on three measurable variables: temperature, pressure, and dwell time. Temperature softens the adhesive and helps it bond. Pressure brings the transfer and garment into consistent contact. Dwell time gives the adhesive enough exposure to complete that bond.
A failure in any one variable can look similar. Too little pressure or time may leave edges lifting. Too much heat can scorch fabric, distort synthetics, or encourage dye migration. A controller can display the intended temperature while cold zones on the platen or a thick seam prevent the garment surface from reaching the same condition.
Practical rule: Treat the machine display as a set point, not proof that the entire design area is ready for production.
Pressing developed from a broader history of heat-transfer decoration. Historical accounts of heat-transfer printing trace early heat-assisted imprinting to ancient China, where heated metal plates were used to apply designs to silk and other fabrics. The method expanded substantially during the 1960s and 1970s, establishing the central production advantage of pressing: a printed design could be transferred onto fabric through controlled heat and pressure without requiring a separate screen for every color or design.
Why the recipe can't be universal
That production advantage still matters. DTF lets a decorator prepare flexible artwork and apply it mechanically, which suits customized products and short runs without burning screens or weeding vinyl. The process can be repeatable, but only when the operator treats each garment and transfer pairing as its own application problem.
For a practical reference point, compare the manufacturer's instructions with a focused DTF heat press settings guide. Start with the transfer supplier's specification, identify the garment fiber and finish, and make sure the design sits on a flat area. Remove seams, thick hems, drawstrings, and other raised features from beneath the transfer.
The right sequence is simple: pre-press to remove moisture and wrinkles, position the transfer on a smooth surface, apply even pressure for the specified dwell time, and peel according to the carrier's instructions. Don't increase temperature automatically when adhesion looks weak. First check whether pressure is uniform and whether the press maintained contact across the design.
Testing and Validating Your Settings
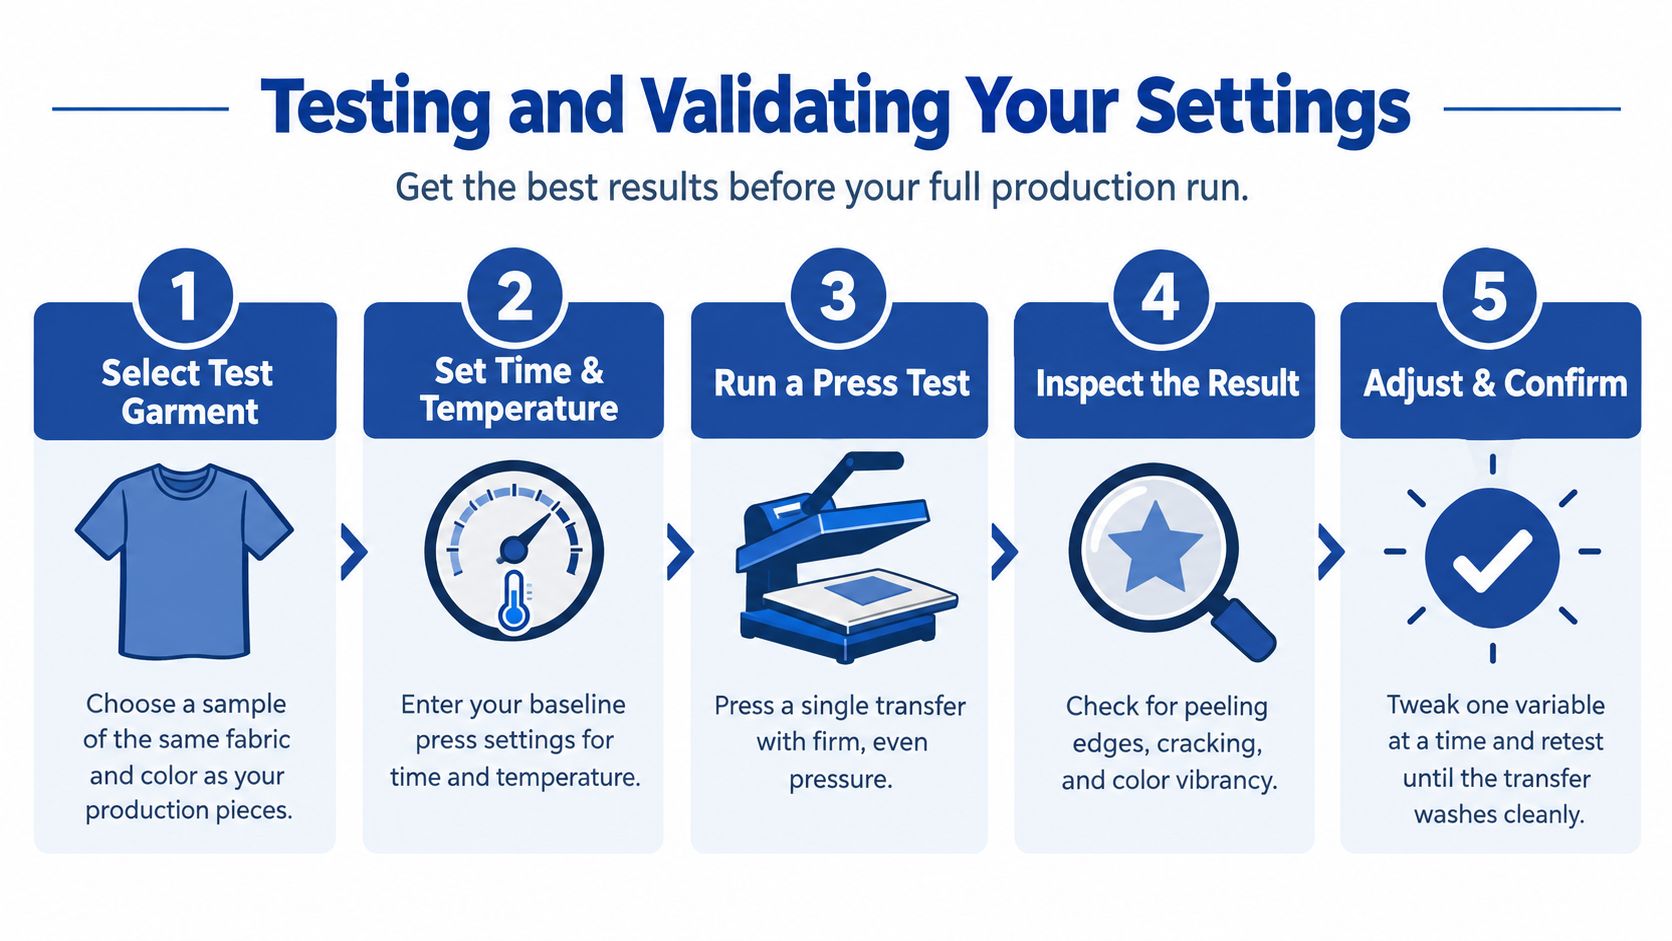
A production run shouldn't be the first test. Use a spare garment that matches the fiber, color, finish, and thickness of the order, then press a single transfer under the supplier's baseline settings. A black cotton shirt, a performance polyester top, and a thick hoodie shouldn't share one validation result just because they all accept DTF.
Build a small test matrix
Change one variable at a time. Hold the temperature steady and compare 10-, 12-, and 15-second presses, as suggested in the DTF pressing guidance. If your press provides a pressure readout, compare approximately 20, 30, and 40 psi while keeping the other conditions stable.
This method shows you what changes the result. Changing heat, pressure, and time together may produce a better-looking transfer, but you won't know which adjustment solved the problem or whether the improvement will survive another garment batch.
A textile-transfer process study found that pressing time had roughly twice the influence of temperature and pressure on adhesion and subsequent wash resistance, with adhesion evaluated after five consecutive washes. The practical lesson is to complete the specified dwell time and establish consistent platen contact before raising heat, as documented in this technical discussion of transfer defects.
Measure the machine, not just the screen
Verify platen temperature at the center and corners with temperature strips or a calibrated infrared instrument. The controller reports its set point, but the garment receives heat through the platen, carrier, transfer, and fabric layers. Those conditions can differ across the design.
Check pressure with a paper test. A sheet should pull out with firm, even resistance. Easy sliding suggests insufficient pressure, while tearing or complete immobility suggests excessive pressure. Inspect the pressed sample immediately, then stretch the fabric gently and examine the edges after cooling.
Record the garment, transfer, temperature, pressure, dwell time, peel type, and observations. A test becomes valuable when someone can repeat it later, not when the details live only in memory.
Mastering the Peel Process
Peel timing is part of the bond, not a cosmetic finishing choice. The carrier film holds the transfer in place while the adhesive settles, and removing it at the wrong moment can lift edges or disturb fine details.
Hot peel means the film comes off immediately after opening the press. One pressing guide specifies peeling within three seconds, using a smooth, low-angle motion instead of pulling the film straight upward. After removing the carrier, the guide recommends covering the design with Teflon or parchment and pressing again for approximately 5–8 seconds. Follow the hot-peel DTF transfer guidance when that system is specified.
A hot peel is efficient, but it demands a controlled motion. Open the press, move the carrier smoothly across the garment, and don't yank upward from one corner. If the print starts lifting, stop and follow the supplier's correction procedure rather than forcing the film away.
Warm and cold peel differences
Warm-peel transfers require the garment and film to cool to a defined intermediate condition before removal. Cold-peel transfers need more patience. Removing either one while it's too hot can pull adhesive or edges away from the fabric.
Using a hot-peel sequence on a cold-peel transfer can damage the print. The reverse mistake can also create handling delays and unnecessary rework. The carrier's instructions take priority over a general pressing chart.
The garment surface matters before the first press. Pre-press briefly to remove moisture and wrinkles, place the design on a lint-free area, and keep seams or thick hems outside the pressure zone. A raised seam can create a gap under part of the design, leaving a weak area even when the time and temperature look correct.
Handling Challenging Fabrics and Blends
Polyester, nylon, performance fabrics, dark garments, and mixed fibers reward a slower process. The controller may show the right number, but the garment face can behave very differently once heat, pressure, and finish interact. That is where jobs go wrong. You get a clean first press, then see shine, shrinkage, dye bleed, or weak bonding after the garment cools.
Start with the garment itself. Read the label, note the fiber blend, color, surface finish, and fabric build, then confirm the transfer adhesive matches that material. This guide to fabrics that work with DTF transfers is a useful checkpoint before you commit a production run. Nylon often needs an adhesive made for low-energy surfaces. Performance knits and coated garments can also react differently from a basic cotton tee, even when the face looks smooth.

Use the fabric to choose the test
Test for the failure you are most likely to see on that fabric. On polyester, watch for dye migration after pressing and again after cooling. On nylon, look for surface distortion or poor anchoring. On fleece, check whether pile and thickness are reducing real contact across the print area. On dark performance wear, pay attention to tacky finishes, gloss, and color change. A press can look fine at peel and still fail once the garment is stretched or washed.
Textile-process research treats temperature, pressure, and dwell time as the variables that control transfer bonding, and it shows that fiber composition and surface construction affect pressing parameters. In practice, that means the press setting is only a starting point. The actual surface condition decides whether the adhesive wets out cleanly or whether the fabric starts to deform first.
The published examples make that clear. 100% polyamide with a Gore-Tex membrane used 185°C, 4 atmospheres of pressure, and 35 seconds, while a fabric containing 86% polyamide and 14% elastane used 150°C, 6 atmospheres, and 35 seconds. Those numbers are fabric-specific. Use supplier recommendations, validate them on the exact garment, and release the job only after the result holds up in real handling.
Troubleshooting Common Pressing Defects
Defects become easier to fix when you connect the appearance to a process cause. Edge lifting usually points to incomplete contact, inadequate pressure, or insufficient dwell time. Gloss or platen marks often indicate excessive heat or pressure. Localized peeling suggests a cold spot, an uneven platen, a seam beneath the design, or inconsistent pressure.
A standard DTF starting point is 300–320°F (149–160°C) for 10–15 seconds with medium-to-heavy pressure, while hot-peel workflows commonly use 320–340°F (160–171°C) for 12–15 seconds, according to this DTF heat press manual. These are starting points, not universal rules. The transfer manufacturer's specifications and your validated garment test take precedence.
Match the defect to the correction
- Lifted edges: Confirm that the design area received firm, even pressure. Check seams and thick sections, then retest dwell time before raising temperature.
- Gloss or platen marks: Reduce unnecessary pressure or heat, use a protective sheet when permitted, and verify that the garment surface isn't overheating.
- Localized peeling: Measure platen temperature across the work area and inspect whether the platen is level. A correct controller reading won't fix uneven contact.
- Cracking: Review the transfer's flexibility, peel timing, and curing conditions. Don't stretch or fold the garment aggressively while the application is still warm.
- Weak overall adhesion: Check moisture, pressure, dwell time, and the transfer's compatibility with the fabric before changing several settings at once.
A second press can improve adhesion and surface finish when the supplier permits it. Cover the design with parchment or butcher paper and apply the specified finishing press, then inspect the cooled garment rather than judging only while it's hot.
Keep a defect log. Record the garment type, transfer batch, press settings, peel method, wash temperature, detergent, drying method, and wash-cycle count. That record turns a recurring complaint into a traceable process adjustment.
Quality Control and Production Efficiency
Quality control starts before the transfer touches the garment. Confirm the artwork size and placement, pre-press the garment to remove moisture and wrinkles, verify that the design area is flat, and check that the platen makes contact across the complete transfer. After pressing, inspect the edges, fine details, color, surface finish, and any signs of scorching or migration.
Release batches with evidence
For every new fabric and transfer combination, test one garment before pressing the full order. Perform a gentle stretch check after cooling, then complete a wash check before releasing a batch when the order's durability matters. Record the conditions so repeat orders can use a proven setup instead of restarting from guesswork.
A useful production checklist includes:
- Garment check: Confirm fiber, color, finish, thickness, and a flat application area.
- Equipment check: Verify actual platen temperature and pressure distribution.
- Application check: Pre-press, position accurately, apply the specified dwell time, and follow the correct peel method.
- Inspection check: Look for lifting, cracking, gloss, migration, uneven color, and incomplete adhesion.
- Record check: Log the transfer, garment, settings, peel sequence, and wash result.
The production layout also affects consistency. Lion DTF Transfers' Auto-build gang sheet builder arranges multiple compatible designs efficiently on one sheet, helping reduce wasted film and lowering the effective cost per transfer. Keeping designs organized before pressing reduces handling mistakes when several transfers are applied in succession.
Don't treat gang-sheet efficiency as a substitute for testing. Consolidate artwork only after confirming which transfers share compatible application conditions. A carefully arranged sheet can improve material use, but each garment still needs the right validated process.
Use the following demonstration as a visual reference for the application sequence, then compare it with your supplier's specifications and your own test records.
The strongest pressing workflow is deliberately unexciting. Measure the platen, test the garment, change one variable, record the result, and release the batch only after the transfer proves itself through inspection and washing. That discipline protects fabric, reduces rework, and makes repeat orders far easier to produce consistently.
Lion DTF Transfers offers ready-to-press DTF transfers, gang sheets, and pressing guidance for makers, apparel sellers, teams, and print shops. Use the Lion DTF Transfers Auto-build gang sheet builder to organize compatible designs efficiently, then validate each garment and transfer combination before production.