










You've got a stack of blanks waiting, the artwork is aligned, and the press is hot. Then the first shirt comes off with a lifted corner, a faint outline, or a glossy patch where the polyester reacted to excess heat. Most failed DTF applications aren't caused by one dramatic mistake. They come from small variables, such as moisture in the garment, uneven pressure, incorrect peel timing, or a setting chosen without considering the fabric.
Reliable heat transfer instructions treat the job as a controlled process. Prepare the blank, match the press recipe to the textile, build adhesion in stages, and inspect the result before moving into production. The same discipline also applies before the transfer reaches the platen. Efficient gang sheet layout reduces handling, waste, and cutting time, so the digital file and the physical press workflow should be planned together.
Preparing Your Garments and Workspace for Success
A clean shirt can still contain enough moisture to interfere with adhesion. Fabric absorbs humidity during storage, washing, and handling, and wrinkles can keep parts of a transfer from receiving even contact. Pre-pressing isn't a cosmetic step. It removes moisture and flattens the surface so the adhesive meets the textile instead of bonding across trapped vapor or raised folds.
Build a repeatable setup
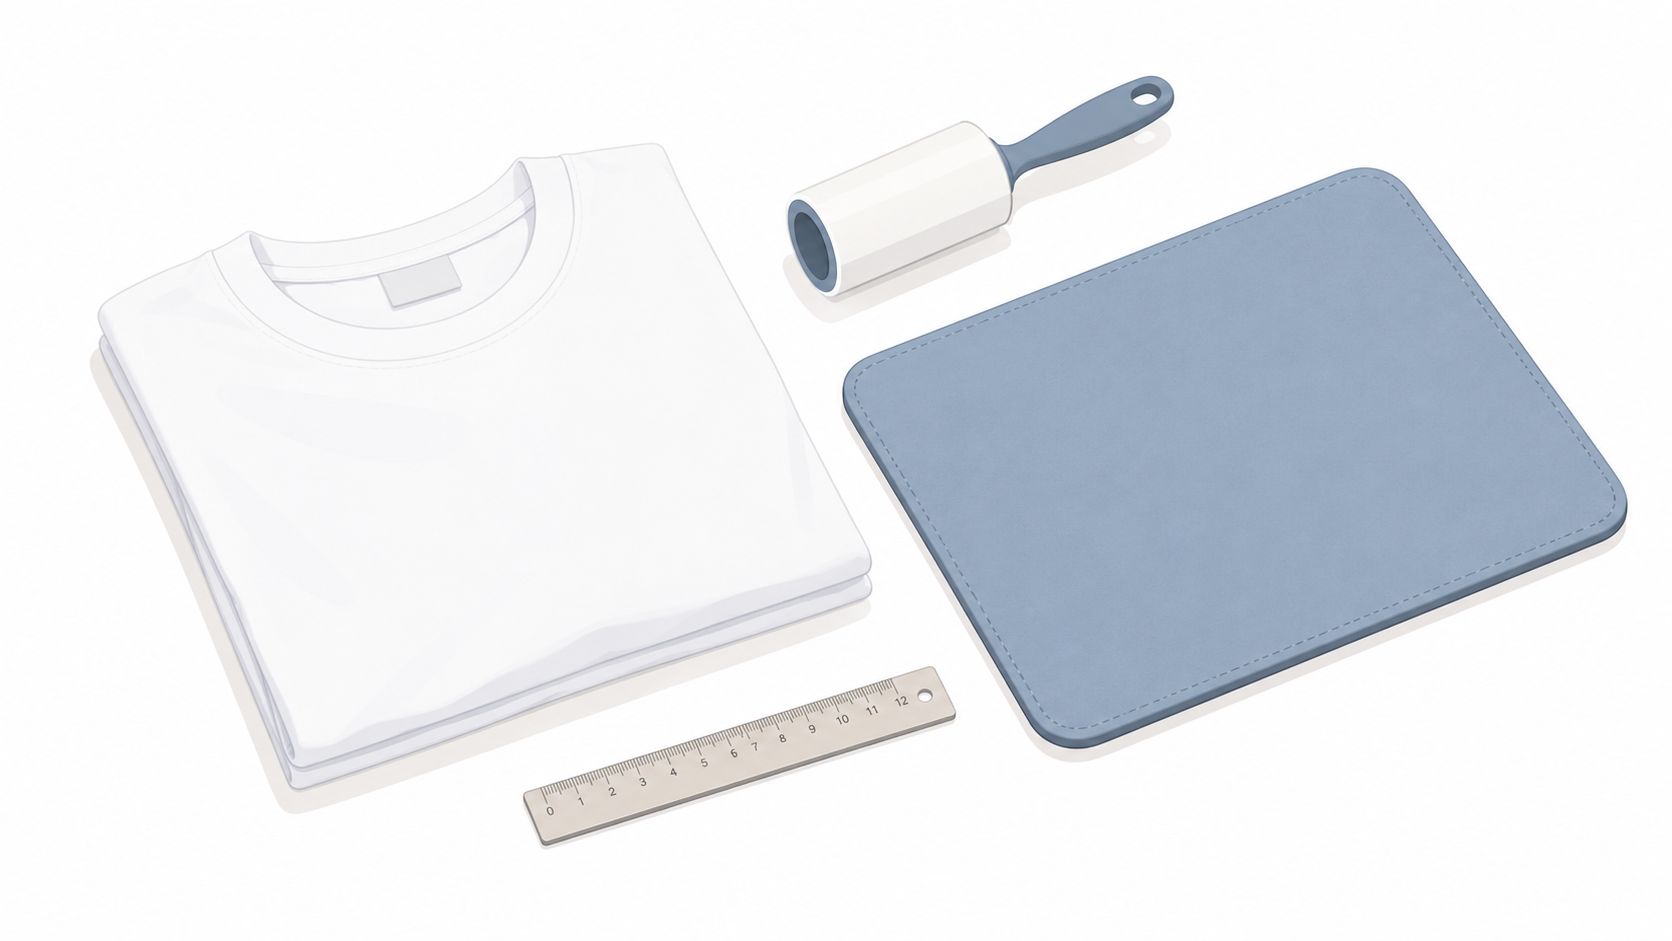
Keep the garments, lint roller, ruler, transfers, protective sheets, and finished-goods area within easy reach. A crowded bench creates avoidable errors. Transfers get placed on the wrong shirt, carrier films collect lint, and operators rush alignment because the next blank is already waiting.
Start with a garment that lies flat on the platen. Remove loose fibers with a lint roller, then load the shirt so the print area is supported evenly. If the garment has a pocket, zipper, seam, or heavy collar near the design, use a pressing pillow or another platen-height solution to bring the printable area level with the press surface.
Positioning matters as much as heat. A ruler or alignment guide helps maintain consistent placement across a run, while a single-layer garment prevents heat from transferring through to the back. Keep the transfer face up with the adhesive side against the fabric, and confirm that the design is straight before closing the press.
Pre-press moisture before applying the transfer
A short pre-press of 3 to 6 seconds is a practical starting point for removing wrinkles and moisture, as described in the STAHLS' heat press operator manual. Open the press, let the garment settle briefly, and check that the area is smooth before placing the film.
Practical rule: If the garment has been stored in a humid room or feels cool and damp, don't compensate by adding more application heat. Dry and flatten the blank first.
Use a Teflon sheet or parchment paper when the transfer instructions call for a protective layer. The sheet protects the carrier and keeps adhesive from contaminating the platen, but it can't correct uneven pressure or a wrinkled garment. For fabric-specific handling, the guide to fabrics compatible with DTF transfers is a useful reference before you start a mixed-material order.
Dialing in Heat Press Settings by Fabric Type
A press setting that succeeds on cotton can fail on polyester or a thick hoodie. Fiber content changes how heat travels, how the adhesive activates, and whether garment dye migrates into light artwork. Treat the transfer manufacturer's recipe as the starting point, then adjust for the actual blank.
Moisture is another hidden variable. A damp garment can absorb heat before the adhesive reaches working temperature, creating weak edges even when the display shows the correct setting. Gang sheet planning also affects consistency: group transfers by material and recipe so one run does not force repeated temperature changes or rushed adjustments.
Compare the working ranges
The full breakdown is in the Lion DTF heat press temperature chart.
| Fabric or transfer type | Temperature range | Dwell time |
|---|---|---|
| Cotton-based garments | 260°F to 280°F | 10 seconds |
| Polyester garments | 240°F to 250°F | 5 to 10 seconds |
| DTF film (general) | 240°F to 280°F | 7 to 10 seconds |
Why polyester needs restraint
Polyester can scorch, develop shine, or release dye into the transfer when the platen runs hotter than the garment and adhesive require. Lowering temperature protects the textile, but insufficient heat leaves the adhesive under-activated. Use a controlled dwell and even pressure rather than compensating for moisture, texture, or poor contact with extra heat.
A two-stage bond is useful on difficult blanks. The first press should establish the transfer without overloading the fabric with heat. After peeling according to the film instructions, a brief finishing press can reinforce adhesion where the design needs it. Keep that stage within the transfer maker's guidance.
Test the actual blank before loading a full gang sheet run. Supplier coatings, knit density, color, and surface texture can change performance, so a setting that works on one polyester shirt may fail on another. Group confirmed settings by blank type, then press each batch with the matching recipe.
Executing the Pressing Workflow and Peel Timing
Once the garment is flat and the recipe is selected, pressing should feel boring. Boring is good. Place the transfer accurately, close the press with the intended pressure, and let the timer control the dwell instead of opening the platen early to check progress.
For a standard workflow, center the film on the pre-pressed fabric, cover it if required, and press at the selected temperature with medium to firm pressure. Published DTF and HTV application guidance commonly uses 300°F to 330°F for 10 to 15 seconds, while the exact recipe still depends on the transfer and textile.
Control pressure across the design
A flat shirt on a flat platen usually receives consistent pressure. Seams and zippers are different. They can lift part of the print area away from the platen, leaving the center bonded while an edge receives little or no effective pressure. A heat press pillow raises the decoration area and lets the seam drop below it, which helps the transfer contact the fabric evenly.
Don't drag the carrier sheet after positioning. Smooth it down, confirm that no lint or fold sits under the design, and close the press in one controlled motion. If the design is larger than the heated area, repositioning can create uneven results, so check platen coverage before beginning a production run.
Treat adhesion as a two-stage process
The first press activates the adhesive and anchors the transfer. The finishing press adds a second controlled contact stage, often through parchment or a Teflon sheet, to reinforce adhesion and improve the surface finish. Several procedural guides specify a finishing press of 5 to 10 seconds, showing why the final press shouldn't be treated as optional cleanup. The FAQ and heat transfer process reference also documents multi-step pressing workflows and material-specific heat-press settings.
Peel timing must follow the film specification. A hot peel comes off immediately while the film is still hot. A warm peel waits briefly until the carrier cools slightly, while a cold peel requires the design to cool completely before removal. Pull slowly at a low angle. If the print lifts with the film, stop, lay the carrier back down, and press again rather than forcing the peel.
This video demonstrates the physical sequence and pressure mechanics:
For hot-peel DTF work, follow the specific hot-peel DTF transfer guidance instead of assuming every PET film behaves the same way.
Maximizing Efficiency with Auto-Build Gang Sheets
Pressing a transfer well doesn't automatically make the job profitable. The layout you send to print determines how much film becomes usable artwork and how much becomes empty space, trimming waste, or awkward scraps that slow the operator down.
Manual gang sheet building is prone to small inefficiencies. Someone leaves too much space between designs, forgets to rotate a small logo, or resizes artwork inconsistently. Those decisions may seem harmless on one order, but they make cutting and sorting harder across a busy workflow.
Let the layout reduce handling
An Auto-build gang sheet builder organizes multiple designs into a usable sheet with less manual resizing and rotation. The operator can prepare a set of logos, names, front prints, and sleeve designs in one organized file instead of arranging each item by eye.
That improves more than film utilization. A predictable layout creates cleaner cut paths, makes job sorting easier, and reduces the chance of confusing similar designs. It also supports a more consistent press rhythm because the operator can group transfers by garment, size, or production batch before the first shirt reaches the platen.
Connect digital planning to physical production
The strongest workflow is planned from the finished garment backward. Group designs that use the same press recipe, leave enough separation for cutting, and label the sheet so the operator can identify each transfer without repeatedly returning to the order screen.
An auto-builder also makes cost control easier to understand. Better packing means less unprinted PET and less ink lost to unused space, which can lower the effective material cost of each design. The exact savings depend on artwork dimensions, sheet format, and order mix, so the useful comparison is your own packed layout against your previous manual layouts.
Production habit: Build the gang sheet before you heat the press. If the digital file is disorganized, the physical workflow will be slower no matter how accurately you press.
For shops and makers, Lion DTF Transfers offers custom gang sheets and an Auto-build gang sheet builder as part of its transfer ordering workflow. Use it to prepare a more efficient sheet, then bring the sorted transfers to the press with the correct fabric recipe and peel method already identified.
Ensuring Longevity Through Proper Washing and Care
A well-pressed transfer can still fail in the customer's laundry room if the garment is washed aggressively or exposed to unnecessary heat. Care instructions protect the adhesive and printed surface from friction, chemical stress, and thermal cycling.
Give customers a simple care card with every order. The instructions should be clear enough that nobody has to guess whether the print can go into a hot wash, face outward in the drum, or sit under a hot iron.
Set expectations before the first wash
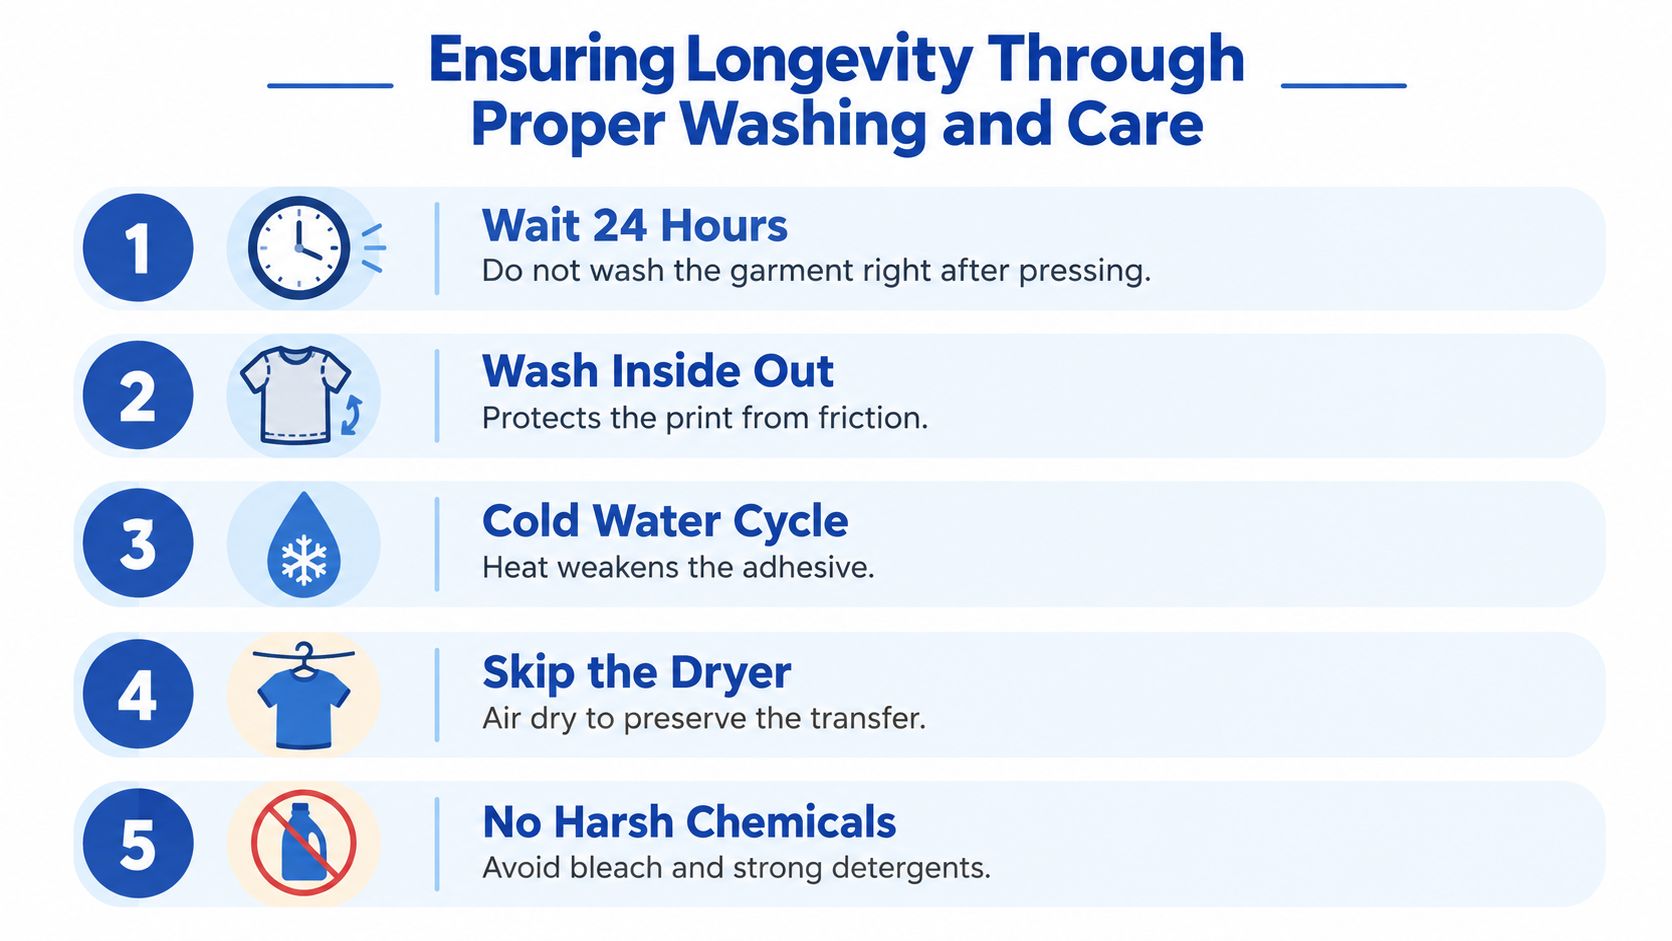
Tell the wearer to wait 24 hours before washing a freshly pressed garment. That gives the applied layers time to settle after pressing. Washing immediately adds mechanical movement before the decoration has had that recovery period.
Recommend washing the garment inside out in cold water. Turning it protects the printed face from direct friction against other garments and helps limit unnecessary heat exposure. A mild detergent is a safer choice than bleach or harsh chemical treatments, which can attack the print or weaken the bond over time.
Dry and iron with the transfer in mind
Air drying is the gentlest option for the finished decoration. If a dryer is unavoidable, use a low-heat approach and avoid treating the garment like an ordinary unprinted blank. High heat can stress adhesive layers and may change the hand or appearance of the print.
Never place a hot iron directly on the transfer. If ironing is necessary, turn the garment inside out or place a protective sheet between the iron and the design. Dry cleaning and chemical treatments should be considered cautiously because the process may not suit every transfer or garment combination.
The best care message is short and visible:
- Wait before washing: Allow the pressed garment to rest for 24 hours.
- Turn it inside out: Reduce direct drum friction on the printed surface.
- Use cold water: Avoid unnecessary thermal stress.
- Air dry when possible: Protect the decoration from dryer heat.
- Skip harsh chemicals: Don't use bleach or strong detergents on the print.
Inspect the first washed sample from a new blank and transfer combination. That check tells you whether the pressing recipe, garment construction, and care instructions are working together before customers receive the order.
Troubleshooting Common Heat Transfer Application Issues
Pressing failures usually leave physical clues. A lifted edge, a dull color shift, or a print that stretches poorly points toward a different part of the process. Diagnose the symptom first, then change one variable at a time so you know which correction solved the problem.
Edge lifting and partial adhesion
When the middle looks bonded but corners or thin details lift, uneven pressure is the first suspect. Seams, zippers, thick collars, and folds can keep parts of the transfer from touching the platen. Reposition the garment, use a heat press pillow where appropriate, and make sure the transfer area is clean and flat.
Insufficient dwell time or pressure can produce the same symptom. Don't immediately increase temperature on a delicate synthetic. Confirm the press reaches the selected setting, apply the recommended pressure, and repeat the finishing press with a protective sheet.
Diagnostic rule: A transfer that lifts only where the garment is uneven usually has a pressure problem before it has a temperature problem.
Peeling during or after application
If the design lifts with the carrier during peeling, the film may have been removed at the wrong stage. A hot-peel film should be peeled promptly, while a cold-peel film needs time to cool. Check the product specification, then peel slowly at a shallow angle.
Persistent peeling after pressing can point to moisture, contamination, or an under-pressed surface. Lint, fabric softener residue, water-repellent coatings, and wrinkles can all reduce direct contact between adhesive and fiber. Recheck preparation and run a controlled test on another blank before committing more garments.
For a basic stretch test, let the transfer cool, then gently stretch the fabric around the design. The graphic should flex with the textile rather than separating at the edges or showing unbonded areas. This isn't a substitute for a wash test, but it can expose weak adhesion before packing.
Dye migration, scorching, and surface damage
A polyester garment that shows a tinted haze through a light transfer may be experiencing dye migration. Excess heat can also create shine, scorch marks, or a changed fabric hand. Move toward the lower polyester range, shorten exposure where the transfer allows it, and test the actual garment color and construction.
If the print feels melted, shriveled, or excessively glossy, the press has likely delivered more thermal energy than the textile or transfer can tolerate. More heat isn't a universal fix for poor adhesion. Moisture removal, level pressure, correct dwell, and the right peel sequence must be checked first.
Keep a simple production log with the garment type, transfer type, temperature, dwell, pressure, peel stage, and observed result. That record turns repeated failures into a usable shop recipe and helps prevent wasted blanks when the next order uses a similar fabric.
Lion DTF Transfers offers hot-peel DTF transfers, custom gang sheets, ready-to-press designs, and an Auto-build gang sheet builder for organizing artwork before pressing. Visit Lion DTF Transfers to upload your files, build a more efficient sheet, and order transfers that fit your garment workflow.
Email orders@LionDTF.com or Text or Call: 833-350-5466