










You've got a stack of transfers on the table, a garment that looked clean five minutes ago, and one shirt that just came off the press with a dull patch near the edge. That's the normal place where DTF Printing and Press either turns into a repeatable workflow or a string of expensive corrections. The difference is usually not the artwork, it's the way the files, powder, press settings, and quality checks fit together.
DTF has moved from a niche process into a major apparel customization category, with the global market estimated at USD 2.72 billion in 2024 and projected to reach USD 3.92 billion by 2030 at a 6.0% CAGR from 2025 to 2030, according to Grand View Research. WTiN also reported more than 7.2 billion DTF prints produced globally in 2024, almost a 30% increase from the prior year, which tells you the process is no longer experimental, it's a production method shops rely on at scale. The shops that win with it don't just print well, they press cleanly, inspect ruthlessly, and build a workflow that doesn't waste film or labor.
Materials and Equipment Checklist
A DTF setup falls apart fast when one piece is wrong. A printer can lay down a perfect image, but if the film isn't coated correctly, the powder clumps, or the press runs hot on one side, the transfer won't survive the next wash. The gear list sounds basic, but each item has a job that the others can't cover.
Start with the print side
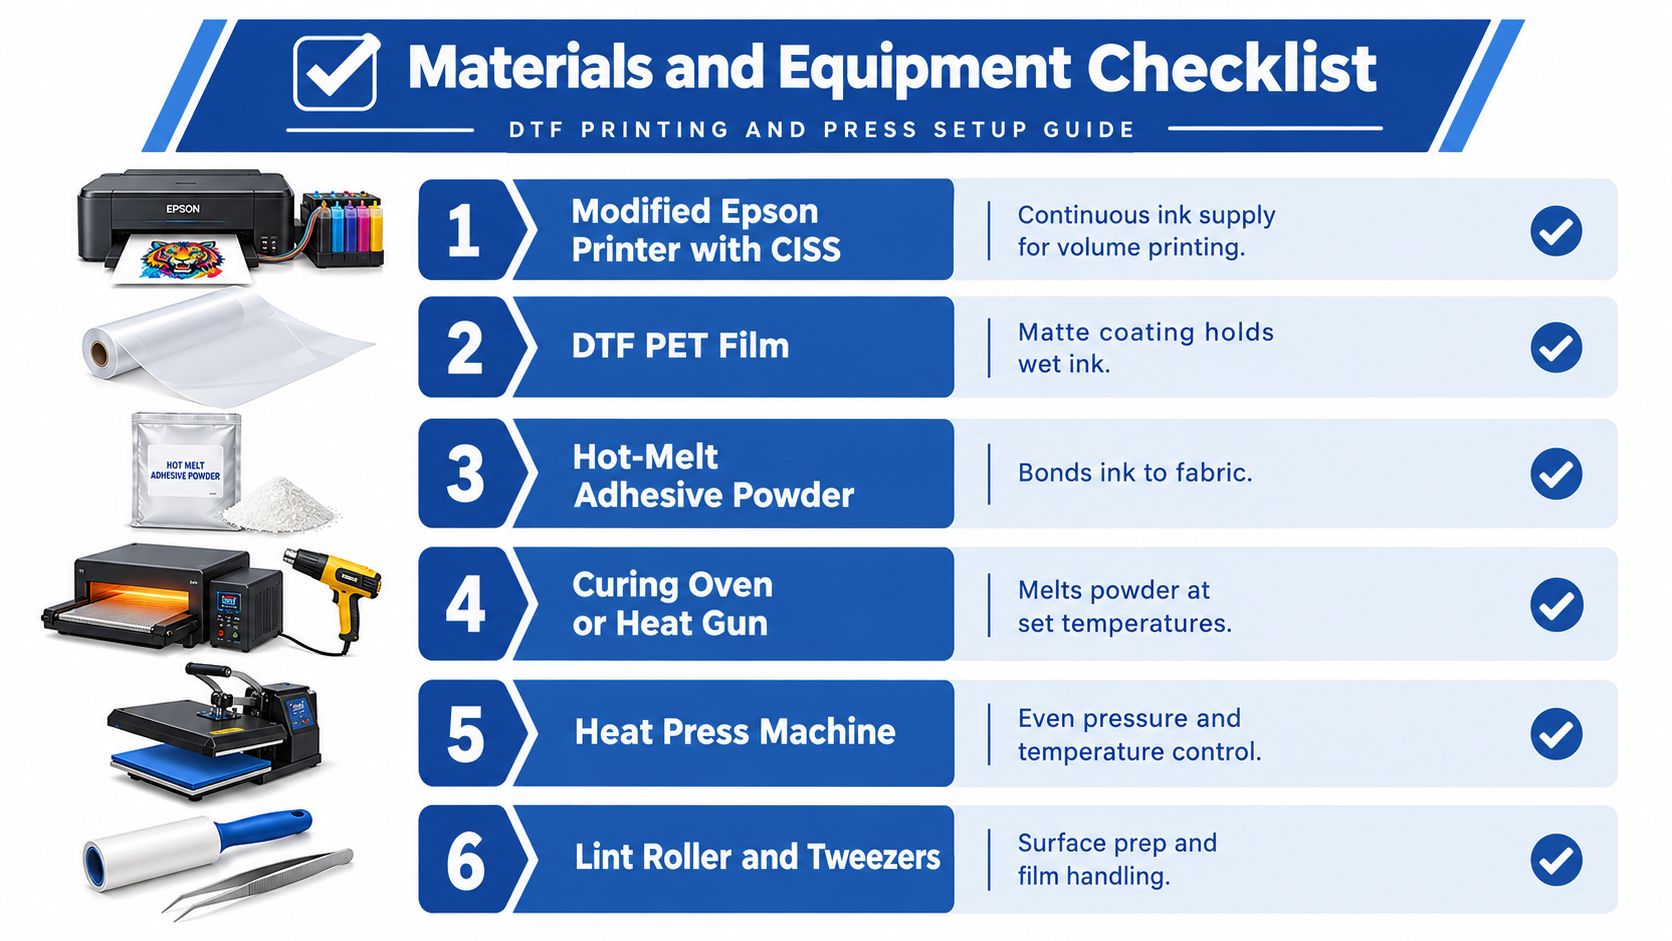
A modified Epson printer with a CISS system is the usual entry point for small shops because it keeps ink moving for volume work. You also need a RIP software workflow that handles white ink cleanly and plays nicely with your gang sheet planning, especially if you're using an Auto-build gang sheet builder to organize multiple orders on one sheet. That combination cuts waste before the file ever reaches the printer.
The consumables matter just as much. Use DTF PET film with a matte coating that holds wet ink, hot-melt adhesive powder that bonds the ink to fabric, and a curing oven or controlled heat source that melts the powder without overcooking the transfer. A reliable heat press with even platen pressure is essential, because uneven heat creates transfer problems that look like bad ink when the actual issue is the machine.
Keep the small tools close
A lint roller clears garment fibers before pressing, and tweezers help you handle film without touching the printed area. That sounds minor until you ruin a fresh transfer with one fingerprint or a strand of lint trapped under the edge. I keep both within arm's reach because every extra step between the press and the table is another chance to contaminate the job.
Practical rule: if a tool affects temperature, pressure, cleanliness, or file layout, it belongs in the setup. If it only looks helpful, it probably belongs in the storage shelf.
If you're building from scratch, think in terms of workflow, not shopping. The right printer, film, powder, heat source, and press should all support one simple goal, consistent transfers that move from file to finished garment without rework.
Print Setup and Gang Sheet Planning
Bad file planning is the easiest way to burn film and time. The artwork might be fine, but if the layout wastes space or the white underbase is set wrong, you'll end up pressing more scraps than shirts. A good file setup makes the press room feel calm because the jobs arrive organized instead of chaotic.
Build the sheet before you print
Start by preparing artwork at the final size and place it into your RIP software with the right color profile and white layer settings. Then use the DTF gang sheet guide to organize multiple designs onto one sheet, because every unused gap is wasted film. For small shops, the Auto-build gang sheet builder is useful for stacking mixed orders quickly without manually dragging every element into place.
A clean gang sheet should group similar sizes together, keep enough cut space between designs, and avoid awkward rotation that slows trimming later. Think about the press room, not just the printer. If you load a sheet that saves five inches of film but creates ten minutes of sorting, you didn't save anything.
The file itself needs the same discipline. Keep edges sharp, remove stray transparent pixels, and check that the design is mirrored only when your workflow calls for it. A bad file usually won't crash the printer, it'll just make a transfer that looks fine on film and wrong on cloth.
Lock the output before the run
Once the layout is ready, do a small proof or at least inspect the preview at full size. The goal is to catch scale mistakes, missing whites, or crowded placement before the printer commits ink. That's the cheapest correction in the whole process.
One useful habit is to standardize your sheet templates by order type. If you repeatedly print logo sets, left-chest marks, and back prints, build those patterns once and reuse them. The more often your shop repeats a layout, the less room there is for human error.
Powdering and Curing the Transfer
Powder is where a lot of beginners get too casual. They shake it on, assume coverage is fine, and then wonder why the edge lifts or the design feels brittle after curing. Adhesion comes from even powder contact, not from guessing.
Coat the ink evenly
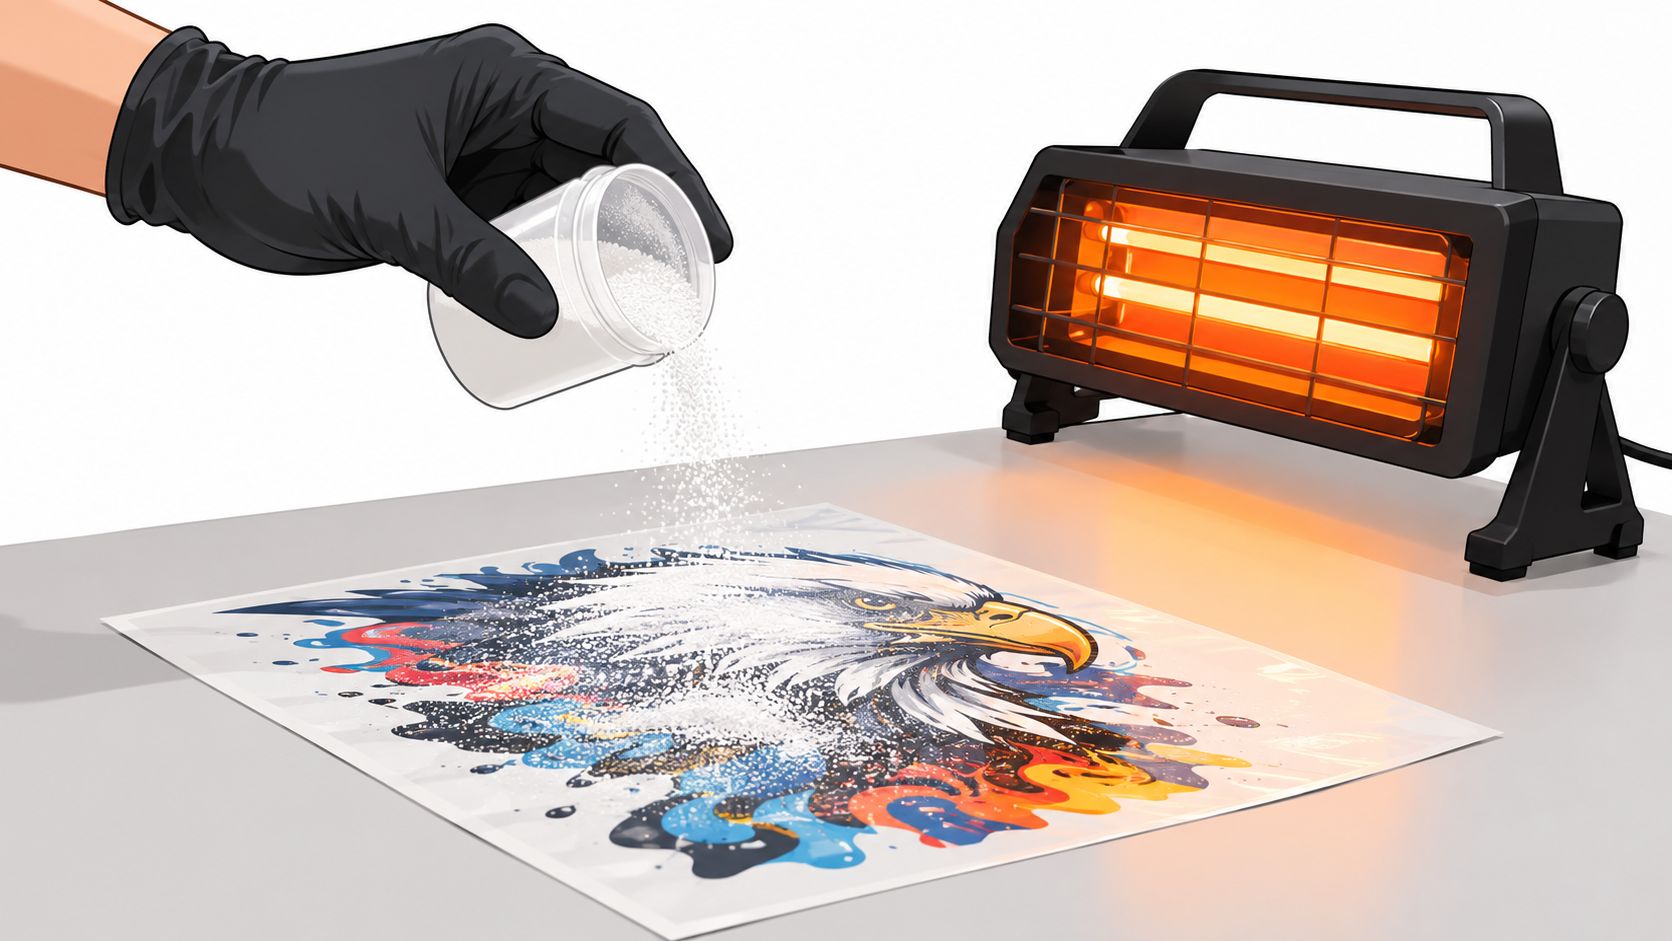
Apply powder while the ink is still wet, then move the sheet so the adhesive reaches every printed area without piling up in one corner. The coating should look even across fine details and solid fills alike. If a section looks patchy, it's going to press patchy.
Once coated, shake off the excess gently. Too much powder leaves a rough edge and a heavy hand feel. Too little leaves weak bonding, especially on narrow text and thin linework.
A transfer that looks “good enough” before curing usually isn't good enough after pressing.
Curing is about melting the powder into a smooth adhesive layer, not baking the film until it stiffens. Independent DTF references place stable curing around the process window used by small shops, and the key is consistency, not speed. If your heat source is uneven, don't compensate by leaving the transfer in longer, because that often creates the next problem, overcured powder that cracks or refuses to bond cleanly.
Inspect before it ever hits fabric
Before pressing, check the cured surface for uniform gloss and complete powder coverage. Look for thin spots near the edges, speckling, or powder clumps that never fully melted. Those flaws usually get worse under pressure, not better.
The other habit that saves hours is keeping cured sheets flat and dry. Humidity can make powder behave unpredictably, so store transfers in a clean, low-moisture area and press them as soon as practical. If you're sorting jobs in batches, label by garment type so you don't accidentally grab a transfer cured for a different fabric.
For a production-minded walkthrough, the how to make DTF transfers guide is a useful companion reference when you're building your own in-shop process.
Heat Press Settings and Fabric Guide
Pressing is where the job either becomes wearable or turns into a return. Cotton, polyester, and blended fabrics don't all tolerate the same heat, and the wrong temperature can scorch one shirt while underbonding the next. The safest habit is to treat press settings as fabric-specific, not universal.
Match the fabric to the press window
For cotton, a practical starting point is 300 to 325°F for 10 to 15 seconds with medium-to-firm pressure. Polyester usually needs a lower target, around 270 to 280°F, to reduce scorch risk. Independent guidance also places the stable DTF press band around 150 to 160°C, with press times commonly spanning 8 to 15 seconds and warm peeling often preferred, depending on the film.
Press with even pressure across the platen. Uneven force shows up as weak corners long before it shows up as a full failure.
Here's a shop-friendly comparison for the main fabrics:
| Fabric Type | Temperature | Press Time | Pressure | Peel Type |
|---|---|---|---|---|
| Cotton | 300 to 325°F | 10 to 15 seconds | Medium-to-firm | Depends on film, often hot or warm peel |
| Polyester | Around 270 to 280°F | 8 to 10 seconds | Medium | Film-specific, usually warm peel caution |
| Blends | Start in the mid-range | 10 to 12 seconds | Medium | Film-specific |
| Dark garments | Match the fabric, then confirm white underbase coverage | Same as base fabric | Medium-to-firm | Film-specific |
| Light garments | Same as fabric baseline | Same as base fabric | Medium | Film-specific |
A separate practical setup also calls for a pre-press of 3 to 5 seconds to remove moisture before the transfer goes down, followed by a 5 to 10 second finishing press after peeling. That finishing pass matters because it smooths the print and helps the transfer settle into the fabric instead of sitting on top like a sticker. For reference, see DTF heat press settings and keep your own test sheet by fabric type.
Don't force one method on every shirt
Hot peel and cold peel both work, but only if your film is made for it. If you peel at the wrong temperature, you can lift ink from the garment or leave the transfer half bonded. That's not a press issue alone, it's a timing issue.
Dark garments reward clean underbase control because the white layer does the heavy lifting. Light garments are more forgiving visually, but they still need the same even pressure and heat balance. If the shirt feels damp or wrinkled before pressing, fix that first. The heat press can't rescue poor prep.
Quality Assurance and Wash Testing
A transfer isn't finished when it looks good on the platen. It's finished when it survives actual use, which means movement, washing, drying, and repeated wear. Shops that skip QA end up shipping returns that were predictable from the first press.
Check adhesion before packing
Start with a visual inspection under consistent light. Look for edge lift, pinholes, powder residue, dull spots, and color shifts between the film and the garment. Then do a quick fingertip check around the perimeter once the transfer has cooled and settled, because weak edges usually announce themselves before the center fails.
Wash testing is the part that protects your reputation. The publisher's product notes mention 100+ wash durability for its transfers, which is the kind of benchmark that tells you the job should feel stable, not delicate, after real use. A practical shop test is to track the same garment through repeated laundering, then compare the first wash, the middle cycle, and the later cycles for cracking, fading, or edge lift.
Build QA into the workflow
Keep a short checklist at the press station:
- Surface prep: remove lint, moisture, and obvious wrinkles before the transfer goes down.
- Press check: confirm platen temperature, even pressure, and correct dwell time.
- Peel check: peel only in the window your film calls for.
- Finish check: run the post-press and inspect the design again.
- Pack check: reject any shirt with edge lift, scorch marks, or visible transfer defects.
The point isn't to make QA slow, it's to make it automatic. If the same defect keeps showing up, the fix is usually not in packaging or trimming, it's in one of three places, heat, pressure, or peel timing. That's why tracking failures by cause matters more than arguing about whether a print “should have” held.
A strong QA process also reduces the temptation to over-press every garment just to feel safe. Over-pressing can make a transfer look flatter at first, then cause long-term damage by stressing the ink or the fabric. Consistency beats panic every time.
Troubleshooting Common Pressing Issues
Most pressing failures fall into a small number of categories. The good news is that once you know the cause, the fix is usually immediate. The bad news is that many operators keep changing three things at once, which hides the actual problem.
Read the symptom, not the guess
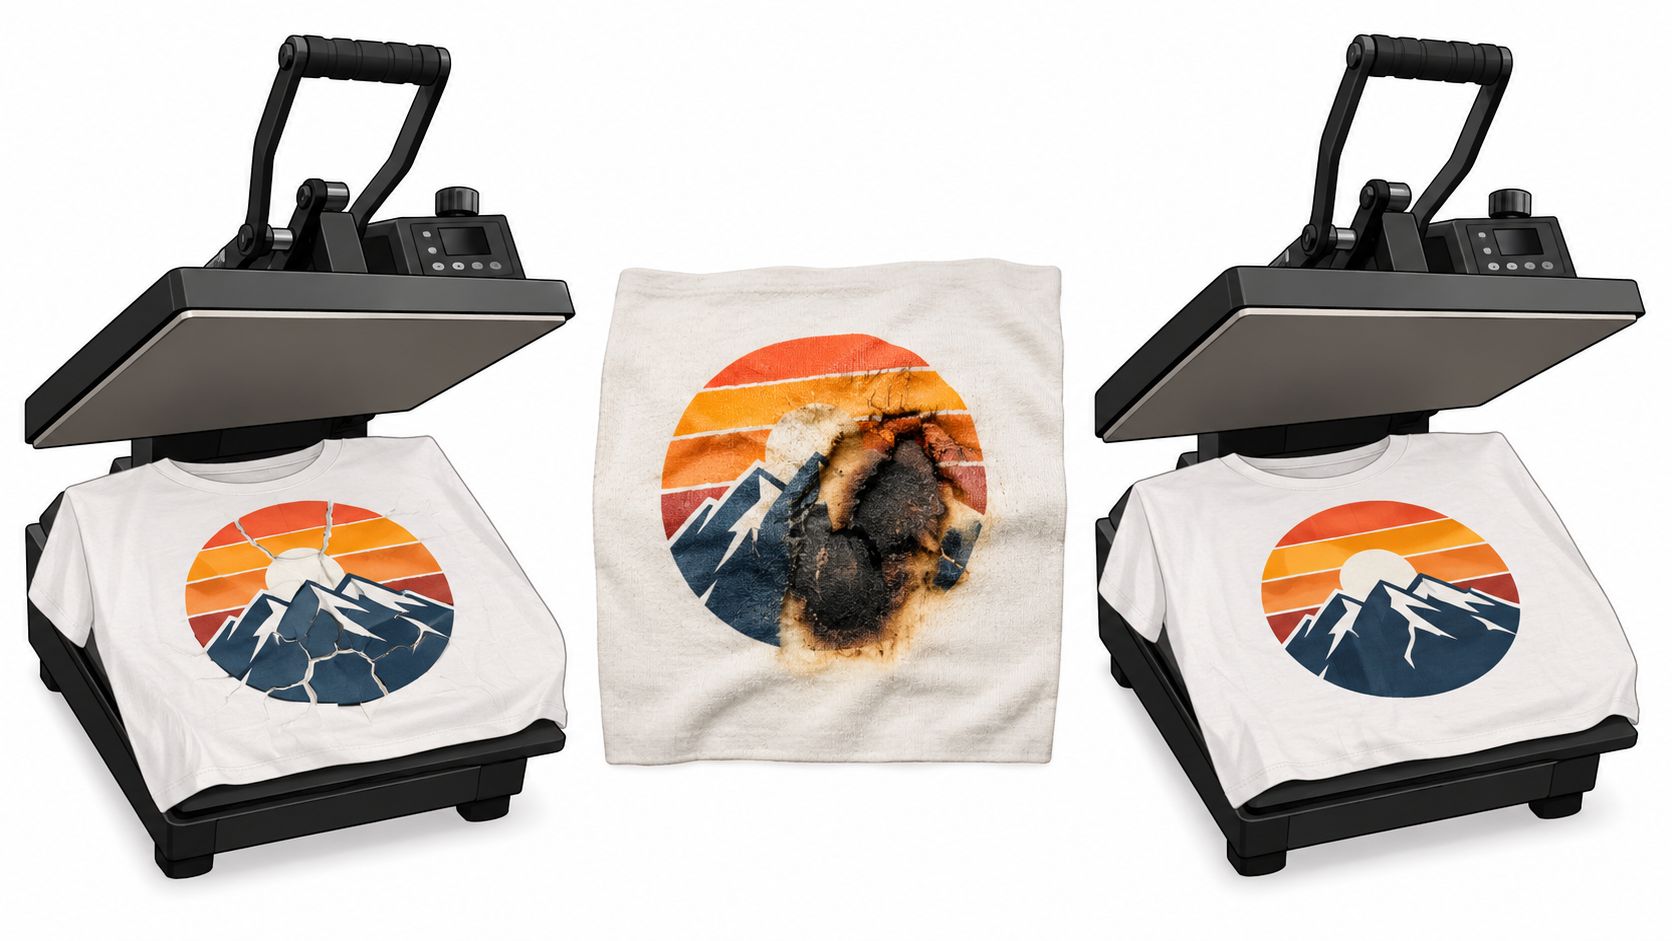
If the print is scorched, the usual cause is too much heat or too much dwell time. If the design lifts on peel, the peel timing is probably off, or the press didn't fully bond the adhesive. If the print cracks later, the transfer was often overcured or overpressed from the start.
A few fast diagnoses save the most grief:
- Poor adhesion at the edges: check pressure distribution first, then revisit your peel window.
- Patchy color or weak ink bond: look at powder coverage before changing the heat press.
- Shiny, stiff feel: you probably overpressed or used too much heat.
- Scorch marks on polyester: lower the temperature before touching press time.
- Film residue after peeling: the transfer was likely not ready to release.
Fix one variable at a time. If you change temperature, pressure, and timing together, you won't know what actually solved it.
The neutral guides on DTF application all point to the same practical truth, the process wants a tight window, not random tweaking. Medium pressure, a controlled press time, and the correct peel method solve most of the issues operators blame on the film itself. More often than not, the film is doing its job and the process isn't.
If the same issue keeps repeating on one press but not another, test the platen itself. Uneven heat across the surface can mimic bad film, bad powder, or bad technique. I've chased “ink problems” that turned out to be one cold corner on the press.
Scaling Your DTF Production Workflow
Scaling isn't about pushing harder, it's about removing friction. Once the basic workflow is stable, the biggest gains come from fewer layout mistakes, fewer press resets, and less time hunting for the next job. Shops that scale well make the same good decisions over and over.
Batch your gang sheets by garment type and keep press presets tied to those fabrics. That lets one operator move faster without relearning settings on every order. It also reduces the temptation to “eyeball” a shirt when the day gets busy, which is when most avoidable mistakes happen.
Keep your equipment maintained on a schedule, because a press room that drifts out of calibration eats margin without notice. Standardize the table layout, label the test garments, and keep the trim area separate from the clean press area. That structure matters more when you're fulfilling mixed orders or moving from hobby volume to repeat customer work.
For shops that want more throughput without more chaos, Lion DTF Transfers offers ready-to-press DTF transfers, gang sheets, and custom print-by-size ordering, which can fit into a production flow when you need outside capacity instead of in-house printing. Used properly, that gives you another way to keep jobs moving while you standardize your own press room.
If you want cleaner presses, fewer reprints, and a workflow that actually scales, start with the basics that hold the whole process together. Visit Lion DTF Transfers to see ready-to-press transfers and gang sheet options that fit the same file-to-press workflow covered here, then build your next run around consistency instead of guesswork.