










You're probably here because one of two things is happening. Either you're tired of weeding tiny heat transfer vinyl letters at midnight, or you're trying to print full-color shirts without turning every small order into a setup headache. That's where DTF heat transfers start to make sense.
For a lot of shops and makers, the moment of relief is simple. You stop asking, “How do I make this design work with my equipment?” and start asking, “How do I get this pressed cleanly and consistently?” That's a much better problem to have.
The Modern Solution for Custom Apparel Printing
A new apparel decorator usually learns the hard way that older methods all have tradeoffs. HTV looks manageable until a customer wants a detailed logo with tiny islands to weed. Screen printing looks efficient until the job is a short run with several colors. DTG can be useful, but fabric choice and workflow can complicate things fast.
DTF heat transfers changed that daily math.
A typical example is the small brand owner who starts with a few shirt blanks, a desktop cutter, and a heat press. The first few one-color names and simple slogans feel fine. Then someone orders a full-color back print, a left chest logo, and matching youth sizes on cotton-poly blends. Suddenly the old workflow slows to a crawl.
DTF sits in the middle of that problem and solves a lot of it. You can print detailed, full-color artwork onto film, then apply it with heat and pressure onto the garment you need. No screen setup. No hand-weeding every curve. No redesigning artwork just because it has gradients or small details.
That's one reason adoption has accelerated. The Global DTF Transfer Film market was valued at $1.2 billion in 2024 and is projected to reach $2.85 billion by 2033, expanding at a CAGR of 10.1%, reflecting rapid adoption across fashion, sportswear, and promotional merchandise, according to Research Intelo's DTF transfer film market report.
DTF became popular because it fits the kind of jobs shops actually get. Small runs, fast turns, mixed fabrics, and artwork that isn't simple.
If you run a print shop, sell merch online, decorate uniforms, or make gifts at home, DTF heat transfers give you a practical path from digital art to finished apparel without a lot of the friction older methods bring with them.
What Are DTF Heat Transfers and How Do They Work
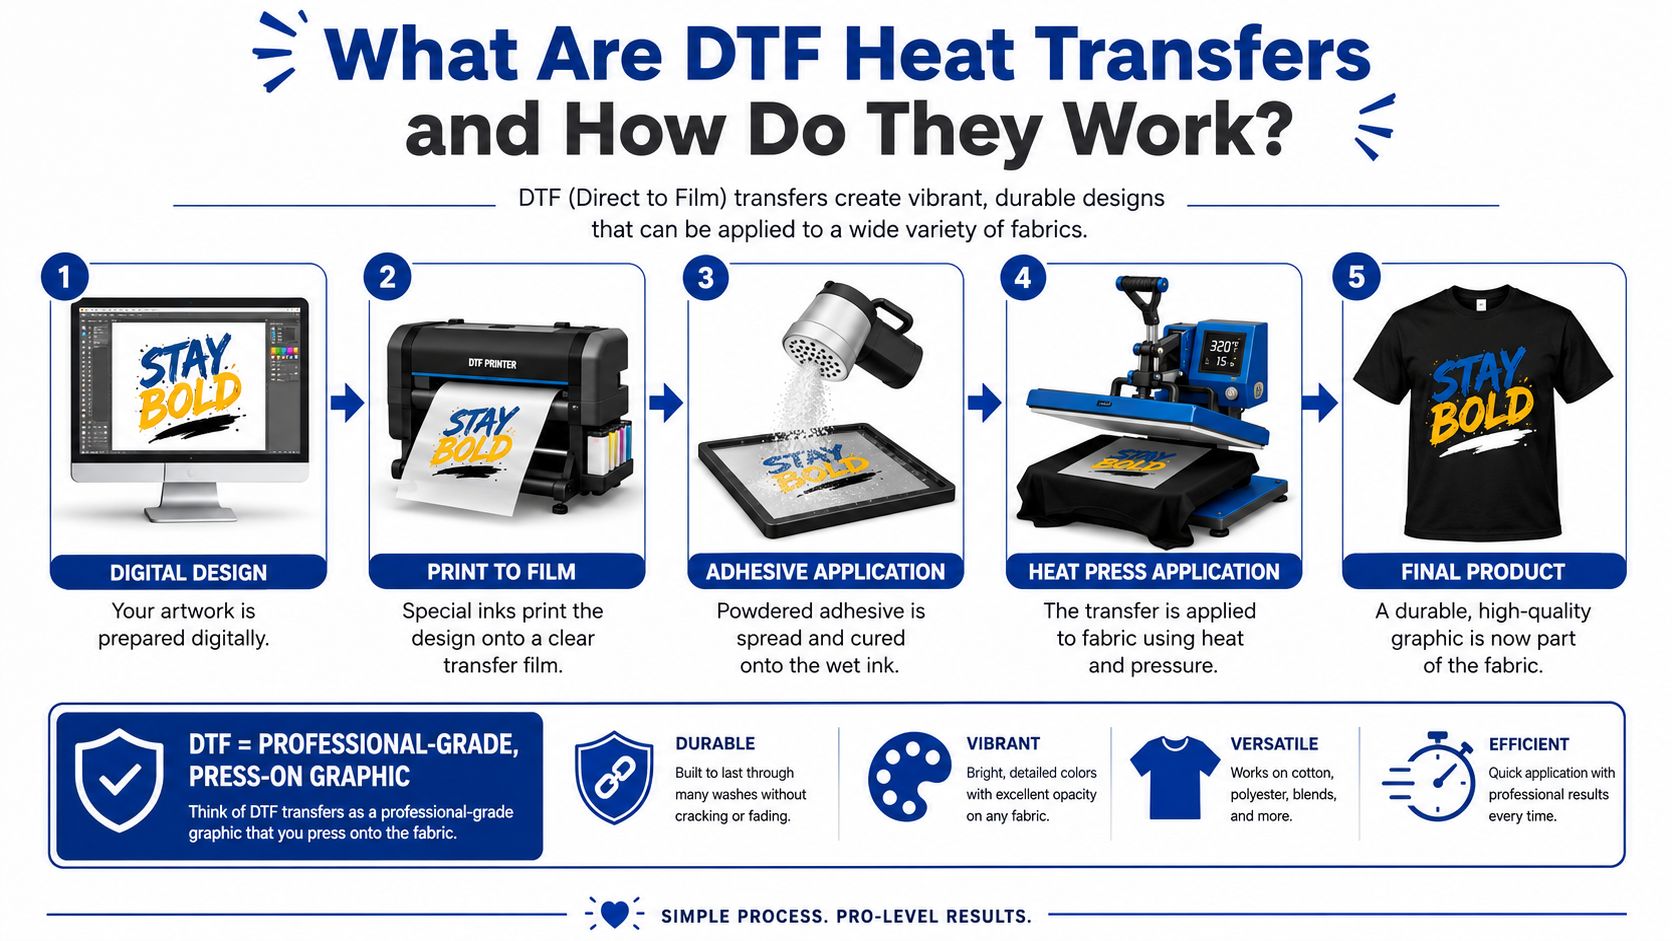
Think of a DTF transfer like a professional-grade press-on graphic that doesn't just sit on the shirt. When it's made and applied correctly, it bonds into the fabric well enough to feel like part of the garment's decoration system, not an afterthought.
The three parts that matter
At the center of the process are three materials working together:
- Transfer film: This is the sheet that temporarily holds the printed image.
- DTF ink: The printer lays down the artwork onto the film.
- TPU adhesive powder: This is what lets the print bond to the garment during pressing.
If you're new, the powder is usually the confusing part. It isn't filler. It's the bridge between the printed image and the shirt.
What actually happens from file to transfer
The workflow is straightforward once you see the order.
- You prepare the artwork digitally. Clean edges, proper sizing, and a transparent background matter here.
- The printer outputs the design onto film. In a standard DTF workflow, color is printed and supported by a white layer so the design can stand out on different garment colors.
- Adhesive powder is applied to the wet ink. The excess is removed.
- The powder is cured. That turns the printed sheet into a ready-to-press transfer.
- The transfer is heat pressed onto fabric. After peeling the film, the graphic stays behind.
The reason DTF works so well on many garment types comes down to adhesion. The molecular adhesion mechanism relies on Thermoplastic Polyurethane (TPU) powder, which must be cured to fully melt and penetrate fabric fibers, creating a permanent bond that can withstand 100+ wash cycles without cracking or peeling, as described by Royal DTF's explanation of DTF transfers.
Practical rule: If the powder isn't cured properly, the transfer may look fine on the film and still fail on the shirt.
Why beginners get tripped up
Most confusion comes from treating DTF like printed paper. It isn't. The film is only the carrier. The cured adhesive and the press application do the main work.
A beginner often sees a bright transfer sheet and assumes the job is almost done. In reality, the final result depends on whether the transfer was cured evenly, aligned correctly, and pressed with the right heat, time, and pressure for the garment.
That's also why DTF heat transfers work for both businesses and hobbyists. The process has technical steps, but each one is learnable. Once you understand what the film does, what the powder does, and what the heat press does, the workflow becomes predictable.
DTF vs Other Print Methods Compared
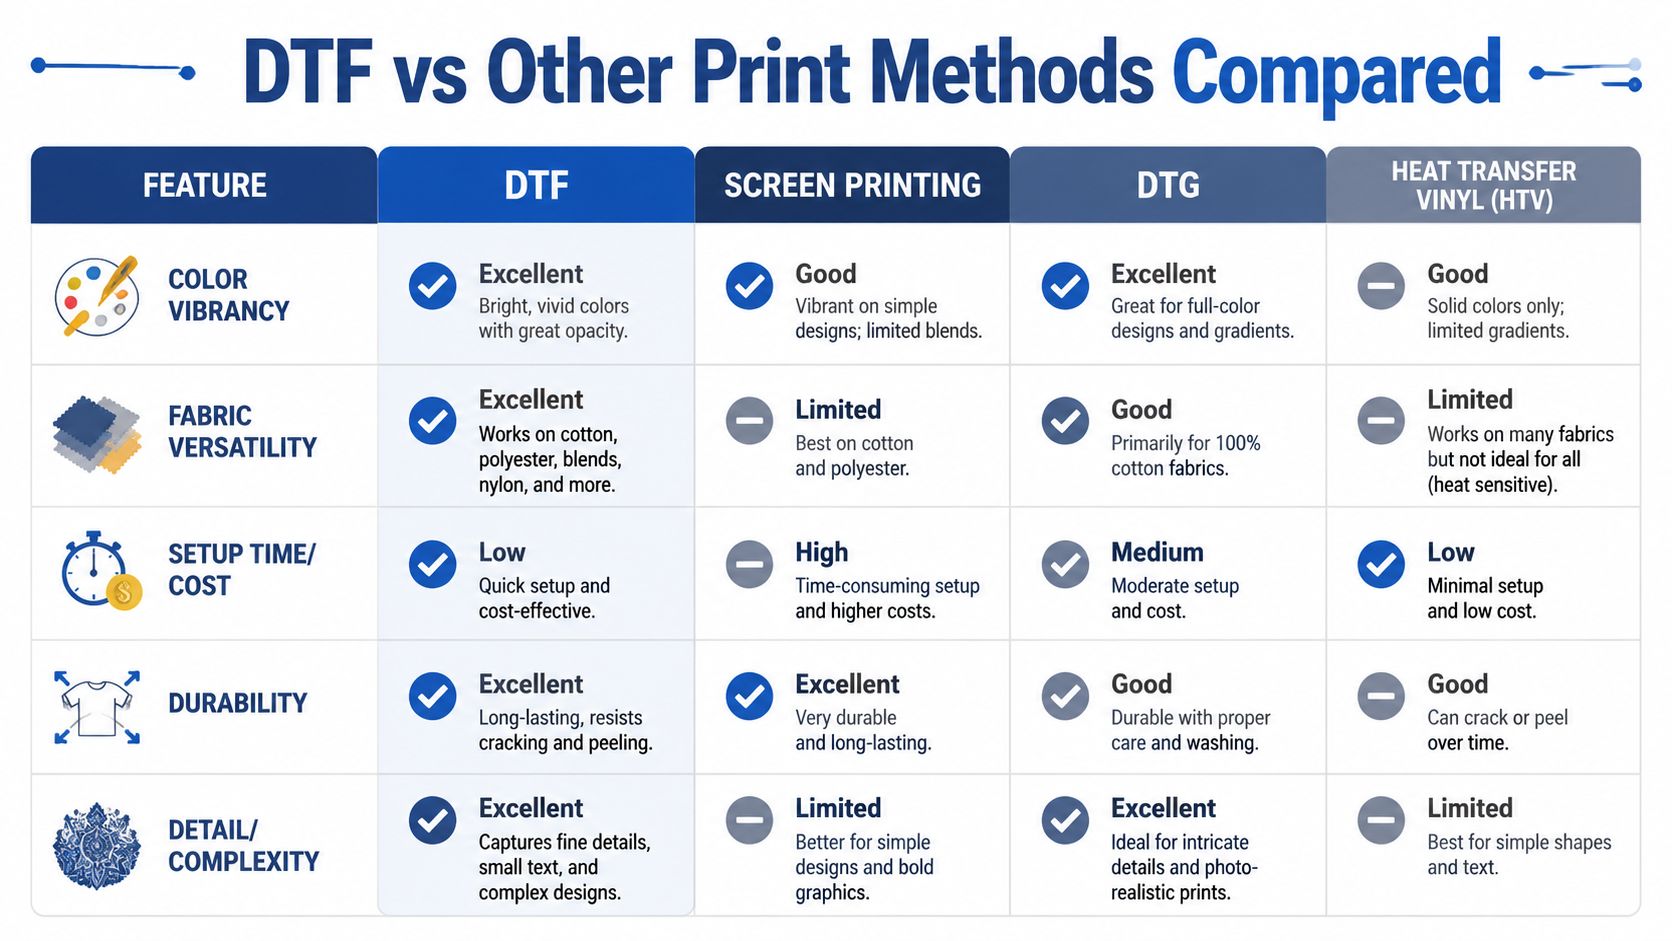
The right print method depends on the job, not on hype. DTF heat transfers are strong in some situations and less ideal in others. If you compare them against screen printing, DTG, and HTV, the choice gets easier.
Print method comparison
| Feature | DTF Transfers | Screen Printing | DTG (Direct-to-Garment) | HTV (Heat Transfer Vinyl) |
|---|---|---|---|---|
| Color vibrancy | Strong full-color capability | Strong for bold spot-color work | Good for detailed prints on suitable garments | Good for simple solid-color graphics |
| Fabric versatility | Works well across many fabric types | Depends on ink system and setup | Often most straightforward on suitable garment types | Useful, but design and fabric needs can limit efficiency |
| Setup time and cost | Friendly for short runs and mixed designs | Better suited to repeat runs after setup | Less setup than screens, but workflow still matters | Simple startup for basic jobs |
| Durability | Strong when applied correctly | Strong when printed correctly | Good, depending on garment and care | Good for the right design style |
| Detail and complexity | Handles detailed multicolor artwork well | Best when artwork fits the process | Good for detailed art | Less ideal for very intricate jobs |
Where DTF wins
DTF is often the practical choice when the order includes multiple colors, small quantities, varied garment types, or complex artwork. That combination shows up constantly in real shops. One customer wants cotton tees, another wants polyester jerseys, and another wants tote bags with a gradient-heavy design.
DTF also gives you flexibility in production. You can press now, hold transfers for later, or combine many graphics onto one sheet for better material use. That's a major advantage when you're trying to keep labor under control.
Where screen printing still makes sense
Screen printing is still a workhorse. If you've got a repeat design, stable garment type, and enough volume to justify setup, it can be a very efficient choice. It's especially comfortable for bold graphics that don't require a lot of tonal variation.
Its weak point is the same one that pushes many short-run orders toward DTF. Setup and separation work can feel heavy when the run is small or the artwork changes often.
Where DTG fits
DTG can produce attractive prints and has a different print feel on the right garment. But it's a separate workflow, and garment compatibility matters. If you're trying to decide between the two methods for your shop, this DTF vs DTG printing comparison from Lion DTF gives a useful side-by-side overview.
If a customer brings you one detailed design for a few shirts across different fabric blends, DTF is often the simpler path from art file to finished order.
Where HTV still earns its place
HTV is not obsolete. It's still useful for names, numbers, simple logos, and jobs where a cutter-based workflow is enough. If you're making team personalization, single-color chest logos, or quick one-offs, HTV can be perfectly sensible.
But once artwork gets intricate, HTV becomes a labor problem. You don't want to spend your profit picking out tiny vinyl pieces with a hook tool.
The short version
Choose the method that matches the job:
- Use DTF transfers when you need detailed full-color prints, mixed fabrics, or efficient short runs.
- Use screen printing when volume is stable and the design justifies setup.
- Use DTG when its garment-specific workflow fits the order.
- Use HTV when the design is simple and the labor stays manageable.
That's the professional mindset. Don't force every order into one process.
Designing and Ordering Your Transfers
Good pressing starts long before the heat press closes. Most failed prints can be traced back to a weak file, sloppy sizing, or poor sheet planning. If the art is clean and the transfer layout is smart, the production side gets much easier.
Start with a press-ready file
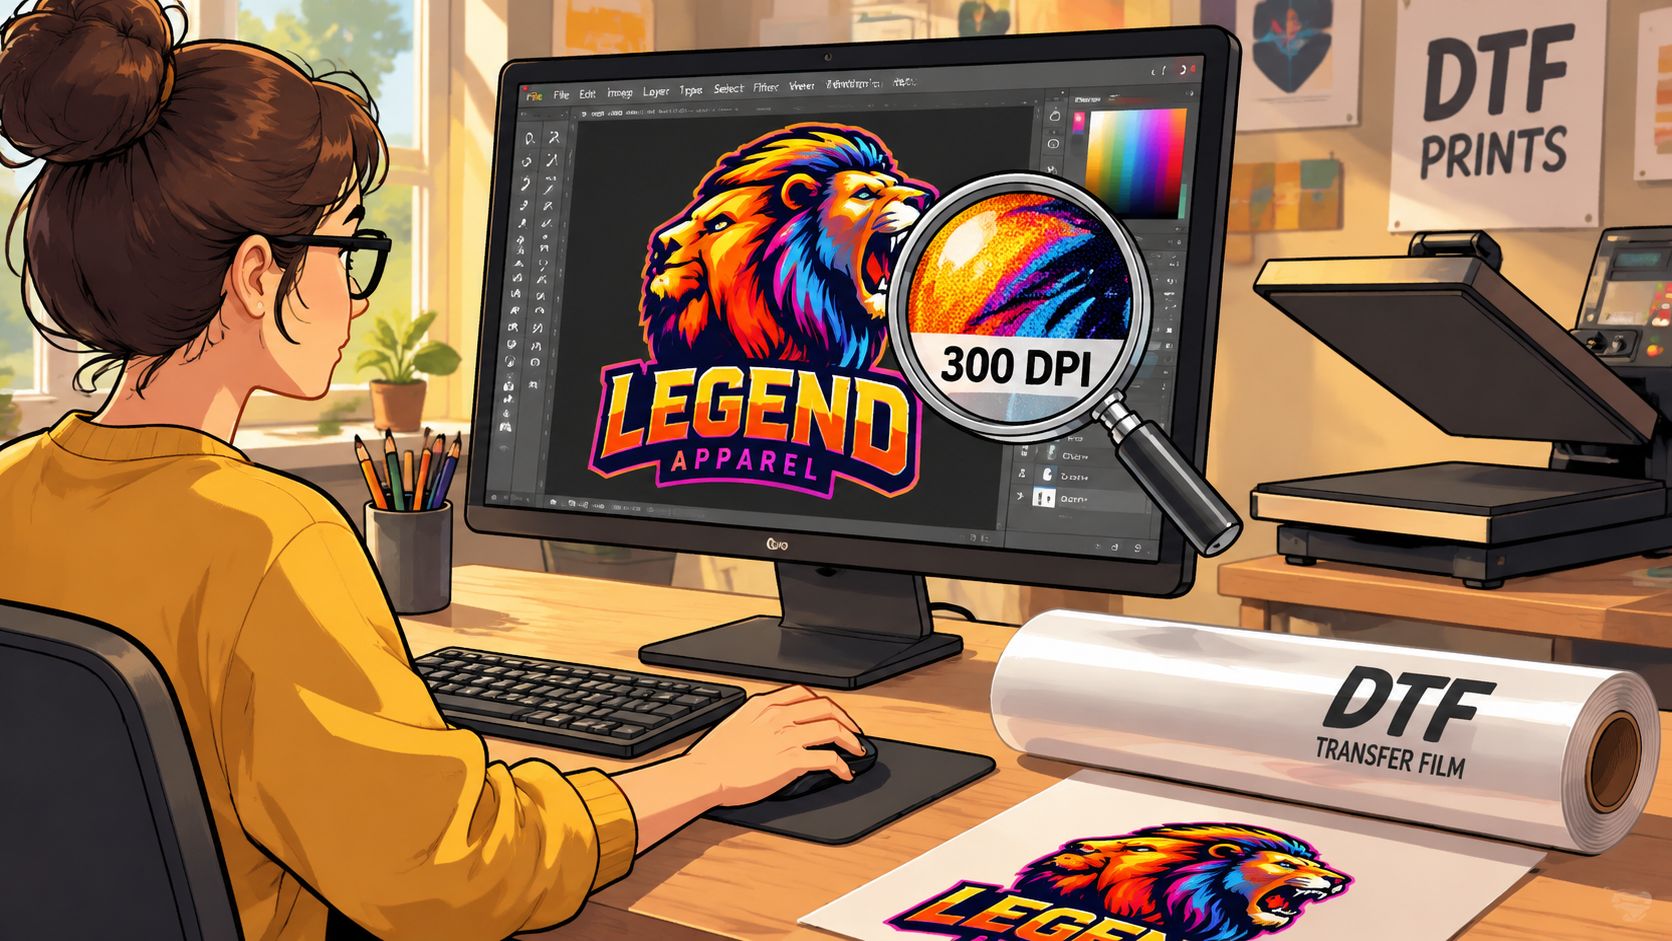
Your artwork should be built at 300 DPI at actual print size, and PNG is the primary file format because it supports transparent backgrounds. The same source also notes that the Auto-build gang sheet builder enforces these specs automatically, flags resolution issues, and optimizes layout to maximize square-inch efficiency, as explained in this guide to optimizing resolution and color density for DTF printing.
That sounds technical, but the takeaway is simple. Don't enlarge a tiny image and expect the transfer to save it.
A few file habits matter more than people think:
- Build at final size: If the logo is meant to print at chest size, design it at chest size.
- Keep the background transparent: A stray box behind the art can become an ugly surprise after pressing.
- Watch thin details: Hairline strokes and tiny text may not hold up well in print.
- Clean the edges: Zoom in and remove loose pixels or accidental shadows.
Color decisions happen before you order
If your screen is wildly bright, your art may look different when printed. Good DTF work depends on a controlled color workflow, including RIP software, matching ICC profiles to the ink and film combination, and calibrating your display to D65 (6500K daylight) with gamma 2.2 and brightness around 120 cd/m², as outlined in ColDesi's article on accurate color in DTF printing.
You don't need to become a color scientist to benefit from that. You just need to understand that random monitor settings create random expectations.
The print can only be as accurate as the chain that produced it. Design file, display, RIP, ink, film, and press settings all have to agree.
Gang sheets are where cost control happens
A lot of beginners order one design at a time and waste space. A smarter move is to place several logos, front prints, sleeve hits, and backup pieces on a single gang sheet. That gives you better material usage and lowers waste.
An Auto-build gang sheet builder becomes useful, especially if you're juggling many sizes or designs. Instead of dragging every file around manually and hoping you used the sheet efficiently, the tool can arrange uploads in a way that saves space and reduces layout errors.
If you want to see how the ordering side works in practice, this guide to ordering custom DTF transfers walks through the process clearly.
A simple ordering checklist
Before you upload anything, check these:
- Resolution: Is the file 300 DPI at actual print size?
- Background: Is it transparent where it should be?
- Size: Did you measure the print area on the actual garment style?
- Line weight: Will the smallest details still print cleanly?
- Sheet planning: Can several designs share one gang sheet?
If you're using Lion DTF Transfers, the Auto-build gang sheet builder is one practical option for handling that last step. It helps place multiple graphics on a single sheet, which is useful when you're trying to keep ordering simple and material use efficient.
Perfect Application Every Time A Step-by-Step Guide
A great transfer can still fail if the pressing is sloppy. Most application problems come from rushing. The shirt has moisture in it, the platen pressure is uneven, or the operator guessed at settings instead of matching them to the fabric.
The setup that gives you a clean start
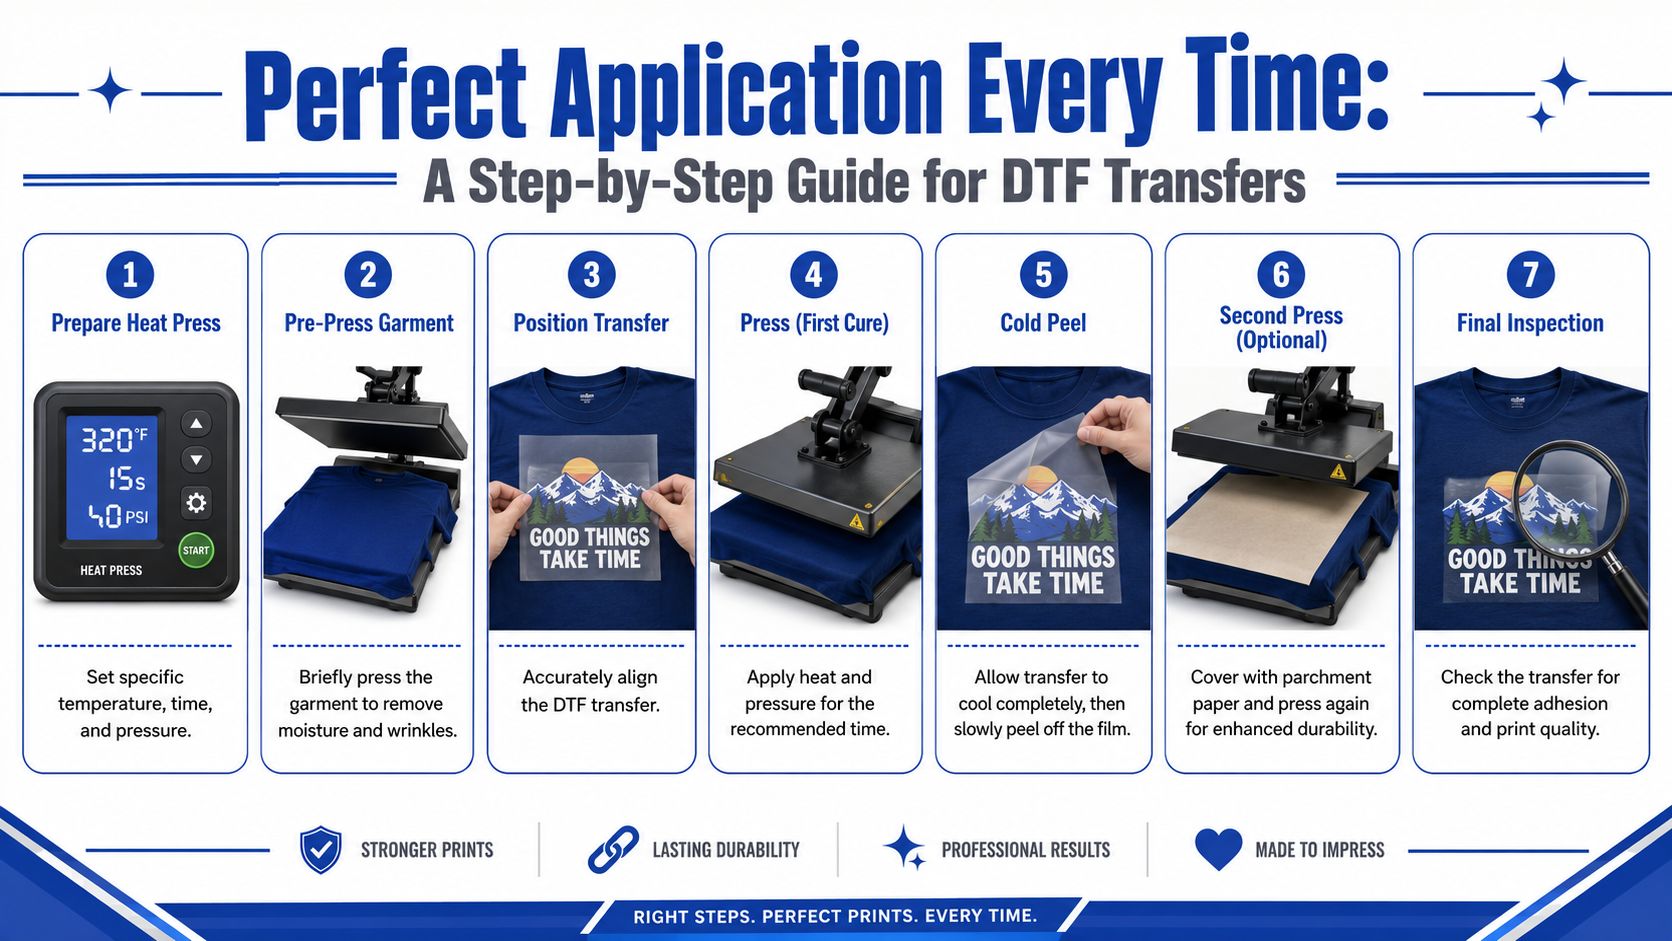
For long-lasting results, standard cotton garments require 270–280°F for 10 seconds, while polyester needs 240–250°F to reduce scorching risk. A pre-press of 3–5 seconds is mandatory to remove moisture, which is the most common cause of adhesion failure, according to this DTF temperature and time chart.
That pre-press is not optional. It flattens wrinkles, drives off moisture, and gives the transfer a stable surface.
Here's the workflow I'd teach a new press operator.
Step-by-step pressing workflow
-
Set the press correctly
Match the settings to the garment. Cotton can usually handle more heat than polyester. Don't use one blanket setting for every fabric that comes through the shop. -
Pre-press the garment
Press the blank for 3–5 seconds. This removes moisture and smooths the print area. -
Place the transfer carefully
Align it with the collar, side seams, or placement guide you use in your shop. Bad placement ruins good prints. -
Run the main press
Use the temperature and time suited to the garment. Apply steady, even pressure. -
Instantly hot peel
Follow the transfer's peel instructions. -
Re-press for finish and durability
Cover with parchment paper and press again briefly. Earlier source material on DTF adhesion notes that a post-press re-press of 5-8 seconds helps lock the design in for extended durability. That second press also improves the finished hand. -
Inspect before stacking
Check all edges, corners, and fine details before moving to the next shirt.
Shop-floor habit: Don't judge the job by the center of the print. Check the corners and the thinnest details first. That's where failures show up.
Fabric guide you can actually use
| Fabric | Heat | Time | Notes |
|---|---|---|---|
| Cotton | 270–280°F | 10seconds | Good starting zone for standard tees |
| Polyester | 240–250°F | 5–7 seconds | Lower heat helps prevent scorching |
| Heavy garments | Follow base fabric setting | Add a little dwell time | Thick material takes longer to heat through |
If you need a practical walkthrough from transfer placement to peel technique, this how to apply DTF transfers guide is a helpful reference.
Mistakes that ruin otherwise good transfers
A few pressing habits cause repeated failures:
- Skipping pre-press: Moisture gets trapped and weakens adhesion.
- Guessing pressure: Uneven pressure leaves parts of the design under-bonded.
- Overheating synthetics: Polyester can scorch or distort before the transfer bonds cleanly.
- Ignoring garment thickness: Hoodies and heavyweight blanks need more heat penetration than thin tees.
If you press with discipline, DTF heat transfers become very repeatable. That's the point you want to reach. Not luck. Repeatability.
Real-World Use Cases for Businesses and Makers
The nice thing about DTF is how many different users can fold it into their workflow without rebuilding their whole business.
A small apparel brand launching new designs
An online seller wants to test several graphics before committing to a big run. DTF lets them order multiple full-color designs, press only what sells, and keep inventory lean. If one design takes off, they can keep pressing from the same artwork style without having to rebuild the design for another method.
Gang sheets help a lot here. A brand can place front logos, back prints, neck tags, and sleeve graphics together instead of ordering each element separately.
A sports team decorating polyester uniforms
Teams often need names, logos, and bold graphics on synthetic garments. That's where careful pressing matters, because polyester needs lower heat than cotton. DTF is useful here because it can decorate performance fabrics that many new decorators find intimidating.
The operator still has to respect the fabric. Lower-temperature application settings are what keep the jersey from scorching while still bonding the transfer.
A business ordering event merchandise
A local company may need shirts, tote bags, and staff apparel with one brand identity across different items. DTF makes that easier because the same visual system can be applied across multiple product types without cutting separate vinyl layers or setting up screens for each version.
That kind of order also favors smart sheet planning. When logos, pocket prints, and event graphics are grouped efficiently, production gets cleaner and waste drops.
A home crafter making gifts
A hobbyist with a solid heat press can use DTF to make family reunion shirts, teacher gifts, birthday apparel, or holiday items without learning a whole print-production department's worth of equipment. The transfer arrives ready to press. The main job is following directions closely.
A lot of people assume DTF is only for production shops. It isn't. It's also a very workable system for careful makers who want better results than craft-vinyl workflows can easily deliver.
That range is why DTF heat transfers keep showing up in so many different businesses. They fit startup brands, established decorators, event merch jobs, school spirit wear, and one-off gift makers without requiring the same production model for every user.
Troubleshooting Common DTF Issues
Even good operators run into bad prints. The trick is learning to diagnose the cause before you waste a stack of garments.
The transfer isn't sticking
This is the most common complaint, and the causes are usually mechanical.
- Check moisture first: If you skipped the pre-press, the garment may have held moisture in the fibers.
- Check your heat setting: Too little heat can leave the adhesive under-activated.
- Check pressure: Uneven pressure can lift corners or thin details.
- Check fabric choice: Some garments need gentler settings and a little more care in pressing.
If the print looks attached but an edge starts to rise, stop and test the rest of the shirt before delivering it.
The print looks dull or off-color
This usually starts earlier in the workflow than people think. The design file may be weak, the monitor may be misleading, or the transfer may have been pressed too aggressively for the garment.
Also inspect the press. If one side applies heat differently than the other, you can get inconsistent finish and bonding across the same design.
The print feels too heavy or plastic
Sometimes that's normal for the artwork. A large chest-to-chest graphic with solid coverage will have more presence than a small logo. But sometimes the feel gets worse because the operator over-pressed the transfer or used too much heat.
A short finishing press under parchment can help smooth the surface. Repeated unnecessary pressing usually won't.
Use pre-wash quality checks
Instead of waiting for a wash test, you can catch problems immediately. According to this guide on common DTF transfer issues and application tips, users can perform non-wash checks like the cold tug test and fingernail peel check to detect lifting. The same source notes that uneven heat or pressure causes 40% of transfer failures.
Try these right after the shirt cools:
- Cold tug test: Gently tug near the edge of the print. You're checking for lifting, not trying to damage it.
- Fingernail peel check: Lightly test a corner or edge. If it lifts easily, bonding is incomplete.
- Surface inspection: Look for silvering, bubbles, or corners that didn't seat properly.
These checks save time and reputation. They let you reject a bad press before it becomes a customer complaint.
If you want DTF heat transfers that are easy to order and simple to fit into a practical production workflow, Lion DTF Transfers offers custom transfers, gang sheets, and an Auto-build gang sheet builder that helps organize multiple designs efficiently before pressing.