


When it comes to St. Patrick's Day designs, you're tapping into a massive retail opportunity. The trick is to create visuals that go way beyond the expected. It’s all about blending those classic motifs we all know—like shamrocks and leprechauns—with modern typography and unexpected color palettes to create apparel people genuinely get excited to wear.
For any print business, that means designing something that’s not just festive, but actually sells.
Creating a St. Patrick's Day Design That Sells
St. Patrick's Day is more than just a cultural celebration; it's a huge commercial event, especially in the apparel world. The real key to cashing in is to create a St. Patrick's Day design that feels fresh, clever, and something people want to be seen in. While the classic symbols are a solid starting point, the designs that truly take off usually put a unique spin on them.
You have to think about who you're selling to. Are you designing for a rowdy local pub crawl, a family-friendly street festival, or a trendy online boutique with a younger audience? Each one demands a totally different vibe. A design for a pub crawl might lean into witty drinking slogans, while a family-focused design would work better with cute leprechauns and bright rainbow graphics.
Moving Beyond the Basics
To make your products really stand out from the sea of green, start with these core elements:
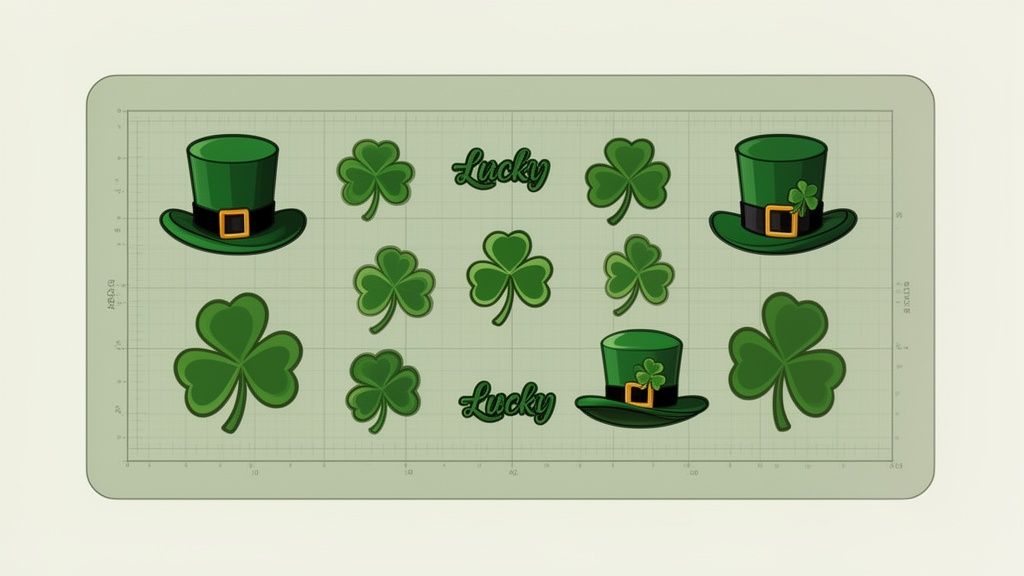
- Unique Motifs: Don't just slap a single shamrock on a shirt and call it a day. Think about creating patterns, weaving in Celtic knots, or using stylized harps. Combining traditional symbols in unexpected ways is what creates visual interest. For instance, a distressed clover integrated with some cool vintage-style typography can catch the eye of a more fashion-forward buyer.
- Clever Typography: The fonts you pick can completely change the personality of your design. A bold, clean sans-serif might be perfect for a minimalist "Lucky" shirt, while an ornate Celtic script gives a more traditional, authentic feel.
- Modern Color Palettes: Green is obviously non-negotiable, but you don't have to be limited to just one shade. Play around with a whole spectrum of greens, from mint to deep emerald. Then, pair them with complementary colors like metallic gold, crisp white, or even a surprising splash of orange to make your design more dynamic and eye-catching.
If you're looking to sharpen your design instincts, it's always a good idea to brush up on the fundamentals. Exploring the principles of what makes a good t-shirt design can give you powerful insights that apply to any holiday, not just this one.
Here’s a quick breakdown of how to approach these elements strategically.
Key St. Patrick's Day Design Elements
This table summarizes the essential components and how to apply them for compelling St. Patrick's Day apparel.
| Design Element | Core Concept | DTF Application Tip |
|---|---|---|
| Iconography | Shamrocks, leprechauns, Celtic knots, pots of gold, rainbows | Combine multiple icons or give a modern twist to a classic. A geometric shamrock pattern is more unique than a single, static icon. |
| Typography | Celtic scripts, bold sans-serifs, vintage handwritten fonts | Font choice dictates the mood. A playful font for a fun slogan, or an elegant script for a more traditional "Sláinte" design. |
| Color Palette | Greens, golds, oranges, whites | Use a range of greens (emerald, mint, kelly) with a metallic gold accent. DTF handles gradients and metallics beautifully, so don't be afraid to add depth. |
| Slogans & Humor | Witty sayings, puns, traditional Irish blessings | Keep text legible and bold. Test font sizes to ensure they print clearly, especially for intricate scripts. |
By thoughtfully combining these elements, you move from creating generic holiday gear to designing apparel that connects with a specific audience and has real commercial appeal.
The Power of DTF Transfers
Direct-to-Film (DTF) transfers are the perfect partner for bringing these vibrant, detailed designs to life. Some print methods struggle with complex colors or fine lines, but DTF is built for it. It excels at producing sharp, full-color graphics with fantastic durability, making it ideal for capturing the tiny details of a Celtic knot or the smooth color transitions in a rainbow.
The real game-changer with DTF is its ability to handle intricate, multi-color designs without the painful, complex setup of screen printing. This unlocks huge creative freedom and makes small-batch, custom orders highly profitable.
The market for this stuff is no joke. Apparel and accessories are a massive part of the holiday spend, with around 31-32% of consumers buying themed items specifically for St. Patrick's Day. That puts clothing right behind food and beverages as a top spending category, spelling out a huge opportunity for print shops.
To really nail your production workflow and keep costs down, you need to be arranging multiple designs on a single sheet. Using an Auto-build gang sheet builder makes this ridiculously easy, streamlining the process so you can pump out a variety of designs for the holiday rush in a way that's both simple and super cost-effective.
Getting Your St. Patrick's Day Designs Print-Ready
A killer design idea is one thing, but turning that concept into a flawless DTF print is where the real magic happens. Getting your digital files set up correctly isn't just a suggestion—it's absolutely essential for prints that pop off the shirt with the same life they have on your screen.
It all starts in your design software. Whether you're an Adobe Illustrator loyalist or you swear by Affinity Designer, the goal is the same: create clean, scalable artwork that will transfer perfectly. I’ve seen it time and again—rushing this prep stage leads to muddy prints, wasted film, and unhappy customers. It pays to get this part right.
This diagram gives a quick look at the core building blocks of a great St. Patrick's Day design.
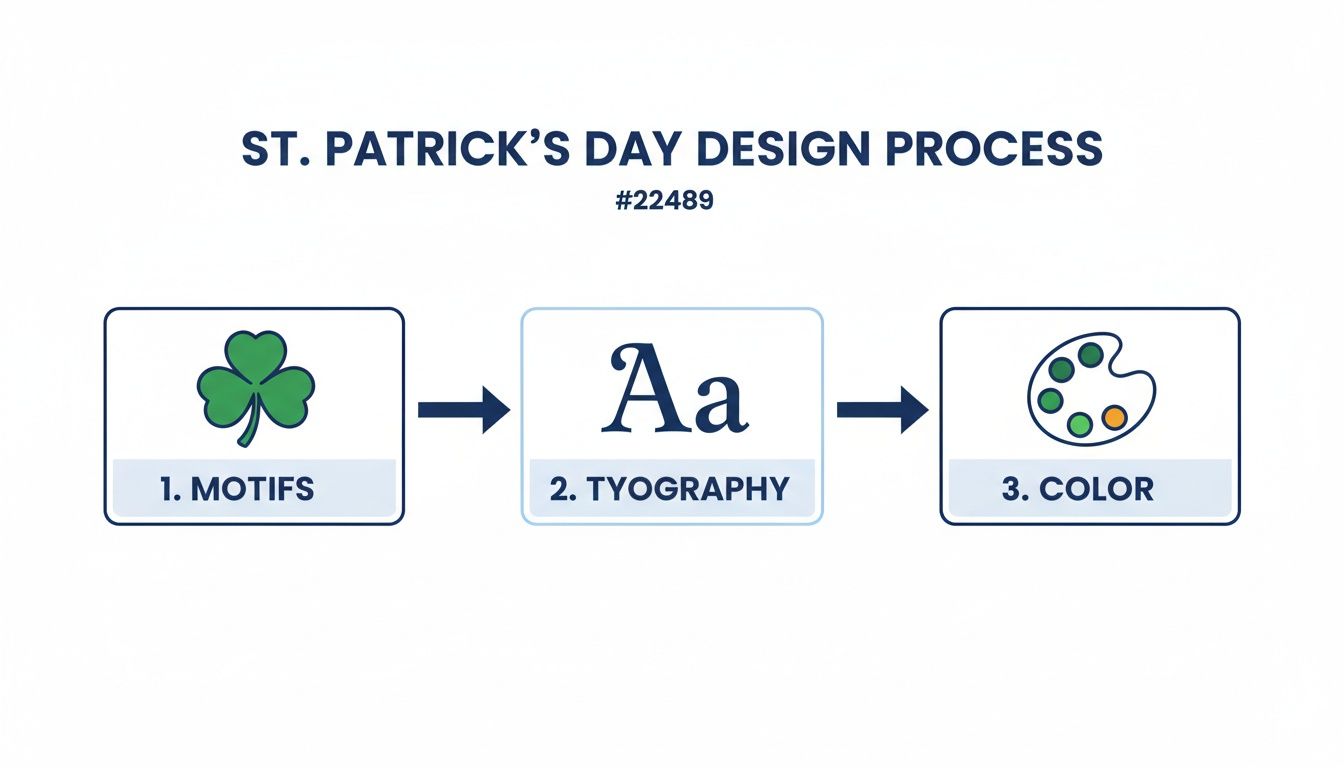
It’s all about making sure the motifs, fonts, and colors you choose all play well together for a killer final product.
Vector is Your Best Friend
Rule number one: always work in vector formats (.AI, .EPS, .SVG) when you can. Unlike pixel-based raster images (like a JPG or PNG), vectors are built with math. That means you can blow up a vector logo from a tiny pocket print to a full-back design with absolutely zero loss in quality.
Try that with a raster file, and you get a pixelated mess with blurry edges. For a professional St. Patrick's Day design with clean lines and sharp text, vector is non-negotiable. If a client sends you a low-res JPG, your first step is always to vectorize it before it ever sees a printer.
Nail Your Color Workflow
Color accuracy can make or break a DTF print. The vibrant greens you see on your backlit monitor (which operates in RGB) can look shockingly different when printed with commercial CMYK inks. The secret to avoiding that disappointment is to design in CMYK from the very beginning.
Here’s the deal:
- Color Gamut: The range of colors a device can produce is its gamut. Your screen's RGB gamut is way bigger than a printer's CMYK gamut. This means your monitor can display bright, electric colors that a printer physically cannot replicate.
- Predictable Prints: When you design in CMYK, you're working within the printer's native color space. This gives you a much more realistic preview of the final transfer and stops that vibrant lime green from turning into a sad, muted olive on the shirt.
Setting your document to CMYK is one of the biggest moves you can make to level up your prints from amateur to pro. You're taking control of the outcome instead of leaving it to chance.
Lock in the Technical Details
Beyond vectors and color modes, a few more technical specs are crucial for a file that prints without a hitch. These are the details that ensure the DTF printer reads your design perfectly every time.
First up is resolution. Your file must be 300 DPI (dots per inch) at the exact size you want it to print. This is the industry standard for high-quality apparel printing and the only way to guarantee your details come out sharp, not soft.
Next is transparency. Your artwork needs a transparent background—no exceptions. When you save your final file (usually as a PNG), make sure transparency is enabled. This tells the printer exactly where to print ink and, just as importantly, where not to. Without it, you’ll get a big white box printed around your design. For a deeper dive, check out our guide on creating custom heat transfer designs.
Finally, once your designs are prepped, arranging them on the film is your next chance to maximize profit. Our Auto-build gang sheet builder takes all the guesswork out of this, automatically nesting your files to use every square inch of film. It’s not just convenient; it’s a powerful tool for slashing your per-print cost and making your entire workflow more efficient.
Using a Gang Sheet to Maximize Your Profits
Alright, your design files are prepped and ready to go. Now comes the part where smart business strategy takes over. Sure, you could print one design at a time, but that's a slow, expensive way to work. If you really want to lower your per-print cost and see your profit margins climb, the gang sheet is your best friend.
A gang sheet is really just one large DTF transfer sheet where you arrange—or "gang up"—a bunch of different designs. Instead of paying for a separate transfer for every single graphic, you pay for one big sheet and pack it as tightly as you can. For a high-volume holiday like St. Patrick's Day, this method completely changes the economics of your production.
The Strategy of Smart Placement
The goal here is simple: treat the film like prime real estate and leave zero wasted space. This means thinking like a puzzle master about how you arrange every single St. Patrick's Day design. You'll want to mix and match different sizes and shapes to create a layout that's incredibly dense and efficient.
Think about it. For a big St. Paddy's Day rush, you're not just making one thing. You're probably printing for a whole range of products:
- Full-Front Adult Tees: These are your anchors, usually around 10-12 inches wide.
- Youth Shirts: Smaller versions of the main designs, maybe 8-9 inches wide.
- Left-Chest Logos: Small but essential 3-4 inch designs for polos or hoodies.
- Accessory Graphics: Tiny 2-3 inch designs for things like hats, koozies, or tote bags.
By tucking those smaller accessory graphics into the gaps around your big t-shirt designs, you're essentially getting them for free. Every square inch of film you fill is another dollar that stays in your pocket instead of ending up in the trash can. This is how you can drive your cost per transfer down, with some pricing getting as low as $0.017 per square inch.
The magic of a well-built gang sheet is turning empty space into pure profit. It's the difference between printing a few shirts and running a scalable, profitable apparel business.
For anyone serious about making money with their designs, learning how to build an effective layout is a non-negotiable skill. If you want a deeper dive, you can explore the different types of DTF gang sheets and how to use them to scale up.
Making It Effortless with an Auto-Builder
Now, you could manually arrange dozens of designs in a program like Adobe Illustrator, but it's a tedious, time-consuming puzzle. You have to rotate, nudge, and reposition each graphic, trying to meticulously fill every last gap. It's doable, but it’s not efficient when you have orders piling up.
This is where technology gives you a massive leg up. Our Auto-build gang sheet builder takes this whole process off your plate. You just upload all your prepared St. Patrick's Day design files, tell it the quantities you need for each, and the software does all the heavy lifting for you.
This tool automatically nests your graphics into the most space-efficient layout possible, guaranteeing you get the absolute best value from every sheet.
What used to take an hour of careful manual work can now be done in just a few minutes. This doesn't just save you a ton of time; it also hits a level of optimization that's nearly impossible to achieve by hand. By letting an automated tool handle the layout, you can focus your energy on what you do best: creating awesome designs and growing your business. It's simply the smartest way to prep for the holiday rush.
Perfecting Your DTF Heat Press Application
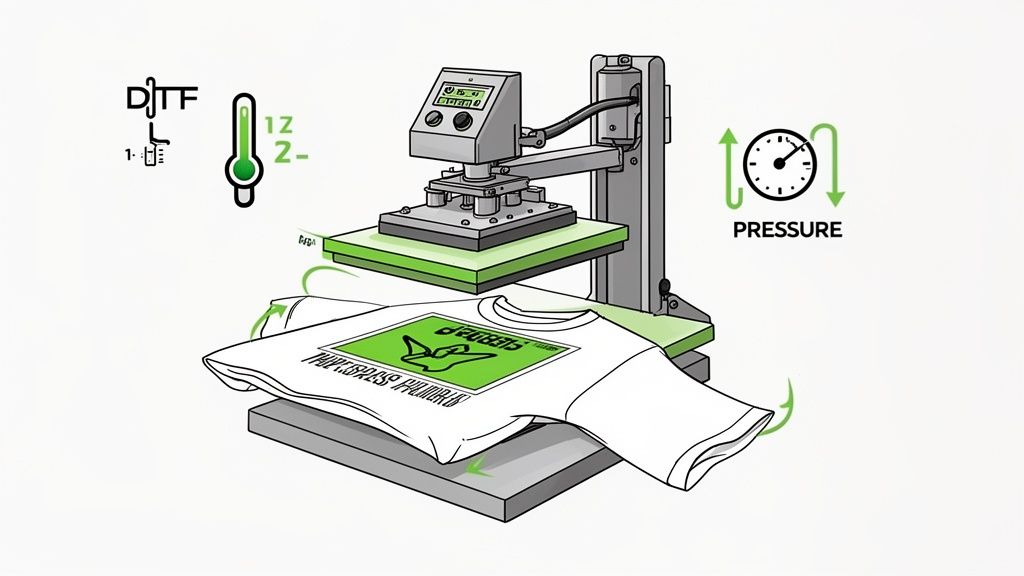
You’ve got your amazing graphics lined up, perfectly arranged with the Auto-build gang sheet builder. Now comes the moment of truth: the heat press application. This is where your digital St Patrick's day design becomes a real, wearable product. Getting this step right is the difference between a print that’s just okay and one that’s vibrant and incredibly durable.
Even a tiny mistake here can sink the final quality. Think about it—inaccurate temperature, uneven pressure, or the wrong timing can lead to transfers that peel, crack, or fade way too soon. To get that professional-grade finish, you need a consistent, dialed-in process every single time.
Setting Up for Success
Before that transfer even touches the garment, a little prep work goes a long way. The first thing you should always do is pre-press your garment for 5-10 seconds. This simple move zaps any lingering moisture and smooths out wrinkles, giving you a perfect canvas for the transfer to stick to.
Positioning is just as crucial. Take a second to line up your transfer with care. You can use a t-shirt alignment tool or just fold the shirt in half to find your center line. Trust me, a crooked design is one of the fastest ways to make a professional product look amateur.
A great press starts with a great foundation. Taking those extra 15 seconds to pre-press and align your design is the single best investment you can make for a flawless, professional-looking final product.
With the garment prepped and ready, it’s time to dial in the settings for your Lion DTF hot-peel transfers.
Ideal Heat Press Settings for Lion DTF Transfers
Different fabrics need slightly different settings to get the best adhesion and longevity. The goal is simple: melt the adhesive just enough to create a solid bond with the fabric fibers, but not so much that you scorch the garment.
Here are the settings we’ve tested and swear by:
| Fabric Type | Temperature | Pressure | Time |
|---|---|---|---|
| 100% Cotton | 280°F | Medium to Firm | 10 Seconds |
| 50/50 Cotton/Poly Blends | 270-280°F | Medium | 10 Seconds |
| 100% Polyester | 240-250°F | Light to Medium | 7-8 Seconds |
Once that initial press is done, let the garment rest for just a few seconds before you perform a smooth, consistent hot peel. After peeling, grab a Teflon sheet or some parchment paper, cover the design, and give it a second press for 5-7 seconds. This final press is what really locks the design into the fabric, making it more durable and giving it a softer, more integrated feel.
Ensuring Long-Lasting Durability
This holiday is a massive opportunity. Consumers spent a record $7.2 billion on St. Patrick's Day in 2024, which shows the huge demand for themed products like custom apparel. When you’re jumping into a market that big, product quality is what keeps customers coming back. You can learn more about the economic impact of this holiday on coactivewealthstrategists.com.
To make sure your customers are happy long after the party's over, good post-press care is a must. Following these guidelines will help your products live up to the Lion DTF standard of lasting 100+ washes.
- Wait 24 Hours: Always tell your customers to wait at least 24 hours before the first wash. This gives the transfer adhesive time to fully cure and bond.
- Wash Inside Out: Washing the garment inside out in cold water is the best way to minimize friction and wear on the design.
- Avoid Harsh Chemicals: Instruct users to stay away from bleach and fabric softeners. They can break down the transfer's ink and adhesive over time.
- Tumble Dry Low: High heat is the enemy. Tumble drying on a low setting or, even better, hanging to dry will preserve the print's color and integrity.
By mastering these application steps and passing on the right care instructions, you can confidently create top-quality apparel that not only looks fantastic but is also built to last.
Finding Profitable Markets for Your Apparel
You've got incredible designs ready to go, and your production process is dialed in. Now for the most important part: finding people who actually want to buy your St. Patrick's Day apparel. A killer design is only profitable if it gets in front of the right crowd. Instead of just throwing your work out there and hoping for the best, zeroing in on specific, high-demand niches can make all the difference.
Two of the most profitable markets for St. Paddy's Day gear are, without a doubt, local hospitality businesses and big public events. Both of these groups have an urgent need for custom apparel, and they're actively looking for solutions during the holiday rush. If you tailor your DTF transfers to solve their specific problems, you can become their go-to printer.
Before diving into specific markets, it's helpful to understand the different types of customers you might be targeting. Each group has unique needs, from one-off novelty tees to large-volume staff uniforms.
Here’s a quick breakdown to help you focus your efforts:
St. Patrick's Day Customer Segments
| Customer Segment | Primary Need | Recommended Design Focus |
|---|---|---|
| Local Bars & Pubs | Staff uniforms and merchandise | Branded logos with shamrocks; city-specific pub crawl designs |
| Event Organizers | Volunteer/staff shirts, official merch | Bold event titles, dates, sponsor logos |
| Corporate Teams | Office party or team-building apparel | Funny, work-safe slogans; subtle company branding |
| Families & Groups | Matching shirts for parades or parties | "First St. Paddy's Day," "Mommy's Lucky Charm," group names |
| Individual Party-Goers | Humorous, trendy, and novelty tees | Pop culture references, drinking jokes, clever Irish sayings |
Thinking about these segments helps you craft designs and marketing messages that resonate directly with what each customer is looking for, instead of trying to be everything to everyone.
Tapping into the Local Bar and Restaurant Scene
Local bars, pubs, and restaurants are the heart of St. Patrick's Day celebrations. For these businesses, this holiday isn't just a party—it's a massive revenue event. That makes them a prime audience for custom apparel, both for their staff to wear and for merchandise to sell to the crowds.
You can pitch them with a few targeted ideas:
- Custom Staff Shirts: Offer to create designs that blend their bar's logo with festive St. Paddy's Day elements. It gives their whole team a polished, unified look during the busiest day of the year.
- Merchandise for Sale: Propose unique, location-specific shirts that patrons will actually want to buy as a souvenir. Think designs like, "St. Paddy's Pub Crawl Champion: [Bar Name] 2024."
- Promotional Swag: Suggest using DTF transfers for branded koozies, tote bags, or hats. They can sell them or use them as giveaways to promote their events and keep their name top-of-mind.
The key is to frame your service as a marketing solution. You're not just selling t-shirts; you're offering them a way to boost brand visibility and cash in on the holiday hype.
St. Patrick's Day is the single biggest day of the year for U.S. bars and restaurants. Back in 2018, beer sales shot up by 174% compared to a typical day, and spirits sales jumped 153%. The commercial power here is enormous.
This data is your proof. These businesses have a budget for the holiday and are actively looking for ways to capitalize on the surge of customers.
Connecting with Parades and Festivals
Beyond individual businesses, large-scale events like city parades, festivals, and "Shamrock Shuffle" fun runs create a huge, concentrated demand for commemorative apparel. Organizers need gear for volunteers and staff, and they almost always sell official merchandise to attendees.
The trick is to reach out to these organizers well in advance. You can usually find contact info on event websites or local community pages. When you get in touch, have a portfolio ready with your best St. Patrick's Day concepts. Your pitch should revolve around reliability and quality—organizers are on a tight deadline and need a partner who can deliver a large volume of high-quality prints without any drama.
Once you’ve locked in a good niche, the work isn't over. You need strategies that don't just secure one-time sales but build lasting relationships. The real goal is to increase customer lifetime value and boost profits by turning that single parade order into an annual partnership. That's how you build a sustainable business.
No matter which market you target, production efficiency is what keeps you profitable. This is where our Auto-build gang sheet builder becomes your secret weapon. You can upload all your designs for these different customers at once, and it will automatically arrange everything to be as cost-effective as possible. It lets you serve these high-volume markets with speed and precision, so you can focus on building client relationships instead of manually dragging files around.
Common Questions About St. Patrick's Day Designs
When you're in the thick of the St. Patrick's Day rush, questions always come up. You might be wrestling with a tricky design file, figuring out the best shirt to print on, or just trying to get your gang sheets laid out without wasting a ton of film. Getting quick, reliable answers is a must.
This section is your go-to guide for those common hurdles. We'll cover everything from the nitty-gritty technical stuff to the best garment choices, based on what we see work year after year.
What Is the Best File Format for a St. Patrick's Day Design?
Hands down, the absolute best format is a vector file. We're talking .AI (Adobe Illustrator), .EPS, or .SVG. Because vector graphics are made from mathematical paths instead of pixels, you can blow them up or shrink them down without losing an ounce of quality. Your pocket logos will be just as crisp as your full-back designs.
If vector isn't an option, your next best bet is a high-resolution PNG with a transparent background. The key here is to save it at 300 DPI at the exact size you plan to print it. If you don't, you're risking a blurry, pixelated transfer that nobody wants.
How Can I Ensure My Greens Look Right After Printing?
Ah, the age-old color matching problem, especially with those iconic St. Paddy's Day greens. The single most important thing you can do is design in a CMYK color profile right from the start.
Your computer screen uses RGB (Red, Green, Blue) and can display a ridiculously wide range of bright, vibrant colors. A CMYK printer simply can't reproduce all of them. By designing in CMYK, you're getting a much more realistic preview of the final printed color. It's the difference between that electric lime green you fell in love with on-screen and the dull, muddy olive green that actually comes out on the shirt.
Pro Tip: For jobs where color is absolutely critical, order a small sample print with a color chart. This shows you exactly how your chosen greens will look on the actual fabric, giving you total peace of mind before you go all-in on a big production run.
Can I Print Small, Intricate Text on My Designs?
You definitely can, but there’s a limit. DTF is amazing at capturing fine detail, but you can go too small with text. When lines are extremely thin, the adhesive powder doesn't have enough surface area to cling to properly. This can lead to letters peeling or bits washing away after a few wears.
As a solid rule of thumb, keep your text lines at a minimum thickness of 0.018 inches (which is roughly 1.3 points in design software). If you're dead set on using a super thin or ornate Celtic font, a simple trick is to add a very subtle stroke or outline. This gives the letters just enough extra body to print, press, and hold up reliably.
What Are the Best Garments for St. Patrick's Day DTF Transfers?
This is where DTF really shines—its versatility is incredible. You're not locked into just one type of fabric, which opens up a ton of creative options for your holiday lineup.
Here are the go-to choices:
- 100% Cotton: The classic for a reason. Cotton gives the transfer a great surface to bond with, leading to really vibrant and tough prints. It’s perfect for your standard tees and hoodies.
- Cotton/Polyester Blends: Think 50/50s or tri-blends. These have a softer feel and are less likely to shrink, making them great for more premium, fashion-forward apparel.
- 100% Polyester: Ideal for performance gear. If you're printing for a "Shamrock Shuffle" 5K or a local sports team, this is your fabric. Just remember to drop your pressing temperature a bit to avoid scorching it.
Ultimately, the right garment depends on who you're selling to. The local pub crawl might want durable, classic cotton tees, while an online boutique's customers might prefer the feel of a softer blended shirt.
How Can I Make My Production Process More Cost-Effective?
During a busy season, efficiency is everything. If you want to boost your profitability, the most impactful thing you can do is use every square inch of your transfer film by creating a gang sheet. But trying to manually cram a dozen different designs onto a sheet is a massive time-sink and almost always leaves expensive empty space.
This is precisely why our Auto-build gang sheet builder is such a game-changer. It takes all your different St. Paddy's Day graphics—big shirt designs, small hat logos, everything—and automatically nests them into the tightest possible layout. It eliminates waste, slashes your cost per design, and gives you back a huge chunk of your prep time. For anyone looking to scale up, it’s an absolute must-have.
Ready to bring your St. Patrick's Day ideas to life with vibrant, durable, and easy-to-use transfers? At Lion DTF Transfers, we make professional-quality printing simple. Build your own custom sheet with our Auto-build gang sheet builder and see how cost-effective your next project can be.