


Ready to turn your design ideas into awesome printed tee shirts? It’s easier and more affordable than you might think, especially with Direct-to-Film (DTF) transfers. This method is a game-changer for anyone looking to create vibrant, durable, and professional-looking apparel that people will actually want to wear.
Bringing Your Custom T-Shirt Vision to Life
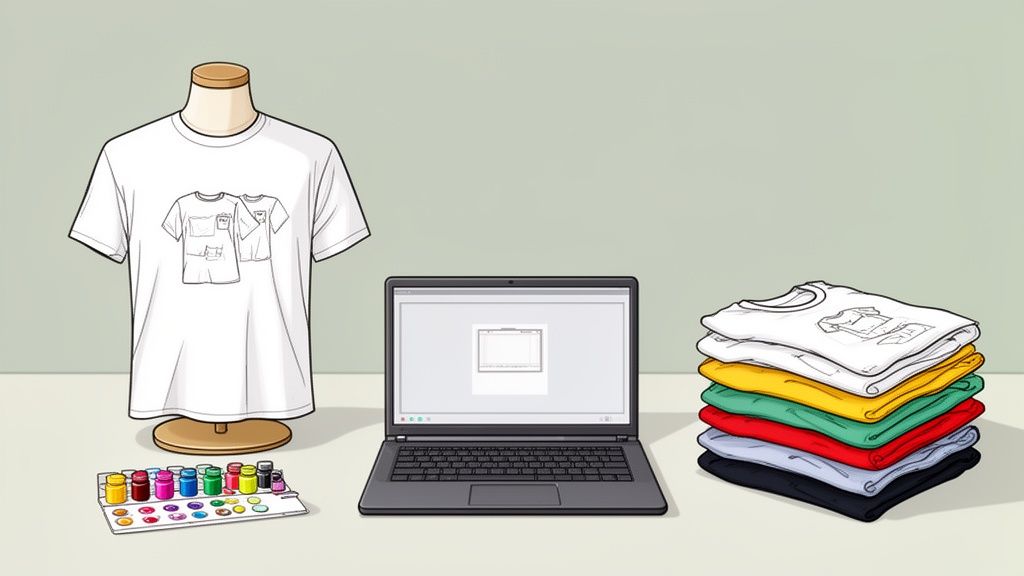
So, you want to make custom t-shirts. You're in the right place. Whether you’re a small business owner dreaming up a new merch line, a print shop pro looking to scale up, or just someone designing for a one-off event, this guide will walk you through the entire process. We’re skipping the generic fluff and getting straight to the practical steps that matter.
This is about more than just printing. It’s about giving you the tools and confidence to produce top-tier custom apparel that genuinely stands out.
Why This Guide Is Different
I’m not here to drown you in technical jargon. Instead, we’ll focus on actionable strategies that deliver real-world results. We're going to lean heavily on DTF transfers, a method that offers incredible flexibility and quality for creators at every skill level. You'll see how this technology makes it possible to produce full-color, complex designs without breaking the bank.
Here’s a sneak peek at what we'll cover:
- Design Prep: How to format your artwork so it prints flawlessly every single time.
- Cost-Saving Hacks: Smart strategies to dramatically lower your per-shirt cost.
- Application Process: A step-by-step walkthrough for a perfect heat press application.
The goal is simple: to equip you with the know-how to create custom printed t-shirts that not only look fantastic but are also profitable and built to last. It’s about building confidence in your entire workflow, from the first design click to the final press.
A Smarter Workflow for Better Results
One of the biggest headaches in the custom apparel world is juggling costs and time. That's why we'll also look at tools designed to make your life easier.
Take our Auto-build gang sheet builder, for example. This tool is a perfect illustration of working smarter. It automatically arranges multiple designs onto a single sheet, a technique that slashes material waste and, in turn, your costs. It’s a simple, easy-to-use solution that delivers immediate value and makes your projects more cost-effective right from the start.
Alright, let's get into it.
Preparing Your Artwork for Perfect DTF Prints
The secret to a stunning custom t-shirt isn't just the press; it all starts with your design file. Before you even warm up your heat press, the quality of your artwork sets the stage for a professional-looking final product. Getting this step right is what separates a sharp, vibrant print from a blurry, amateurish one.
Think of your design file as the blueprint. A flawed blueprint guarantees a flawed result, no matter how great your transfers or t-shirts are. That's why dialing in a few technical details is non-negotiable if you want a clean, professional finish every time.
Resolution and Background Are Everything
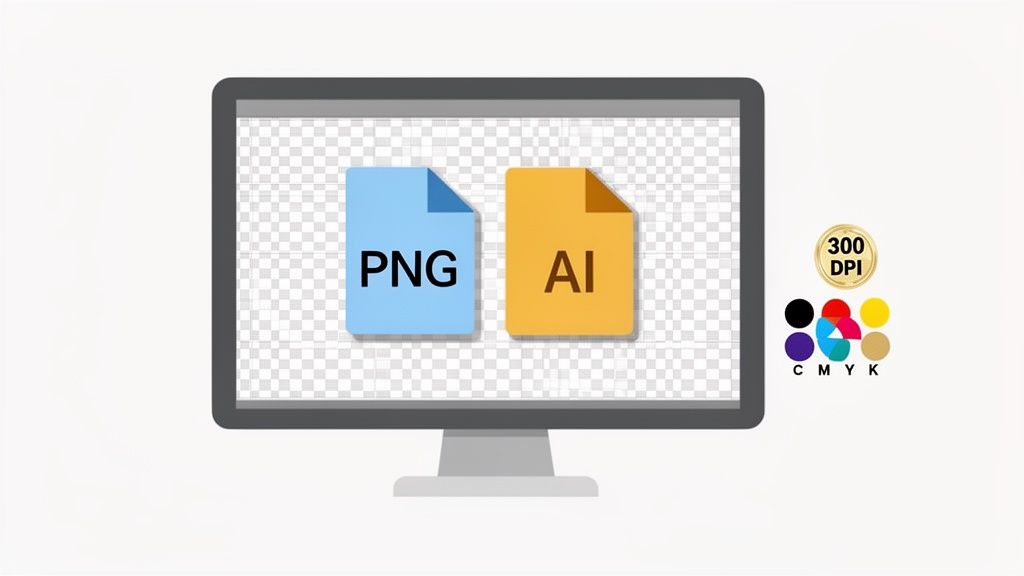
First things first, let's talk clarity. For any DTF print, your artwork absolutely must have a resolution of 300 DPI (dots per inch). Submitting anything less is a recipe for a pixelated, fuzzy image that just won't look good on a shirt. This high resolution is the industry standard for a reason—it ensures every little detail is captured with precision.
Just as critical is the background of your file. It needs to be transparent. If you upload a design with a white or colored box behind it, our printers will print that box. You’ll end up with a big, unwanted square around your graphic on the final shirt—a costly and frustrating mistake that's super easy to avoid.
Key Takeaway: Lock this in: 300 DPI resolution and a transparent background. These two settings are the foundation of a high-quality DTF print. Double-check them before you upload anything, and you'll save yourself a world of headaches and wasted materials.
Choosing the Right File Type
The format of your file also plays a major role in the outcome. You'll generally be working with two main types: raster and vector.
- Raster Files (PNG): These are pixel-based, making them perfect for highly detailed artwork, photos, or designs with complex color gradients. A high-resolution PNG is the most common and versatile format for DTF, and it's what our easy-to-use Auto-build gang sheet builder is optimized for.
- Vector Files (AI, EPS): These are built with mathematical formulas instead of pixels, which means you can scale them to any size without losing an ounce of quality. They're ideal for logos, text-based graphics, or any design that needs to be resized often.
While both are great, a properly saved 300 DPI PNG with a transparent background is typically all you need for fantastic, professional results. For a deeper dive into crafting the perfect file, check out our guide on custom heat transfer designs.
Sidestepping Common Design Pitfalls
Beyond the file specs, a few common design elements can cause issues during printing. To make sure your vision translates perfectly from the screen to the fabric, try to avoid these mistakes:
- Lines that are too thin: Super-fine lines or tiny text can struggle to print clearly and may not have enough surface area to adhere properly to the garment.
- Complex gradients or glows: While DTF handles color beautifully, really soft gradients or "glow" effects can sometimes print with harsh edges instead of a smooth fade.
- Color mismatches: Always design your artwork in a CMYK color space, not RGB. Your computer screen uses RGB (light), but printers use CMYK (ink). Designing in CMYK from the start gives you a much more accurate preview of how the final colors will look when printed.
Using Gang Sheets to Lower Your Printing Costs
Once your artwork is print-ready, the real strategy comes into play: figuring out how to get your transfers made without wasting money. This is where mastering the gang sheet becomes a game-changer for anyone doing printed tee shirts custom orders. Instead of printing one design at a time, a gang sheet lets you cram multiple graphics onto one big sheet of DTF film.
Think of it like cutting cookies from a sheet of dough. You wouldn't space them out an inch apart, right? You’d get them as close as possible to minimize the scraps. The same logic applies here—every unused inch of film is money down the drain, so packing your designs tightly is the secret to a profitable workflow.
The Power of Smart Nesting
The serious savings come from a technique called "nesting," which is just a fancy term for strategically arranging different designs to use up every last bit of space. For instance, a single t-shirt order might need a large back graphic, a small left-chest logo, a sleeve hit, and a custom neck tag.
Instead of paying for four separate transfers, you can nest them all onto one gang sheet. That simple move can slash your cost-per-print.
- Combine Order Elements: Mix large and small designs for the same job onto one sheet.
- Fill the Gaps: Use those tiny neck tags or logos to fill the awkward empty spaces around your main graphics.
- Plan Ahead: If you have extra room, print designs for future orders you know you'll need.
Streamlining with an Auto-Build Tool
Look, arranging designs by hand can be a real drag, especially when you have a complex order with lots of little pieces. This is exactly why our Auto-build gang sheet builder is such a powerful ally. You just upload your individual PNG files, and the software automatically nests them for you in the most efficient, cost-effective layout possible.
It completely takes the guesswork and human error out of the equation, making the whole process incredibly easy. You get the tightest arrangement every single time without sinking hours into a design program. That’s how businesses scale. For a deeper dive, check out our complete guide to DTF gang sheets.
This strategy of maximizing film usage isn't just a neat trick; it's a fundamental business practice for any successful print shop. By cutting down your material waste, you directly boost your profit margin on every t-shirt you sell.
The custom apparel world is blowing up, and efficiency is what separates the winners from the rest. The custom screen printing industry in the U.S. is projected to hit $12.8 billion by 2025, with 15,427 businesses competing for a piece of the pie. This insane growth highlights a massive opportunity for anyone who can produce quality gear affordably. Tools like our cost-effective Auto-build gang sheet builder are no longer optional—they're essential for staying competitive. You can discover more about the custom printing market and its growth on IBISWorld.com.
The Complete Heat Press Application Process
You’ve got your DTF gang sheet in hand, and now it's time for the magic. The heat press is where your printed film transforms into a durable, professional-looking design on fabric. Nailing this part of the process is what separates an amateur print from a shirt that looks retail-ready and stands up to wear and tear.
Getting the settings right on your press is everything. Different fabrics react differently to heat, and getting it wrong can mean a scorched shirt or, even worse, a transfer that starts peeling after the first wash.
Dialing In Your Heat Press Settings
Think of your heat press settings as the recipe for a perfect print. The key ingredients are temperature, pressure, and time.
For most DTF transfers, the sweet spot for temperature is somewhere between 240-280°F. You'll want to use medium to firm pressure—enough to bond the ink into the fabric fibers but not so much that you flatten the texture of the garment.
The application itself is a simple two-step press:
- First Press (The Application): This is your main press, lasting about 7-10 seconds. It’s just long enough to melt the adhesive and transfer the ink from the film onto the shirt.
- Second Press (The Cure): After you peel the film off, a quick second press for 5-7 seconds is what really locks the design in. This final step cures the ink, giving it that soft, matte finish and incredible durability.
Pro Tip: Always use a protective sheet, like a Teflon sheet or parchment paper, for that second press. It keeps the exposed ink from sticking to your hot platen and protects the design, guaranteeing a smooth, clean finish.
My Go-To Pressing Workflow
Once my settings are locked in, I follow the same workflow every single time for consistent results. It’s pretty straightforward.
First, always pre-press the shirt for 5-7 seconds. It seems like a small step, but it’s crucial. This gets rid of any moisture and wrinkles, giving you a perfectly flat, dry canvas for the transfer.
Next, I carefully position the DTF transfer. Take your time here. I always use a t-shirt ruler or at least measure to make sure everything is centered and straight. A crooked design is a dead giveaway of a rush job. Once it looks good, it's time for that first press.
This infographic shows exactly why we bother with gang sheets in the first place—it's all about efficiency. 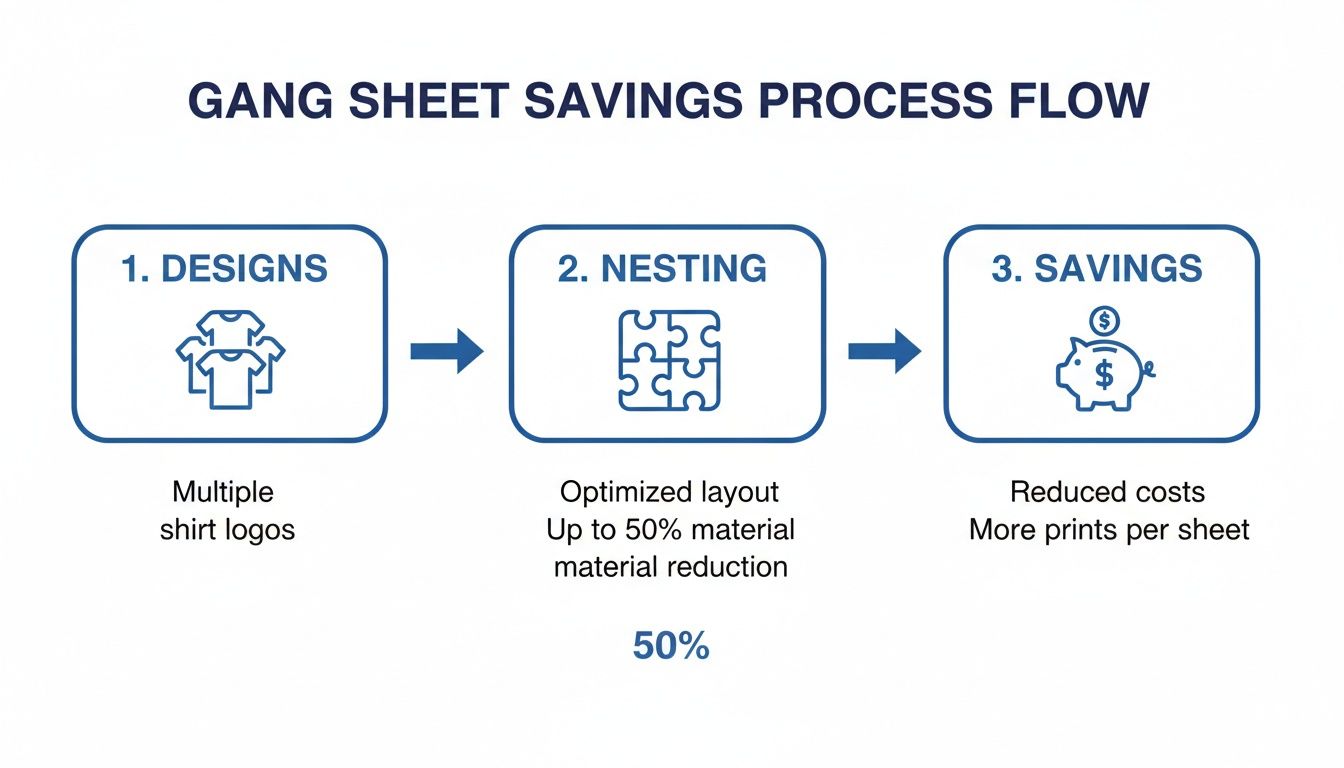 By nesting multiple designs together, you slash material waste and drive down your cost per print. It’s a strategy that our Auto-build gang sheet builder makes incredibly easy and cost-effective.
After that first press, let the transfer cool down completely before you peel the film. Don't rush it. Peel it back in a smooth, steady motion. Then comes the final, most important step: the second press. This is what gives DTF transfers their reputation for longevity, allowing them to withstand over 100 washes.
If you want an even more detailed breakdown, we’ve put together a complete guide on how to use a heat press machine.
It's no surprise the custom t-shirt market is blowing up, with projections showing it will grow from USD 6.84 billion in 2025 to USD 13.19 billion by 2031. Digital methods like DTF are a huge part of that, growing at a massive 12.28% CAGR because they offer such an efficient way to go from a digital file to a finished product.
Heat Press Settings for Common Fabrics
To take the guesswork out of it, here are the go-to settings I use for the most common fabrics you'll be printing on.
| Fabric Type | Temperature | Press Time (1st Press) | Pressure | Press Time (2nd Press) |
|---|---|---|---|---|
| 100% Cotton | 280°F | 10 seconds | Medium-Firm | 5-7 seconds |
| Polyester | 240-250°F | 7-10 seconds | Medium | 4-6 seconds |
| 50/50 Cotton-Poly Blend | 270-280°F | 10 seconds | Medium | 5-7 seconds |
| Tri-Blends | 270-280°F | 10 seconds | Medium | 4-6 seconds |
Remember, these are starting points. Your heat press might run a little hotter or cooler, so a quick test print on a scrap piece of fabric is always a good idea before you start a big run.
Why DTF Is a Game-Changer for Custom Apparel
If you really want to get the most out of your print method, you have to understand what makes it tick. Direct-to-Film (DTF) has exploded in popularity for creating printed tee shirts custom made for just about any project, and for very good reason. It hits that sweet spot of quality, versatility, and efficiency that older methods struggle to match.
Think about traditional screen printing. For every single color in your design, you need a separate screen. That process gets expensive and time-consuming, fast—especially for small orders. DTF completely sidesteps that. It prints full-color, photorealistic designs in a single pass, giving you zero color limitations.
Plus, there are no minimum order quantities. This is huge. It means DTF is just as perfect for a one-off sample as it is for a massive production run.
Unmatched Versatility and Durability
One of the biggest wins for DTF is its ability to stick to almost any fabric you can throw at it. Whether you're printing on 100% cotton, slick polyester, common blends, or even tricky materials like nylon and leather, DTF transfers deliver a clean, consistent finish. That kind of flexibility opens up a whole world of creative projects way beyond a standard t-shirt.
And these prints are built to last. When applied the right way, DTF transfers are tested to survive over 100 washes without cracking, peeling, or fading into a ghost of the original design. They also stretch right along with the fabric and have a soft, lightweight feel, so the final product is actually comfortable to wear. That reliability is a massive selling point for anyone building a brand where quality is non-negotiable.
DTF technology empowers creators by knocking down the traditional barriers to entry. The freedom to print any design, on virtually any fabric, with no minimums—that’s what makes it so powerful for businesses and hobbyists alike.
Efficiency That Drives Growth
The sheer efficiency of the DTF process is a major reason it’s taking over. The global custom t-shirt printing market was valued at a massive USD 5.16 billion in 2024 and is on track to hit USD 9.82 billion by 2030. A huge part of that explosion is driven by digital methods like DTF, which are projected to grow at a 12.28% CAGR. Why? Because they excel at handling small, on-demand orders without the painful setup times of screen printing. You can dig into the market's explosive growth and trends over on Grandviewresearch.com.
This speed gives you a serious advantage. Quick turnarounds mean you can jump on market trends, test new designs with almost no risk, and get orders out the door faster.
When you pair that speed with an easy-to-use tool like our Auto-build gang sheet builder, the entire workflow becomes incredibly streamlined and cost-effective. The builder automatically nests your designs to maximize every inch of the film, which drastically cuts down on waste and lowers your cost per print. Suddenly, even the smallest runs become highly profitable. This blend of speed, quality, and affordability is exactly why DTF is redefining the custom apparel game.
DTF vs. Other Customization Methods
Choosing the right decoration method can make or break your project's profitability and quality. While methods like screen printing and HTV have their place, DTF offers a unique combination of benefits that often makes it the superior choice for modern apparel creators. Here’s a quick breakdown of how they stack up.
| Feature | DTF Transfers | Screen Printing | Heat Transfer Vinyl (HTV) |
|---|---|---|---|
| Color Capability | Unlimited colors, gradients, and photorealistic detail | Limited to one color per screen; complex designs are costly | Limited to solid color layers; gradients are not possible |
| Fabric Versatility | Excellent on cotton, polyester, blends, nylon, leather, and more | Best on cotton and blends; requires special inks for other materials | Good on cotton and polyester, but limited on other fabrics |
| Minimum Order Quantity | None. Perfect for one-offs or large runs | High minimums are typical due to extensive setup time and costs | No minimums, but weeding complex designs is very time-consuming |
| Feel on Garment (Hand) | Soft, lightweight, and flexible | Can feel thick and heavy, especially with multiple color layers | Can feel stiff or like a plastic layer on top of the fabric |
| Durability | Excellent; rated for 100+ washes without cracking or fading | Very durable, but can crack or fade over time, especially on darks | Good durability, but can peel or crack if not applied perfectly |
| Detail & Complexity | Handles fine lines, small text, and intricate details perfectly | struggles with very fine details and complex, multi-color designs | Limited by the weeding process; tiny details are difficult to cut |
| Setup & Turnaround | Fast setup; digital file is ready to print almost instantly | Slow, labor-intensive setup involving screens, emulsion, and cleanup | Faster than screen printing, but weeding adds significant time |
As you can see, while screen printing is great for simple, high-volume jobs and HTV works for basic one-offs, DTF truly excels across the board. It combines the full-color detail of a high-end printer with the durability and versatility needed for professional apparel, making it the go-to for creators who refuse to compromise.
Got Questions About Custom DTF T-Shirts?
Once you start prepping your first DTF order, a few questions always seem to surface. We get it. Let’s walk through the most common ones we hear to make sure you can move forward with total confidence and sidestep any costly mistakes.
What File Format Gives the Best Results?
This one’s crucial. For the sharpest, cleanest prints, you should always upload your design as a PNG file with a transparent background at 300 DPI.
That high resolution is what gives your final print that crisp, professional look without any fuzzy edges or pixelation. The transparent background is non-negotiable—it’s what prevents a big, ugly white or colored box from printing behind your actual graphic.
While vector files like AI or EPS are fantastic, a high-quality PNG will get the job done perfectly for the vast majority of projects. It’s also the ideal format for getting the most out of easy-to-use, cost-effective tools like our Auto-build gang sheet builder.
Can I Use a Regular Iron Instead of a Heat Press?
Short answer: please don't. We strongly advise against using a household iron to apply DTF transfers, and here’s why. A proper heat press delivers two things an iron simply can't: consistent temperature and even, firm pressure.
An iron has hot spots and applies pressure unevenly, which leads to a weak, patchy bond between the transfer and the fabric. The result? A print that looks splotchy from the start and will almost certainly crack or peel after just a wash or two. Investing in a quality heat press is the single best move you can make to ensure your custom shirts look professional and are built to last.
Key Takeaway: The difference between an amateur and a pro-grade custom t-shirt often comes down to the application. A heat press isn't just a friendly suggestion; it's a must-have for a durable, high-quality finish you can be proud to sell or wear.
How Does a Gang Sheet Builder Actually Save Me Money?
Our Auto-build gang sheet builder is designed for one primary purpose: to save you real money by using every last inch of the transfer film. It’s all about efficiency and ease of use.
The software’s algorithm is smart. It intelligently nests all your different designs—say, a large back graphic, a small chest logo, and a few sleeve details—as tightly together as possible, like a game of Tetris.
This completely eliminates wasted space on the film. Since you pay for the entire sheet, fitting more designs onto it directly lowers your cost-per-print. It’s a simple equation: less material waste equals more profit in your pocket, whether you're making ten shirts or a thousand. The builder makes this cost-effective process incredibly simple.
And once you've perfected your t-shirts, you'll need to get them to your customers. For a great breakdown of the logistics side of things, check out this helpful a small business guide to Australian parcel delivery. Nailing your shipping process is just as important as nailing the print quality.
Ready to bring your designs to life with a quality and speed you can count on? At Lion DTF Transfers, we make creating professional-grade custom apparel straightforward. Use our powerful and easy-to-use Auto-build gang sheet builder to create your next order and see why thousands of creators trust us for vibrant, durable, and fast DTF transfers.