


Ready to turn those blank garments into custom art? Getting it right with a heat press comes down to three things: hitting the perfect temperature and time, applying solid pressure, and peeling the transfer film just right. This guide will walk you through mastering the whole process so you can press vibrant, long-lasting Direct-to-Film (DTF) transfers every single time.
Your Hands-On Guide to Flawless Custom Apparel
The heat press is the heart of any custom apparel shop. Moving beyond the user manual and into real-world application is what separates good results from great ones. Success really boils down to understanding the "big three" of pressing: time, temperature, and pressure. Think of this as your personal walkthrough for getting professional-grade results from your very first press.
This simple yet powerful process has become a cornerstone for creators and businesses everywhere. The global heat press machine market is booming, thanks to its expanding use in textiles and personalized goods. By 2025, it's estimated that over 20 million units will be in operation worldwide, showing just how popular this method is for both DIY crafters and commercial shops. You can see more on this trend by checking out the market insights on DataInsightsMarket.com.
Streamlining Your Creative Workflow
Before you even power on the press, you need your designs ready to go. Juggling multiple graphics for a single project or for different clients can get messy fast. This is where planning your layout becomes a game-changer for saving time and materials.
A well-organized design sheet is the first step to a profitable print run. By minimizing wasted space between your graphics, you directly reduce your material costs and increase your overall output.
To make this step totally painless, a tool like our Auto-build gang sheet builder is essential. You can upload all your different designs, and it automatically arranges them to maximize every inch of a single transfer sheet. It’s a huge time-saver for anyone looking to make their workflow more efficient and cost-effective. It takes the guesswork out of layout planning, saving you valuable time and material.
For a deeper dive into what makes these transfers so effective, check out our complete guide to understanding DTF transfers. Nailing your heat press technique starts with great preparation, and having your designs perfectly arranged is a critical first step.
Setting Up Your Workspace and Machine
A professional-quality DTF transfer doesn't just happen when you lower the heat platen. It starts way before that. Getting your environment right is the foundation for both your safety and the quality of your finished products. When you master the setup, you control every variable, which leads to a smooth, repeatable, and successful workflow every single time.
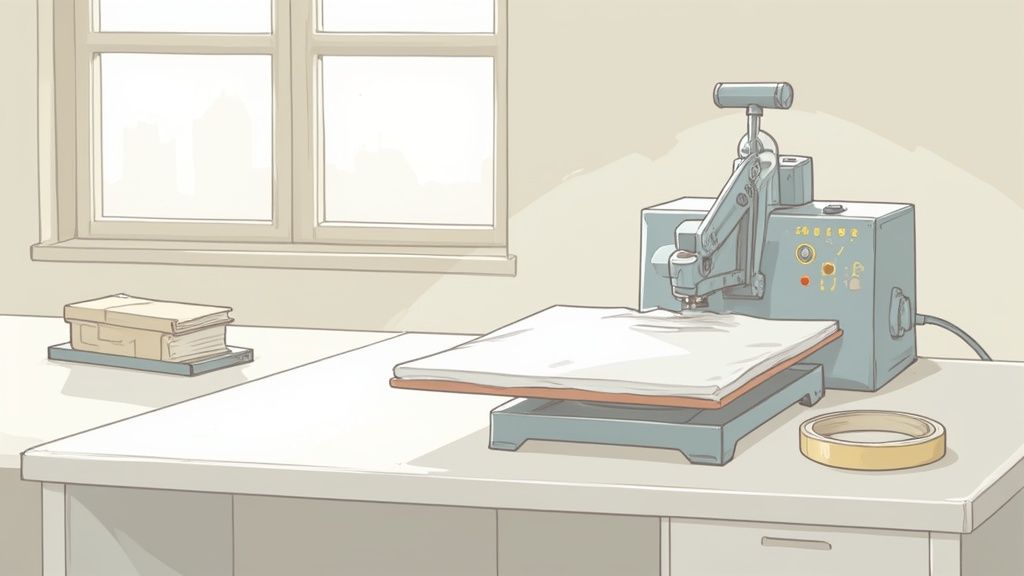
First thing's first: figure out where your press is going to live. This isn't a portable gadget—the average machine weighs over 40 pounds and needs a dedicated, permanent spot. You're looking for a surface that is incredibly sturdy and perfectly level. Trust me, a wobbly table is just asking for inconsistent pressure and is a serious safety hazard.
You also need excellent ventilation. Heat presses can release fumes from certain fabrics, so an open window or a decent air circulation system is a must. Lastly, give yourself plenty of room to work around the machine. You'll need space to lay out your transfers and maneuver garments without feeling boxed in.
Powering On and Initial Settings
Once your press has a home, it’s time to bring it to life. Most presses have a simple on/off switch, usually on the side or back of the control box. Flip it on, and the digital display will light up, showing the current temperature and time.
The control panel is usually pretty straightforward, with buttons to adjust the temperature and time. For Lion DTF transfers, a great starting point is 240-280°F. Use the controls to dial that in.
Next, set your timer. For our hot-peel transfers, 7-10 seconds is the sweet spot. The machine will start heating up, and most models will beep once they hit the target temperature. Don't sweat it if the temp bounces a few degrees when you open and close the platen—that's totally normal.
Pro Tip: Before you press your first real garment of the day, do a quick "ghost press." Just close and open the empty machine a couple of times. This helps stabilize the lower platen's temperature, ensuring your first real press gets perfectly even heat from the get-go.
Preparing Your Garment for a Flawless Transfer
This next step is absolutely non-negotiable if you're after professional results. Every single garment, whether it just came out of a box or off a hanger, holds invisible moisture and wrinkles that can completely ruin a transfer. The fix? A quick pre-press.
A pre-press is exactly what it sounds like: you press the garment for just a few seconds before applying the transfer. Here's why it's so important:
- It Zaps Moisture: Trapped moisture turns into steam under the heat, which is a surefire way to stop the DTF adhesive from bonding correctly to the fabric fibers.
- It Smooths Everything Out: A pre-press gets rid of all the wrinkles, creating a perfectly flat canvas for your transfer to stick to.
- It Warms Up the Fabric: It also warms the material, making it more receptive to the transfer's adhesive, leading to a much stronger bond.
Just lay your shirt on the platen, smooth it out, and press it for 3-5 seconds. You might even see a little puff of steam—that's the hidden moisture making a run for it. This simple move is one of the biggest factors in preventing peeling and making sure your designs last. The whole process of applying consistent heat and pressure is key, and you can learn more about why a heat press is essential for DTFs in our detailed guide.
With a solid workspace and a properly prepped garment, you’ve built the foundation for a perfect press. Now you can move forward with confidence, knowing you’ve already taken care of the details that lead to vibrant, durable, and seriously impressive custom apparel.
Mastering Time, Temperature, and Pressure
The secret to a DTF transfer that looks incredible—vibrant, smooth, and ridiculously durable—is finding the perfect balance between three key elements. This is where using a heat press becomes both a science and an art. Nailing the right combination of time, temperature, and pressure is what separates a homemade-looking print from a professional-grade product that lasts wash after wash.
Think of it as a recipe. Too much heat can scorch the fabric or ruin the transfer's adhesive. Not enough time creates a weak bond that starts peeling after the first wash. And the wrong pressure can leave you with an uneven application or a stiff, plastic-like finish. Getting it right is everything.
The Foundation: Temperature Settings
Temperature is your starting point. Different fabrics react to heat in completely different ways, so a setting that works perfectly for a 100% cotton tee will be way too hot for a delicate polyester blend. The goal here is simple: melt the DTF adhesive just enough to bond permanently with the fabric fibers, without damaging either one in the process.
For Lion DTF transfers, the sweet spot for most jobs is somewhere between 240°F and 280°F. This range covers the most common garment types you'll be working with.
- 100% Cotton: You can go a bit hotter here, so aim for the higher end, around 280°F. Cotton is a resilient fabric and can handle the heat, which helps ensure a deep, lasting bond.
- Polyester & 50/50 Blends: Be more careful with these. Start on the lower end, around 240-270°F. Polyester fibers are sensitive and can scorch or even melt at high temperatures, so a lower heat setting is absolutely crucial to avoid damage.
- Tri-Blends & Sensitive Fabrics: When you’re working with delicate materials, always play it safe. Start at 260-270°F and only bump it up slightly if you absolutely have to.
The temperature on your display isn't just a number—it's a direct command to the adhesive on your transfer. A variance of even 10 degrees can dramatically alter the outcome, affecting both the vibrancy and the longevity of your print.
To make things easier, here's a quick-reference chart with our go-to starting points for the most common fabrics.
Recommended Heat Press Settings for DTF Transfers
| Fabric Type | Temperature Range °F | Press Time (Seconds) | Pressure Level | Peel Type |
|---|---|---|---|---|
| 100% Cotton | 280°F | 10 | Medium-Firm | Hot or Cold |
| 50/50 Cotton/Poly | 270-280°F | 10 | Medium | Hot or Cold |
| Polyester | 240-250°F | 7-10 | Medium | Hot or Cold |
| Tri-Blends | 260-270°F | 10 | Medium | Hot or Cold |
Remember, these are starting points and heat presses can differ. Always test press before a big production run!
Dialing in Time and Pressure
Once you've got your temperature set, the next two variables—time and pressure—work hand-in-hand. Time is simply how long you apply the heat, while pressure is the force that physically embeds the transfer's ink and adhesive into the garment's weave.
For our hot-peel transfers, a press time of 10 to 15 seconds is usually all it takes. This quick press ensures the adhesive activates perfectly without overcooking the transfer, which can weaken the bond. Proper calibration of these settings is vital for any business that needs consistent, high-quality results.
Pressure is a bit more subjective and often comes down to the feel of your machine. For DTF, you’re looking for medium to firm pressure. So, what does that feel like in the real world?
- You should need a solid, two-handed motion to close and lock the press.
- It shouldn't feel like you're about to break the handle or strain your back.
- When you release the press, you should be able to see the texture of the fabric weave slightly through the transfer film. That’s the money shot—the sign of a perfect press.
This balance of heat and pressure is fundamental across all sorts of manufacturing. While your focus is on custom apparel, it's interesting to see how other materials transform with various heat-dependent processes as well.
If you want to dive deeper into specific materials, our comprehensive guide on heat press settings for DTF is a fantastic resource that breaks it down even further.
The Art of the Test Press
Guides and charts are great starting points, but let's be real: every heat press has its own quirks, and every batch of garments can be slightly different. That's why the test press is a non-negotiable step for any serious professional. Always, always test your settings on a scrap piece of the same fabric or in a hidden area of the garment before you commit to a full production run.
This one small step can save you from ruining an entire box of expensive shirts. Press a tiny logo or a corner of a design, see how it peels, and check how the fabric responds. If it peels like a dream and the fabric looks perfect, you’ve found your recipe. You're ready to go.
The Heat Pressing Process from Start to Finish
Okay, your workspace is ready and your press settings are locked in. It's time for the main event—the actual press. This is the moment where all that preparation pays off, turning a plain garment and a fresh DTF transfer into a professional-quality product. The process itself is pretty straightforward, but nailing the details is what separates an okay print from a perfect one.
First thing's first: getting the garment on the lower platen correctly. Open up the press and lay your shirt down flat, taking a second to smooth out every single wrinkle and fold. The flatter the surface, the more even the pressure, which is absolutely critical for a solid bond. Be mindful of seams, collars, and pockets, since these can create uneven spots that prevent the transfer from making full contact.
Positioning the Garment and Aligning the Transfer
Centering the garment is key for a professional look. Here’s a classic trick of the trade: fold the shirt in half vertically and give it a quick pre-press. This leaves a faint centerline, giving you a perfect guide for aligning both the garment on the platen and the transfer on the shirt.
Next up is aligning the transfer itself, and this is where precision really counts. If you’re just pressing a single design, you can often eyeball it or use a simple t-shirt alignment tool. But when you're working with a sheet full of different graphics, an organized layout is your best friend.
This is another spot where our Auto-build gang sheet builder really shines. By arranging all your designs efficiently onto a single sheet, it doesn't just save you material—it makes placement so much easier. A well-built gang sheet from our builder helps you align a whole set of graphics at once, which is a huge boost for productivity and consistency.
This diagram breaks down the three core elements you should have set before you even think about closing that press.
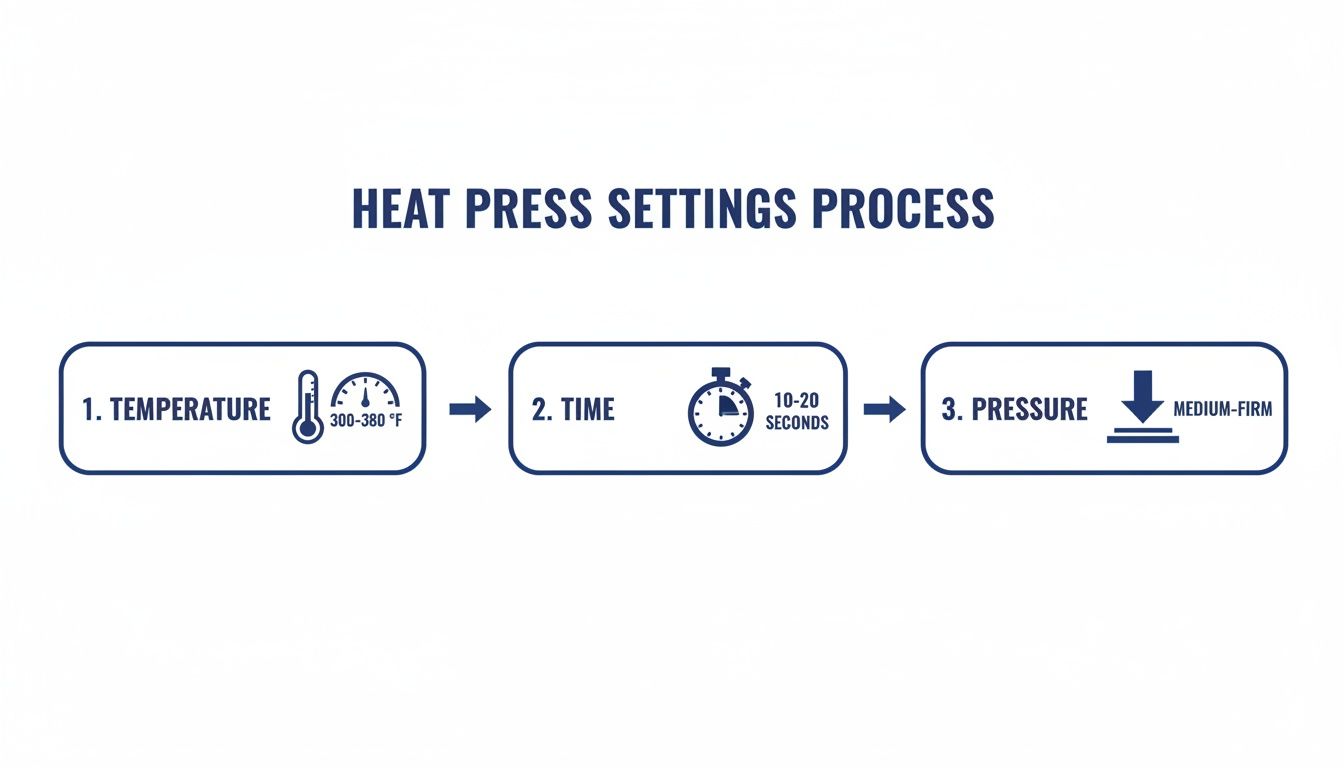
Thinking about temperature, time, and pressure as a simple workflow helps reinforce how they all work together to create the final product.
Protecting Your Investment with a Cover Sheet
Before you clamp down that press, there’s one last essential step: using a protective cover sheet. This is usually a Teflon sheet or a piece of parchment paper that you place over the DTF transfer. It’s a simple move that serves two very important purposes.
First, it shields your garment from direct contact with the hot metal platen, preventing any scorching or yellowing, especially on lighter fabrics. Second, it keeps your heat platen clean by stopping any ink or adhesive residue from sticking to its surface. A clean platen is non-negotiable for clean, consistent presses down the road.
Never press a DTF transfer without a protective cover sheet. It’s a simple, inexpensive piece of insurance that protects both your product and your heat press from damage.
Once your garment is positioned, the transfer is aligned, and the protective sheet is in place, you’re ready to go. Firmly pull the handle down to close and lock the machine. The timer will kick on automatically. Now, just wait for the beep.
The Moment of Truth: The Perfect Peel
When that timer goes off, open the press smoothly and confidently. This is the moment we've all been waiting for, and your technique here defines the final quality. The next step is the peel, and for Lion DTF transfers, you’ll be doing a hot peel.
This means you peel the clear film carrier away from the garment almost immediately after the press opens, while everything is still hot. Don’t hesitate. If you wait too long and let it cool, you risk an incomplete peel where parts of the design get left behind.
Here’s the technique for a flawless hot peel:
- Start at a Corner: Pick one corner of the transfer film to get things started.
- Peel Low and Slow: Grab that corner and peel the film back at a low, sharp angle—almost parallel to the shirt. Avoid pulling straight up.
- Use a Consistent Motion: Keep a steady, smooth speed as you peel the entire film away. A consistent roll prevents parts of the design from lifting unexpectedly.
You should feel a slight, satisfying release as the film comes off, leaving behind a vibrant, perfectly bonded graphic. If you see any part of the design lifting with the film, stop immediately. Lay the film and cover sheet back down and press again for another 5-7 seconds. This usually happens if there was an issue with pressure or a cold spot on your platen. Master this simple peeling motion, and you'll get that buttery-smooth, screen-print feel that makes DTF so popular.
Taking Care of Your Prints and Your Press
The timer beeps, the press opens—but the job isn't quite over. What you do after the press is just as important as the press itself. This is where you lock in the quality for your customers and protect the machine that makes it all possible.
Proper care instructions ensure your hard work lasts, and routine maintenance on your press guarantees you can keep producing top-notch results day after day.

Giving your customers clear, simple washing instructions is a non-negotiable final step. It sets expectations, prevents premature cracking or fading, and keeps them coming back for more.
Making Sure Your Creations Last
The first 24 to 48 hours are crucial. In this window, the DTF ink and adhesive are fully curing and bonding with the fabric fibers. Always tell your customers to wait at least a full day before that first wash to let the transfer permanently set.
When wash day comes, a few simple rules make all the difference. These are the care instructions we recommend for every garment made with Lion DTF transfers:
- Turn It Inside Out: This is the easiest and most effective way to protect the print from rubbing against other clothes in the wash.
- Wash Cold: Hot water is the enemy of longevity. It can slowly break down the adhesive over time, so stick with cold water to keep things gentle.
- Use a Mild Detergent: Skip the harsh chemicals, bleach, and fabric softeners. They can be too aggressive on the print. A basic, mild detergent is all you need.
- Tumble Dry Low or Hang to Dry: High heat from a dryer can damage a DTF transfer. If you must use a dryer, use the lowest heat setting. For best results, hang drying is the gold standard.
Follow these steps, and those prints will stay sharp and vibrant for 100+ washes. That's a huge selling point you can pass on to your customers.
Your Heat Press Maintenance Checklist
Your heat press is the heart of your operation, and like any hard-working machine, it needs regular check-ups. Good maintenance habits not only extend the life of your press but also prevent frustrating misprints and wasted materials.
Start with the heat platen. After a busy day, you might have small bits of residue from transfers or cover sheets. While the press is still warm (not scorching hot!), wipe the platen down with a clean, soft cloth. If something is really stuck on there, use a cleaner made specifically for heat platens. Never, ever use an abrasive pad that could scratch the non-stick coating.
A clean platen is critical for even heat. Any little speck of debris can create a cold spot, leading to an incomplete transfer and a ruined garment.
Next, get in the habit of checking your pressure. Over time, the pressure mechanism on any press can loosen up a bit with heavy use. Every few weeks, just do a quick "feel test." Does it take the same amount of effort to lock it down? If it feels too easy, give the pressure knob a turn until you're back to that sweet spot of firm, even pressure.
Finally, a quick safety check goes a long way. Take a look at the power cord for any fraying or damage, and double-check that your outlet is rated to handle the machine's power draw.
Here's a simple routine to follow:
-
Weekly:
- Wipe down the upper platen with a soft cloth after you're done for the day.
- Give the lower platen and silicone pad a quick inspection for any wear and tear.
-
Monthly:
- Confirm your pressure settings and adjust them if needed.
- Check all electrical cords and connections.
- Use an infrared temperature gun to make sure the temperature on your display matches the actual platen temperature.
This checklist takes just a few minutes but pays you back in consistency and reliability. It keeps your press running like new, ensuring every print is perfect—which is especially important when you're pressing a full sheet from our Auto-build gang sheet builder and need every single design to come out flawless.
Common Heat Pressing Questions Answered
Even when you’ve dialed in your settings and followed every step, questions are going to pop up. That's just part of the heat pressing game. Whether you're a seasoned pro or just unboxing your press, running into a little trouble is completely normal.
Here, we're going to tackle some of the most common hiccups and curiosities we hear about. Think of this as your go-to troubleshooting guide, ready to help you press with more confidence and handle any challenge that comes your way.
Why Are My DTF Transfers Peeling After Washing?
This is easily the most frequent and frustrating issue out there, and it almost always comes down to the initial application. When a design starts cracking or peeling away, it’s a sure sign the transfer's adhesive didn't properly melt and bond with the fabric's fibers.
The most likely culprits are not enough pressure or heat. If your press isn't hot enough, or if you aren't clamping it down firmly enough, you're starting with a weak bond that's doomed to fail. Double-check your settings, make sure they match the fabric you're using, and always run a quick test on some scrap material to confirm your setup is solid.
What Causes a Ghosting or Faded Look on Prints?
"Ghosting" is that faint, blurry double image you sometimes see on a finished shirt. It happens when either the transfer film or the garment itself shifts, even just a tiny bit, while you're opening or closing the heat press. To beat it, make sure your shirt is lying perfectly flat and is secure on the platen before you press. No wrinkles, no movement.
A faded or washed-out look is another common problem. It can be caused by a few different things:
- Pressure is too light: The transfer isn't being physically pushed into the fabric weave; it's just sitting on top.
- Time is too short: The adhesive simply didn't get enough time under heat to fully activate and cure.
- Temperature is too low: The heat wasn't high enough to properly melt the adhesive layer into a permanent bond.
How Do I Know if My Pressure Is Right?
Getting the pressure right is often more about feel than a specific number on a digital display. For DTF transfers, you're aiming for a solid medium-to-firm pressure. What does that mean in the real world? It means you should need a firm, two-handed effort to close and lock the machine, but you shouldn't feel like you’re about to snap the handle off.
Here's a pro tip: a great visual cue is to look at the transfer right after you press it. You should be able to see the texture of the garment's fabric weave faintly through the design. That's the tell-tale sign of a perfect press.
Can I Use a Regular Iron Instead of a Heat Press?
Look, it's tempting to grab a household iron for a one-off project, but for any serious work, it is highly discouraged. An iron simply cannot deliver the two things that are absolutely critical for a successful DTF transfer: consistent, even heat across the entire design and heavy, uniform pressure.
Using an iron almost guarantees a spotty application, which leads to quick peeling and a design that just won't last. It's an investment, but a proper heat press is a non-negotiable tool for professional results.
Ready to create flawless, durable custom apparel with less hassle? The Lion DTF Transfers Auto-build gang sheet builder makes it incredibly easy and cost-effective to arrange all your designs on a single sheet, maximizing your material and your profits. Get started today and experience the difference of professional-grade transfers.