


Ever heard of DTF transfers? It’s short for Direct-to-Film, and it’s one of the coolest ways to get vibrant, full-color designs onto just about any fabric. The easiest way to think of them is like high-quality, ready-made graphics for your apparel. Once you press them with heat, they become a soft, durable part of the garment itself, making it ridiculously simple to create pro-level custom gear.
The Magic Behind DTF Transfers

If you've ever seen a small brand’s t-shirt with a super intricate, multi-color design that feels amazing and holds up in the wash, you’ve probably seen DTF in action. This is the technology that closes the gap between the insane detail of digital printing and the legendary durability of screen printing. It's a game-changer for creators big and small.
The process itself is surprisingly straightforward. Your digital design is printed onto a special clear film using water-based inks. A solid layer of white ink goes down behind the colors, which is the key to making your design pop, even on black or dark-colored fabrics.
How It All Comes Together
While the ink is still wet on the film, a fine adhesive powder gets sprinkled over the design. It's then melted just enough to create a smooth, even backing. This powder is the secret sauce—it’s what physically bonds your design to the fabric when you press it.
The final part is where you come in, and it couldn't be easier:
- Place it: Just position the cured transfer right where you want it on your garment.
- Press it: Apply heat and pressure with a heat press for a few seconds.
- Peel it: Once it's pressed, you peel away the clear film, and voilà! A perfect, full-color design is now permanently part of the fabric.
This simple "press and peel" workflow is why DTF transfers have become the go-to for everyone from Etsy shop owners to full-scale apparel companies. All the messy, complicated steps of other printing methods are gone. You get to focus on what matters: creating and applying awesome designs.
Why Is Everyone Talking About DTF?
The explosion in popularity comes down to one word: flexibility. While other methods lock you into specific fabrics (like 100% cotton), DTF just works. Cotton, polyester, blends, leather, nylon—you name it. This unlocks a whole new world of creative freedom for custom clothing, hats, bags, and so much more.
And the market reflects this shift. The global Direct-to-Film printing market was valued at around USD 2.72 billion in 2024 and is expected to hit nearly USD 4.56 billion by 2032. That kind of growth, which you can read more about at 360iResearch.com, shows just how many businesses are relying on it for fast, on-demand printing.
For any creator or business, keeping costs down and waste to a minimum is huge. That's why ordering your designs on a "gang sheet"—where multiple designs are arranged onto a single large film—is the smartest way to go. To make it totally painless, our Auto-build gang sheet builder automatically packs your designs together for you, squeezing the most value out of every square inch. It’s an absolute game-changer for producing affordable, high-quality custom DTF transfers.
Choosing the Right Printing Method for Your Project
Picking the best way to bring your apparel designs to life can feel like a tough call with so many options out there. Every method, from old-school screen printing to the latest digital techniques, has its place. The real secret is matching the right technology to what you need for a specific project—thinking about things like how many you're ordering, how complex the design is, and what kind of fabric you're using.
Direct-to-Film (DTF) has quickly become a powerful, do-it-all solution, but you need to know how it stacks up against the other big players to make a smart decision. Let's break down how DTF transfers compare to Direct-to-Garment (DTG), screen printing, and Heat Transfer Vinyl (HTV).
H3: DTF Transfers vs DTG Printing
Direct-to-Garment (DTG) printing is probably DTF's closest cousin. They're both digital, which means they're fantastic at printing full-color, photorealistic images. DTG printers are basically like a paper printer but for clothes, spraying ink directly onto the fabric.
But DTF has a few game-changing advantages. The biggest one is fabric versatility. DTG is picky; it works best on 100% cotton and needs a messy, time-consuming pre-treatment spray just to get the ink to stick right. DTF, on the other hand, doesn't care. You can press DTF transfers onto almost anything—cotton, polyester, nylon, leather, you name it—with absolutely no pre-treatment needed.
This makes DTF the undisputed champ for anyone printing on different kinds of products, like polyester team jerseys or those popular blended-fabric hoodies. Plus, the white ink underbase in a DTF transfer is consistently bright and solid, creating a brilliant canvas for colors on dark garments, which can sometimes be a weak spot for DTG.
For a deeper look at the specifics, check out our complete guide comparing DTF vs DTG printing.
H3: DTF Transfers vs Screen Printing
Screen printing has been the king of high-volume apparel for decades. It works by pushing ink through a mesh screen onto the shirt, and you need a separate screen for every single color in your design. Done right, it produces incredibly durable and vibrant prints that have that classic, professional feel.
The main catch with screen printing is all the setup involved. Creating those screens is expensive and takes a lot of work, which makes it a poor choice for small orders or designs with lots of colors. If your design has six colors, you need six screens, and you're paying for every single one of them.
This is exactly where DTF comes in and changes the game. As a fully digital process, DTF has zero setup costs per color. It doesn't matter if your design has one color or a hundred—the price is the same. This makes DTF transfers the perfect choice for:
- Small to medium-sized orders: You can print just one shirt or a few dozen without killing your budget.
- Highly detailed, multi-color designs: Gradients, photos, and complex art are printed perfectly with no extra fees.
- On-demand printing: Order only what you need, right when you need it. No more guessing and getting stuck with unsold shirts.
Now, if you're printing a massive order of a simple one or two-color design—think 500+ identical shirts—screen printing is still going to be your most cost-effective bet. But for just about everything else, DTF gives you flexibility and affordability that screen printing can't touch.
H3: DTF Transfers vs Heat Transfer Vinyl (HTV)
Heat Transfer Vinyl (HTV) is a go-to for crafters and small shops. The process is straightforward: cut your design from a sheet of colored vinyl, then use a heat press to stick it onto a garment. It's great for simple things like text, numbers, and basic shapes.
The problem is, HTV hits a wall fast when you get to more complex designs. Every color needs its own separate layer of vinyl that has to be cut, "weeded" (which means painstakingly picking out all the tiny excess pieces), and then pressed one at a time. It's an incredibly slow process that often leaves the design feeling thick and stiff on the shirt.
DTF transfers completely eliminate all of that frustration. Your entire multi-color design is printed on a single sheet, ready to press in one quick step. There is no weeding, no layering, and no limit to the detail you can achieve. Even better, the finished DTF print is much softer and more flexible than layered vinyl, feeling more like it’s part of the fabric. This makes it a much better option for detailed logos, intricate art, and any design where you want a premium look and feel.
To help you see it all at a glance, we've put together a quick comparison table. This breaks down how each printing method performs across the factors that matter most to your business.
H3: DTF Transfers vs Traditional Printing Methods
| Feature | DTF Transfers | DTG (Direct-to-Garment) | Screen Printing | HTV (Heat Transfer Vinyl) |
|---|---|---|---|---|
| Best For | Full-color designs, small-to-medium orders, all fabric types | Photorealistic prints on cotton, small orders | High-volume orders (100+), simple designs (1-4 colors) | Simple text/shapes, names/numbers, one-offs |
| Design Complexity | Excellent (unlimited colors, gradients, fine details) | Excellent (full-color photos) | Poor (cost increases with each color) | Poor (very difficult for complex or multi-color designs) |
| Fabric Versatility | Excellent (cotton, poly, blends, leather, nylon) | Poor (best on 100% cotton, requires pre-treatment) | Good (works on most fabrics but may need different inks) | Good (specific vinyl types needed for different fabrics) |
| Feel on Garment | Soft, flexible, lightweight | Very soft, breathable (ink dyes fabric) | Can be thick depending on ink layers | Often thick and stiff, especially with multiple layers |
| Durability | Excellent (lasts 50+ washes) | Good (can fade over time, especially without proper care) | Excellent (extremely durable, often outlasts garment) | Good (can crack or peel over time, especially if layered) |
| Setup Cost | None | Low (digital file prep) | High (screens must be created for each color) | Low (no setup, but material cost per design) |
| Labor | Low (print and press) | Low (pre-treat, print, cure) | High (screen prep, printing, cleanup) | Very High (cutting, weeding, layering) |
Each method has its day, but for modern apparel creators who need versatility, quality, and efficiency, DTF consistently comes out on top. It blends the best of digital printing's detail with a workflow that’s simple and scalable.
Your Step-by-Step Guide to Applying DTF Transfers
Applying a DTF transfer might look a little technical from the outside, but it’s actually a straightforward and seriously satisfying process. Think of it less like a complicated science project and more like baking a cake—if you follow the recipe and pay attention to the details, you’re going to get perfect results every single time.
This guide breaks it all down into five simple steps, making sure your designs look professionally printed and are built to last.
Step 1: Prepare the Garment (The Pre-Press)
This first step is hands-down the most important, but it's also the one most people skip when they're starting out. Before you even think about laying down your transfer, you need to prep the garment with a quick "pre-press."
This simple step zaps any hidden moisture out of the fabric and smooths out every wrinkle, creating a perfectly flat canvas for the transfer's adhesive to grab onto. Just a 5-10 second press is all it takes. Seriously, don't skip it—this guarantees a stronger, more permanent bond.
Step 2: Set Up Your Heat Press
Once the shirt is prepped and ready, it’s time to dial in your heat press. The secret to a perfect application comes down to three things: Time, Temperature, and Pressure. Getting this trio right is everything.
While the settings can shift a bit depending on your fabric, here’s a solid starting point that works for most materials:
- Temperature: 300-320°F (149-160°C)
- Time: 10-15 seconds
- Pressure: Medium to firm
Always double-check the specific instructions that come with your transfers and consider the fabric you’re pressing. For instance, delicate materials like polyester might need a lower temperature to keep them from getting scorched. Nailing these settings is critical, and if you want to dive deeper, our guide on how to use a heat press machine is a great resource.
Step 3: Position the Transfer
With your press hot and ready, carefully place the DTF transfer onto the garment. The design should be facing up, with the clear film on top.
Take your time here to get the alignment just right. A ruler or a T-square tool can be a lifesaver for making sure everything is perfectly centered and straight before you press.
This infographic helps visualize when DTF is the right call for a project, based on the size of your order, the number of colors, and how complex the design is.
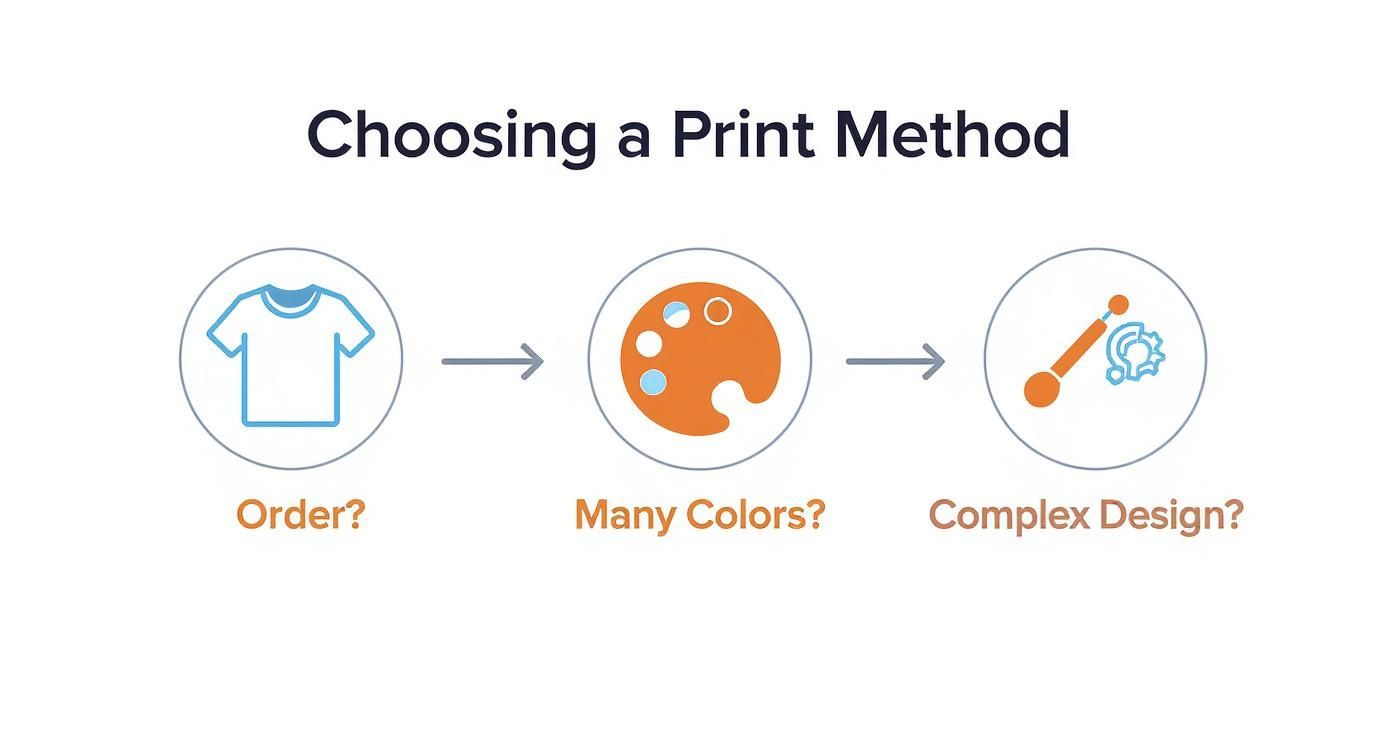
As you can see, DTF really shines when you're working with intricate, full-color designs, especially for smaller batches where methods like screen printing just aren't practical.
Step 4: The Pressing and Peeling Process
Alright, time for the main event. Lay a protective sheet—like parchment paper or a Teflon sheet—over the transfer. This protects both the design and your heat press from direct contact. Close the press, lock it down, and hit that timer. The heat and pressure are now working their magic, activating the adhesive and bonding the ink right into the fabric's fibers.
Once the timer buzzes, it's time to peel. This is where you'll find out if you have a hot peel or a cold peel transfer. Hot peel transfers, like the ones we make, are built for speed—you can peel the film off the second the press opens. Cold peel transfers require you to wait for the garment to cool down completely before touching the film.
Pro Tip: When you peel, pull the film back smoothly and steadily at a low angle. Don't just rip it off. This gentle touch ensures every tiny detail of your design stays put, right where it belongs, without any lifting.
Step 5: The Final Press
Last but not least, we have the final press. This step locks in the design, gives it a buttery-soft matte finish, and makes it incredibly durable.
Just place your protective sheet back over the exposed design and press it one more time for 5-7 seconds. This final touch pushes the ink even deeper into the fabric, dramatically improving how it feels and how well it holds up in the wash. Follow these steps, and you'll be knocking out pro-level custom apparel from your very first try.
How to Prepare Your Artwork for Perfect DTF Prints
The incredible quality you see in modern DTF transfers starts long before the printer ever touches the film. It begins with your digital file. Think of your artwork as the blueprint for your final shirt; the cleaner the blueprint, the sharper and more vibrant the finished product. Getting this step right is the secret to making what you see on screen translate flawlessly to fabric.
Don't worry, this isn't nearly as complicated as it sounds. It just requires a little attention to a few key details. By following a few best practices, you'll set yourself up for professional, consistent results that make your designs look like they came from a high-end retail shop.
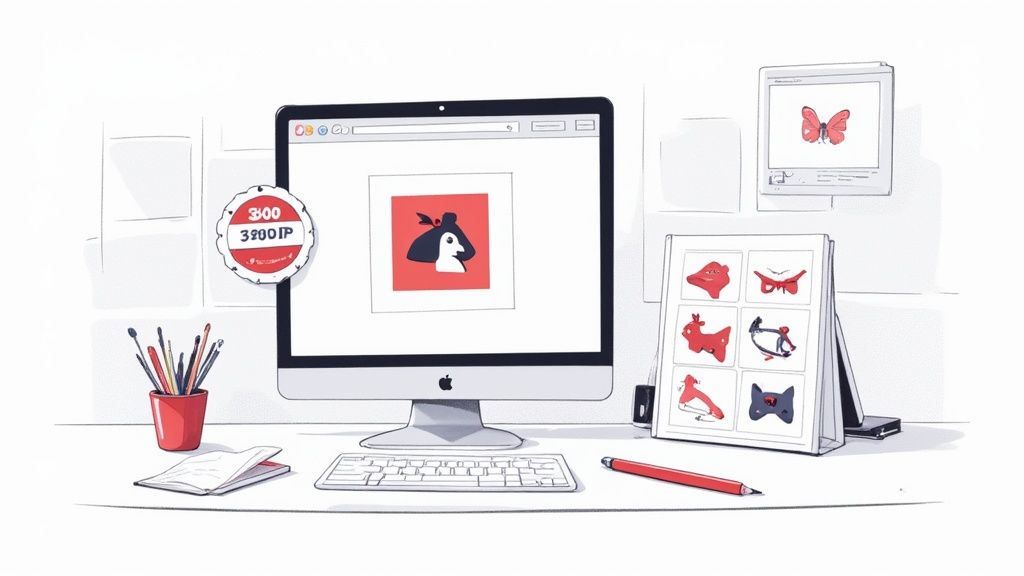
Everything starts right here, on the designer's screen. A clean, high-resolution file is the foundation of a perfect DTF print.
Mastering the Technical Specs
First things first, let's nail down the technical foundation of your design file. These settings aren't just suggestions—they are non-negotiable for achieving crisp, high-quality prints that don't look blurry or pixelated once they're on a garment.
- Resolution: Always, always set your artwork to 300 DPI (dots per inch). This is the gold standard for high-quality printing. If you use a lower resolution, like the 72 DPI common for web images, you'll end up with a blurry, unprofessional-looking transfer.
- Color Mode: Your file should be saved in the RGB color space. While you might have heard that CMYK is for printing, DTF printers are actually optimized for RGB files. This helps them produce the most vibrant and accurate colors on fabric.
- File Format: The absolute best format for DTF is a PNG file with a transparent background. This is critical. The printer prints exactly what it sees, so any white background left in your file will be printed as a solid white box on your garment.
For your prints to truly pop, a good grasp of understanding color theory will also go a long way in making sure your designs look as good on fabric as they do on your monitor.
Avoiding Common Design Pitfalls
Beyond the basic file setup, a few common design mistakes can trip people up and cause major headaches during the printing process. Steering clear of these will save you from frustrating—and costly—reprints.
The most important rule? Avoid semi-transparent pixels. Anything in your design with less than 100% opacity, like feathered edges, glows, or soft shadows, simply won't print correctly. The DTF process needs solid blocks of color for the adhesive powder to stick to, so every edge has to be sharp and clean.
Think of it like a stencil. The adhesive powder needs a solid, defined shape to cling to. If the edges are hazy or faded, the powder won't adhere properly. You'll get a patchy, incomplete transfer that will probably start peeling after the first wash.
This is also a great time to explore other ways to make your prints stand out. For more inspiration, check out our guide on creating amazing custom heat transfer designs.
Maximize Value With Gang Sheets
Once your designs are perfected, the smartest and most cost-effective way to order them is on a gang sheet. A gang sheet is just one large transfer film where you can arrange multiple designs. This lets you fit your main graphics, logos, sleeve prints, and neck tags all onto one sheet.
It’s a game-changer for reducing waste and bringing your cost-per-print way down. Instead of paying for a bunch of small, individual transfers, you pay for one larger sheet packed with everything you need.
To make this even easier, our Auto-build gang sheet builder is the perfect tool for the job. You don't have to spend time manually cramming designs together trying to make them fit. Just upload your files, and our software will automatically and efficiently nest them for you. This feature ensures you get the absolute most value out of every square inch of film, making your business more profitable and your workflow a whole lot faster.
Where DTF Transfers Really Shine
It’s one thing to talk about specs and technical details, but the true magic of DTF transfers happens when you see them out in the wild. Knowing they’re durable is great, but seeing them survive an entire season on a local sports team’s jerseys? That’s what really matters. The killer combination of a ridiculously soft feel, serious durability, and the freedom to print on almost anything makes DTF the perfect solution for countless real-world projects.
This flexibility is a massive advantage for businesses and creators. It lets you take on jobs that used to be too expensive or complicated. The on-demand model means you can confidently say "yes" to small, custom orders without worrying about high setup costs or minimums. It’s all about adapting to new trends without needing a warehouse full of unsold inventory.
Powering Small Businesses And Brands
For anyone launching a t-shirt brand from their garage, DTF is an absolute game-changer. Let's say you want to drop a new collection with ten different complex, multi-color designs. With screen printing, the setup fees for all those screens would be astronomical. With DTF, you can print all ten designs on a single gang sheet, keeping your costs down and profits up, even from the very first sale.
And it’s not just for startups. Established promotional product companies and marketing agencies running on tight deadlines rely on DTF to deliver high-quality branded workwear and event merch, fast.
DTF transfers level the playing field. They give small creators the same high-quality, full-color printing power as major apparel brands, but without the massive upfront investment or waste.
This efficiency is especially important for online businesses. When you're using DTF transfers to create apparel for your e-commerce store, getting clean, professional product photos is non-negotiable. It's worth looking into how tools like AI product photography for fashion brands can help you create stunning visuals that make your products pop.
From Team Sports To Special Events
Local sports teams need vibrant, durable names and numbers on polyester jerseys—a material that can be a real headache for other printing methods. DTF bonds perfectly to these synthetic fabrics, creating a flexible print that moves with the athlete and stands up to rough use. The bright, crisp colors keep team logos and sponsor graphics looking sharp all season long.
The same idea applies to schools, event organizers, and hobby crafters. Whether you’re making shirts for a family reunion, a school spirit week, or a charity 5k run, DTF makes it easy and affordable to produce amazing custom gear.
The ability to arrange multiple designs with our Auto-build gang sheet builder makes these kinds of projects incredibly cost-effective. You can fit logos, names, and event dates all onto one sheet, stretching your budget further than ever before.
Common Questions About DTF Transfers
Getting into DTF transfers is exciting, but it's totally normal to have a few questions before you dive in. The best way to build confidence and get killer results from your very first press is to get straight answers. Let's tackle some of the most common questions we hear every day.
We’ll cover everything from how long these prints really last to the nitty-gritty of design limitations. By the end, you'll have the practical insights you need to press and design like a pro.
How Durable Are DTF Transfers, Really?
This is usually the first thing on everyone's mind, and for good reason. You're making products that need to look awesome and hold up. The great news is that high-quality DTF transfers are incredibly tough, often lasting for 50-100 washes or more when they're applied correctly. In a lot of cases, the print will actually outlast the t-shirt it's on.
But durability isn't just about the transfer itself—it's a team effort. A few key things work together to decide how long your design will stay vibrant and crack-free.
- Proper Application: This is non-negotiable. Using the right temperature, time, and pressure with a quality heat press is what makes the adhesive fully bond with the fabric.
- Garment Quality: A better-quality shirt or hoodie provides a solid foundation for the transfer and holds up better in the wash, which in turn protects the print.
- Washing and Care: Following simple care instructions is huge. Washing inside out in cold water and avoiding high-heat drying will dramatically extend the life of any print.
Nail these three factors, and you'll be creating apparel that looks fantastic for years.
Can I Use a Home Iron Instead of a Heat Press?
It’s a tempting shortcut, especially when you're just starting out. While you technically can try to apply a DTF transfer with a home iron, we strongly discourage it for anyone serious about professional, consistent results. A heat press isn't just a helpful tool; it's essential.
The whole problem comes down to one thing: an iron can't provide consistent heat and pressure. The surface of an iron has hot spots and cool spots, meaning some parts of your design get scorched while others barely get warm. This uneven application leads to terrible adhesion, and you end up with a print that’s almost guaranteed to crack, peel, or wash right off.
A heat press is engineered to deliver perfectly even temperature and pressure across the entire transfer. This is the only way to ensure the adhesive melts uniformly and bonds deep into the fabric fibers, creating that permanent, soft-hand feel DTF is famous for.
An iron just can't do that. Investing in a reliable heat press is the single best thing you can do to protect your time, your materials, and your reputation. It guarantees every product you sell is top-quality.
What Is the Smallest Detail I Can Reliably Print?
DTF is amazing for capturing fine details and sharp lines that are just impossible with methods like vinyl. This opens up a ton of creative freedom. That said, there's a physical limit to how thin a line can be and still hold enough adhesive powder to stick to a shirt properly.
As a solid rule of thumb, the absolute thinnest you should ever make a line in your design is 0.018 inches (or 1.3 pt). Anything smaller is asking for trouble—it likely won't print or transfer correctly because there isn't enough surface area for the adhesive powder to grab onto.
To be on the safe side and guarantee crisp, reliable results every single time, we recommend keeping your lines and small design elements at 0.025 inches (or 1.9 pt) or thicker. This gives the print a sturdy foundation to stick to the film and then transfer perfectly to the fabric, ensuring even the most delicate parts of your artwork stay put. Sticking to this simple guideline will help you avoid frustrating print fails and keep your work looking sharp. And if you want to be super cost-effective, filling up a sheet with designs is the way to go—our Auto-build gang sheet builder makes this a breeze by arranging all your files for you.
Ready to create stunning, durable custom apparel with ease? At Lion DTF Transfers, we provide premium, vibrant DTF prints that make your designs come to life. Explore our custom gang sheets and ready-to-press collections today.