


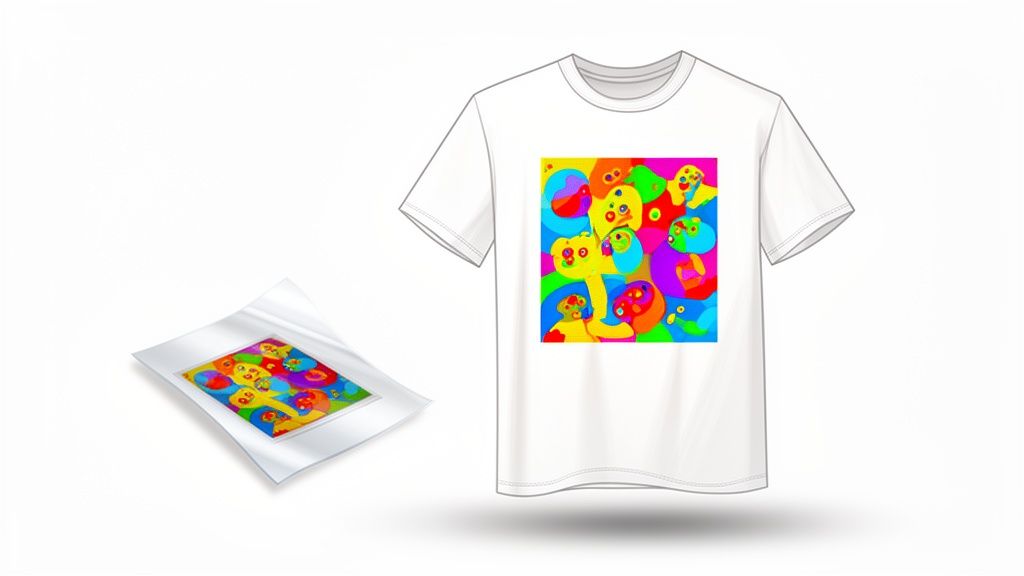
So, you want to print custom tee shirts without the massive learning curve or the crazy high setup costs of old-school methods? Let’s talk about Direct-to-Film (DTF) printing. It’s a total game-changer, letting you create vibrant, full-color designs on pretty much any fabric you can think of.
Whether you’re making a single shirt for fun or gearing up for a thousand-piece order, DTF is the modern answer for professional-quality apparel.
Why DTF Is Your Best Bet to Print Custom Tee Shirts
If you've dipped your toes into the custom apparel world, you've probably heard about screen printing, heat transfer vinyl (HTV), or even Direct-to-Garment (DTG). They all have their place, but DTF transfers have quickly become the go-to for creators who want the best of everything rolled into one simple process.
Think of this guide as your complete roadmap. We're skipping the fluff and getting straight to the practical, step-by-step framework you need to succeed—from prepping your artwork to that final, perfect press.
The DTF Advantage for Your Projects
DTF really shines when it comes to versatility and quality. Unlike DTG, which is picky and works best on high-cotton fabrics, DTF plays nice with a huge range of materials.
- Fabric Freedom: Go ahead and print those incredible designs on cotton, polyester, fleece, leather, and all sorts of blends without losing an ounce of quality.
- Vibrant, Detailed Graphics: DTF is a beast at reproducing complex designs. It handles unlimited colors, photorealistic details, and smooth gradients flawlessly.
- Exceptional Durability: When you apply them right, these transfers are soft, flexible, and tough. We're talking tested to survive over 100 washes without cracking, peeling, or fading.
The demand for custom gear isn't just a fleeting trend; it’s a booming industry. The global custom t-shirt printing market hit USD 5.16 billion and is on track to smash USD 9.82 billion by 2030. Digital methods like DTF are fueling this explosion because they deliver the speed and cost-effectiveness needed for the intricate designs everyone wants.
Streamlining Your Workflow for Major Cost Savings
One of the smartest things about the DTF process is how it lets you maximize every single print. Instead of ordering transfers one by one, you can batch multiple designs onto a single large film, known as a gang sheet.
By loading up a single sheet with different logos, sleeve hits, and full-sized graphics, you bring your per-print cost way, way down. Honestly, this is the single most effective trick for stretching your budget and boosting your profit margins.
To make this dead simple, our Auto-build gang sheet builder takes care of the entire layout for you. Just upload your designs, tell it how many of each you need, and the tool arranges everything perfectly to eliminate wasted space. It turns a tedious task into a quick, money-saving step.
This is an essential tool for anyone serious about creating custom apparel efficiently. If you're still weighing your options and want a deeper dive, check out our guide comparing DTF vs DTG printing.
Preparing Your Artwork for Flawless Prints
Let’s be honest: the single biggest factor in how your custom shirts turn out is the quality of your artwork. You can have the best printer in the world, but a blurry, low-resolution file will always produce a blurry, low-resolution print. Getting this right isn't just a technical step; it's the foundation of a professional product people will actually want to wear.
Think of your design file as the blueprint for the final shirt. Any flaws in that blueprint—fuzzy edges, stray pixels, or the wrong color setup—get faithfully reproduced on the fabric. Nailing the prep work saves you time, money, and the gut-wrenching disappointment of unboxing a batch of flawed tees.
Nail the Technical Specs for DTF Printing
To get that crisp, vibrant look you see on professional apparel, your artwork needs to meet a few key standards. The most critical requirement is resolution, measured in Dots Per Inch (DPI). For printing, the gold standard is 300 DPI.
An image that looks sharp on your computer screen (which is usually just 72 or 96 DPI) will look pixelated and fuzzy when it’s printed on a shirt. Always start your design in a 300 DPI canvas or make sure your final exported file meets this minimum. This is, without a doubt, the most common reason for poor print quality.
Just as important is a truly transparent background. Your artwork needs to be saved as a PNG file, which is a format that supports transparency. This ensures only your design gets printed, not a big white or colored box around it.
Pro Tip: Don't just trust the checkered background in your design software. Some programs use it as a visual placeholder, not true transparency. Zoom way in on the edges of your design to check for a faint "halo" of white or colored pixels. Those nearly invisible artifacts will show up in the final print and can ruin an otherwise great design.
To make sure your file is ready, you can use professional software like Adobe Photoshop or even free, user-friendly alternatives like Photopea to remove backgrounds and double-check your settings. For those just starting out, researching the best apps for clothing design can give you a major head start on creating print-ready artwork from the get-go.
Why Vectors Are King for Logos and Text
While high-resolution raster images (like PNGs) are great for photos and complex, detailed illustrations, vector files are the only way to go for logos, text, and solid graphics. Vector graphics are built using mathematical equations, not a grid of pixels.
What does that mean for you? It means you can scale a vector design to any size—from a tiny pocket logo to a massive back print—and it will never, ever lose quality or get blurry. The lines will always be perfectly sharp and clean, which is absolutely essential for professional branding.
- Raster (PNG, JPG): Made of pixels. Gets blurry and pixelated when you enlarge it. Best for photos.
- Vector (AI, SVG, EPS): Made of mathematical paths. Infinitely scalable with no quality loss. Best for logos and text.
If you have a pixel-based logo, it is absolutely worth the effort to get it vectorized. It’s a one-time step that ensures your brand looks sharp on every single shirt you print, today and for years to come.
Understanding Color for Perfect Prints
Here's something every new designer learns the hard way: the colors on your screen won't automatically match the final printed colors perfectly. Your screen displays color using an RGB (Red, Green, Blue) model, while printers often use a CMYK (Cyan, Magenta, Yellow, Black) process.
Thankfully, modern DTF technology has incredibly advanced color processing. For the most predictable and vibrant results, we recommend designing in a standard CMYK color profile.
If you're curious about the science behind it, you can learn more about the RGB to CMYK conversion process to get a better handle on how your on-screen design translates to a physical product.
Ultimately, prepping your artwork is all about taking control of the final outcome. By focusing on resolution, transparency, and the right file type, you're setting yourself up for success and guaranteeing every shirt you produce looks fantastic.
Building a Gang Sheet to Maximize Your Budget
Once your artwork is ready to go, the next move is what separates the pros from the hobbyists. This is where you shift from just ordering prints to strategically planning your entire run for maximum efficiency and, more importantly, profit. The secret weapon here is the gang sheet.
Instead of ordering every single transfer one by one, a gang sheet lets you pack multiple designs onto a single, large sheet of film. This one simple adjustment is probably the single most powerful way to slash your per-print cost and directly fatten up your profit margins. For ease of use and maximum cost effectiveness, nothing beats using a tool like our Auto-build gang sheet builder.
It's no secret the custom apparel world is booming. In the U.S., the custom screen printing industry—a close relative to modern DTF—is now made up of over 15,427 businesses. With a 5.9% annual growth rate, the market is on track to hit $12.8 billion, all thanks to easy online ordering and new apparel trends. And while screen printing has held a massive 55% market share for big bulk jobs, digital methods are becoming non-negotiable for anyone trying to stay competitive. You can get a deeper dive into the custom printing industry's growth on ibisworld.com.
This is exactly why mastering tools like gang sheets isn't just a good idea; it's essential for anyone serious about making money in this space.
The Old Way vs. The Smart Way
Not too long ago, setting up a gang sheet was a real headache. You’d have to fire up Adobe Photoshop or Illustrator, manually place each graphic, spin them around, and try to cram everything in without leaving awkward, expensive gaps. It took forever and never felt truly optimized.
Now, our Auto-build gang sheet builder completely changes the game. It takes that frustrating puzzle and turns it into a simple, hands-off process. You just upload your designs, tell it how many of each you need, and the software handles the rest.
The builder’s algorithm instantly figures out the most efficient layout possible, nesting your graphics together to kill wasted space and maximize every square inch of the film. A task that used to eat up an hour of your day is now done in seconds.
This kind of smart layout is a lifesaver, especially when you need to print custom tee shirts for different clients or product lines all at once.
This diagram breaks down the simple but critical flow for getting your art ready for the builder—nailing the high-resolution, transparency, and vector requirements is key. 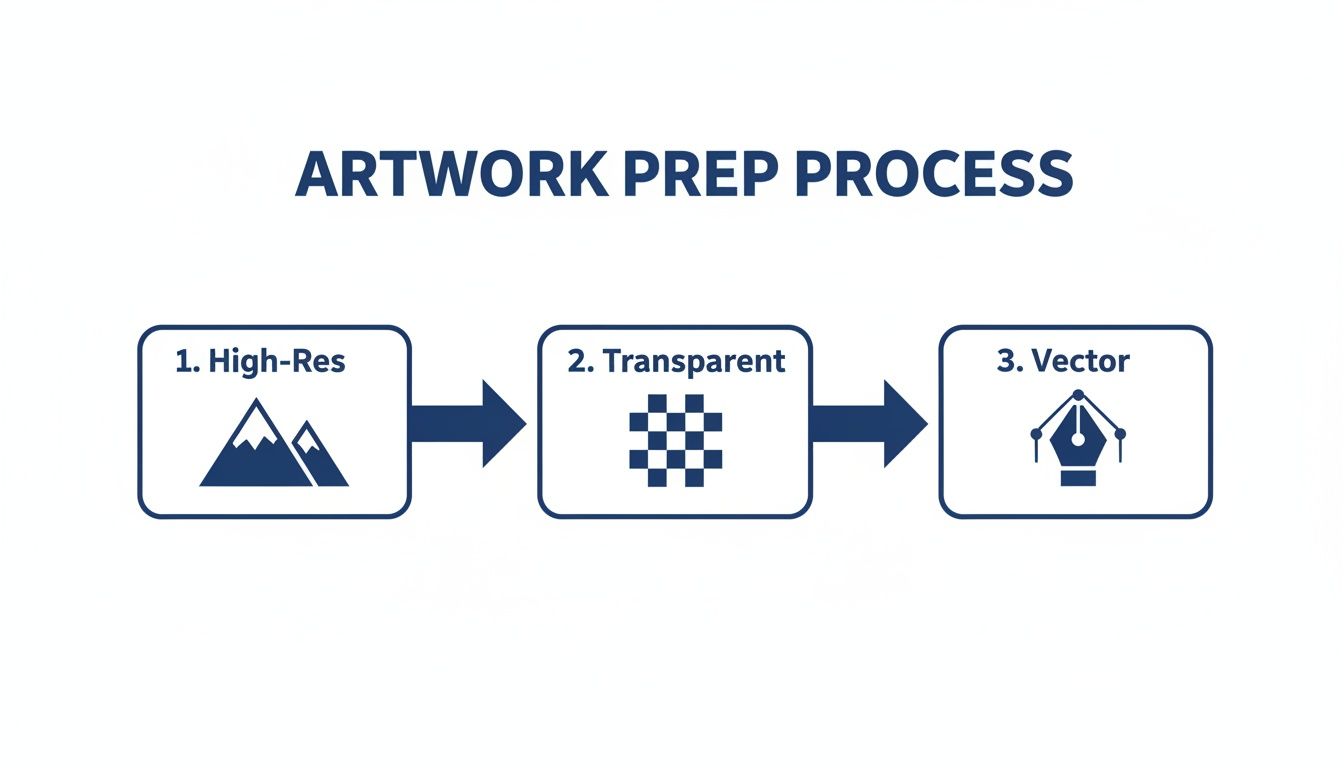 Getting these fundamentals right before you upload ensures the gang sheet builder can do its job perfectly, giving you flawless final prints.
A Real-World Cost-Saving Scenario
Let's look at how this actually impacts your wallet. Imagine you’re prepping for a weekend market and need to stock up on a few of your brand's best-sellers.
Your print list looks like this:
- 15 chest logos (4x4 inches)
- 10 full-back graphics (11x14 inches)
- 20 small sleeve prints (2x2 inches)
Ordering these as individual transfers means paying a separate price for all 45 pieces. That cost adds up fast, chipping away at the profit you make on every single shirt.
By using a gang sheet, you combine this entire run onto one or maybe two large sheets. You’re paying for the total film area, not for each little design. The cost savings are huge—we’re talking a 50-70% reduction in your per-transfer cost, sometimes even more. Using our Auto-build gang sheet builder makes this process effortless and guarantees you get the most cost-effective layout.
That kind of efficiency means you can either price your shirts more competitively at the market or just pocket a much healthier profit. It’s a core strategy that elevates a side hustle into a real business. For a more detailed breakdown, check out our guide on what DTF gang sheets are and how to use them.
How Our Auto-Builder Simplifies Everything
Using the auto-builder couldn't be easier. We designed it to be completely intuitive, even if you’ve never touched graphic design software in your life.
Here's how it works:
- Upload Your Designs: First, just upload all the print-ready PNG files you need for your project.
- Set Your Quantities: Next to each design, type in how many copies you need. No more duplicating files manually.
- Choose Your Sheet Size: Pick the gang sheet dimensions that make the most sense for your order size and budget.
- Let the Builder Work: Click one button, and the tool automatically arranges everything into the tightest layout possible.
This isn’t just about saving money on film. It’s about saving your time—time you can pour back into creating new designs, marketing your brand, and actually growing your business. For anyone who’s serious about printing custom apparel, it’s an absolute game-changer.
A Practical Guide to Applying Your DTF Transfers
Alright, you've got your gang sheet cut and your transfers are lined up. Now comes the best part—actually bringing your designs to life on the fabric. This is that magic moment where your digital art becomes a real, wearable product.
To get it right, you need to nail three things: temperature, time, and pressure.
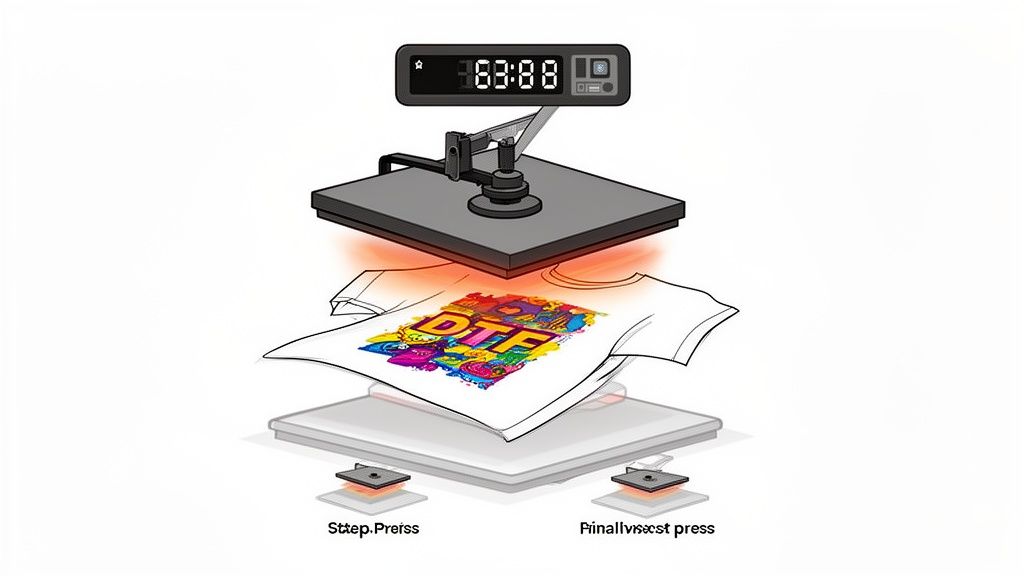
Dialing in these settings is what separates a shirt that looks amazing after 100 washes from one that cracks and peels in a month. And let's be clear: a home iron just won't cut it. You need the consistent, even heat and pressure that only a quality heat press can provide. It's a non-negotiable tool for professional results.
Dialing in Your Heat Press Settings
Every fabric reacts to heat differently. What works for a beefy cotton hoodie will absolutely scorch a lightweight polyester tee. Learning these little nuances is the key to avoiding costly mistakes and trashed garments.
The idea is to melt the transfer's adhesive just enough to create a permanent bond with the fabric's fibers, all without damaging the shirt itself. It’s a delicate balance, so we put together a handy cheat sheet for the most common materials you'll be working with.
Recommended Heat Press Settings by Fabric Type
This quick-reference chart is your starting point for getting the right temperature, time, and pressure for different materials.
| Fabric Type | Temperature | Time (First Press) | Pressure | Notes |
|---|---|---|---|---|
| 100% Cotton | 280°F | 10-seconds | Medium-Firm | This is your go-to for most standard tees. |
| Polyester | 240-250°F | 7-10 seconds | Medium | Lower temps are crucial to prevent scorching. |
| 50/50 Blends | 260-280°F | 10 seconds | Medium | A good middle-ground for both fiber types. |
| Tri-Blends | 260-285°F | 10 seconds | Medium-Light | These are sensitive, so press with care. |
| Fleece/Hoodies | 270-280°F | 10 seconds | Firm | Needs a bit more time and pressure to adhere. |
Always check the recommendations from your transfer provider first, but these settings are a rock-solid foundation for getting consistently great presses.
The Two-Press Method for a Flawless Finish
If you want that soft, matte finish that feels like it’s part of the shirt, you need to use the two-press method. This simple workflow ensures the design is perfectly bonded and embedded into the fabric for a premium look and feel.
- The Pre-Press: Before anything else, press the blank shirt for 5-7 seconds. This is a critical first step. It irons out any wrinkles and, more importantly, removes trapped moisture, giving you a perfectly flat, dry canvas.
- Position and First Press: Lay your DTF transfer on the shirt, design side up. You can use heat-resistant tape to hold it in place if you're worried about it shifting. Cover it with a Teflon sheet or parchment paper and press using the settings from the chart above.
- The Hot Peel: As soon as the timer beeps, open the press and immediately peel away the film. Hot peel transfers are designed for this—just pull it back in one smooth, confident motion.
- The Finishing Press: Cover the exposed design with your parchment paper or Teflon sheet one last time and give it a final press for another 5-7 seconds. This is the secret sauce. It pushes the ink deep into the fabric fibers, kills any plastic-like shine, and gives it that signature soft, matte look.
This finishing press is non-negotiable for a professional product. It dramatically improves the hand-feel of the print, making it more flexible and comfortable to wear, while also locking it in for maximum longevity.
Troubleshooting Common Application Issues
Even when you do everything right, things can go wrong. The good news is that most issues are simple to diagnose and fix. Here's a quick rundown of what to look for.
- Poor Adhesion (Edges Peeling): Nine times out of ten, this is a pressure problem. If your pressure is too light, the adhesive can't make full contact. Crank it up to a firm, even setting and try again.
- Scorching or Shininess (on Polyester): The culprit here is almost always too much heat. Drop your temperature down into the 260-275°F range for synthetics. Using a Teflon sheet also helps distribute heat more gently.
- Stiff, Plastic-Like Feel: This is a dead giveaway that you skipped the finishing press. That second press is what softens the design and makes it feel like part of the fabric. Never skip this final step.
By following this proven process—pre-press, first press, hot peel, and finishing press—you’ll be churning out high-quality custom apparel that looks and feels incredible.
Scaling Your Custom Apparel Business
Making that leap from a fun side project to a real-deal custom apparel business is a huge move. This is where your creative passion has to meet a solid business strategy. The focus shifts from just making one awesome shirt to figuring out how to build a smooth, profitable operation that can handle real volume.
If you're ready to scale up—whether you're launching a brand, growing your print shop, or taking on big promotional orders—the timing couldn't be better. The demand for custom gear is massive and still climbing. While Asia Pacific makes up over a third of global revenue, the U.S. is still the single largest market in an industry set to hit USD 10 billion by 2030. That’s a huge opportunity for small businesses ready to get serious. You can dig deeper into these global market trends on technavio.com.
Developing a Winning Pricing Strategy
Let's get straight to it: pricing is everything when you scale. If you underprice, you’re just spinning your wheels, leaving money on the table and making growth impossible. Overprice, and you’ll scare off the very customers you need. A smart pricing model isn't a random guess; it's a simple formula based on what it actually costs you to produce a shirt.
To get to a profitable number, you have to count everything.
- Cost of Goods: This is the easy part. It’s the cost of your blank tee plus the cost of the DTF transfer itself.
- Labor and Time: Your time isn't free. Assign yourself a reasonable hourly rate for pressing, folding, and packing each shirt. Don't skip this.
- Overhead: These are the "hidden" costs that can sink you if you ignore them—shipping supplies, design software, marketing, even a slice of your utility bills.
Once you have your total cost for one shirt, you apply your markup to find your retail price. A 2x to 3x markup is a common starting point, but this can shift depending on your brand's vibe and who you're selling to. Building a solid financial plan is key, and understanding concepts like how to price embroidery services can offer valuable insights that apply across any custom apparel method.
Partnering with a Reliable DTF Supplier
When orders start picking up, bottlenecks become your worst enemy. Your ability to get high-quality products out the door on time is almost completely dependent on your supply chain. This is why finding a dependable DTF transfer supplier is one of the smartest moves you can make.
A great supplier isn't just a printer; they are an extension of your business. Their speed, consistency, and quality directly impact your brand's reputation and your ability to meet customer expectations.
You need a partner who offers real, tangible benefits that help you grow.
- Fast Turnarounds: A client needs 100 shirts for an event this weekend? You need a supplier who offers 1-2 business day shipping or even next-day air to make it happen.
- Advanced Color-Matching: Brand consistency is non-negotiable. A top-tier supplier with precise color tech ensures a brand’s specific Pantone blue looks the same on every single order, every single time.
- Support Services: As you get busier, you need to offload tasks. Tools like our Auto-build gang sheet builder can save you a massive amount of time and money by perfectly optimizing your layouts. And for those really complex or high-volume jobs, a 'We Build It For You' service is a lifesaver, freeing you up to focus on sales instead of tedious file prep.
By focusing on sharp pricing and strategic partnerships, you build a framework that can handle growth. This is how you turn your creative hustle into a durable business built for the long haul.
Got Questions? We've Got Answers
When you're first getting into custom apparel, a few questions always seem to come up. It's totally normal. Getting a handle on these key details is what separates a good-looking shirt from a great one that you can confidently sell or wear. Let's run through some of the most common questions we hear every day.
What’s the Smartest Way to Print on a Budget?
For anyone doing small or medium-sized runs with a bunch of different designs, nothing even comes close to a DTF gang sheet. Think about it: instead of paying for each individual logo, you’re just paying for the total space you use on the film.
This is a huge win when you’ve got an order with a mix of big back prints, a few chest logos, and maybe some tiny sleeve graphics. By arranging them all on one sheet, you consolidate your costs and seriously drop the price per transfer. Our Auto-build gang sheet builder is designed for exactly this. It automatically packs your designs as tightly as possible, cutting down on waste and making sure you get the most bang for your buck.
How Do I Make Sure My Colors Don't Look "Off"?
Great color starts with a great art file. No exceptions. For the best, most vibrant results, always create your designs at 300 DPI and save them as a PNG with a fully transparent background. If you stick with a standard sRGB color profile, you'll get the most predictable outcome from screen to shirt.
A pro tip we always share: double-check for any semi-transparent pixels in your design. Little fades or glows can sometimes print in weird ways, so it's best to stick with solid colors for a clean, sharp look.
Beyond your file, the real secret is working with a print shop that has their color game on lock. Modern DTF systems use sophisticated color-matching tech that's calibrated to translate your digital file into ink with stunning accuracy. If you're working on a project where the color has to be perfect—like for a specific brand—ordering a single sample transfer first is a smart, low-cost way to ensure everything is spot-on.
Can I Just Use My Home Iron to Press These?
We get this one a lot. While it's tempting to try, using a regular home iron for DTF transfers is a recipe for disappointment. The problem isn't just the heat; an iron can't provide the consistent, heavy pressure needed for the adhesive to properly bond with the fabric fibers.
You'll almost always end up with an uneven application where some parts stick and others start peeling after just one wash. To get that professional, soft-hand feel and the legendary durability DTF is known for (100+ washes!), a real heat press is non-negotiable. Even an entry-level press will blow an iron out of the water and give you results you can be proud of.
So, What Really Makes DTF Better Than Other Methods?
DTF has a sweet spot that other methods just can't hit. It really combines the best features of digital and traditional printing.
- DTF vs. Vinyl (HTV): With DTF, you get unlimited colors, smooth gradients, and even photorealistic detail. Plus, there’s absolutely zero weeding involved, even on the most complex designs.
- DTF vs. Screen Printing: There are no setup fees or screen charges, which makes DTF incredibly affordable for small runs or designs with lots of colors. A five-color logo costs the same as a one-color logo.
- DTF vs. Direct-to-Garment (DTG): DTF prints are often more durable and versatile, sticking beautifully to polyester and blends where DTG can struggle. They also feel incredibly soft and flexible on the garment.
At the end of the day, DTF gives you the full-color freedom of digital printing with the workhorse durability of older methods. It's the best of both worlds.
Ready to bring your designs to life with apparel that looks and feels incredible? At Lion DTF Transfers, we're obsessed with delivering premium DTF transfers with unmatched speed and color accuracy. Let's get your next project started at https://liondtf.com.