


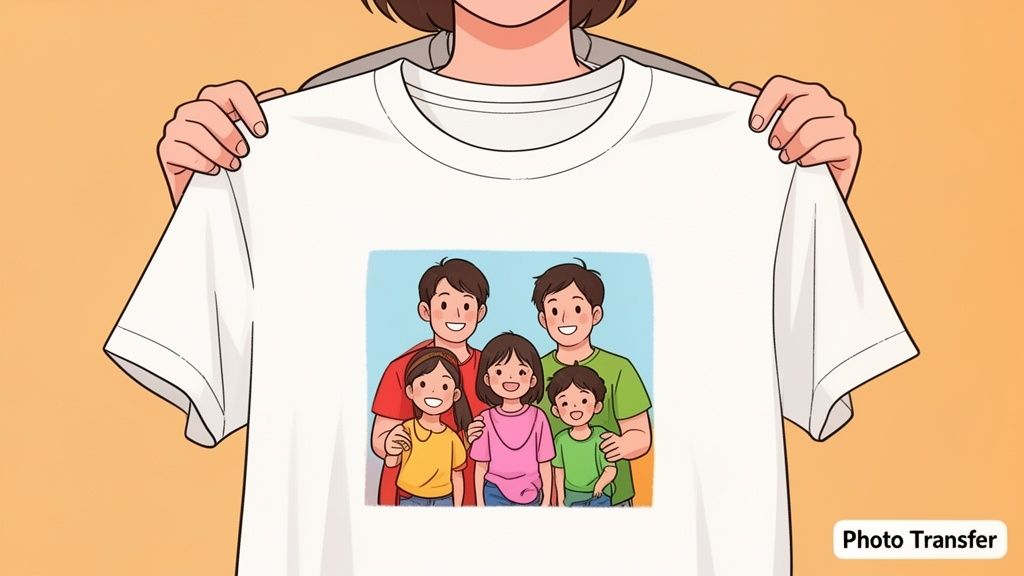
There was a time when putting a photo on a shirt meant you'd end up with a stiff, plastic-like square that would crack and peel after a few washes. Thankfully, those days are long gone. Modern photo iron on transfers have completely changed the game, letting you turn any digital picture—from a candid family portrait to that perfect vacation sunset—into a custom, wearable piece of art.
If you're looking for vibrant, long-lasting results that actually feel soft on the fabric, Direct-to-Film (DTF) technology is where it's at.
Bringing Your Favorite Photos to Life on Fabric
What used to require a professional print shop is now completely accessible for hobbyists and small business owners alike. High-quality DTF transfers deliver a pro-grade finish that was once out of reach for small-scale projects.
This guide will walk you through the whole process, showing you exactly how to transform a cherished photo into something you can actually wear. We’ll focus on what makes DTF so special—its ability to capture every tiny detail, from the subtle color gradients in a landscape to the fine lines in a beloved pet's fur.
Why Quality Matters for Photo Transfers
When you're trying to preserve a memory, the last thing you want is a blurry, faded image. The quality of the transfer itself is everything. A top-tier transfer, like those from Lion DTF, is engineered to produce sharp, crystal-clear images with colors that really pop.
This is possible because the DTF process prints your photo onto a specialized film first, which allows for a full spectrum of colors and gradients that old-school iron-on paper just can't handle. The result is a design that integrates with the fabric instead of just sitting on top like a stiff decal. It moves and stretches with the garment, which keeps it comfortable and prevents that dreaded cracking.
The real game-changer with modern photo iron-ons is their durability. A properly applied DTF transfer can handle over 100 washes, making sure your custom creation stays in your wardrobe rotation for years to come.
Maximizing Value for Every Project
Creating custom gear shouldn't drain your bank account, especially if you're outfitting a whole group for a family reunion, a local sports team, or your own small business. This is where a little strategic planning can make a huge difference in your budget.
Instead of ordering one transfer at a time, you can slash your costs by grouping multiple designs onto a single sheet. Tools like Lion DTF's Auto-build gang sheet builder make this incredibly simple for ease of use and cost effectiveness. Just upload all your photos—even if they're for different projects or need to be different sizes—and the tool helps arrange them to fill the sheet.
By using every last inch of the film, you bring the cost-per-print way down, making your projects much more affordable without ever sacrificing that professional quality your memories deserve.
How to Choose and Prepare Your Best Photos
Not every picture on your camera roll is ready for its big debut on a t-shirt. An image that looks stunning on your backlit phone screen can easily fall flat when it’s transferred to fabric. Honestly, picking the right photo and giving it a little prep work is the single most important step to make sure your custom apparel looks sharp, vibrant, and exactly how you pictured it.
The whole journey, from a digital file to a killer photo iron-on, starts with quality. If you begin with a low-resolution photo, you're going to get a blurry, pixelated, or soft-looking print. It’s a classic mistake that can sink an otherwise awesome project before it even starts, no matter how good the transfer material is.
The Foundation of a Great Transfer: High Resolution
For a crisp, clear print, you have to start with a high-resolution image. The gold standard in the print world is 300 DPI (dots per inch) at the final size you want to print. Photos from modern smartphones are usually big enough, but anything you’ve saved from social media or a text message has likely been compressed and is way too small.
So, how do you check? On a computer, just right-click the image file and look at its "Properties" (or "Get Info" on a Mac). You’ll see the dimensions in pixels. As a general rule of thumb, an image that’s at least 2000 x 3000 pixels is a solid starting point for most t-shirt designs.
Here's the key takeaway: You can always shrink a big, high-quality photo without losing detail, but you can never successfully blow up a small, low-res photo without it turning into a blurry mess.
Fine-Tuning Your Image for Fabric
Beyond just the resolution, the actual look of your photo plays a huge part in how it translates to a garment. From my experience, photos with strong contrast and bright, punchy colors almost always produce the most impactful results on apparel.
Think about making a few quick edits to really make your photo pop:
- Boost the Contrast: Pushing the contrast up just a bit helps create a clean separation between light and dark areas. This keeps the final print from looking washed out.
- Enhance Saturation: A little bump in color saturation can make the hues richer and more vivid, fighting back against any dullness that can happen when ink soaks into the fabric.
- Adjust Brightness: If your photo is too dark, you'll lose all the good details. Brighten it just enough to make sure your subject is clear and easy to see.
- Crop for Impact: Sometimes the best part of a picture is a small detail. Don’t be afraid to crop in tight around your main subject to create a design that’s more focused and powerful.
If you want to get your images prepped perfectly without a lot of fuss, a free AI photo editor online can be a huge help. These tools often have one-click enhancements that take all the guesswork out of making those quick adjustments.
Get Creative and Save Money
Once your photos are edited and ready to go, it's time to think smart. Let's say you have a few different pictures for a few different projects—like custom shirts for a family reunion and a tote bag with your dog's face on it. You don't need to place a bunch of separate orders. This is where you can really maximize your budget.
Using Lion DTF's Auto-build gang sheet builder, you can upload all your prepped photos and arrange them onto a single transfer sheet. For ease of use and cost effectiveness, it’s a super intuitive tool designed to be the most affordable way to get multiple high-quality photo iron-on transfers at once, seriously cutting down your cost per print.
Why DTF Is the Modern Choice for Photo Prints
When it comes to putting a photo on a shirt, the technology you use is everything. For years, the only real DIY option was that flimsy iron-on paper from the craft store. We’ve all been there. It was a fun start, but the results often looked… well, homemade. You’d end up with a stiff, plastic-like box around your image that was just waiting for the first wash to crack and peel.
Thankfully, the game has completely changed. Modern Direct-to-Film (DTF) transfers have set a new standard for quality, durability, and feel, making them the hands-down winner for creating lasting photo iron on transfers. The difference isn't small—it's a night-and-day comparison in every way that counts.
The Feel and Finish on Fabric
One of the biggest letdowns with old-school iron-on paper is the way it feels. The transfer sits on top of the fabric like a thick, heavy sticker. This doesn’t just make the shirt uncomfortable, it creates a rigid patch that refuses to move or stretch with the rest of the garment.
DTF transfers, on the other hand, are engineered for a soft, flexible finish. Because the ink bonds directly into the fabric's fibers, the final print is lightweight and breathable. It literally becomes part of the shirt, allowing it to stretch and move naturally. Your custom photo apparel will feel just as good as it looks, without any of that bulky, plastic sensation.
The real magic of DTF is how it integrates with the fabric. The transfer feels soft to the touch, and you won't see a stiff, boxy outline around your photograph, which is a common issue with traditional paper transfers.
Unmatched Vibrancy and Detail
A photograph is all about the details—the subtle gradients in a sunset, the sparkle in an eye, or the intricate patterns in a piece of clothing. Traditional transfer paper always seemed to struggle here, leading to colors that looked muddy or washed out. Fine details would get lost in translation, leaving you with a fuzzy, less-than-sharp image.
This is where DTF truly shines. The technology is capable of printing a full spectrum of colors with incredible precision.
- Photorealistic Quality: DTF can replicate millions of colors, ensuring your photo is reproduced with stunning accuracy and vibrancy.
- Crisp Details: Even the most intricate parts of your image, like fine lines or small text, come out sharp and clear.
- No Unwanted Background: Unlike paper that leaves a faint film or box, DTF transfers are printed precisely to the shape of your image, giving you a clean, professional look right out of the box.
Built to Last Through Wash and Wear
Let’s be honest, durability is the make-or-break factor for any custom garment. There's nothing more disappointing than watching your beautiful photo transfer crack, peel, or fade after just a couple of washes. This is a frustratingly common story for anyone who has used traditional iron-on paper.
High-quality DTF transfers from a provider like Lion DTF are in a completely different league when it comes to longevity. They are specifically designed to withstand the rigors of real life.
In fact, these transfers are tested to endure over 100 washes without losing their integrity. This level of durability means that your cherished memories will stay vibrant and intact on the fabric for years, not just a few wears.
The demand for more professional and reliable customization options is exploding. The global market for iron-on transfer sheets was valued at $1.21 billion and is expected to nearly double, showing a massive shift toward higher-quality solutions like DTF.
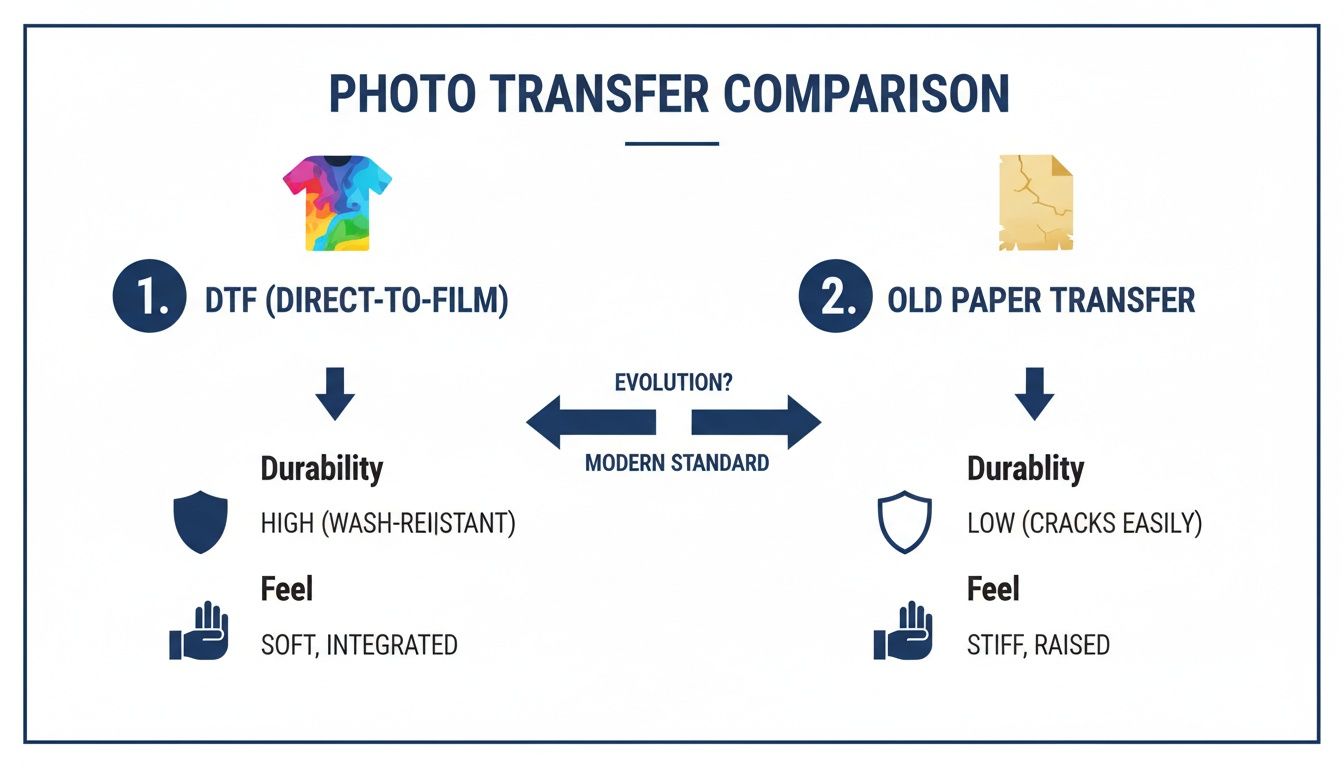
DTF Transfers vs Traditional Iron-On Paper
To really see the difference, it helps to put them side-by-side. The gap between old-school methods and modern DTF technology becomes pretty clear.
| Feature | DTF Transfers (Lion DTF) | Traditional Iron-On Paper |
|---|---|---|
| Feel on Fabric | Soft, flexible, and integrated into the fabric. | Stiff, plastic-like, and sits on top like a sticker. |
| Durability | Lasts for 100+ washes without cracking or peeling. | Often cracks, peels, or fades after a few washes. |
| Color Vibrancy | Excellent, with photorealistic color and detail. | Muted or dull colors, with loss of fine detail. |
| Fabric Compatibility | Works on cotton, polyester, blends, light & dark colors. | Usually limited to light-colored cotton or poly-blends. |
| Image Outline | No boxy outline; transfer is cut to the image shape. | Often leaves a visible film or box around the image. |
| Stretchability | Stretches with the fabric without cracking. | Does not stretch, causing the transfer to crack. |
As you can see, for anyone serious about quality and longevity, DTF isn't just an alternative—it's the only real choice for creating photo apparel that lasts.
Expanding Your Creative Freedom
Your creativity shouldn't be boxed in by your materials. Traditional photo transfer papers come with a long list of rules—they might only work on light-colored cotton fabrics, for example. DTF smashes those limitations and opens up a world of possibilities.
DTF transfers work beautifully with a huge range of fabrics, including cotton, polyester, rayon, and blends. They perform just as well on dark garments as they do on light ones, with no loss of color vibrancy. For small businesses and e-commerce sellers, this versatility is a game-changer for offering a diverse product line. You can learn more about the nuts and bolts of the technology in our detailed guide on how DTF transfers work.
And for those looking to produce multiple designs, DTF offers another huge advantage. Using Lion DTF's Auto-build gang sheet builder, you can place several different photos onto a single sheet. This approach is incredibly cost-effective and easy to use, allowing you to produce a variety of custom pieces affordably without ever compromising on professional-grade quality.
Your Guide to a Flawless Heat Press Application
Alright, you've prepped your photos and know why DTF is the only way to go. Now for the fun part: making it real. Using a heat press to apply a photo iron on transfer is pretty straightforward, but the difference between "homemade" and "professional" is all in the details. Let's walk through the process to make sure your design comes out perfectly.
The mission here is a perfect press. No scorched fabric, no peeling corners, just a clean, permanent application. Think of your heat press as the final, crucial step in locking that memory onto your garment. It all boils down to three things: consistent temperature, even pressure, and the right timing.
The Essential First Step: Pre-Pressing
Before your transfer even gets near the garment, you need to prep the fabric. Cotton and blends hold a surprising amount of moisture, even when they feel bone dry. That hidden moisture is the number one enemy of a good transfer; it turns to steam under the heat and messes with the adhesive.
This is why you always pre-press.
Lay your shirt on the heat press, close it (don't lock it down), and give it a quick 5-10 second blast of heat. This simple move does two critical things: it zaps any moisture and irons out all the wrinkles, giving you a perfectly flat, dry canvas to work with.
Seriously, don't skip the pre-press. It’s the single easiest thing you can do to prevent adhesion problems and guarantee a solid bond. It's a pro move that makes a huge difference in the final result.
Dialing in Your Heat Press Settings
Different fabrics need different treatment. If you use the same settings for everything, you’ll end up with a scorched polyester tee or an under-cured transfer on a cotton hoodie. Pressure is just as important—it ensures every last bit of your photo makes solid contact with the fabric.
Here are the go-to settings for applying Lion DTF transfers to the most common materials:
- 100% Cotton: Aim for 280°F for 10 seconds. Use medium to firm pressure.
- Polyester & Poly-Blends: Back the heat off a bit to 240-260°F for 8-10 seconds with medium pressure. This helps avoid that dreaded shiny, scorched look on synthetic fibers.
- Tri-Blends and Delicates: Be gentle here. Drop the temperature to 260-280°F and press for 8-10 seconds with medium pressure.
These are solid starting points. For a deeper dive, check out our complete guide on heat press settings for DTF transfers.
The quality you get from this process is worlds away from the old-school photo paper transfers. The difference in durability and feel is night and day.
As you can see, DTF wins hands-down. You get a soft, vibrant print that actually lasts, which is something those stiff, cracking paper transfers could never deliver.
The Hot Peel and Final Press
Once the timer beeps, pop open the press. It’s reveal time. Lion DTF transfers are a hot peel, which means you can pull the film off right away while the shirt is still hot on the platen. Just grab a corner and peel it back in one smooth, steady motion. You'll be left with your vibrant photo bonded perfectly to the fabric.
But hold on, you're not done yet. There's one more quick step for maximum durability.
- Cover the exposed design with a Teflon sheet or a piece of parchment paper.
- Close the heat press again.
- Press for another 5-7 seconds using the exact same settings.
This final press is the secret sauce. It locks the ink deep into the fabric's fibers, making the design incredibly durable in the wash and giving it a clean, matte finish.
The heat transfer paper market, which was valued at $541.1 million, continues to grow, but ongoing issues with ink and durability are pushing more and more creators toward superior options like DTF.
If you're looking to master different application techniques, you might find some great tips in this A DIY Guide to Iron On Clothing Decals. It’s a solid resource for anyone serious about apparel decoration.
And don't forget, if you have a bunch of photos for a big project, our Auto-build gang sheet builder is the most cost-effective and easy way to get it done. You can arrange and order all your photo iron on transfers at once, saving you time and money.
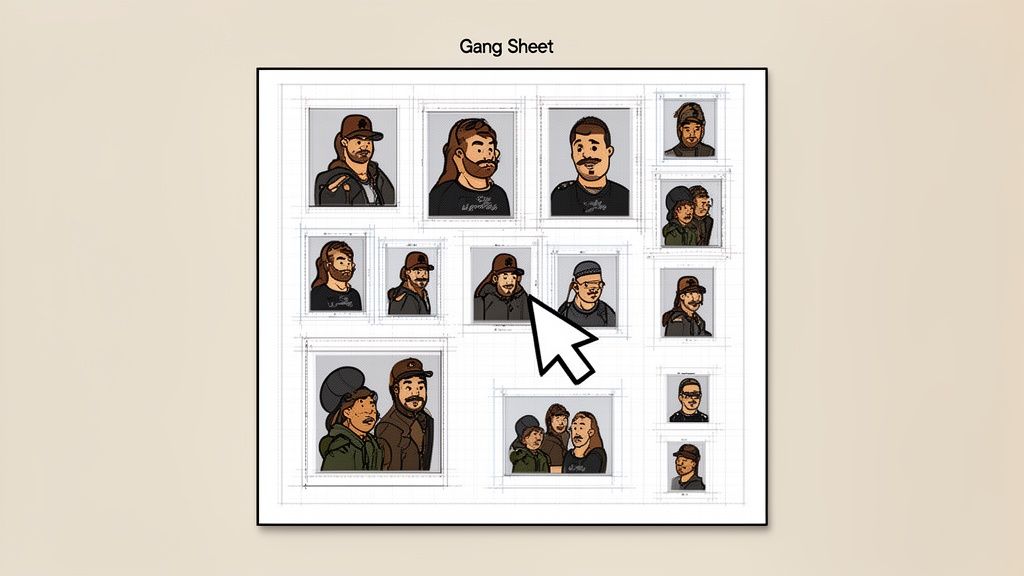
Getting More Prints for Your Money with Gang Sheets
If you're making more than one custom piece, efficiency is the name of the game. Ordering individual photo iron-on transfers works for a one-off project, but the costs add up fast for small business owners, Etsy sellers, or anyone outfitting a team.
This is where a smarter ordering strategy makes a huge difference.
The single most effective way to stretch your budget is by using a gang sheet. Think of it as one large transfer sheet that you can pack with as many different designs as you can fit. You're not paying per image anymore; you're paying for the whole sheet. That means your cost per print drops dramatically.
How a Gang Sheet Maximizes Your Budget
Let's say you need ten small photo transfers for a batch of hats, five medium ones for t-shirts, and a couple of large logos for tote bags. Ordering each of those separately would be a slow, expensive process. A gang sheet lets you bundle them all into a single order.
You just upload all your photos and logos and arrange them to fill the space. It’s a game-changer for a few key reasons:
- Drastic Cost Reduction: The more images you squeeze onto a sheet, the less you pay for each one. Simple as that.
- Ultimate Flexibility: Mix and match different images, sizes, and even designs for different clients or projects, all on the same sheet.
- Minimized Waste: By packing your images in tightly, you use almost every square inch of the film. It's good for your wallet and better for the environment.
For small businesses, this is huge. It lets you produce a whole range of products without a massive upfront investment, making it easier to test new designs or handle small-batch orders profitably. We dive deeper into this in our guide on how to use DTF gang sheets.
Making It Easy with the Auto-Build Gang Sheet Builder
The thought of manually arranging dozens of images might sound like a headache, but modern tools have made it incredibly simple. The Lion DTF Auto-build gang sheet builder was designed for exactly this. It's a user-friendly online tool that handles the hardest parts for you, ensuring ease of use and maximum cost effectiveness.
You just upload your prepared photo files, and the builder helps you arrange them for the best possible fit. You can literally watch your cost-per-image drop in real-time as you fill the sheet.
This method is powered by Direct-to-Film (DTF) technology, which has made a massive impact on the custom apparel world. The DTF printing market hit $2.72 billion globally and is expected to reach $3.92 billion by 2030. Its ability to produce crisp, durable prints on nearly any fabric makes it the perfect tool for anyone with a heat press.
This approach empowers creators to produce professional-quality photo iron on transfers at a fraction of the old-school cost, leveling the playing field for crafters and entrepreneurs alike.
You’ve just pressed a killer photo onto a shirt, and it looks perfect. Now, the real goal is to keep it that way. Making that memory last is just as much about aftercare as it is about the application itself.
Honestly, a few simple habits are all that separate a shirt that looks brand new after a year from one that starts to fade and peel way too soon. The great thing about high-quality DTF is that it’s built to be durable, but you still have to be smart about it.
The Right Way to Wash and Dry
The number one enemy of any custom print? Friction and heat. The easiest way to fight back is to turn the garment inside out before it ever touches the washing machine. This tiny step shields the photo transfer from rubbing up against other clothes, zippers, and buttons, which is a major cause of cracking and peeling over time.
Once it's inside out, stick to these rules for washing:
- Go Cold or Go Home: Hot water is the fastest way to weaken a transfer's adhesive and dull its colors. Always, always choose a cold cycle.
- Keep the Detergent Mild: Aggressive detergents, bleach, and even some scented fabric softeners are too harsh for the print. A gentle, bleach-free detergent is your best bet.
- Skip Fabric Softeners Entirely: These products are designed to break down fibers, but they can also break down the adhesive holding your transfer in place. Just leave them out.
When it's time to dry, heat is still the villain. The absolute best method is to hang the garment up and let it air dry. If you're in a hurry and have to use a machine, make sure you tumble dry on the lowest heat setting possible.
And whatever you do, never put a hot iron directly on the transfer. If you need to get wrinkles out, keep the shirt inside out, use low heat, and carefully press around the design area.
A well-cared-for DTF transfer can easily handle 100+ washes, holding onto its color and flexibility without a problem. Following these simple steps is how you get there. It’s the secret to keeping your custom gear looking pristine.
Stocking Up for Future Projects
Now that you know how to make your creations last, you can start planning your next batch of projects. Thinking ahead is the smartest way to make your custom apparel affordable and fun.
Instead of ordering just one transfer whenever inspiration strikes, think about grouping your favorite photos or designs together. With Lion DTF's Auto-build gang sheet builder, you can easily arrange a bunch of different images onto one sheet. It's a game-changer for cost savings and ease of use, letting you build a personal stash of ready-to-press designs for any occasion while seriously cutting your cost per print.
Common Questions About Photo Transfers
Even with a process that's pretty straightforward, questions are bound to pop up. It happens anytime you're working with new materials or trying out a new technique. Getting solid answers is the fastest way to build confidence and skip over the common mistakes that trip people up with photo iron on transfers.
Here are some of the most frequent questions we get from crafters and small business owners just like you.
What Resolution Should My Photo Be?
For a sharp, professional-looking transfer that doesn't scream "homemade," you need to start with a good quality image. Aim for at least 300 DPI (dots per inch) at the final size you plan to print it.
Grabbing a low-resolution image off social media is a surefire way to get a blurry, pixelated mess once it’s blown up on a shirt. Always, always start with the original, high-quality file from your camera or phone. It makes all the difference.
Can I Use a Regular Home Iron?
Look, you might be able to get a transfer to stick with a home iron, but a heat press is strongly recommended, especially for DTF photo transfers. Why? A heat press gives you perfectly consistent temperature and even pressure across the entire design. A home iron just can't do that.
That consistent heat and pressure is what ensures the transfer properly bonds to the fabric, giving it the durability to survive dozens of washes.
Honestly, using a home iron is the number one reason we see transfers peeling after a wash. Those uneven heat spots and inconsistent pressure just can't create the permanent bond a heat press can. If you're serious about this, it's an investment that pays for itself in reliable, pro-quality results.
Will My Transfer Have a Background on the Shirt?
Nope, and that’s one of the best parts about modern DTF technology. Some of the old-school transfer papers would leave a stiff, boxy outline around your image, which never looks good.
DTF prints are different. They are cut precisely to the shape of your photo, so the image blends seamlessly right into the fabric. You get just your picture, no weird background, for a much cleaner, high-end finish.
How Can I Order Multiple Small Photos Affordably?
This is exactly what gang sheets were made for. Instead of ordering every single photo as a separate transfer (which gets expensive fast), you can use a tool like our Auto-build gang sheet builder.
It lets you upload all your different images and arranges them onto a single large sheet. This is, by far, the most cost-effective and easy-to-use way to get a bunch of different photo transfers at once. It drops your cost per print way down and makes those small-batch projects a whole lot more profitable.
Ready to turn your favorite photos into professional-quality apparel? The Lion DTF Transfers Auto-build gang sheet builder makes it easy and affordable to get all your designs in one simple order. Create your custom photo transfers today!