Ready to make your own graphic tees? It really boils down to three things: a design that connects, a solid printing method like Direct-to-Film (DTF), and a reliable heat press to bring it all together. This trio is the secret to creating professional, durable, and surprisingly cost-effective apparel, whether it's for a passion project or your small business.
Your Blueprint for Creating Graphic Tees
Jumping into the world of custom apparel can feel like a huge leap, but trust me, creating pro-quality graphic tees is more achievable now than ever. Think of this guide as your roadmap, taking you from that first flicker of an idea all the way to a finished product you’d be proud to sell. We're not just making t-shirts; we're bringing a unique vision to life.
And this isn't just for big brands with deep pockets. The custom apparel scene is exploding, and independent creators are at the heart of it. The custom t-shirt printing market is on track to hit around $9 billion in 2025, jumping from $8.17 billion in 2024. Analysts see this trend continuing, predicting the market will reach an incredible $13.55 billion by 2029. Why? Because people are more than willing to pay for products that feel personal and unique. You can read more about the custom apparel market growth and what's fueling it.
What to Expect in This Guide
We're going to walk through every critical stage of the process. You'll get practical advice you can actually use to start making tees with confidence. The focus here is on modern, efficient methods that let small businesses and solo creators get amazing results without a massive upfront investment.
Here’s what we’ll cover:
- Conceptualization and Design: Tips for creating graphics that not only look good but also resonate with your audience.
- Printing Technology: A deep dive into why Direct-to-Film (DTF) transfers are such a game-changer for quality and versatility.
- Cost-Effective Ordering: How to use smart tools like our Auto-build gang sheet builder to fit multiple designs on one sheet, stretching your budget further for maximum cost effectiveness and ease of use.
- Application and Finishing: Step-by-step instructions for getting a perfect, long-lasting press every single time.
This guide is more than a list of instructions—it's a blueprint for building a skill, a hobby, or even a business. When you understand each piece of the puzzle, you'll be able to produce apparel that not only looks fantastic but also holds up to professional standards.
To keep sharpening your skills and stay on top of the latest trends, it's always a good idea to check out resources like Branditok's blog for more insights.
Alright, let's get started.
Crafting Designs That Actually Sell
A killer graphic tee starts with a design that actually connects with someone. Before you get lost in fonts and colors, you have to nail down who you're designing for. If you try to create a shirt that everyone will love, you'll probably end up with something nobody is passionate about.
The secret is to get specific. Find your niche. Instead of a vague idea like "funny t-shirts," dig deeper. How about "funny t-shirts for dog owners"? Even better: "funny t-shirts for corgi lovers." When you tap into a passionate community, your designs stop being just graphics and become inside jokes, badges of honor, and conversation starters.
The Technical Details That Matter
Once you've got the creative vision locked in, the technical side is what separates an amateur-looking shirt from a truly professional product. Getting these details right from the jump saves you a ton of headaches, wasted money, and disappointing prints down the road. This is the foundation for making your own graphic tees look slick.
First up, and this is non-negotiable: resolution. Your design file has to be 300 DPI (dots per inch). If you use a lower resolution, like the 72 DPI standard for web images, it's going to look blurry and pixelated when it hits the fabric. A high-res file simply packs more information into every inch, giving you that crisp, sharp print you're after.
Next, you need to get familiar with two basic image types:
- Raster Graphics: These are your pixel-based images, like a photograph. The key thing to remember is that they're resolution-dependent. Try to blow up a small raster image, and it'll get blocky and lose quality fast. Common formats are PNG, JPEG, and GIF.
- Vector Graphics: These are built with math—lines, curves, and points. Their superpower is scalability. You can resize a vector graphic from a tiny sleeve logo to a massive billboard with absolutely zero loss in quality. Think AI, EPS, and SVG files.
For designs with complex colors and textures, a high-resolution raster file (PNG) is perfect. For logos, text, or simpler graphics, starting with a vector file in a program like Adobe Illustrator is always the smartest move.
Preparing Your Files for Flawless Printing
Alright, let's get that design print-ready. The single most common mistake beginners make is forgetting about the background. For a graphic to print cleanly, it needs a transparent background. If you save your design with a white background still attached, you're going to get an ugly white box printed around your art—a dead giveaway of a DIY job.
The gold standard for DTF printing is a PNG file with a transparent background at 300 DPI. This format gives you the sharpness and transparency needed for a professional finish, ensuring only your design gets transferred to the shirt.
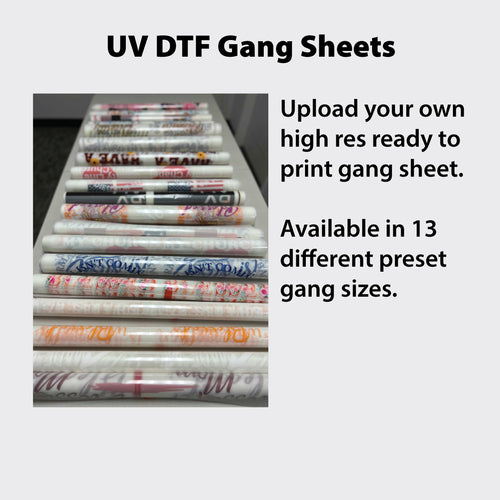
When it's time to print, you want to be efficient. Printing one design at a time is slow and racks up costs quickly. This is where a gang sheet becomes your best friend. It lets you arrange multiple designs—different sizes, logos, and full graphics—onto one large sheet to be printed all at once.
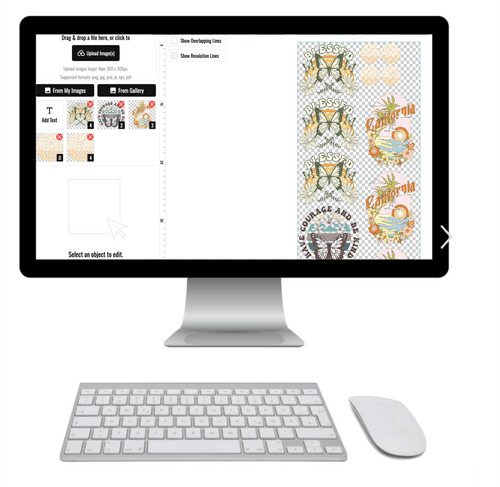
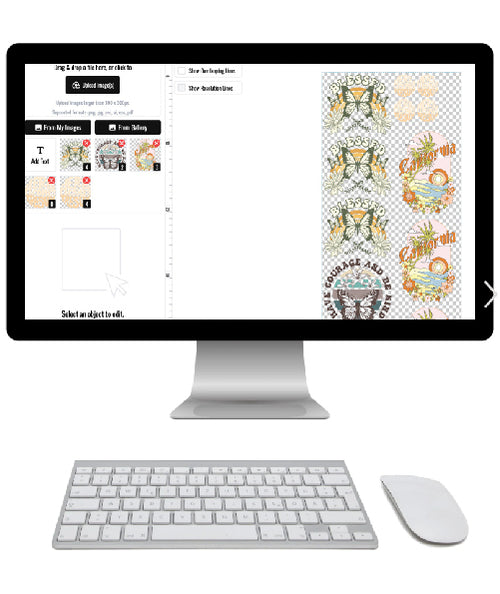
To make this dead simple and super cost-effective, our Auto-build gang sheet builder is the tool you need. You just drag and drop your print-ready PNG files, and the builder automatically nests them for ultimate ease of use, maximizing every single square inch of the sheet. This crushes your per-transfer cost and makes it affordable to produce a whole variety of designs at once.
Getting the design phase right is about more than just creativity. It’s about understanding the technical rules that guarantee a high-quality outcome. Master your resolution, know your file types, and use smart strategies like gang sheets, and you'll be creating graphic tees that look like they came straight off a retail rack.
So, you've nailed down an awesome design. Now comes the big question: how do you actually get it onto a shirt? This decision is a huge deal—it affects the final look, the feel, your costs, and how efficiently you can produce your gear.
Sure, there are the old-school methods. Screen printing is a classic for a reason; it’s durable and cheap for massive runs of simple designs. But the setup costs are killer, and things get complicated and expensive fast once you add more colors. Then you have heat transfer vinyl (HTV), which is fine for a one-off project but often feels thick and plasticky, with a bad habit of cracking or peeling over time.
This is exactly where Direct-to-Film (DTF) printing comes in and completely changes the game for creators.
The Unmatched Versatility of DTF
Right off the bat, the biggest win for DTF is that it isn't picky about fabrics. It works beautifully on 100% cotton, polyester, fleece, nylon, and blends.
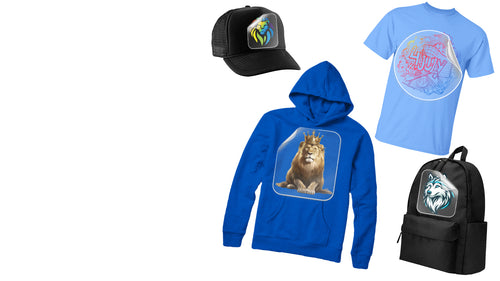
This means you’re not boxed in. You can press that same vibrant design onto a super-soft cotton tee, a sleek poly performance shirt, or a cozy fleece hoodie without a single issue. Compare that to something like sublimation, which can only bond with polyester fibers, seriously limiting your garment choices. DTF blows those barriers away, giving you total freedom to pick the best apparel for your brand.
Superior Feel and Unbeatable Durability
Nobody likes a custom tee with a graphic that feels like a stiff, heavy patch. That’s the classic complaint with HTV. DTF transfers, on the other hand, are known for their incredibly soft, flexible feel. Because the ink is printed onto a film first, the final transfer is lightweight, breathable, and moves with the fabric instead of fighting against it.
And when it comes to durability? DTF is a beast. These prints are engineered to last, often outliving the shirt itself. They resist stretching, cracking, and fading, even after going through the wash dozens of times. This pro-level longevity is a major reason why so many small businesses and established brands are making the switch.
A high-quality DTF transfer should easily handle 50-100+ wash cycles without any major breakdown. That's the kind of durability that builds trust and keeps customers coming back for more.
To help you visualize where DTF stands against the other popular methods, here's a quick side-by-side breakdown:
T-Shirt Printing Method Comparison
This table compares the most common methods for making graphic tees, focusing on the key factors that matter most to creators and small businesses.
| Method | Best For | Fabric Compatibility | Feel & Durability | Cost-Effectiveness |
|---|---|---|---|---|
| DTF | Full-color, detailed designs on any fabric at any scale. | Excellent (Cotton, poly, blends, nylon, fleece, leather). | Soft, flexible, and highly durable. Excellent wash resistance. | Excellent for small to large runs. Very low cost per print with gang sheets. |
| Screen Printing | Simple, low-color designs in very large batches (100+). | Good (Best on cotton, but can work on blends). | Varies. Can be soft, but heavy ink layers feel thick. Very durable. | Poor for small batches due to high setup fees. Great for huge volumes. |
| DTG | Full-color, detailed designs on natural fibers. | Limited (Primarily cotton and high-cotton blends). | Very soft and breathable as ink soaks into the fabric. Good durability. | Good for one-offs and small runs, but can be slow. |
| HTV | Simple, single-color text or shapes for one-offs. | Good (Cotton, poly, blends). | Often feels thick and stiff. Prone to cracking/peeling over time. | Okay for single items, but time-consuming and expensive to scale. |
| Sublimation | Full-color designs on white/light polyester garments. | Very Limited (Polyester only). | Excellent. Ink becomes part of the fabric, so there is no feel. Permanent. | Good for one-offs, but limited by fabric and color choices. |
As you can see, DTF hits that sweet spot of versatility, quality, and scalability that's hard to beat.
Cost-Effectiveness for Any Scale
For anyone just starting out, budget is everything. Screen printing forces you into large minimum orders to be affordable, which is a huge gamble when you’re testing a new design. DTF, on the other hand, makes it possible to do small, affordable runs. This flexibility is perfect for launching a new collection, creating limited-edition drops, or handling custom orders without sinking cash into a mountain of inventory.
While both DTF and Direct-to-Garment (DTG) are great for full-color designs, they serve different needs when it comes to fabric options and workflow. For a deeper dive, check out our in-depth comparison of DTF vs DTG printing.
The real secret to making DTF incredibly cheap is using gang sheets. Instead of ordering one transfer at a time, you can pack a single large sheet with multiple designs—your main graphics, smaller sleeve logos, neck tags, you name it. This approach drops your cost-per-print down to almost nothing.
Our Auto-build gang sheet builder takes all the guesswork out of this. You just drag and drop your artwork, and the tool automatically arranges everything to use every last inch of space. It makes production ridiculously efficient and cost-effective, giving anyone the power to create retail-quality graphic tees with incredible ease of use.
Mastering the DTF Gang Sheet Builder
Alright, now that you see why DTF is the clear winner for quality and versatility, let's get into the single biggest strategy for making it ridiculously affordable. Ordering individual transfers one by one? That's the slow, expensive route. The real secret the pros use to slash their costs is the gang sheet.
A gang sheet is just a big roll of DTF film where you cram as many designs as you can to be printed all at once. Shifting your mindset from ordering per design to printing per sheet is a total game-changer for anyone trying to make graphic tees without breaking the bank.
The Power of Maximizing Your Print Area
Think of it like baking cookies. You wouldn't put one single cookie on a giant baking tray, right? Of course not. You'd fill that entire sheet to make the most of your oven space and time. A gang sheet is the exact same logic, but for printing.
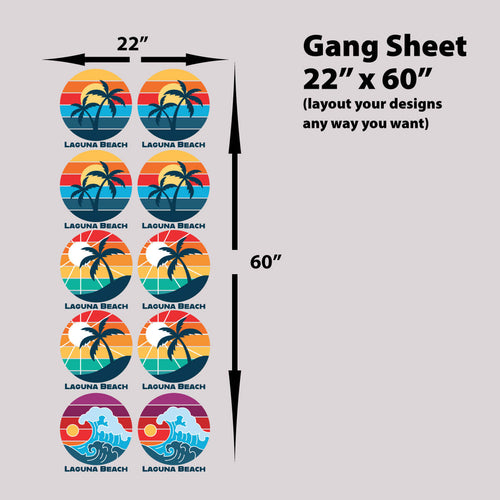
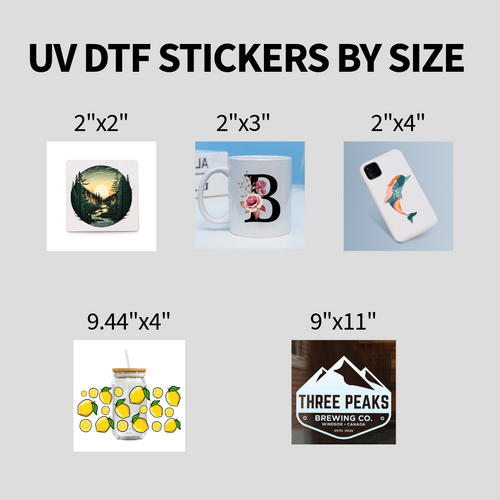
Instead of paying for a single 12x12" chest design, you can grab a 22x60" sheet and fit that main design, plus a bunch of sleeve logos, a few pocket-sized graphics, and even some custom neck tags—all for one flat price.
This completely flips your cost-per-print on its head. All of a sudden, those little add-on graphics like sleeve hits or neck tags become practically free. You're just filling up empty space on a sheet you've already paid for. This is the kind of efficiency that lets small shops and independent creators go toe-to-toe with the big brands on price without ever cutting corners on quality.
From printing the film to the final press, the whole DTF workflow is built for efficiency, and gang sheets just crank that up a notch.
This process shows how every step—printing, powdering, and pressing—is streamlined for consistency. Using a gang sheet just means you’re prepping a whole bunch of transfers in one go.
Our Secret Weapon: The Auto-Build Gang Sheet Builder
Let's be real: manually arranging designs to fit perfectly on a sheet is a tedious puzzle. You're constantly measuring, rotating, and nudging graphics around, trying not to waste an inch of that precious film. That’s exactly why we built our Auto-build gang sheet builder—to take all that guesswork and manual labor off your plate, maximizing both cost-effectiveness and ease of use.
It’s a powerful tool with a simple drag-and-drop interface. Just upload all your print-ready PNG files, and the builder’s smart tech automatically nests them together, finding the most space-efficient layout possible. No more playing digital Tetris.
For a deeper dive into making your print budget work harder, check out our detailed guide on the strategic advantages of using DTF gang sheets.
A Quick Walkthrough of the Builder
Using the auto-builder is incredibly straightforward and puts you in the driver's seat of your production costs. Here’s how it works:
- Choose Your Sheet Size: First up, pick the gang sheet dimensions that fit your project. We've got various sizes, from smaller sheets for quick tests to massive rolls for big production runs.
- Upload Your Art: Next, just drag and drop all your print-ready design files right into the builder. You can toss in everything at once—from huge back pieces to tiny logos.
- Watch the Magic Happen: The tool instantly gets to work, arranging your designs to maximize every square inch. You can see it happen in real-time as it rotates and fits each graphic together perfectly.
- Fine-Tune if You Want: While the auto-build is ridiculously good, you still have the final say. Feel free to manually move, resize, or duplicate any design right on the sheet to make any last-minute tweaks.
- Review and Go: The builder shows you a crystal-clear preview of your final gang sheet and calculates the cost instantly. No hidden fees, no surprises. What you see is exactly what you get.
This tool isn't just about saving space; it's about saving you time and headaches. It lets you get back to what you do best—creating awesome designs—instead of getting bogged down in tedious layout planning.
Let’s say you’re dropping a small collection. You've got a main t-shirt design, a matching hoodie design, and a logo you want to put on the sleeve of both. With our builder, you could:
- Add two copies of the 11" wide t-shirt design.
- Place one copy of the 12" wide hoodie design.
- Duplicate the 3" sleeve logo four times.
The builder will arrange all six of these graphics onto a single sheet, giving you a complete set of transfers for two full outfits at a tiny fraction of what you'd pay to order them one by one. This is how you start making graphic tees with real business savvy.
Pressing Your Designs for a Perfect Finish
You’ve got your premium transfers in hand, and now for the most satisfying part: bringing your design and garment together. A perfect application is just as crucial as a killer design. This is where your vision finally becomes a wearable, professional-quality product.
This final stage is all about precision. Getting the right temperature, pressure, and time creates a permanent bond, and when you nail these three elements, you get flawless, retail-ready results every single time.
Why a Heat Press Is Non-Negotiable
First things first, let's address the elephant in the room: can you just use a home iron? While it might seem possible for a one-off craft project, it’s a guaranteed path to inconsistent and short-lived results. A home iron simply cannot deliver the uniform heat and consistent, heavy pressure that DTF transfers need to cure properly.
This lack of control leads to all the classic problems:
- Uneven Adhesion: You'll end up with spots where the design lifts or bubbles because the heat wasn't evenly distributed.
- Poor Durability: Without enough pressure, the adhesive won’t fully bond with the fabric fibers. That means your design will likely crack and peel after just a few washes.
- Scorched Garments: Irons have notorious "hot spots" that can easily burn or discolor your t-shirts, ruining all your hard work.
A quality heat press is an investment in consistency and professionalism. It gives you precise control over every variable, ensuring every shirt you make meets the same high standard. When you're making graphic tees for a business, that reliability is everything.
Perfecting Your Pressing Technique
Applying our hot-peel transfers is straightforward, but following the steps correctly is the key to a flawless finish. Before you even think about placing the transfer, always pre-press your garment for 5-10 seconds. This simple step removes hidden moisture and wrinkles, creating a perfectly smooth surface.
Recommended Settings:
- Temperature: 300-320°F (149-160°C)
- Time: 10-15 seconds
- Pressure: Medium to heavy
Once your press is heated, position your transfer on the garment. Lay a Teflon sheet or parchment paper over the design to protect it, then press for the recommended time.
The real magic of our transfers is the hot-peel technique. As soon as the press opens, you can peel the film away smoothly and confidently while it's still hot. It's faster and leaves a soft, clean finish.
After that initial peel, I always recommend a quick second press. Cover the design again with parchment paper and press for another 3-5 seconds. This final step helps lock the design into the fabric fibers, seriously enhancing its soft-hand feel and long-term durability.
For a complete guide, check out our article on the best heat press settings for DTF transfers to fine-tune your process for different fabrics.
Troubleshooting Common Application Issues
Even with the best equipment, you might run into a hiccup now and then. Don't worry—most issues are an easy fix.
If you notice parts of your transfer aren't sticking, it’s almost always a pressure problem. Double-check that your heat press is applying firm, even pressure across the entire design. If you're pressing near a thick seam, collar, or zipper, the platen might not be making full contact. Using a pressing pillow can help even out the surface and solve this instantly.
What if the design feels too thick or stiff after pressing? Your temperature might be a bit too high, or you may have pressed for too long. Stick to the recommended settings and remember that the short second press is all you need to set the ink. Mastering this final step is what elevates your project from a simple DIY shirt to a professional-grade graphic tee you can be proud of.
Turning Your Passion into a Business
Once you've got your production process completely dialed in, the natural next step is to start thinking bigger. It's one thing to make awesome tees for yourself, but turning that skill into a real-deal business is a whole different ballgame. Moving from a hobbyist to an entrepreneur brings a new set of challenges, but trust me, the rewards are worth it. It all begins with smart sourcing and a solid pricing strategy.
Finding the right blank apparel is a game-changer. Your customers will absolutely notice the difference between a cheap, scratchy tee and a soft, well-fitting one. Look for suppliers that give you the details—fabric weight (GSM or oz), material blends (like 100% ringspun cotton vs. a 50/50 poly-cotton blend), and consistent sizing. Don't be shy about ordering samples from a few different wholesalers. Get the shirts in your hands and feel the quality for yourself before you commit to a big order.
Pricing Your Tees for Profitability
With your blanks and transfers figured out, it’s time to talk numbers. Pricing your graphic tees correctly is what separates a sustainable business from a short-lived hobby. A classic mistake is only accounting for the cost of the shirt and the transfer itself. You have to factor in everything.
Your pricing formula should cover all the bases:
- Cost of the Blank Tee: The price per shirt you pay your supplier.
- Cost of the DTF Transfer: This is where using our Auto-build gang sheet builder gives you a massive advantage by slashing your per-design cost through its cost-effective and easy-to-use platform.
- Your Time: Seriously, don't forget to pay yourself for the labor of pressing, folding, and packing each order.
- Overhead: This is the sneaky stuff—shipping supplies, software subscriptions, and marketing costs.
A great starting point is the cost-plus pricing model. Just add up all your direct costs per shirt, then add your desired profit margin. A healthy margin is typically between 40% and 60%. This ensures you’re not just breaking even but actually building a profitable brand.
Marketing Your New T-Shirt Brand
Your amazing products won't sell themselves. Good marketing kicks off with visuals that stop the scroll. You don't need a professional studio to make it happen; you can take incredible product photos with a smartphone, some good natural lighting, and a clean background. Make sure to shoot a mix of flat lays (shirts laid out neatly) and lifestyle shots (on a model or yourself) to show people how the tees actually look and fit in the real world.
Once your graphic tees are ready for the spotlight, understanding how to successfully launch a new product is your roadmap to building a real brand. Social media platforms like Instagram and TikTok are visual goldmines for apparel. Post high-quality photos, create engaging videos showing your pressing process, and start connecting with potential customers who share your vibe.
The opportunity for creators right now is bigger than ever. The global print-on-demand market, which powers so many independent brands like yours, is projected to hit a staggering $19.8 billion by 2029. This incredible growth just shows how modern tech allows anyone to launch a business with minimal upfront risk. By combining quality products with smart marketing, you can turn that passion project into a thriving business.
Got Questions About Making Graphic Tees?
Even the best guides leave a few questions unanswered, especially when you’re getting your hands dirty for the first time. Getting the right info upfront is the key to building confidence and dodging those rookie mistakes. Let's tackle some of the most common questions we hear from creators just like you.
What’s the Best File Format for My Designs?
For the sharpest possible prints, a high-resolution PNG file (300 DPI) with a transparent background is the absolute gold standard. This setup guarantees your design prints with clean, crisp edges—no more of that dreaded colored box around your artwork.
Vector files, like AI or SVG, are also a fantastic way to go. Their biggest superpower is scalability; you can stretch a design from a tiny pocket logo to a massive back piece with zero loss in quality. The good news? Our Auto-build gang sheet builder is designed to handle all these pro-level formats, making your upload process easy and cost-effective.
How Many Designs Can I Squeeze onto One Gang Sheet?
This is my favorite question because the answer puts you squarely in control of your costs. The number of designs you can fit is completely up to you and depends on two things: the size of your graphics and the dimensions of the gang sheet you pick. For example, a 22x60 inch sheet might hold dozens of small logos or just a handful of big front-and-back designs.
That’s exactly why our Auto-build gang sheet builder is such a game-changer for your wallet. It makes it incredibly easy to use your space efficiently. You can upload all your artwork at once and drag everything around visually, seeing in real-time how to pack every last square inch to get the most cost-effective sheet possible.
Can I Just Use My Home Iron Instead of a Heat Press?
Look, for a one-off personal project you might get away with it, but we really, really advise against it for anything else. If you want professional, durable results that you can actually sell or wear with pride for years, a heat press isn't just a suggestion—it's non-negotiable.
A heat press delivers consistent, even heat and the heavy, uniform pressure that a home iron just can't physically replicate. That combination is absolutely critical for the DTF adhesive to properly bond to the fabric fibers. Without it, you're looking at a graphic that will peel or crack after just a few trips through the laundry.
How Do I Take Care of My New Custom Tee?
Proper care is what makes a great custom tee last. To keep your DTF-printed shirt looking vibrant and feeling great wash after wash, just follow these simple rules:
- Turn the garment inside out before washing. Use cold water on a gentle cycle.
- Tumble dry on a low heat setting. For maximum longevity, hang it up to air dry.
- Steer clear of harsh detergents or any kind of bleach.
- Whatever you do, never iron directly on the graphic itself.
Ready to stop wondering and start creating? Lion DTF Transfers makes it ridiculously simple to bring your designs to life with quality you can see and feel. Fire up our Auto-build gang sheet builder and see for yourself how easy it is to create vibrant, durable transfers for your next big idea.

