Key Takeaways:
- Process Clarity: Learn the exact steps for creating professional-grade DTF transfers from home.
- Essential Tools: Understand which equipment and materials make the biggest difference in print quality.
- Pressing Precision: Find out how heat press settings impact the final outcome of your DTF application.
DTF (Direct-to-Film) printing has opened up a new level of control and versatility for apparel decorators, especially those ready to bring production in-house. Whether you're looking to expand your offerings, reduce outsourcing costs, or meet faster turnaround expectations, making your own DTF transfers at home can give you a serious edge if it's done right. But not all setups deliver equal results. The difference is in the detail: from how you prep your files to how you dial in your press settings.
At Lion DTF Transfers, we’re not just part of the DTF industry; we help define it. With thousands of custom and wholesale orders fulfilled across the U.S. every week, we’ve become the go-to supplier for print shops, apparel brands, and on-demand creators who value speed, consistency, and pro-level results. Our same-day and one to two day turnaround is matched only by the precision of our transfers, which are tested, trusted, and ready to press.
We will be discussing how to make DTF transfers at home, breaking down the process step by step with insights that come straight from the production floor.
What Is A DTF Transfer?
DTF (Direct-to-Film) transfers are a modern print solution designed to deliver high-quality, full-color graphics onto fabric using heat and pressure. Unlike traditional screen printing, DTF uses water-based inks printed onto a special PET film, then applied to garments using a heat press.
The process offers professional results without the need for burning screens, weeding vinyl, or pretreating garments. This makes it ideal for both large production shops and small businesses working from home.
What sets DTF apart is its versatility. It adheres to cotton, polyester, blends, and more. The finished result is durable, stretchable, and vibrant, holding up well through multiple washes.
If you're just getting started and wondering which side of the DTF transfer you print on, it's an important detail that affects print quality and application success.
DTF transfers offer a scalable, mess-free method for printing detailed artwork on demand. For print professionals, they’re a reliable tool that delivers speed, consistency, and clean results without the overhead of traditional methods.
Essential Equipment And Materials For Making DTF Transfers At Home
To make high-quality DTF transfers at home, including next day dtf projects, you’ll need the right equipment and materials. Each part of the setup plays a role in the final result, from print clarity to how well the transfer adheres to the fabric.
DTF Printer
A DTF-specific printer is required. These printers are often modified versions of standard inkjet models that support pigment-based textile inks. Avoid using regular home printers, as they aren't built to handle the ink flow or film feed needed for DTF printing.
PET Film
You’ll need cold peel PET film designed for DTF printing. It acts as the base for your printed design and must be compatible with your printer and ink. Always store it in a clean, dry place to avoid contamination that can affect transfer quality.
DTF Ink And Adhesive Powder
DTF ink is a water-based pigment ink that prints in CMYK plus white. The white ink acts as the backing layer for vibrant prints. After printing, you’ll apply DTF adhesive powder to the wet ink. This powder is what allows the transfer to bond permanently with the fabric during pressing.
Curing Unit Or Heat Source
Once the powder is applied, it needs to be melted to create a stable transfer. This is typically done with a curing oven or a heat press used in hover mode. The powder must melt evenly without burning or bubbling.
Heat Press
A quality heat press is essential. It provides the pressure and temperature required to apply the transfer to fabric. If you're unsure why a heat press is used and not a household iron, check out this resource on why is a heat press is used for DTFs.
With the right tools in place, you’ll be set up for consistent, professional results from home. In the next section, we’ll walk through the full DTF transfer process step by step.
Step-By-Step Process: How To Make DTF Transfers At Home
Creating DTF transfers at home requires precision at each stage. From printing to heat pressing, the goal is to produce sharp, vibrant designs that hold up in real-world wear. Here’s how the full process works:
Step 1: Prepare Your Design File
Start with a high-resolution design in CMYK color mode. Make sure the background is transparent and the file format is compatible with your RIP software, typically PNG or TIFF. The RIP software will separate colors and manage white ink layering, which is essential for bold prints.
Step 2: Print The Design On Pet Film
Load the PET film correctly into your DTF printer. If you’re not sure how to orient it, review this guide on which side of the DTF transfer you print on. Print in mirror mode so the image appears correctly when transferred. The printer will lay down colored ink first, followed by a layer of white ink.
Step 3: Apply Adhesive Powder
While the ink is still wet, sprinkle hot-melt adhesive powder over the printed area. Hold the film by the edges and gently shake off the excess powder. Be thorough here. Uneven powder application will result in patchy adhesion during pressing.
Step 4: Cure The Powder
Use a curing oven or hover your heat press about half an inch above the film to melt the powder evenly. You’ll know it’s cured when the powder turns glossy and smooth. This step is critical to avoid under- or over-melting, both of which affect durability.
Step 5: Press The Transfer Onto the Fabric
Place your garment on the heat press, position the film face down, and press with firm pressure. The exact temperature and time settings are covered in the next section. Allow the film to cool fully before peeling it off. Rushing this step will affect the transfer’s finish and feel.
Step 6: Optional Post-Press
Some printers do a second press with a sheet of parchment or Teflon for added durability and a matte finish. It’s not mandatory, but it can help lock in the ink and smooth out the texture on certain fabrics.
This is the full DTF transfer process simplified for at-home production. Next, we’ll get into how to optimize the actual print step, including file setup and printer settings.
How To Print DTF Transfers: File Setup And Printing Tips
Printing is where quality starts. Even with the best film and powder, poor file prep or incorrect printer settings can ruin a transfer. Here’s how to get the printing stage right the first time.
Use High-Resolution Artwork
Always work with high-resolution images at 300 DPI or higher. Low-res designs may look fine on screen but will blur or pixelate when printed on film. Avoid stretching or upscaling images unless they were created as vectors.
Convert To CMYK
DTF printers use CMYK ink systems with an added white channel. Your artwork should be prepared in CMYK color mode to preserve color accuracy during output. Files created in RGB may shift in tone once converted.
RIP Software Configuration
RIP (Raster Image Processor) software is non-negotiable in DTF printing. It controls ink layering, white ink placement, and print order. Configure your RIP to print white ink last, layered over the color inks. This gives your transfers the opacity needed to pop on dark or colored garments.
Print In Mirror Mode
Mirror your design before sending it to the printer. The design prints reversed on the film so that when it is pressed onto the garment, it reads correctly. Skipping this step is a common mistake among beginners.
Dry Environment And Clean Workspace
Dust or humidity can compromise the print surface. Keep your film clean and store it flat. Avoid touching the print side of the film with bare hands, as oils can interfere with ink adhesion. A controlled environment prevents print defects like banding or bleeding.
By dialing in these steps, you’ll get cleaner prints, better color, and fewer issues during pressing. Now let’s break down the application process, including heat press settings and pressing technique.
DTF Transfer Instructions: Heat Press Settings For DTF And Application
The pressing stage is where everything comes together. A well-printed film will only produce professional results if it's applied with the correct heat, pressure, and timing. Here's how to get consistent results during application.
Set The Right Heat Press Temperature
For most DTF transfers, a temperature of 240 to 280°F is ideal. Lower than that, and the adhesive may not activate fully. Higher temperatures can scorch fabric or distort the print. Always allow your heat press settings for DTF to reach full temperature before starting.
Apply Firm, Even Pressure
Use medium to firm pressure to bond the adhesive powder to the fibers of the fabric. Uneven or light pressure can cause peeling, especially at the edges. A clamshell or swing-away press is recommended for better control over pressure distribution.
Press Time
Press for 7-10 seconds, depending on your fabric and transfer type. If you are pressing thicker garments or textured material, you may need to increase the time slightly. For standard t-shirts, 10 seconds is usually sufficient.
Let It Cool Before Peeling
DTF transfers require a cold peel unless your film is labeled otherwise. Do not peel the film immediately. Let it cool to room temperature. Peeling too soon can result in lifting or smudging of the ink.
Optional Post-Press
Once the film is removed, you can apply a second press for 5 to 10 seconds using a Teflon or parchment sheet. This helps seal the design into the fabric and reduces any slight shine left by the film.
For more insight into successful pressing, Lion DTF has also shared tips and tricks for beginners pressing DTF transfers on t-shirts. Even experienced users can benefit from revisiting the basics.
Now that your transfer is applied, let’s look at a few ways to fine-tune your setup and avoid common pitfalls.
Final Thoughts
Making DTF transfers at home gives print professionals more control over production, faster turnaround, and a chance to expand their offerings without outsourcing. When done correctly, at-home DTF printing delivers durable, high-resolution results that meet the demands of real-world customers.
Still, scaling DTF work from your home setup to high-volume jobs requires time, testing, and equipment that can keep up. That is where Lion DTF Transfers comes in. For custom runs, bulk orders, or when you need same-day and next-day DTF printing without sacrificing quality, we have you covered.
Our transfers are wash-tested, ready-to-press, and produced with U.S.-based speed and reliability. Whether you're filling a last-minute order or planning a large campaign, we offer dependable support and fast fulfillment.
Read also:
- Learn about the Top DTF Printing Solutions with Lion DTF Transfers
- DTF Transfers: Elevate Your Custom Printing with Lion DTF
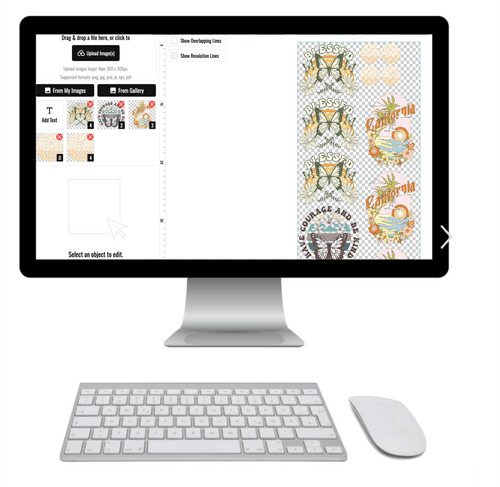
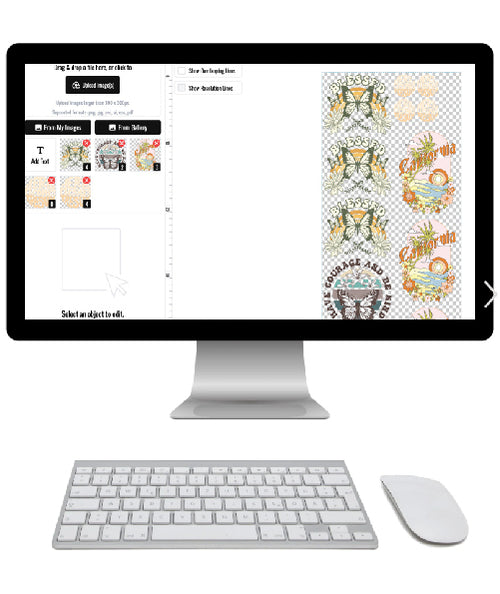
- The New Auto Builder Feature Is Changing DTF Gang Sheet Creation!
Frequently Asked Questions About How To Make High-Quality DTF Transfers At Home
Can I reuse a DTF transfer more than once?
No. DTF transfers are single-use only. Once the design has been applied to a garment, the PET film is discarded. Attempting to reuse it will not result in another usable transfer.
What types of garments are not ideal for DTF transfers?
Highly textured or heat-sensitive materials such as certain nylons or waterproof-coated fabrics may not bond well with DTF adhesive. Always test before full production.
Do I need to pretreat fabric before applying a DTF transfer?
No. One of the advantages of DTF technology is that pretreatment is not required. The adhesive powder used in the process handles the bonding to fabric.
Can I use a Cricut heat press for DTF transfers?
Cricut presses are generally not recommended. They often lack the pressure consistency and heat distribution needed for durable DTF application. A standard clamshell heat press is preferred.
How should I store unused DTF transfers?
Keep them in a cool, dry place, away from direct sunlight and humidity. Store flat in a dust-free environment to avoid contamination of the adhesive layer.
What software is needed to print DTF transfers?
You will need RIP software that supports white ink printing and precise ink layering control. Standard design software like Photoshop is used for artwork, but not for printing.
Can DTF transfers be used on items other than clothing?
Yes. DTF transfers can also be applied to tote bags, aprons, and certain types of flat fabric accessories. Just ensure the material can handle the required heat and pressure.

