


If you're looking to create your own unique apparel, printing custom tee shirts is an incredible way to bring your vision to life. For brands, creators, and even individuals, Direct-to-Film (DTF) transfers have become one of the most reliable and versatile methods out there. The technique lets you apply vibrant, full-color designs to almost any fabric, giving you professional-quality results without the crazy setup costs of old-school printing.
Why DTF Is Changing the Game for Custom Tee Shirts
The demand for personalized apparel has absolutely exploded. We're talking about a massive market for everyone from Etsy sellers cranking out one-off designs to established brands launching full collections. The numbers back it up, too—the global custom t-shirt printing market is on track to hit somewhere between $12.4 billion and $20.05 billion by the mid-2030s. That’s a huge opportunity.
For a long time, traditional printing methods forced you to make a trade-off. Screen printing? Great for huge batches of simple designs, but the setup costs are steep, making small orders or complex graphics a total non-starter. Sublimation gives you those beautiful, soft-to-the-touch prints, but it only really works on light-colored polyester. This is exactly where DTF comes in and changes everything.
Unmatched Versatility and Durability
DTF printing completely tears down those old barriers. Its biggest advantage is the sheer flexibility it offers, working perfectly on a massive range of materials.
- 100% Cotton: Get bright, solid prints that feel fantastic.
- Polyester: Works like a charm on performance wear and other synthetics.
- Blends: Adheres flawlessly to those popular 50/50 cotton/poly blends and even tri-blends.
This adaptability makes DTF the go-to solution for just about any apparel project you can dream up. It's worth taking a look at the broader world of custom printing options to see just how much of a leap forward this technology really is.
And these prints are built to last. We've put our Lion DTF transfers through the wringer, and they can handle over 100 washes without cracking, peeling, or fading. You’re getting a premium, long-lasting product every time.
The real power of DTF is its ability to deliver retail-quality, full-color designs on virtually any fabric, for any order size. It removes the limitations that once held back small businesses and creators.
Makes Sense for Any Scale
DTF makes custom tee shirts printing accessible and profitable, whether you're a one-person shop or a growing brand. Since there are no screens to burn or complicated setups, printing a single shirt is just as cost-effective as printing a hundred.
This is perfect for testing new designs, fulfilling on-demand orders, or creating unique one-of-a-kind pieces. And when you're ready to scale up, tools like our Auto-build gang sheet builder make the process even more efficient and cost-effective. You can pack multiple designs onto a single sheet, maximizing every square inch and driving down your cost per print.
If you're weighing your options, check out our detailed comparison of https://liondtf.com/blogs/news/dtf-vs-dtg-printing to see how the two methods stack up for different business needs.
Getting Your Designs Ready for Flawless DTF Prints
Every professional-looking shirt starts with a solid design file. Seriously, think of your digital file as the blueprint for the final product—any cracks in that foundation will absolutely show up on the finished tee. Spending a few extra minutes getting your artwork print-ready is the single best thing you can do to guarantee crisp, vibrant results for your custom tee shirts printing projects.
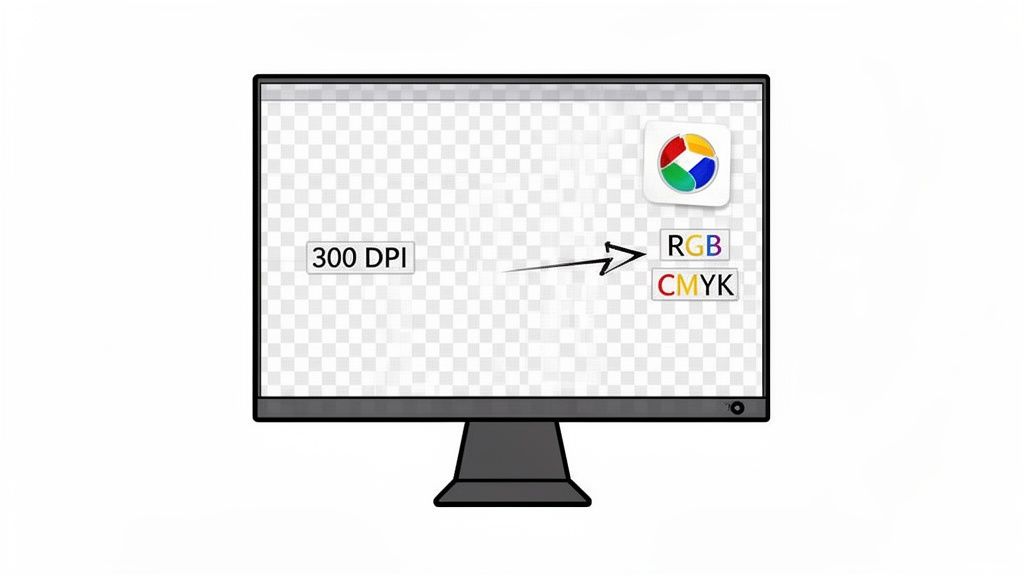
The first rule in this game is to always, always start with the highest quality file you can get your hands on. It's simple to shrink a big, high-resolution image down, but it's completely impossible to add detail that was never there to begin with. Trying to blow up a small, low-quality image is just a recipe for a blurry, pixelated mess that screams unprofessional.
The Gold Standard: File Format and Resolution
For DTF printing, the undisputed champion is a transparent PNG file at 300 DPI (dots per inch). This combo is everything. DPI is just a measure of how many pixels are packed into your image; more dots means a sharper, cleaner print. While 72 DPI might look fine on a website, 300 DPI is the non-negotiable standard for professional printing.
And that transparency part? It’s critical. A transparent background means we only print your design, not some clunky white or colored box around it. This is what lets your art sit perfectly on any color shirt you choose.
A classic rookie mistake is saving a JPEG with a white background and just hoping it's transparent. Always test your file by dropping it onto a colored background in your design software. If you see a box, you’ve got to remove it properly before uploading.
Side-Stepping Common Design Pitfalls
Beyond just resolution, there are a few sneaky issues that can wreck an otherwise great design. You might not even notice them on your computer screen, but they become painfully obvious once pressed onto a shirt.
- Feathered Edges: If your artwork has soft, blurry, or "glowing" edges, it's going to translate poorly. The DTF process needs a hard, defined line for the adhesive to grab onto. Keep your designs crisp and clean.
- Semi-Transparent Pixels: Pixels that aren't fully opaque—think a shadow set to 50% transparency—won't print right. The white underbase layer that makes DTF prints pop won't be applied correctly, leaving you with a faded, washed-out look.
- Stray Pixels: I've seen it a hundred times. Tiny, random pixels left over from editing can show up as little specks on your final print. Always zoom way in and give your art a final once-over before you export.
Nailing these details is a huge part of creating incredible custom heat transfer designs. Taking the time to clean up your file is what separates the pros from the amateurs.
A Word on Vector Files and Color
If you're working with logos or text-heavy graphics, vector files (AI, EPS, or SVG) are your best friend. Unlike pixel-based images like PNGs, vectors are built with math, not dots. That means you can scale them to any size—from a tiny chest hit to a massive back piece—and they will stay perfectly sharp. No exceptions.
Finally, let's talk color. Your screen shows colors in RGB (Red, Green, Blue), which is a light-based model. Our printers, on the other hand, use CMYK (Cyan, Magenta, Yellow, Black), which is an ink-based model. The bottom line is that some of those super-bright, electric colors you see on screen just can't be perfectly replicated with ink.
Managing expectations around color is key, especially with clients. While DTF has an amazing color range, slight shifts can happen. A digital mockup is a great way to show what the final product will look like and get the green light before you press a single shirt. Get your files right from the start, and you're already halfway to a perfect print.
Maximizing Value with a Gang Sheet Strategy
Once your designs are prepped and good to go, the next big question is how to get them printed without breaking the bank. This is where you can really start thinking like a pro and save some serious cash on your custom tee shirts printing. Instead of ordering one design at a time, it's time to bundle them up.
The whole strategy hinges on a simple but powerful concept called a gang sheet. Think of it as one big transfer film that you can pack with multiple designs. Instead of paying for each individual print, you're just paying for the sheet itself. The game is to fit as many graphics as you can into that space.
The Power of Ganging Your Designs
Let's say you've got a few jobs lined up: a dozen shirts for a local landscaper, a couple of one-off designs for your Etsy store, and some pocket logos for a corporate client. Ordering each of these as separate transfers would be slow and way more expensive than it needs to be.
Ganging them up changes everything. You can toss all those designs—the big graphic for the back, the small chest logos, the sleeve prints—onto a single sheet. Your cost-per-design immediately plummets. You're buying film by the square footage, not by the piece, which is always the smarter way to buy. For ultimate ease of use, an Auto-build gang sheet builder automates this entire process for maximum cost effectiveness.
This method is the secret weapon for small businesses and growing brands. It lets you combine a bunch of small, random jobs into one big, cost-effective print run. You get the pricing power of a bulk order without having to print hundreds of the same exact thing.
This flexibility is a huge reason why digital methods are blowing up. Screen printing will always have its place, but the custom apparel world is shifting fast. In fact, the market for digital printing techniques like DTF is projected to grow by 12.28% annually, making it the fastest-growing segment through 2030. Why? Better color, serious wash resistance, and the ability to handle small, on-demand jobs without the crazy setup fees of old-school methods. You can dig into more on this custom t-shirt printing market trend if you want the full picture.
Forget Manual Layouts with an Auto-Build Gang Sheet Builder
Now, you could try to arrange all those designs on a sheet yourself. But manually rotating, nudging, and nesting every single graphic to squeeze out every last bit of space feels like a frustrating game of Tetris. It’s tedious, and it's easy to leave money on the table by wasting film.
This is exactly why we built our Auto-build gang sheet builder. It takes all the guesswork out of the equation for ultimate ease of use and cost effectiveness.
The process couldn't be simpler:
- Upload Your Files: Just drag and drop all your print-ready PNG files into the builder.
- Let the Tech Do the Work: Our software instantly analyzes the size and shape of every graphic.
- Get a Perfect Layout: It then intelligently rotates and nests them together, packing them in tight to minimize waste and maximize your value.
It completely removes the manual headache and guarantees you’re getting the most bang for your buck on every single sheet. It’s the ultimate "work smarter, not harder" tool for anyone serious about their custom apparel game.
Choosing Your Best DTF Ordering Method
Gang sheets are a game-changer for anyone doing multiple jobs, but they're not the only way to get your transfers. Depending on what you’re working on, a different approach might make more sense. It really comes down to balancing cost, convenience, and how much design work you want to do yourself.
To help you figure it out, we’ve put together a quick comparison of the different ways you can order from us.
| Ordering Method | Best For | Key Advantage | Cost-Effectiveness |
|---|---|---|---|
| Auto-Build Gang Sheet | Multiple unique designs for various jobs or clients. | Maximum space efficiency and the lowest cost per print through easy automation. | Highest |
| Ready-to-Press Designs | Quick, one-off projects or testing popular trends. | No design work needed; just pick a graphic and press. | Moderate |
| Single Pre-Sized Transfers | A single, specific design for a small batch of shirts. | Simple and direct ordering for straightforward projects. | Lowest |
Picking the right method all comes down to the job at hand. If you’re running a business and juggling different client orders, the Auto-build gang sheet builder is easily your most profitable and user-friendly option. But if you just need a single shirt for a birthday gift, one of our ready-to-press designs will get the job done fast. Knowing your options lets you tailor your strategy for any custom tee shirts printing project that comes your way.
Getting a Perfect Press Every Single Time
Your DTF transfers just landed on your doorstep. Awesome. Now comes the most important part of the whole custom tee shirts printing process—the part that turns that printed film into a durable, professional-looking shirt that feels amazing and holds up wash after wash.
This is where your attention to detail really shines. We’re going to walk through the exact steps for applying Lion DTF hot-peel transfers, covering everything from prep to the final press. Getting this right is how you avoid the dreaded peeling or cracking down the road.
Don’t Skip the Pre-Press. Ever.
Before a transfer even touches the fabric, you have to pre-press the shirt. This is a non-negotiable step that beginners often skip, and honestly, it’s the root cause of most application failures.
A quick pre-press for just 5-10 seconds does two critical things: it zaps any hidden moisture out of the fabric fibers and smooths out every last wrinkle. This gives you a perfectly flat, stable surface for the transfer to bond to.
Think of it like priming a wall before you paint. Skipping this step means you're applying your design to an unstable surface, which compromises the adhesive bond and leads to a print that just doesn't last.
Dialing in Your Heat Press Settings
Getting your heat press settings just right is absolutely crucial. While different materials might need small tweaks, a solid starting point for Lion DTF hot-peel transfers is 300-320°F (149-160°C) with medium to firm pressure.
Here’s a quick breakdown of our go-to settings for common fabrics:
- 100% Cotton: 280°F for 10 seconds.
- 50/50 Cotton-Poly Blends: 260-280°F for 10 seconds.
- 100% Polyester: 240-250°F for 7-10 seconds (this helps avoid scorching the fabric).
If you’re working with a new garment, it's always smart to test your settings on a scrap piece first. Finding that perfect trifecta of heat, pressure, and time is the secret to a flawless bond.
For a much deeper dive, you can learn more about perfecting your heat press settings for DTF transfers in our detailed guide.
The Application: From Placement to Final Press
Alright, your garment is pre-pressed and the machine is hot. Let's do this. The process is simple, but precision is key.
First, carefully position the DTF transfer on the shirt. I highly recommend using a t-shirt alignment tool or at least a ruler to make sure it’s dead center and perfectly straight. Once you’re happy with the placement, lock it down for the first press using the settings for your fabric.
The second the timer beeps, lift the press and peel the film away immediately. Our transfers are hot-peel, so you need to remove that carrier sheet while it's still piping hot. Use a smooth, confident motion—don't hesitate or let it cool.
With the film gone, there's one last step to lock in the design for maximum durability. Lay a protective sheet (Teflon or parchment paper works great) over the design and press it one more time for 5-10 seconds. This final press helps meld the ink right into the fabric fibers, giving it that soft-hand feel and ensuring it can handle dozens of washes.
The infographic below shows just how simple it is to get your designs ready with our Auto-build gang sheet builder before you even get to the press, highlighting its ease of use.
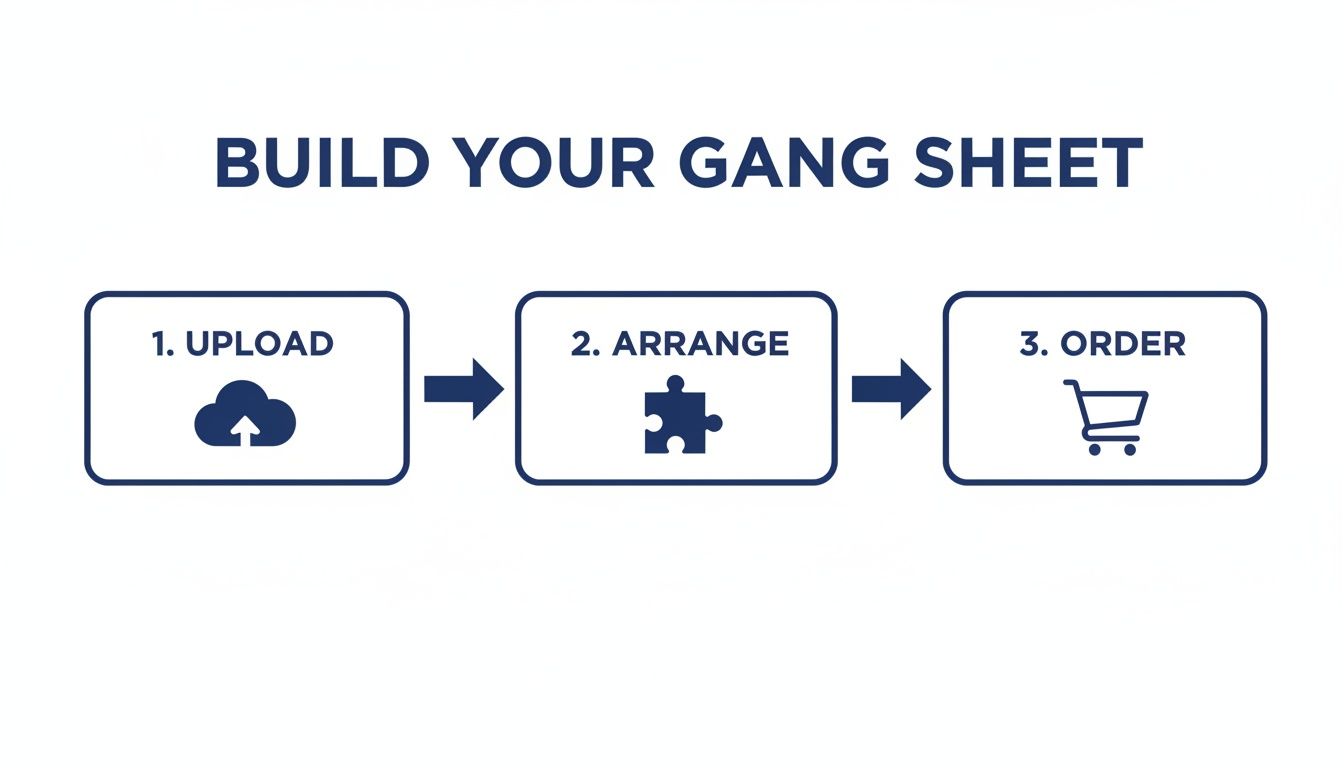
This workflow, from uploading your art to arranging it, makes sure your transfers are cost-effective and perfectly prepped for the pressing process.
Pro Tips for Tricky Applications
Not every garment is a flat, friendly t-shirt. Zippers, thick seams, collars, and pockets can create uneven pressure, which is a one-way ticket to a failed application.
In these situations, a pressing pillow is your best friend.
A pressing pillow is just a heat-resistant foam pad that you slide inside the shirt. It raises up the print area so the heat press platen makes direct, even contact with your transfer, bypassing any lumpy seams or buttons. This guarantees the entire design gets the consistent pressure it needs for a strong bond, giving you perfect results even on the most challenging pieces.
Post-Press Care to Ensure Print Longevity
You’ve pressed the perfect shirt, and it looks incredible. But the job isn't quite done. The real test of a quality print is how it holds up over time, and a little customer education goes a long way in making sure your hard work lasts.
Giving your customers clear, simple care instructions is a massive value-add that builds trust. It shows you care about the product long after it's sold and reinforces the professional quality of your custom tee shirts printing work.
Think about it: a shirt that still looks fantastic after dozens of washes becomes a walking advertisement. Our DTF transfers are built to withstand 100+ washes, and following these guidelines helps every print live up to that potential.
The Right Way to Wash DTF Printed Garments
The washing machine can be a battlefield for printed apparel, but a few simple rules will keep those designs looking sharp. The main takeaway? Be gentle. High heat and harsh agitation are the enemies of any print.
First, always tell your customers to turn the garment inside out before tossing it in the wash. This is the single most effective step they can take. It creates a protective barrier, minimizing the friction the print endures as it tumbles against other clothes.
Next, it's all about the settings:
- Water Temperature: Wash in cold water only. Hot water can mess with the adhesive and soften the ink over time.
- Machine Cycle: A gentle or delicate cycle is the way to go. It reduces the physical stress on both the fabric and the transfer.
- Detergent: A mild detergent is all you need. No harsh chemicals.
Heads up: it's critical to avoid chlorine bleach and fabric softeners. Bleach will absolutely attack the colors and degrade the print, while fabric softeners leave behind a chemical coating that can break down the transfer's adhesive bond.
Drying and Ironing Best Practices
How the shirt is dried is just as important as how it's washed. The intense, direct heat from a high-temp dryer cycle can be just as damaging as a hot wash.
The best method, hands down, is to hang dry the garment. This avoids heat and tumbling altogether, which is the kindest option for any printed tee. If a machine dryer is the only option, tell them to tumble dry on the lowest possible heat setting.
Finally, let's talk ironing. You should never, ever iron directly on top of a DTF transfer. The heat will melt the print in an instant, ruining both the shirt and the iron. If the shirt needs a touch-up, make sure it’s turned inside out so you're only ironing the fabric, not the design itself.
Sharing these simple care instructions ensures every piece you produce stands the test of time. This reflects well on your work and keeps your customers happy—turning one-time buyers into loyal fans.
Got Questions About DTF Printing? We Have Answers.
When you're diving into the world of custom tee shirts printing, you're bound to have questions. Everyone does. The goal is professional, repeatable results, so let's clear up some of the most common things we hear from creators and brands just like you.
What Is the Main Difference Between DTF and Screen Printing?
Honestly, it comes down to two things: setup and design complexity.
Screen printing is an absolute workhorse for massive runs of simple, one or two-color designs. But getting there involves some serious upfront work and cost to create the screens. DTF, on the other hand, is built for printing full-color, photorealistic graphics with no setup fees. That makes it the undisputed champ for small batches, one-off custom pieces, and on-demand orders. An Auto-build gang sheet builder further enhances this by making it incredibly easy and cost-effective to combine multiple small jobs.
Can I Use a Home Iron Instead of a Heat Press?
For any kind of professional work, we're going to give that a hard no. A home iron just can't provide the consistent, even pressure and exact temperature the DTF adhesive needs to properly melt into the fabric fibers.
Trying to use an iron is a surefire way to get prints that peel, crack, and generally look unprofessional after the first wash. A quality heat press isn't just a tool; it's a non-negotiable part of the process for getting retail-quality results.
One of the biggest mistakes beginners make is underestimating the importance of a heat press. It's the key to turning a great transfer into a durable, long-lasting garment that customers will love.
How Do I Know if My Design File Is High Enough Quality?
The gold standard in the print world is 300 DPI (dots per inch) at the final size you want to print.
Not sure if yours makes the cut? Here's a simple trick: zoom way in on your design file on your computer screen. If the edges look fuzzy, blurry, or you can see the little squares of individual pixels, that's exactly how it's going to print. Always, always start with the best source file you can get your hands on for crisp, sharp lines.
What Is the Turnaround Time for a DTF Order?
This is one of the best parts of the DTF process. Unlike screen printing, which can take weeks to get moving on big jobs, DTF is incredibly fast.
Most providers, including us here at Lion DTF, can often get orders out the door within just 1-2 business days. This speed is a game-changer for businesses that need to restock a hot-selling design or jump on a new trend while it's still relevant. If you're in a real time crunch, we also offer 24-hour printing and next-day air shipping to make it happen.
Ready to see for yourself what all the fuss is about? The Lion DTF Auto-build gang sheet builder makes it ridiculously easy—and cost-effective—to get started. Just upload your artwork, and our tool automatically arranges it to give you the most bang for your buck.