


So, you're ready to turn those blank shirts into killer custom apparel? You've come to the right place. This guide is your complete playbook for using Direct-to-Film (DTF) transfers to create professional-quality gear. Whether you're launching a merch line, outfitting a team, or just growing your side hustle, we'll walk you through everything from the first design idea to the final press.
Your Blueprint for Pro-Level Custom Tee Shirts
Making top-tier custom tee shirts is easier than ever, and a big reason for that is DTF. This method lets you create vibrant, full-color designs that are seriously durable and surprisingly easy to apply. It’s a game-changer for entrepreneurs and creators who want professional results without the headaches of older printing techniques.
This guide is all about actionable advice, not just theory. We’re digging into the practical steps that guarantee a high-quality finished product, every single time. From prepping flawless artwork to mastering the heat press, you'll get the confidence to produce apparel that not only looks amazing but also lasts.
What This Guide Covers
We’ve laid this out as a complete A-to-Z walkthrough. Our goal is to help you sidestep the common mistakes and dial in your workflow for both quality and speed.
Here’s a quick look at what we’ll get into:
- Artwork Preparation: How to set up your design files with the right specs for clean, razor-sharp prints.
- Smart Ordering: Using tools like our Auto-build gang sheet builder to pack more designs onto a single sheet for ultimate ease of use and cost effectiveness.
- Heat Press Mastery: Applying your transfers perfectly for a durable, professional finish on any fabric.
- Real-World Use Cases: Getting inspired by how other businesses and makers are crushing it with DTF.
Before going all-in on DTF, it helps to know the lay of the land. Understanding the different types of T shirt printing gives you the context to see why DTF is such a powerful choice for so many projects.
The DTF process isn't just a craft; it's a massive opportunity. The global custom t-shirt printing market was valued at around USD 3.8 billion in 2023 and is on track to hit USD 9.59 billion by 2033. That growth is fueled by e-commerce and a huge demand for unique, personalized products.
Here's a quick look at the major stages involved.
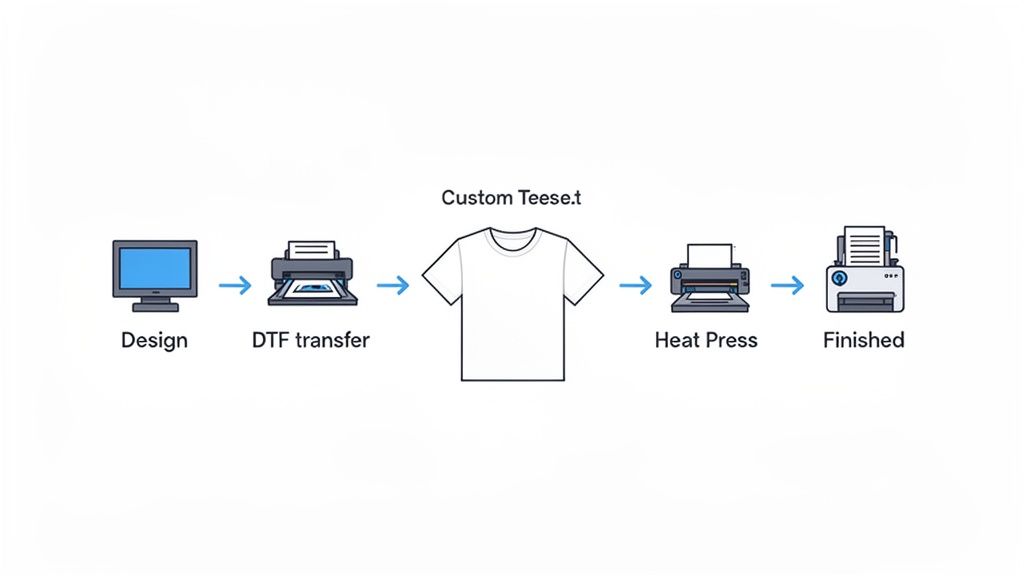
DTF Transfer Process At a Glance
The journey from a digital file to a finished shirt is straightforward when you break it down. Each stage plays a critical role in the final quality.
| Stage | Key Objective | What to Focus On |
|---|---|---|
| Design & File Prep | Create a print-ready file | High resolution (300 DPI), transparent background, correct color mode (CMYK) |
| Ordering Transfers | Get the best value and quality | Choosing a reliable supplier, using gang sheets for multiple designs with our Auto-build gang sheet builder for ease of use and cost effectiveness. |
| Heat Pressing | Bond the transfer to the fabric | Accurate temperature, even pressure, and correct timing (the "Big 3") |
| Peeling & Finishing | Reveal the final design | Following cold/hot peel instructions, optional second press for a matte finish |
Nailing each of these steps ensures your final product is something you're proud to sell or wear.
By following this blueprint, you’re not just making a shirt. You’re creating a high-quality product that can build a brand, unite a team, or bring a creative vision to life.
Nailing Your Artwork for Flawless DTF Prints
The secret to a killer custom tee shirt starts long before you ever power on the heat press. It begins with your design file. The quality of your digital artwork is the single biggest factor that determines whether your final print looks sharp and professional or blurry and homemade.
Think of it like building a house—a shaky foundation guarantees a flawed result, no matter how good the construction. Getting your file prep right isn't just a suggestion; it’s the blueprint for a vibrant, clean print that really pops.
Raster vs. Vector: What's the Real Difference?
When you're prepping artwork, you'll run into two main file types: raster and vector. Knowing when to use each one is crucial for getting the results you want.
- Raster Images (.PNG, .JPEG): These are your pixel-based files, made up of tiny squares of color. They're perfect for photographs and highly detailed graphics. The catch? If you try to blow them up, they get pixelated and blurry.
- Vector Images (.AI, .EPS, .SVG): Instead of pixels, vectors use math—lines, points, and curves—to create an image. This means you can scale them up from a tiny chest logo to a massive back piece with zero loss in quality. The lines stay perfectly crisp every time.
For most DTF jobs, a high-quality raster file like a PNG is perfectly fine. But for logos, text, and graphics that need razor-sharp edges, vector is king. If you're diving deeper, our guide to custom heat transfer designs has more insights.
Your Print-Ready File Checklist
To make sure what you see on screen is what you get on the shirt, your file has to hit a few technical marks. Sending a file that isn't print-ready is the fastest way to cause delays and end up with a print you're not happy with.
Here’s what you absolutely need for a perfect print:
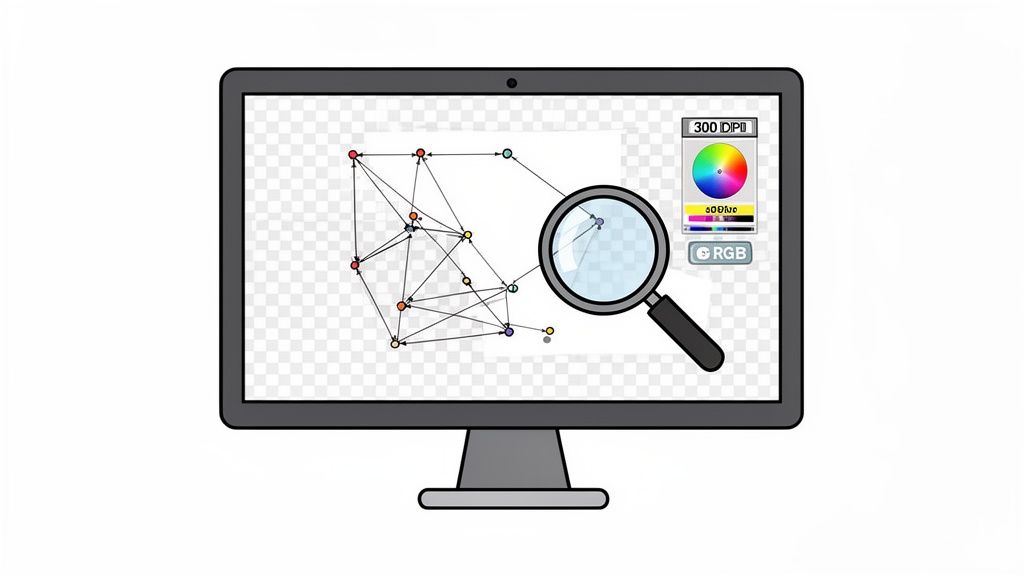
- Resolution of 300 DPI: Dots Per Inch (DPI) is all about pixel density. For printing, 300 DPI is the industry standard. A 72 DPI image pulled from a website will look like a blurry mess on a shirt. Always, always start your design canvas at 300 DPI.
- Transparent Background: This is a big one. Your design needs to be saved on a transparent background. If you upload a file with a white background, that white box is going to get printed right onto your shirt. Saving as a .PNG file is the easiest way to lock in that transparency.
- CMYK Color Profile: Stick with the CMYK color profile. This ensures the colors on your monitor are as close as possible to the final printed colors, helping you avoid any nasty surprises or color shifts.
Key Takeaway: Think of a print-ready file as your quality insurance. A 300 DPI .PNG with a transparent background using an CMYK profile is the gold standard for creating awesome custom tees.
Dodging Common Artwork Mistakes
Even when you think you have the settings right, tiny errors can trip you up. One of the most common headaches is seeing a faint box or "haze" around your finished design. This is usually caused by stray pixels, soft edges, or semi-transparent drop shadows that you can't see on your screen but the printer definitely can.
To fix this, get in there with a hard-edged eraser tool in your design software and meticulously clean up the edges of your artwork. Zoom way in and hunt for any fuzzy glows or nearly invisible pixels. It also pays to use modern AI image editing tools that can help clean up and optimize your art for DTF printing.
Another thing to watch out for is starting with a low-quality source image. You simply can't grab a tiny logo from a website header, stretch it out, and expect it to look good. Always start with the largest, highest-resolution version of the art you can find. Getting these details sorted makes the whole process smoother, especially if you're using something like our Auto-build gang sheet builder, which relies on clean files to pack your designs efficiently for ease of use and cost effectiveness.
Alright, with your artwork prepped and ready to rock, it’s time to order your transfers. This is the part where you shift from creative director to production manager, and your choices here directly impact your budget and profit margins on those custom tee shirts. The goal is simple: get the best prints for the lowest cost per piece.
You've really only got two ways to go: ordering transfers one-by-one, by size, or ganging multiple designs onto a big sheet. For a single, one-off project, ordering by size is fine. But if you’re printing more than just a couple of designs, it's almost never the smart financial move.
The Power of the Gang Sheet
Think about it like this: you could bake one cookie at a time on a tiny pan, wasting a ton of energy and oven space. Or you could load up a giant baking sheet with dozens of cookies at once. A gang sheet applies that same logic to DTF transfers, and it's a total game-changer.
Instead of paying for each design individually—a 4-inch chest logo here, a 2-inch sleeve logo there—you pay for one large sheet of film. You then pack, or "gang," that sheet with as many different designs, logos, and sizes as you can cram onto it. This move absolutely tanks your cost per individual print.
For small businesses, brands, and creators, mastering the gang sheet is the single most effective way to slash your overhead. It's not just a trick; it's a core strategy for profitability.
Maximizing Value with Our Auto-Build Gang Sheet Builder
Manually arranging designs on a sheet to avoid dead space can feel like a frustrating game of Tetris. It's slow, tedious, and you almost always end up leaving money on the table in the form of empty film. This is exactly why we built a tool to do the heavy lifting for you.
Our Auto-build gang sheet builder was designed for one purpose: to make your life easier and your projects more profitable. It’s a simple drag-and-drop tool where you upload all your print-ready PNG files. From there, the software automatically nests them together, rotating and arranging every piece to create the tightest layout possible. This ensures you get the absolute most out of every single square inch you pay for, combining ease of use with maximum cost effectiveness.
The process couldn't be simpler:
- Pick Your Sheet Size: Choose the dimensions that make the most sense for your job.
- Upload Your Files: Just drag and drop all your prepared designs into the builder.
- Optimize the Layout: You can let the auto-build feature work its magic instantly, or you can manually tweak the arrangement if you have a specific layout in mind.
This combination of ease and efficiency makes it the clear winner for anyone producing multiple custom tee shirts. To see it in action and get a better feel for how different layouts can work, check out our complete guide to DTF gang sheets.
Real-World Scenario: A Small Brand Launch
Let’s put this into practice. Picture a small clothing brand, "Coastline Threads," getting ready to drop a new collection.
Here’s their print list:
- 25 large back designs (11" wide) for their hoodies.
- 25 matching left-chest logos (3.5" wide).
- 25 branded neck tag labels (2" wide).
- 15 special-edition sleeve graphics (2.5" wide).
If they ordered all 90 of those transfers individually, the cost would be ridiculously high. Instead, the owner fires up the Auto-build gang sheet builder, uploads the four design files, and lets the tool pack them onto a few large sheets. The big back prints go down first, and all the smaller logos, tags, and sleeve hits are automatically tucked into the empty spaces. The result? They get all their transfers for a fraction of what they would have paid, making their launch that much more profitable.
When You Need an Expert Hand
Look, sometimes you're just slammed. Or maybe you'd rather have the peace of mind knowing a pro handled the layout. For those moments, we offer a "We Build a Gang Sheet for You" service.
This is the perfect option for really complex orders or for anyone who just wants to hand it off and focus on other parts of their business. Our team takes your files and meticulously arranges them to guarantee zero wasted space and a perfectly optimized sheet.
You just provide your files and quantities, and our experts handle the rest.
Ultimately, whether you use the intuitive Auto-build gang sheet builder yourself or lean on our expert service, the goal is the same. By shifting away from single-transfer orders and embracing the incredible value of gang sheets, you're setting your custom tee shirts project up for financial success right from the start.
Mastering the Heat Press for a Perfect Finish
Once your transfers arrive, it's time for the best part: pressing your custom tee shirts and watching them come to life. A quality DTF transfer is only half the battle; the final press is where the real magic happens. This is the moment a great design becomes a durable, professional-grade product that feels amazing and is truly built to last.
Getting this right isn't about luck—it's about precision. The perfect blend of temperature, pressure, and time is what creates a permanent bond between the transfer and the fabric. When you nail these settings, you get designs that won't crack, peel, or fade, even after dozens of washes.
The Big Three: Temperature, Pressure, and Time
Every fabric reacts differently to heat, so a one-size-fits-all approach just won't cut it. Cotton can take the heat, but polyester and other synthetic blends are way more sensitive and can scorch if you're not careful. It’s always best to start with a reliable baseline and then tweak it for your specific garment.
Before you even get to pressing, the ordering process should be just as clean and simple. This is what a smooth workflow looks like, from uploading your art to placing the order.
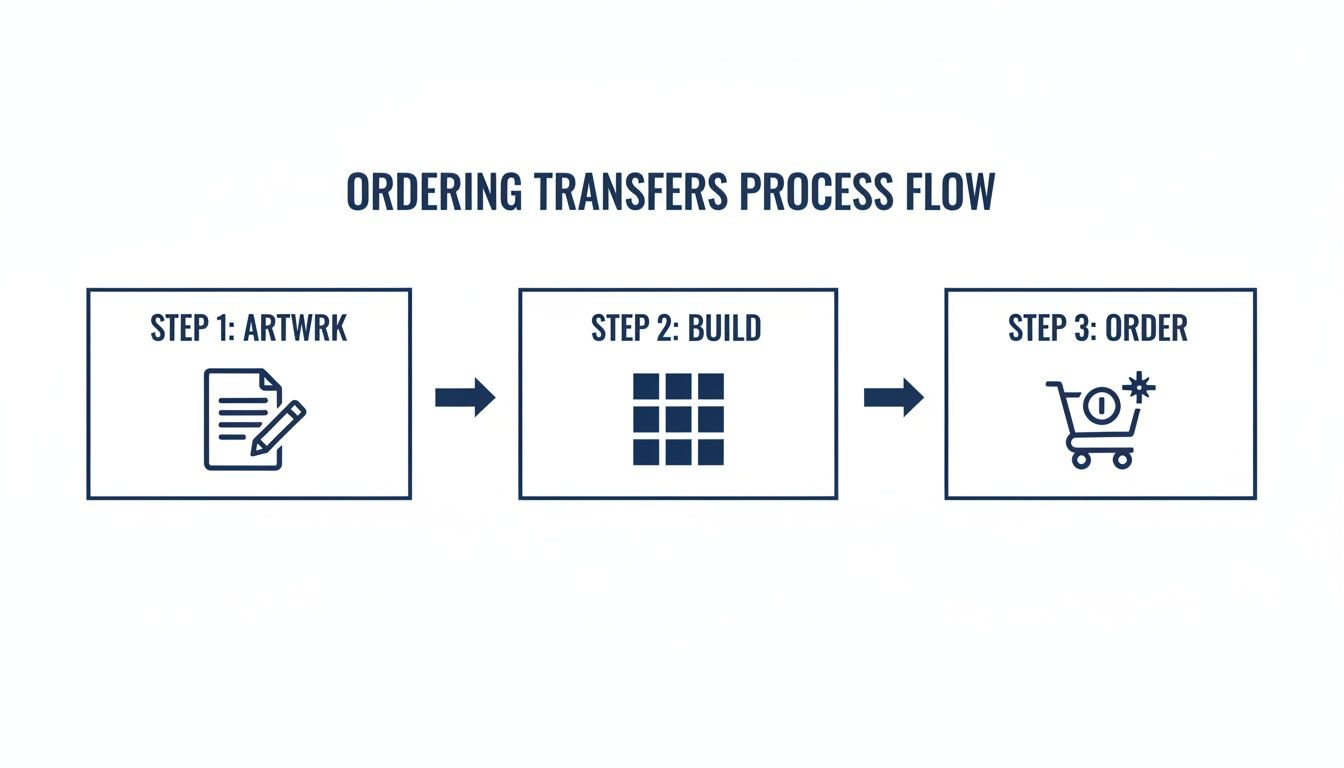
This kind of streamlined approach, especially with tools like our Auto-build gang sheet builder, makes sure your pre-production is just as efficient as your pressing due to its ease of use and cost effectiveness.
Now, back to the press. Think of the three key elements as a triangle—if one side is off, the whole thing falls apart.
- Temperature: This is the heat needed to activate the transfer’s adhesive. Too low, and it won't stick right. Too high, and you'll burn the shirt or ruin the print.
- Pressure: This ensures solid, even contact between the transfer and the fabric fibers. Not enough pressure leads to patchy adhesion, while too much can cause the ink to bleed out.
- Time: This is how long the heat and pressure are applied. It needs to be just long enough for the adhesive to fully melt and bond, but short enough to avoid scorching.
For a deep dive into the exact numbers for different materials, our complete guide on heat press settings for DTF transfers is a great resource. It breaks down the ideal settings for everything from standard cotton to tricky tri-blends.
Here’s a quick-reference table to get you started on some of the most common fabrics we see.
Heat Press Settings for Common Fabrics
This table provides a great starting point for applying DTF transfers to various materials. Always remember to test a small, inconspicuous area if you're working with a new fabric for the first time.
| Fabric Type | Temperature (°F) | Press Time (seconds) | Pressure | Peel Type |
|---|---|---|---|---|
| 100% Cotton | 280°F | 10 | Medium-Firm | Hot Peel |
| Polyester | 240-260°F | 5-7 | Medium | Hot Peel |
| 50/50 Blends | 260-270°F | 10 | Medium | Hot Peel |
| Tri-Blends | 260-270°F | 10 | Light-Medium | Hot Peel |
| Canvas/Denim | 280°F | 10 | Firm | Hot Peel |
Using these guidelines will help you achieve a strong bond and a clean finish every time, protecting both the garment and the vibrancy of your design.
The Art of the Hot Peel
Our transfers are all designed for a hot peel, which is a massive advantage for your production speed and the final feel of the shirt. "Hot peel" means you remove the clear carrier film the second the heat press opens, while everything is still piping hot. This technique gives you a much softer, more matte finish that feels like it’s part of the fabric, not just sitting on top of it.
To get a perfect hot peel, open the press and, in one smooth, confident motion, pull the film away from the garment. Don't hesitate or peel slowly—this can cause parts of the design to cool unevenly and lift off. A swift, consistent peel is the secret to a flawless transfer.
Pro Tip: After you peel the film, cover the design with a Teflon sheet or parchment paper and give it a second press for 5-7 seconds. This final press locks the design in, gets rid of any leftover shine, and makes it even softer and more durable.
Ensuring Long-Lasting Vibrancy
How well you press directly impacts how long the final product lasts. Custom t-shirts are a huge business, with the industry projected to hit $46.99 billion in 2025. While screen printing has been the old standby, digital methods like DTF are exploding in popularity because they can create vibrant designs that hold up for over 100 washes. That kind of durability is a major selling point for any brand creating premium apparel.
To make sure your customers get that longevity, give them a few simple care instructions. Tell them to:
- Wait 24-48 hours before the first wash.
- Turn the garment inside out.
- Use cold water on a gentle cycle.
- Tumble dry on low or, even better, hang dry.
- Avoid bleach and fabric softeners.
By mastering your heat press technique and providing solid after-care advice, you're not just selling custom tee shirts—you're delivering a high-quality, durable product that people will want to wear over and over again.
Where Custom Tees Make a Real-World Impact
It’s one thing to talk about specs and temperatures, but it’s another to see how creators and businesses are actually using DTF transfers to grow. Let's move past the technical stuff and look at a few real-world situations where custom tee shirts become the key to making money, building a community, or just letting creativity run wild.
The appetite for personalized gear isn't just a trend; it's a massive market. The custom t-shirt industry is set to climb to USD 3900.4 million by 2025, growing at a 7.3% clip. Graphic designs are the main driver, making up 58% of that revenue. This boom is all about events, branding, and merch drops for everything from sports teams to schools, creating the perfect environment to launch your own project. You can discover more insights about this growing market and see exactly where you fit in.
The Local Brewery Launching Merch
Picture a small, independent brewery—let's call them "Hop Haven"—that's built a solid local fanbase. They're looking for a way to lock in their brand identity and open up a new revenue stream. The answer? A line of killer custom tee shirts for their staff and their customers.
They cook up three different designs:
- A clean, bold logo tee for the team to wear behind the bar.
- An artsy, illustrative print celebrating their flagship IPA.
- A retro design shouting out their founding year.
Instead of placing three separate, expensive orders, they use our Auto-build gang sheet builder. They upload all three shirt designs, plus a few smaller logos for hats and tote bags, onto one sheet. This move slashes their cost-per-item and makes their merch profitable from the very first sale, highlighting the ease of use and cost effectiveness of the tool. Now, their shirts are walking billboards around town and an easy add-on for anyone stopping by the taproom.
Outfitting a Youth Sports League
Now, think about a community soccer league. They've got hundreds of kids across a dozen teams, and they need jerseys, warm-up gear for coaches, and spirit wear for parents to buy at the games. Trying to screen print shirts for every team, each with a different sponsor logo on the back, would be a logistical and financial mess.
This is exactly where gang sheets save the day. The league coordinator gathers all the team logos, player numbers, and sponsor graphics.
By using the Auto-build gang sheet builder, they can pack every single piece onto a few large transfer sheets. This makes it insanely affordable to outfit every single team, no matter how many different designs they need, thanks to its cost effectiveness and ease of use.
The end result is professional, unified gear that builds team pride without draining the league's budget. It’s a perfect example of how to tackle a complex, multi-design project without the usual headaches.
The Online Creator's Limited-Edition Drop
Finally, imagine a popular YouTuber with a loyal following. To celebrate a big subscriber milestone, they want to do a limited-edition merch drop. But ordering hundreds of shirts upfront is a huge financial gamble—what if they don't sell? For an independent creator, dead inventory is a killer.
DTF transfers offer the perfect print-on-demand model. The creator finalizes their special-edition design and orders a small run of transfers.
Using a gang sheet, they can fit the main graphic alongside some smaller, sticker-sized versions to throw in as a bonus for the first 100 orders. This setup allows them to press shirts only after an order is placed, wiping out all the upfront inventory cost and risk. This "just-in-time" approach is a game-changer for creators who want to offer exclusive custom tee shirts without the financial weight of a bulk order.
Your Top DTF Transfer Questions, Answered
Alright, let's wrap this up by hitting some of the most common questions that pop up when you're making custom tee shirts with DTF. Getting straight answers to these will help you feel more confident, avoid some rookie mistakes, and make sure your projects nail the landing.
Think of this as the final checklist before you fire up that heat press. We'll cover everything from saving a bit of cash to making sure your final product looks and feels totally professional.
What’s the Big Deal with an Auto-Build Gang Sheet Builder?
The single biggest reason? Drastic cost savings and ease of use. It's that simple.
Our Auto-build gang sheet builder is designed to let you pack as many different designs, logos, and sizes onto a single sheet as possible. Instead of paying for each transfer one by one, you're only paying for the sheet itself. This absolutely tanks your cost per print.
This is a game-changer for businesses juggling multiple designs. Imagine you need a big back graphic, a small left-chest logo, and a sleeve hit for a new shirt. Ordering those separately adds up fast. Ganging them together makes it ridiculously economical. The tool automatically nests your artwork for the tightest fit, so you're not paying for wasted film. It's hands-down the smartest way to order custom tee shirts due to its ease of use and cost effectiveness.
How Can I Make Sure My Shirt Colors Are Accurate?
Getting your colors right starts with the file. For the most predictable results, always set up your artwork in an CMYK color profile—it’s the standard for most digital printing. A sharp, high-resolution file (300 DPI) is just as important; anything less can get pixelated and make your colors look muddy.
But honestly, the most crucial part is working with a good DTF supplier who has their color management dialed in. While tiny shifts can happen because of screen differences, a quality printer can get incredibly close to what you see on your monitor.
Can I Use DTF Transfers on Polyester or Blends?
Yep, absolutely. This is one of the best things about DTF technology—it’s not picky about fabrics. These transfers stick perfectly to a huge range of materials, including:
- 100% Cotton
- 100% Polyester
- Cotton/Poly Blends
- Tri-Blends
- Canvas and Denim
The trick is just to adjust your heat press settings. Temperature, pressure, and time all need to be tweaked for the specific fabric you're using. This ensures you get a solid, permanent bond without scorching the shirt. When in doubt, always check your supplier's recommendations and run a quick test press on some scrap material.
What's the Difference Between a Hot Peel and a Cold Peel?
This just refers to when you pull the clear carrier film off the transfer after pressing it. The timing makes a big difference in the final look and feel of the print.
For a hot-peel transfer, like the ones we make, you'll peel the film off immediately after the heat press opens, while everything is still hot. This method is way faster for production runs and leaves the design with a softer, more matte finish that feels like it’s part of the fabric.
A cold-peel transfer, on the other hand, means you have to wait for the shirt to cool down completely before you can remove the film. This process often leaves a slightly glossier finish. For anyone trying to crank out orders and wants that premium, soft feel on their custom tee shirts, hot-peel is the way to go.
Ready to see your designs in person? At Lion DTF Transfers, we've made creating pro-level custom apparel fast, simple, and budget-friendly. Use our industry-leading Auto-build gang sheet builder for unmatched ease of use and cost effectiveness, and we’ll ship your vibrant, durable transfers in as little as one business day. Start your order today