


So, what exactly are custom DTF prints? Think of them as the next evolution in custom apparel. We’re talking about vibrant, full-color designs printed onto a specialized film, all set to be heat-pressed onto pretty much any fabric you can imagine.
This technology lets you create incredibly detailed, durable custom gear with no minimum order size. It's a game-changer for everyone, from hobbyists making a single t-shirt to established brands running large production lines.
What Are Custom DTF Prints
Let's break it down. Imagine a printing method that grabs the best features from all the others: the stunning, unlimited colors of a high-end photo printer, the rock-solid durability of screen printing, and the freedom to print on almost any fabric. That's the magic of custom DTF prints.
The name itself, DTF (Direct-to-Film), tells you exactly how it works. We take your digital design and print it directly onto a clear transfer film using special water-based inks.
From there, a fine layer of powdered adhesive is applied to the wet ink. This powder gets cured with heat, forming a flexible, solid layer that acts as the "glue" for your design. What you end up with is a ready-to-press transfer that looks a bit like a high-tech sticker, ready to bring your garment to life. When you apply heat and pressure with a heat press, that adhesive layer melts and permanently bonds the ink right into the fabric's fibers.
The Game-Changing Advantages
Why is everyone talking about DTF? Simple. It solves a ton of the headaches found in other printing methods. Here’s what makes custom DTF prints the top choice for so many creators:
- Fabric Versatility: Seriously, you can press these onto almost anything. Cotton, polyester, blends, canvas, denim—even tricky materials like leather. While other methods are picky about fabrics, DTF works on nearly any material that can handle a heat press.
- Vibrant Colors on Any Garment: This is where DTF really shines. The process uses a white ink base layer, which means your bright, full-color designs will pop, even on dark fabrics like black or navy blue. An intricate, colorful design looks just as amazing on a black hoodie as it does on a white tee.
- Exceptional Durability and Feel: These transfers are tough. They can handle dozens and dozens of washes without cracking, peeling, or fading. Once it's on the shirt, the print has a soft, lightweight feel that stretches and moves with the fabric—not a stiff, plastic shield sitting on top of it.
This unique blend of quality, flexibility, and durability is why the apparel industry is adopting DTF so quickly. In fact, the global DTF printing market was valued at around USD 2.72 billion in 2024 and is expected to hit nearly USD 3.92 billion by 2030. You can learn more about the expanding DTF market and see how it’s shaking up modern apparel decoration.
Why It's So Cost-Effective
One of the biggest wins with custom DTF prints is the pricing. Old-school methods like screen printing demand costly, time-consuming setups for every single color in a design. That makes small orders or multi-color artwork ridiculously expensive.
DTF doesn't have that problem.
Since the entire process is digital, printing a design with twelve colors costs the exact same as printing one with a single color. This makes it incredibly affordable for one-off custom pieces and massive production runs alike. To stretch your budget even further, our easy-to-use Auto-build gang sheet builder lets you fit multiple different designs onto one sheet, slashing your cost-per-print and making sure you get the absolute most out of every single order.
How DTF Prints Compare to Other Methods
Choosing the right way to print on apparel can feel like navigating a maze. With so many options out there, how do you know which one is right for your project? The best choice really boils down to what you need—the complexity of your design, how many pieces you're making, and the type of fabric you're working with.
Let's walk through a real-world scenario. Imagine you're launching a small brand and need 20 t-shirts with a vibrant, photorealistic logo that's full of color gradients. This is where a method like screen printing starts to hit a wall. Screen printing needs a separate screen made for every single color, which makes complex, low-quantity orders incredibly expensive and slow.
This is exactly where DTF shines, especially when working with dtf transfers ready to press. Because it’s a digital process, the number of colors doesn't matter one bit. Printing a simple one-color design costs the exact same as printing a full-spectrum rainbow, making it the perfect choice for intricate artwork on small to medium-sized orders.
This decision tree shows you how to pick the right print method based on what your project demands.
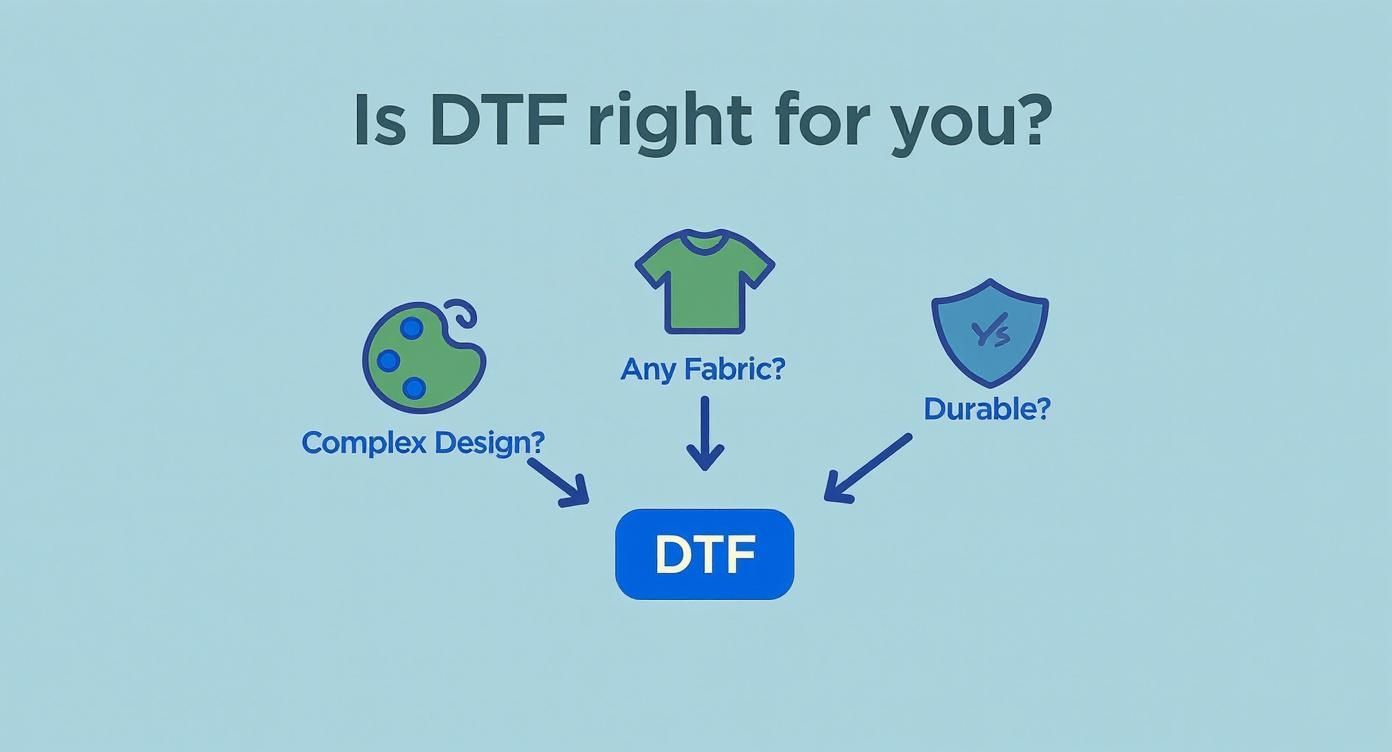
As you can see, when your project calls for complex designs, works across different fabrics, and needs to last, all signs point directly to DTF printing as the best tool for the job.
Let's break down how custom DTF prints really stack up against the old guards of apparel decoration. The table below gives you a quick, side-by-side look at how DTF compares to screen printing, vinyl (HTV), and DTG across the factors that matter most.
DTF Prints vs Traditional Methods: A Quick Comparison
| Feature | Custom DTF Prints | Screen Printing | Heat Transfer Vinyl (HTV) | Direct-to-Garment (DTG) |
|---|---|---|---|---|
| Best For | Full-color, detailed designs at any quantity. | Simple, 1-4 color designs in high volumes (100+). | Names, numbers, and very simple graphics. | "Soft-hand" prints on 100% cotton garments. |
| Color Capability | Unlimited colors and gradients, no extra cost. | Limited colors; each color adds significant cost. | Limited to available vinyl colors; layering is complex. | Unlimited colors, but can look faded on darks. |
| Fabric Versatility | Excellent. Works on cotton, poly, blends, leather, and more. | Best on cotton/blends. Struggles with heat-sensitive fabrics. | Good. Works on cotton, poly, and blends. | Limited. Primarily for 100% cotton; struggles with poly. |
| Feel on Garment | Soft, lightweight, and flexible. Stretches with fabric. | Can be thick, especially with many colors. | Can feel thick and stiff, especially when layered. | Very soft and breathable, as ink dyes the fibers. |
| Durability | High. Excellent wash resistance without cracking or fading. | Very high. One of the most durable methods. | Good, but can peel or crack over time with improper care. | Good, but can fade over time, especially without pre-treatment. |
| Setup Costs | Zero setup fees. | High setup costs for screens and color separation. | No setup fees, but weeding intricate designs is labor-intensive. | Minimal setup, but pre-treatment is often required. |
This comparison makes it clear: while every method has its place, DTF offers a unique combination of versatility, quality, and cost-effectiveness that the others just can't match for most modern apparel projects.
DTF vs Direct-to-Garment (DTG)
Direct-to-Garment (DTG) is another digital player, often described as an inkjet printer for fabric. It creates beautifully soft, breathable prints and is fantastic for full-color designs on 100% cotton garments. The catch? Its performance drops off a cliff on polyester or blended fabrics, and colors can look washed out on dark shirts if they aren't pre-treated perfectly.
DTF, on the other hand, keeps its punchy vibrancy across all fabric types and colors, all thanks to its white ink underbase. This means your design will look just as brilliant on a black polyester hoodie as it does on a white cotton tee, giving you a consistency that DTG can't always promise.
If you want to go deeper, we've got a complete guide exploring the key distinctions between DTF and DTG printing. This flexibility makes custom DTF prints a far more reliable option for creators who work with all kinds of different apparel.
DTF vs Heat Transfer Vinyl (HTV)
Heat Transfer Vinyl (HTV) is the go-to for simple, single-color graphics like names and numbers on sports jerseys. The process involves cutting designs from colored sheets of vinyl and heat-pressing them onto the fabric. While it’s great for basic personalization, HTV gets clunky and impractical for designs with multiple colors or fine details, since each color has to be cut and layered by hand.
That layering process also results in a thick, stiff patch on the garment. DTF transfers, in contrast, arrive as a single, ready-to-press application. The final print is thin, light, and stretches right along with the fabric, delivering a much softer and more comfortable feel than multi-layered vinyl ever could.
Cost-Effectiveness at Different Scales
For massive runs of simple, one or two-color designs—we're talking 500+ shirts—screen printing can eventually become more cost-effective because of its economies of scale. But for almost every other situation, DTF offers a clear financial edge.
There are no setup fees for different colors, which makes small and medium runs incredibly affordable. This is where you can really stretch your budget. For example, instead of ordering transfers one by one, you can use our simple and cost-effective Auto-build gang sheet builder to fit multiple different designs—for front pockets, back graphics, and sleeve logos—all onto a single sheet. This simple move slashes your cost per print, making it unbelievably easy to manage inventory and produce a whole range of designs without breaking the bank.
Preparing Your Artwork for Flawless DTF Prints
The incredible quality you see in custom dtf prints is a team effort. It's a partnership between our printers and your design file. Think of your artwork as the blueprint for a skyscraper; if the blueprint is blurry or has missing details, the final building will have flaws. The exact same principle applies here—a perfect print starts with a perfectly prepared file.
This isn't about needing a graphic design degree. It’s about knowing a few simple rules that make sure the image you see on your screen is precisely what ends up on your fabric. Getting this right from the start is the best way to avoid common issues like fuzzy edges, weak colors, or unexpected print errors. It’s your ticket to a professional result, every single time.
The Golden Rules of File Preparation
To get those crisp, vibrant transfers we’re known for, your artwork needs to meet a few key technical specs. These aren't just arbitrary rules; each one plays a vital role in how the ink, powder, and film work together.
- Resolution is King: Your file absolutely must be 300 DPI (dots per inch). DPI is the language of print resolution. An image at 72 DPI might look fine on your phone, but it will print out pixelated and blurry. A 300 DPI file has all the data needed for sharp, clean lines.
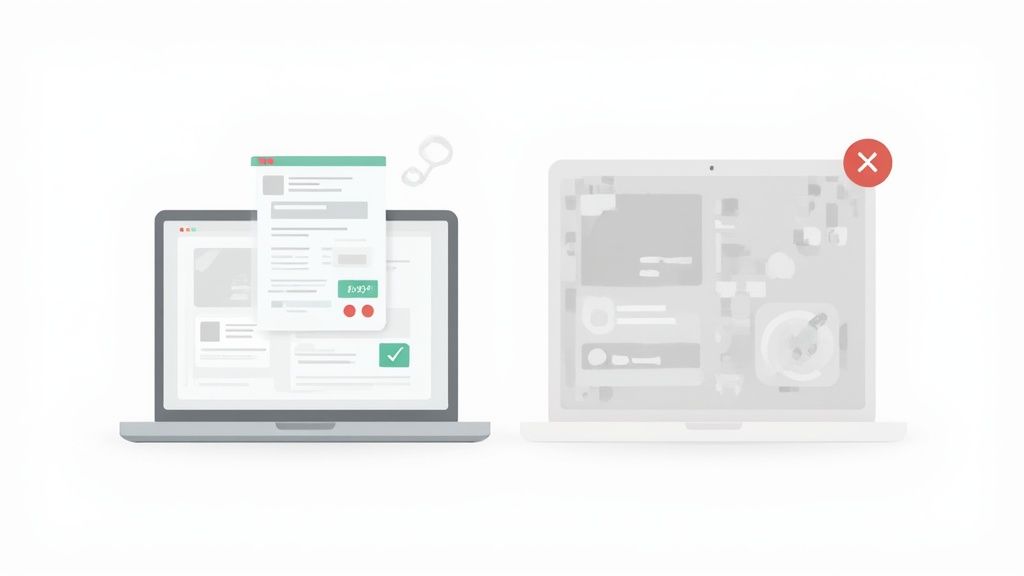
- Use a Transparent Background: Always save and upload your artwork as a PNG file with a transparent background. If you upload a JPG or a PNG with a white box behind your design, that box will get printed. Transparency is what tells our printers to only lay down ink where your actual design is.
- Correct Sizing: Design your art at the exact size you want it printed. If you make a 3-inch logo and then try to stretch it to 12 inches in the uploader, you’ll lose quality and the print will look distorted. Size it right in your software first.
Avoiding Common Artwork Pitfalls
Even with the right file type and resolution, small mistakes in the artwork itself can cause big problems on the press. Here are the most common traps we see and how you can steer clear of them.
- Stray Pixels: After erasing a background, tiny, almost invisible pixels can get left behind. You might not see them, but the DTF printer will. This results in small, unwanted specks of ink around your design. The fix? Zoom way in and double-check that the area around your art is perfectly clean.
- Semi-Transparent Edges: Soft, feathered, or glowing edges look great on a screen, but they don’t play well with DTF. The printer needs a solid, defined edge to properly apply the adhesive powder. Any semi-transparent areas will lead to a weak print that might not transfer right or could even wash away. Make sure all edges of your design are sharp and 100% opaque.
- Thin, Wispy Lines: Super fine lines or tiny, disconnected text (think smaller than a 7pt font) can be too delicate for the adhesive powder to grab onto. This can cause parts of your design to get lost when you peel the film. Give your lines enough thickness to be durable.
The core idea is simple: what you upload is what we print. If your file has a flaw, that flaw will show up on the final transfer. Taking a few extra minutes to check your artwork is the single best thing you can do to guarantee a flawless result.
Simplifying the Process with the Right Tools
Feeling a bit overwhelmed? Don't be. Most design software, even free tools, lets you set the correct DPI and export with a transparent background. Before you finalize anything, it’s always a good idea to understand the basics of optimizing digital images, which will help ensure your colors are vibrant and details stay sharp on the final product.
And for the absolute best bang for your buck, you can arrange multiple print-ready designs using our Auto-build gang sheet builder. This tool offers unmatched ease of use and cost-effectiveness by letting you fit several different designs onto one sheet, which drastically lowers your cost per print. For more ideas, check out our guide on creating amazing custom heat transfer designs.
Got your artwork files ready to go? Awesome. Now, the next step is turning that vision into a physical print in the smartest, most budget-friendly way possible. The ordering process for custom DTF prints is pretty simple, but knowing how to order can make a huge difference. This is where you shift from just buying transfers to making a savvy investment for your brand or project.
The real secret to saving money isn't just ordering a ton of prints—it's ordering smarter. A little strategy in how you arrange your designs can slash your cost-per-print, making pro-level apparel totally achievable, no matter your scale.
The Power of the Gang Sheet
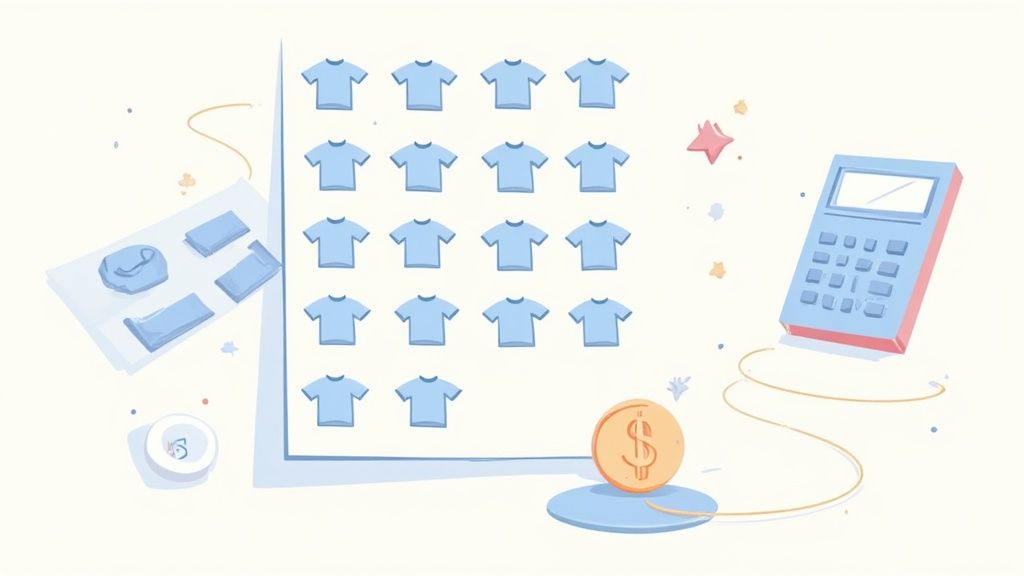
Let's say you have an order for a shirt that needs a big graphic on the back, a small logo on the chest, and a little design on the sleeve. If you ordered each of those as a separate transfer, it would be a waste of time and money.
A gang sheet is the solution. Think of it like a giant canvas. Instead of printing one design, you can arrange—or "gang up"—all your different designs onto one large sheet of transfer film.
This is, without a doubt, the most effective way to save cash on custom DTF prints. Whether you're filling a sheet with a hundred of the same logo or mixing and matching designs for different projects, you pay for the sheet, not for each image on it. The more you can fit, the less you pay for each individual piece. For maximum ease of use and cost-effectiveness, our Auto-build gang sheet builder is the perfect tool for the job.
This simple trick is changing the game for businesses managing their own printing. The DTF market is blowing up—it's projected to hit between USD 4.15 billion and USD 4.59 billion by 2032—and tools like gang sheets are becoming non-negotiable for anyone serious about efficiency.
Effortless Ordering with the Auto-Build Gang Sheet Builder
Building a gang sheet might sound like a headache, but we've made it ridiculously easy with our Auto-build gang sheet builder. This tool is designed for ease of use and cost-effectiveness. Seriously, even if you have zero design skills, this tool does all the heavy lifting for you. It takes your uploaded artwork and automatically packs it together to use every last inch of space.
Here’s a quick peek at just how simple it is to get your perfect layout.
You can upload a bunch of different files, tell it how many of each you need, and just watch as the builder nests them all together for the most economical setup. It's that easy.
Key Takeaway: The whole point of the builder is to kill wasted space. By packing your designs in tight, it makes sure you’re not paying for blank film. That savings goes directly back into your pocket, highlighting its cost-effectiveness.
If you want to go even deeper on this, check out our full guide on everything you need to know about DTF gang sheets.
Our Ordering Process and Turnaround Times
We keep things simple and transparent. Once you’ve used the easy Auto-build gang sheet builder and everything looks good, you’ll see the price right upfront. No hidden costs, no confusing math—what you see is what you pay.
We also know that speed is everything, whether you're knocking out customer orders or prepping for a big event. We've built our whole operation around getting you what you need, fast.
- Fast Production: Most orders are printed and out the door within 1–2 business days.
- Flexible Shipping: We’ve got options, including Next Day Air for those rush jobs.
- Local Pickup: If you're in the area, you can even swing by for same-day pickup.
This focus on speed means you get your top-quality custom DTF prints right when you need them, without ever sacrificing the vibrant color and tough durability our transfers are known for. And once you've nailed down your ordering, the next step is to make sure you effectively price handmade products so your business can thrive. Combine smart ordering with smart pricing, and you're setting yourself up for success.
Applying Your DTF Prints Like a Pro
Alright, you've got your awesome custom DTF prints in hand, and now comes the most satisfying part of the job: bringing your design to life. Applying a DTF transfer is pretty straightforward, but getting it right comes down to precision. Think of it less like ironing and more like a simple science experiment—follow a few key steps, and you'll get a perfect, professional-grade result every time.
Nail the technique, and you'll create a bond between the ink and fabric that’s built to last, wash after wash. The great news is the process is the same whether you're working with cotton, polyester, or a tricky blend. This guide will walk you through each step, turning that heat press into a tool for flawless custom gear.
Step 1: Prepare Your Garment
Before you even think about placing that transfer, you need to prep your canvas. Garments, especially cotton ones, are notorious for holding onto moisture from the air. That hidden moisture is the enemy—it can turn into steam during pressing and interfere with the adhesive, leading to a weak bond.
To knock it out, always start with a pre-press. Lay your garment flat on the heat press and hit it for 5-6 seconds at your application temperature. This quick step does two critical things: it zaps any moisture and smooths out wrinkles, giving you a perfectly flat, dry surface to work with.
Step 2: The First Press
With your garment prepped and ready, it's time for the main event. Carefully position your DTF transfer on the shirt, making sure the design side is facing up. If you're worried about it shifting, a little heat-resistant tape can be your best friend here.
Now, let's talk settings. These are the magic numbers for most cotton and poly blends:
- Temperature: 240-280°F
- Time: 10 seconds
- Pressure: Medium to Firm
Always cover the transfer with a Teflon sheet or parchment paper. This protects both your print and your heat press platen. Press for the recommended time, and once the timer dings, lift the press and carefully move the garment aside to cool.
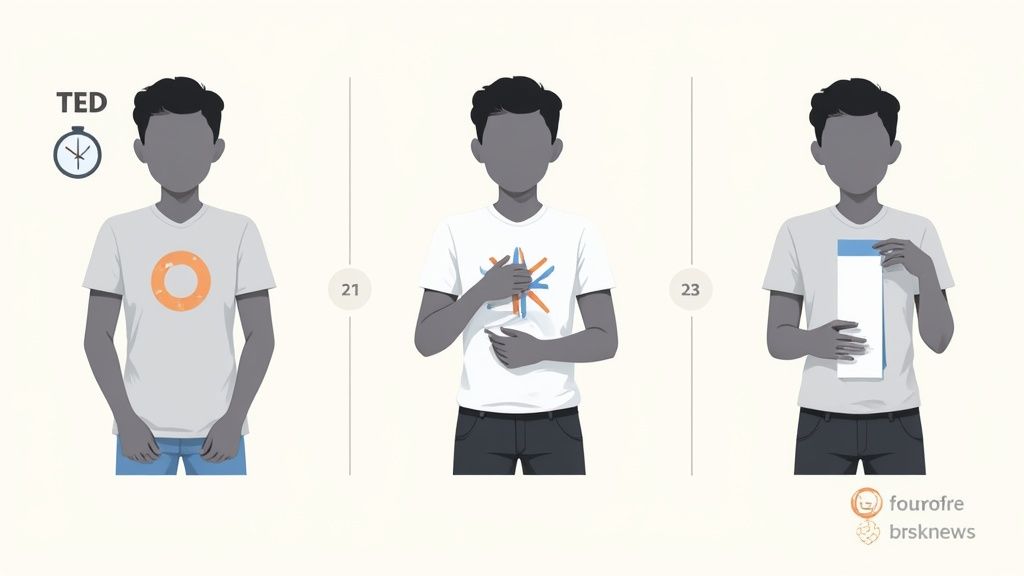
Step 3: The Hot Peel
As soon as the timer dings, peel the transfer by grabbing a corner and peel the film back at a low angle. Waiting to peel it is the #1 mistake people make, and it can cause the design to lift or even tear. You may peel it cold and it is occasionally recommended for extra fine artwork on certain fabrics. Then, let it cool down completely, all the way to room temperature. Once it's cool, grab a corner and peel the film back slowly, smoothly, and at a low angle. Don't rip it off like a band-aid. A slow, deliberate peel is what leaves your crisp, vibrant design perfectly stuck to the fabric.
Step 4: The Final Press for Durability
Your design is on the shirt, but we're not quite done. There’s one last step to lock it in for good. This final press melts the design fully into the fabric's fibers, which seriously enhances its durability and gives it a softer, matte finish.
Place the garment back on the press, cover the design again with your Teflon sheet or parchment paper, and press it for another 5-7 seconds at the same temperature. Trust me, this quick second press makes a huge difference in the longevity and feel of your custom dtf prints, ensuring they can handle whatever you throw at them.
Troubleshooting Tip: If your transfer isn't sticking right after the first press, it's almost always one of two things: not enough pressure or not enough heat. Double-check your heat press settings and make sure you’re applying firm, even pressure across the entire design.
Keeping Your Printed Garments Looking New
You’ve invested in custom apparel, and like any good investment, it deserves the right care to make sure it lasts. The good news is, keeping the vibrant colors and sharp details of your custom DTF prints looking fresh is incredibly simple.
A few small tweaks to your laundry routine are all it takes to keep your garments looking brand new, wash after wash. The secret isn't complicated—it's all about protecting the print from its two biggest enemies: heat and friction. High heat from the washer and dryer can soften the transfer's adhesive, while all that tumbling can cause the design to rub against other clothes, leading to premature wear.
Simple Steps for Lasting Prints
Stick to these guidelines, and you’ll protect the integrity of your design and the fabric itself. We're talking dozens of washes without fading, cracking, or peeling.
- Turn It Inside Out: Before you even think about washing, always turn your garment inside out. This one simple step creates a protective barrier, shielding the print from direct abrasion with other items in the load.
- Wash with Cold Water: Make the cold cycle your new best friend. Cold water is gentle on the DTF adhesive and helps prevent those vibrant inks from bleeding or fading over time.
- Use a Mild Detergent: Stay away from harsh detergents, bleach, and fabric softeners. These chemicals can break down the inks and adhesive, weakening the bond between the print and the garment.
Pro Tip: Try to wash your printed garments with similar colors and textures. Tossing a soft t-shirt in with heavy items like jeans or towels can create extra friction that wears down the design faster.
Drying for Maximum Durability
How you dry your apparel is just as important as how you wash it. That intense heat from a conventional dryer is the quickest way to degrade a print.
- Hang Dry When Possible: Honestly, the absolute best method is to hang dry your garments. This approach eliminates both heat and friction, preserving the print perfectly. It's a game-changer.
- Tumble Dry on Low: If you have to use a dryer, make sure you choose the lowest heat setting (tumble dry low) and pull the garment out as soon as it's done. Don't let it bake in there.
Got Questions About Custom DTF Prints?
As you get ready to kick off your project, a few final questions usually pop up. We get it. Knowing the answers gives you the confidence to dive in and create some seriously cool custom gear. Here are the straight-up, helpful answers to the questions we hear most often about custom dtf prints.
What Kinds of Fabrics Can I Actually Use DTF On?
This is where DTF really shines. One of its biggest wins is its incredible versatility. Forget other print methods that are super picky about materials—DTF transfers stick beautifully to a massive range of fabrics.
You can press with confidence on:
- Cotton and Cotton Blends: From 100% cotton tees to comfy 50/50 hoodies, DTF gives you a soft, durable print that feels great.
- Polyester: DTF is a total game-changer for performance wear and athletic apparel, offering fantastic adhesion where other methods just can't hang.
- Canvas and Denim: This makes it perfect for creating custom tote bags, rugged jackets, and stylish hats that last.
- Leather and Nylon: Yeah, you read that right. With the right heat and pressure settings, you can even decorate non-traditional items.
Bottom line: if the material can handle the heat of a press (we’re talking around 240-280°F), it’s almost certainly a great candidate for a DTF print.
How Well Do DTF Prints Hold Up in the Wash?
DTF prints are built to last, period. When you apply them correctly, the design literally becomes part of the fabric, stretching and moving right along with it.
We've put our transfers through the wringer, and they consistently stand up to 100+ wash cycles without cracking, peeling, or fading. Just follow the simple aftercare rules—wash inside out with cold water and hang dry—and your design will stay looking sharp for years.
The secret sauce is the final press. That last 5-7 second press is what truly locks the ink into the fabric fibers, creating a permanent bond that’s miles ahead of what you’d get from old-school heat transfer methods.
Seriously, Why Can’t I Just Use My Home Iron?
Look, we wish it were that easy, but a home iron just can't cut it. It simply cannot deliver the consistent, high pressure and even temperature that a proper DTF application demands.
Irons have hot spots and cool spots, and it's physically impossible to apply the firm, uniform pressure needed to permanently bond the adhesive to the fabric. If you try it, you'll end up with a print that looks okay for a minute and then peels right off after the first wash. A heat press isn't just a recommendation; it's a non-negotiable tool for getting professional, lasting results.
Is There a Minimum Order to Get Started?
Nope. None at all. Because DTF is a digital process with zero setup fees per color, there are no minimum order requirements. You can order a single transfer for a one-of-a-kind gift or thousands for a massive production run.
For the best bang for your buck, we always point people to our Auto-build gang sheet builder. Its ease of use and cost-effectiveness are unmatched, allowing you to pack multiple designs onto a single sheet. This drastically slashes your cost per print and makes even the smallest orders incredibly affordable.
Ready to bring your designs to life with color and durability that just won't quit? At Lion DTF Transfers, we make ordering fast, simple, and affordable. Build your custom gang sheet today and see the difference for yourself.