


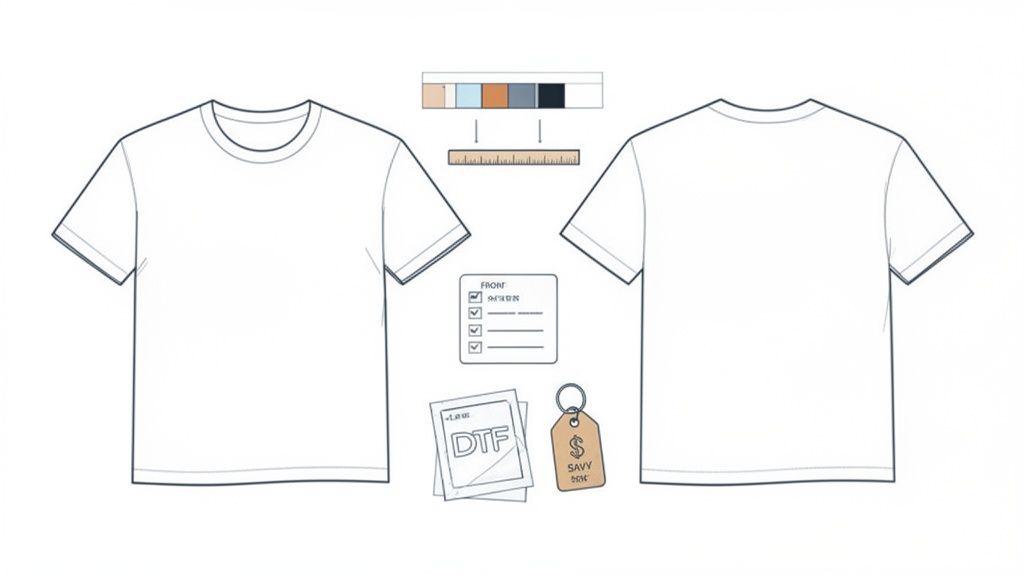
Turning a digital idea into a professional-grade t-shirt people actually want to wear is the core of any successful apparel brand, event, or print shop. It’s a process, and mastering the workflow is your ticket to getting a piece of this booming market.
Your Blueprint for Professional Custom Apparel T Shirts
Welcome. If you’re here, you’re serious about creating premium custom t-shirts that don’t just look good but actually sell. Whether you're launching a clothing line from your garage, gearing up a local business with branded apparel, or running a full-scale print shop, getting the process right from start to finish is what separates the pros from the hobbyists. The demand for unique, personalized clothing is exploding, and that’s a huge opportunity for anyone who can deliver.
This guide is your roadmap. We’re going to walk through the entire workflow, focusing heavily on Direct-to-Film (DTF) transfers. You'll see exactly why DTF has become the go-to for so many in the industry—the color vibrancy is unmatched, the feel is soft, and the durability is seriously impressive. We’ll cover everything from prepping your artwork for a perfect print to pressing the final product.
Unlocking Your Creative Potential
The journey from a digital concept to a finished shirt has a few critical stages. Nail each one, and you’ll get a flawless product every time. This guide is built on practical, real-world advice for every step:
- Design Prep: Learn the non-negotiable tech specs for artwork that prints clean and crisp.
- Production Smarts: Discover how to maximize your materials and cut costs with better planning.
- Application Mastery: Get the exact steps for applying transfers to create sellable, durable apparel.
- Growing Your Business: Find real strategies for pricing your work and scaling your operation without the headaches.
Look, the goal is to build a repeatable process that delivers consistent quality, order after order. By focusing on a reliable and efficient production method, you can spend less time fixing mistakes and more time growing your business.
A Market That's Ready to Grow
The buzz around custom apparel isn't just talk; the numbers back it up. The global custom t-shirt printing market is on a tear, projected to jump from USD 6.09 billion in 2025 to USD 13.72 billion by 2032. This isn't just a trend—it's a fundamental shift in how businesses, event organizers, and individuals express themselves. You can dig deeper into these market trends and their implications for your business.
Throughout this guide, we'll point you to tools that save you time and money, like our Auto-build gang sheet builder. It takes the guesswork out of arranging multiple designs, making your print runs more efficient and cost-effective. By the time you’re done here, you’ll have the practical know-how to turn your ideas into premium garments that build a loyal customer base.
Preparing Your Designs for Flawless Printing
A killer print starts long before the heat press warms up. It begins with your design file. Getting your artwork dialed in is probably the single most important step in creating professional custom apparel t shirts, because it directly controls the sharpness, color accuracy, and overall pop of the final product.
Trust me, skipping these fundamentals is a recipe for frustration and costly reprints. This isn’t just about making something look good on screen; it’s about making sure that vision translates perfectly onto fabric. The technical details—from resolution to color mode—are everything.
Setting the Standard with 300 DPI Resolution
Resolution is the bedrock of a crisp, professional-looking print. We measure it in DPI (dots per inch), and for apparel, the magic number is 300 DPI. A design built at this resolution has enough data packed in to print sharp and clean, without any of that fuzzy, pixelated mess.
Think of it like stretching a small photo to fit a giant billboard—it just gets blurry and distorted. The same thing happens here. That cool graphic you found online is likely 72 DPI. It looks fine on your monitor, but it will look jagged and amateur when it’s printed on a shirt. Always, always start your design canvas at 300 DPI to make sure your final transfer is as clear as you imagined it.
The CMYK Color Conversation
Here's a hard truth of printing: what you see on your screen is not what you get on the shirt. The reason? Color mode.
Your monitor uses an RGB (Red, Green, Blue) color profile. It's an additive light model, which is why screen colors can look so incredibly vibrant. Printers, on the other hand, run on a CMYK (Cyan, Magenta, Yellow, Key/Black) profile, a subtractive model that works with ink on a surface.
To get predictable, accurate color, you absolutely have to convert your design file to CMYK before sending it off. This one step gives you a much more realistic preview of the final printed colors, helping you avoid that sinking feeling when a bright electric green on screen turns into a duller, muted shade on the finished tee. It closes the gap between the digital world and the real one.
Key Takeaway: Always design in or convert your files to the CMYK color mode. This single action is one of the most effective ways to manage color expectations and prevent disappointing results.
Understanding Vector vs. Raster Graphics
Your design will be one of two types: raster or vector. Knowing the difference is a game-changer.
- Raster Graphics: These are pixel-based images, like a photograph. Think JPEGs, PNGs, and GIFs. They are resolution-dependent, which means if you try to make them bigger, they lose quality and get blurry.
- Vector Graphics: These are built with mathematical formulas, lines, and curves. Think AI, EPS, and SVG files. You can scale them up to the size of a building with absolutely zero loss in quality.
For logos, text, and clean line art, vector is king. Period. If a client hands you a tiny, pixelated logo, the first step is almost always to "vectorize" it—meaning, redraw it in a vector format—to make it usable for high-quality printing. For a deeper look at prepping different kinds of artwork, our guide on creating custom heat transfer designs has some extra pointers.
Final Checks for a Perfect File
Before you hit "save," run through this quick checklist. These small habits will prevent the most common (and annoying) printing errors, ensuring your custom apparel looks polished every single time.
-
Ensure a Transparent Background: Unless a solid box is part of your actual design, you need a transparent background. This is usually as simple as saving your file as a PNG. It’s what prevents that ugly white or black box from printing around your graphic.
-
Convert Text to Outlines: Fonts are a classic trip-up. If the print shop doesn't have the exact font you used, their computer will substitute it with something else, completely wrecking your design. The fix? Convert all text to outlines or shapes. This locks your letters into fixed vector shapes, so they’ll print exactly as you intended, no matter who opens the file.
Mastering these prep steps puts you in the driver's seat. You control the quality, minimize errors, and ensure every shirt you make is something you're proud to put your name on.
Mastering the Art of the Gang Sheet
Once your individual design files are dialed in, it’s time to shift from thinking about single prints to thinking like a production pro. This is where the gang sheet becomes your secret weapon—and one of the smartest ways to slash your costs and pump up your profits on every order.
Instead of ordering transfers one by one, a gang sheet lets you "gang up" multiple designs onto one big sheet. This simple move completely changes your cost structure. What used to be a bunch of small, separate expenses becomes a single, much more efficient purchase. For anyone serious about building a custom apparel t shirts brand, this is how you start to scale.
The Power of Maximizing Every Inch
Think of it like loading a moving truck. You wouldn’t just toss boxes in; you’d tetris them together to use every bit of space. A gang sheet works on the exact same principle. Every square inch of that transfer film costs you money, so your goal is to make sure none of it goes to waste.
This is where a little planning pays off big time. Let's say you land a job for a local construction crew. They need:
- 25 large logos for the back of their crew shirts.
- 25 smaller left-chest logos for the front.
- 10 tiny hard-hat logos.
Instead of ordering 60 separate transfers, you arrange all of them on a few large gang sheets. Just like that, your cost per print plummets, and your profit margin for the job goes through the roof.
Streamlining Production with Smart Tools
Let’s be honest: arranging dozens of designs by hand is a drag. It’s tedious, time-consuming, and almost impossible to do without leaving awkward, money-wasting gaps. This is precisely why automated tools are such a game-changer.
We built our Auto-build gang sheet builder to solve this exact headache. You just upload all your print-ready files, and the software automatically nests them together for the tightest possible fit. It rotates and places your graphics to maximize every last inch of the sheet, saving you both time and cash. For ease of use and cost-effectiveness, it's less of a convenience and more of a strategic business tool.
The image below breaks down the crucial prep work for each file before it even hits the builder.
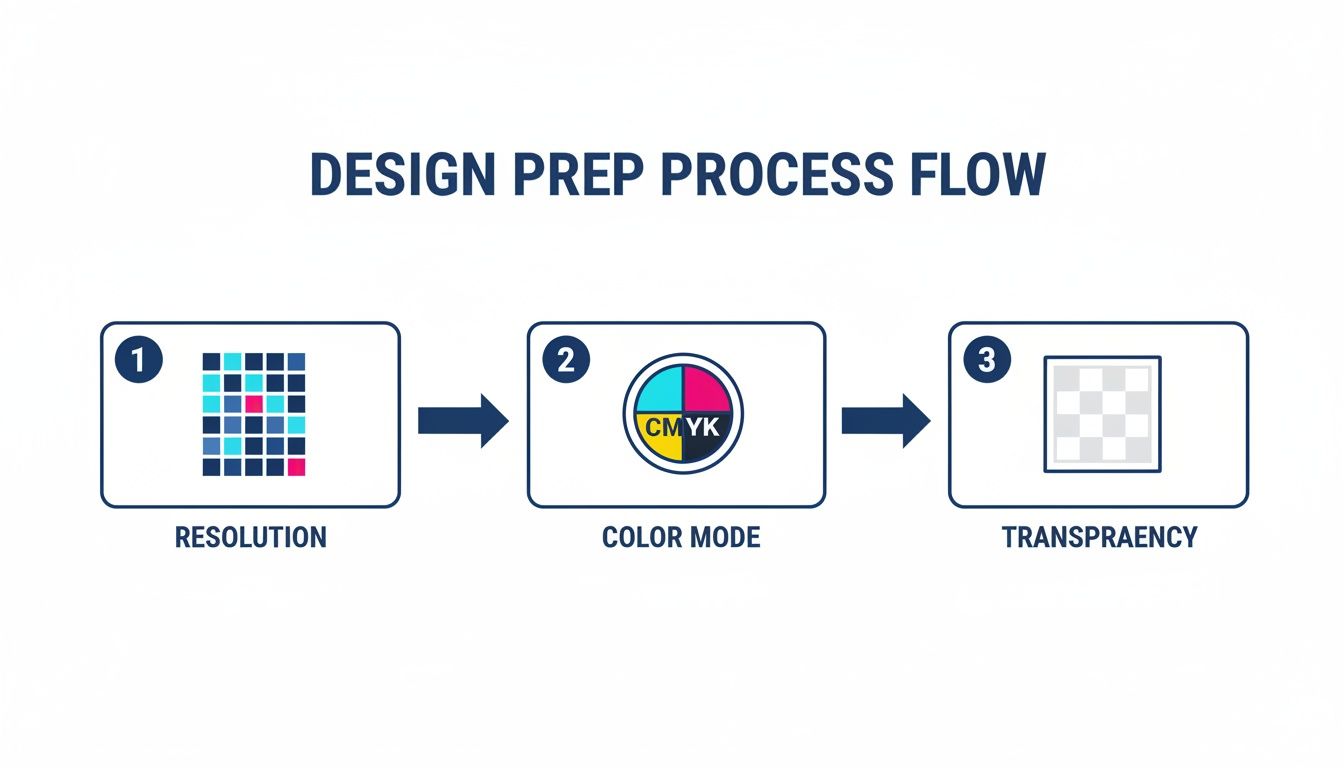
This workflow shows the non-negotiable checkpoints—Resolution, Color Mode, and Transparency—that guarantee every single design on your sheet is ready for a perfect print.
Gang Sheet Size and Capacity Examples
To really see how gang sheets impact your bottom line, it helps to visualize how many designs you can actually fit. This table breaks down a few popular sizes and their potential capacity, showing how quickly the cost per print drops as you scale up.
| Gang Sheet Size | Example Adult T-Shirt Logos (11"x11") | Example Left-Chest Logos (4"x4") | Potential Cost Per Print |
|---|---|---|---|
| 22"x24" | Up to 2-4 | Up to 25-30 | $0.60 - $1.20 |
| 22"x60" | Up to 8-10 | Up to 65-75 | $0.45 - $0.90 |
| 22"x120" | Up to 18-20 | Up to 140-150 | $0.30 - $0.60 |
As you can see, the larger the sheet, the more you can fit, and the lower your per-print cost becomes. This is the math that allows small shops to compete and grow.
Strategic Ways to Organize Your Gang Sheets
Building a great gang sheet isn’t just about cramming designs together; it’s about making your life easier when it’s time to press. A well-organized sheet saves you time on the back end, which is just as valuable as saving money on the front end.
For instance, you could organize your sheets by client. One sheet might hold all the different logos for a single corporate order, keeping everything for that job in one spot. Another smart method is organizing by color. If you have five different designs that all use a vibrant orange, grouping them ensures perfect color consistency across the entire batch. For a deeper look at these strategies, check out our guide on understanding DTF gang sheets for more pro tips.
By thinking ahead, your gang sheet becomes more than a cost-saving tool—it becomes a part of your assembly line. When you can grab one sheet and press an entire order without hunting for mismatched pieces, you’re operating like a professional.
This shift from a per-design cost to a per-sheet cost is what separates the hobbyists from the businesses. It lets you price your custom apparel t shirts more competitively while keeping your margins healthy. You can offer clients package deals—like a shirt, hat, and tote bag combo—by fitting all the logos onto a single, affordable sheet. Mastering this skill is a true sign of an efficient and scalable apparel operation.
Picking the Right Transfers for Your Project
The transfer you choose is literally the heart and soul of your finished garment. It’s what dictates the look, the feel, and—most importantly—the durability of your custom apparel t shirts. While there are a bunch of options out there, hot-peel Direct-to-Film (DTF) transfers have pretty much become the undisputed favorite for professionals who need quality and consistency every single time.
So, why the loyalty to DTF? It all boils down to performance. These transfers give you incredibly vibrant colors, a remarkably soft hand-feel on the fabric, and a durability that's been proven to last for over 100 washes. That's not just a marketing claim; it's the standard that separates sellable, retail-quality merchandise from cheap promotional throwaways.
Why DTF Just Works Better Than Traditional Methods
For years, screen printing and heat transfer vinyl (HTV) were the go-to methods for custom apparel. Both still have their place, of course, but DTF swoops in to solve their biggest headaches, making it a far more versatile and practical choice for modern apparel businesses.
- Screen Printing: This method is an absolute workhorse for massive runs of simple, one or two-color designs. But the moment you introduce more colors, it gets expensive and complicated, fast. You need a separate screen for every single color. DTF, on the other hand, handles full-color, photorealistic images with an unlimited color palette in one clean, efficient step.
- Heat Transfer Vinyl (HTV): Vinyl is great for simple text and basic shapes, but it really struggles with intricate details. And anyone who's spent hours weeding—that tedious process of removing excess vinyl by hand—knows how much of a time-sink it can be. DTF prints complex, highly detailed designs perfectly every time, with absolutely no weeding required.
This move toward smarter digital methods is reshaping the entire industry. Digital techniques like DTF are fueling a huge chunk of the custom t-shirt market's growth, which is projected to jump from USD 5.68 billion in 2025 to USD 9.82 billion by 2030. It's this technology that's powering the on-demand business models we see today, cutting down on waste and making it possible to create killer full-color designs, even for small batches. You can dig into more data on this market shift and its impact on custom printing.
The Ordering Workflow From Start to Finish
Once you've used a tool like our Auto-build gang sheet builder to pack your designs onto a cost-effective layout, the actual ordering process is a breeze. A smooth handoff here is key to getting exactly what you need, right when you need it.
First, you'll upload your completed, print-ready gang sheet file. This is where all your prep work pays off—those high-resolution, CMYK files with transparent backgrounds are now perfectly arranged to maximize every square inch of film. The system takes this master file and gets it ready for the printers.
Quick tip: The quality of your uploaded file directly translates to the quality of the final transfer. Double-checking your resolution, color mode, and transparency before hitting "upload" is the final, crucial quality-control step on your end.
Selecting the Right Shipping for Your Timeline
The last piece of the puzzle is choosing your shipping method. This decision is critical for managing client expectations and hitting those non-negotiable deadlines. Your options are built to fit different business needs, whether you're planning ahead or handling a last-minute fire drill.
Here’s a quick breakdown of what to consider:
- Standard Shipping: This is your go-to, most economical choice for jobs you've planned in advance. It offers a reliable delivery window without the extra cost of expedited services.
- Next-Day Air: When a client needs an order for a fast-approaching event, this option is a lifesaver. It guarantees your transfers arrive quickly, letting you press and deliver on a super tight schedule.
- Same-Day Pickup: For local businesses, this is a game-changer. If you're near our production facility, you can literally place an order in the morning and have the transfers in your hands by the afternoon. It enables an incredibly fast turnaround for your customers.
Getting a handle on these options is a core part of running a responsive and reliable custom apparel business. It lets you confidently promise delivery dates and build a reputation for dependability—which, as we all know, is just as important as the quality of your shirts.
Nailing the Perfect Press and Long-Term Care
Your DTF transfers have landed, and now for the best part: bringing your product to life. A perfect, clean press is what turns your custom apparel t shirts from a craft project into sellable, professional-grade merchandise. Getting this step right is the key to making sure every shirt you sell looks and feels premium.
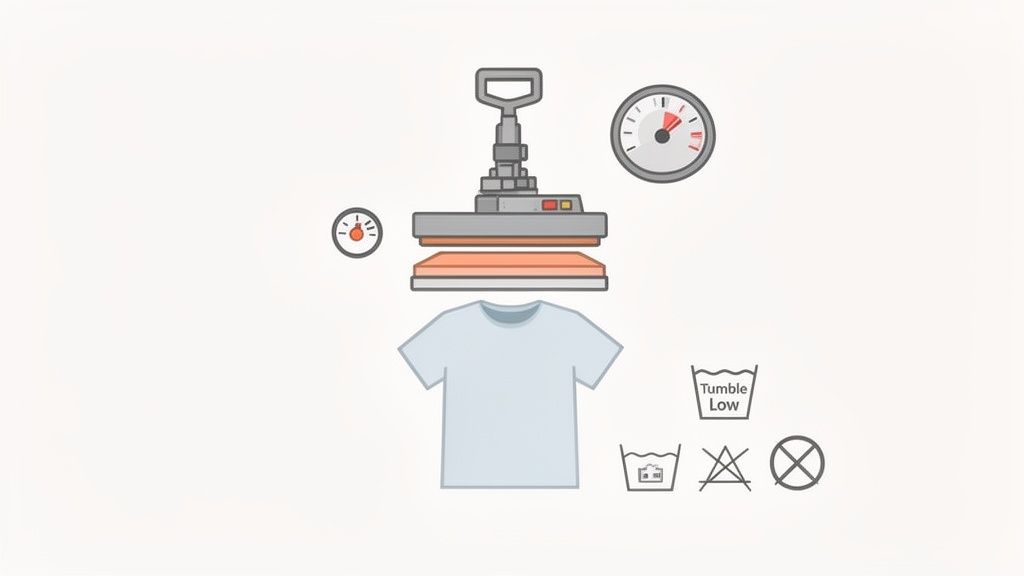
Applying the transfer is a science, but a simple one. It really just comes down to three things: temperature, time, and pressure. When you get those three elements balanced just right, the transfer melts seamlessly into the fabric fibers. The result is a soft, durable finish that feels like it was always part of the shirt.
Prep Work for a Flawless Application
Before you even think about laying down your transfer, you need to do a quick pre-press. A lot of people skip this, but it’s a non-negotiable step if you want professional results. Pressing the blank shirt for just 5-7 seconds does two critical things.
First, it zaps any hidden moisture out of the fabric. A shirt can feel dry, but ambient humidity can mess with the transfer adhesive and cause peeling later on. Second, a pre-press irons out all the wrinkles, giving you a perfectly flat surface for an even application. No more distorted or puckered designs.
Dialing In Your Heat Press Settings
Getting your settings right is everything. They can shift a bit depending on your heat press and the fabric you're using, but there's a solid starting point for most cotton and poly-blends.
- Temperature: Set your press to 240-280°F. This is the sweet spot—hot enough to cure the adhesive properly without scorching the garment.
- Time: The first press only needs about 5-7 seconds. That’s all it takes.
- Pressure: Go with medium to firm pressure. You want to make sure the heat and pressure are distributed evenly across the entire transfer.
After that initial press, do one final "finishing press." Just cover the design with a sheet of parchment or teflon paper and press again for another 5-7 seconds. This little trick locks the design into the fibers, makes it even more durable, and gives it a high-end matte finish. For a deeper dive, check out our complete guide on heat press settings for DTF to really fine-tune your process for different materials.
Mastering the Hot Peel
Our DTF transfers are designed for a hot peel, which is a huge time-saver in production. As soon as that timer goes off, open the press and immediately peel the clear carrier film off the garment.
The trick is to use a smooth, confident motion. Start at a corner and pull the film back on itself at a low, steady angle. Don't just yank it straight up, as that can pull bits of the design off with it. A fluid, consistent peel is what gives you that clean release every single time, leaving a sharp, vibrant graphic behind.
The goal here is to create a repeatable process. Once you find the perfect combo of time, temp, and pressure for your setup, you'll be able to crank out professional-quality shirts one after another.
Long-Term Care for a Lasting Print
The final piece of the puzzle is giving your customers clear wash instructions. It’s a small detail, but it protects their purchase, keeps the shirt looking awesome, and reinforces that you sell high-quality stuff.
Just tell them to follow these simple rules:
- Wait 24 Hours: Let the adhesive fully cure for at least 24 hours before the first wash.
- Wash Inside Out: Turning the shirt inside out protects the print from rubbing against other clothes.
- Use Cold Water: Always wash on a gentle cycle with cold water. This keeps the colors bright and the transfer intact.
- Tumble Dry Low or Hang Dry: High heat is the enemy. Tumble dry on the lowest setting possible, or better yet, just hang it to dry.
- No Bleach or Fabric Softeners: Harsh chemicals can break down the transfer adhesive over time.
Scaling Your Custom Apparel Business
Alright, let's talk about leveling up. Taking your t-shirt gig from a side project to a real-deal business is all about scaling smart. It's that moment you shift from chasing one-off sales to building a predictable, profitable system. This means getting your numbers straight, spotting real growth opportunities, and carving out your own corner of the market.
At the heart of this whole transition is one thing: knowing your costs. If you don't have a rock-solid grip on your expenses, you're just guessing at your prices. And guessing is a terrible way to grow a business. To scale profitably, you need a clear, repeatable strategy that makes sure every single shirt you sell is actually making you money.
Crafting a Bulletproof Pricing Model
Pricing your custom apparel t shirts can feel like a tightrope walk. Go too high, and you might spook potential customers. Go too low, and you're on the fast track to burnout, working your tail off for pennies. The secret is to build your price from the ground up, starting with your actual, hard costs.
Your total cost isn't just the price of the blank tee. To get this right, you have to account for every single thing that goes into making that finished product:
- The Blank T-Shirt: This one's easy. It's your base cost.
- The DTF Transfer: Figure out the cost per design. This gets way cheaper when you use tools like our Auto-build gang sheet builder to pack as many prints as possible onto each sheet. This is a highly cost-effective approach that boosts profitability.
- Labor: Your time is worth money. Set an hourly rate for yourself and break it down per shirt. For example, if you can press 60 shirts in an hour and your rate is $20/hr, your labor cost is only about $0.33 per shirt.
- Overhead: Don't forget the small stuff. Factor in a little slice for your software subscriptions, electricity, and other business expenses.
Once you’ve added all that up to get your total cost, a solid rule of thumb is to double it for your wholesale price. Then, double the wholesale price to get your retail price. This gives you healthy margins to cover everything else and, most importantly, reinvest back into the business.
Proven Tactics for Driving Growth
Once your pricing is dialed in, you can start focusing on strategies to land bigger orders and keep customers coming back. Growth isn't an accident—it comes from making intentional offers that give your clients real value.
A great example is creating product bundles. Think about a "New Business Starter Pack" that includes 20 t-shirts, 10 hats, and a handful of tote bags. You can group all the designs onto a few gang sheets to keep your costs down and offer the whole package at a discount compared to buying everything separately. It makes the decision easy for your client.
Tiered discounts for bulk orders are another classic for a reason. They reward customers for spending more, which is exactly what you want.
Here's a pro tip: Structure your offerings into "Good, Better, Best" tiers. Present a budget-friendly shirt, a more stylish mid-range option, and a premium brand. This lets customers pick what fits their wallet and quality standards, and you'd be surprised how many will choose to upgrade.
Identifying and Serving Lucrative Niches
Instead of trying to be the printer for everyone, zero in on a specific niche where you can become the go-to expert. This lets you tailor your designs and marketing directly to a group of people who are already passionate about something.
Think local sports leagues needing uniforms, corporate clients needing branded gear for their next big event, or online creators launching merch for their followers. To really take off, it helps to understand proven strategies to scale an e-commerce business that can be applied to your apparel operation.
The market for custom apparel is absolutely massive, stretching far beyond your local community. For example, the Asia Pacific region is a powerhouse, accounting for an estimated 39.4% of global custom t-shirt revenue in 2024. That growth is fueled by a young demographic and a booming e-commerce scene, proving just how huge the potential is for online sellers. By finding your niche and locking in a reliable supplier, you can turn your passion project into a thriving business.
Got questions? Good. When you’re jumping into the world of custom apparel t shirts, a few things always come up. Here are some of the most common questions we hear from creators and business owners getting started with DTF transfers, along with some straight-up answers.
What’s the Minimum Order for DTF Transfers?
This is one of the best parts about DTF: there often isn’t one. The flexibility is a game-changer, especially for small businesses. You can order just one transfer to test a new design, create a single sample for a client, or run a super small batch for a pop-up event.
This completely sidesteps the old-school screen printing problem where you had to commit to a huge run just to make it affordable, often leaving you with boxes of unsold shirts. With DTF, you print what you need, when you need it.
Can I Fit Multiple Designs on a Single Sheet?
Not only can you, but you absolutely should. This is the whole idea behind creating a gang sheet, and it's the smartest way to get your cost-per-print way down. Instead of paying for a bunch of individual transfers, you can pack a single sheet with all the different graphics you need for a project.
Think about it: a local soccer team needs large logos for the back of their jerseys, smaller crests for the front, and maybe some sleeve numbers. You can fit all of those different elements onto one gang sheet, which dramatically cuts down your costs for the entire uniform order.
Our Auto-build gang sheet builder was designed for exactly this. It takes the guesswork out of the process and automatically arranges your designs to use every last inch of space, so you get the most bang for your buck without having to play Tetris with your artwork. It's the most cost-effective and easy-to-use solution for maximizing your print runs.
How Long Do DTF Transfers Actually Last?
A high-quality DTF transfer is built to take a beating. When you press it correctly with a good heat press, the design literally becomes one with the fabric. We're talking about transfers that can handle 100+ wash cycles without cracking, peeling, or fading into a ghost of your original design.
Of course, proper care helps. Following the wash instructions—like using cold water and low heat in the dryer—will keep the garment looking fresh for years. That kind of durability is what reinforces your brand’s reputation for quality.
Ready to create apparel that looks and feels professional? At Lion DTF Transfers, we arm you with premium hot-peel DTF transfers, powerful online tools, and the fastest turnaround in the business. Start building your next best-seller today at https://liondtf.com.