


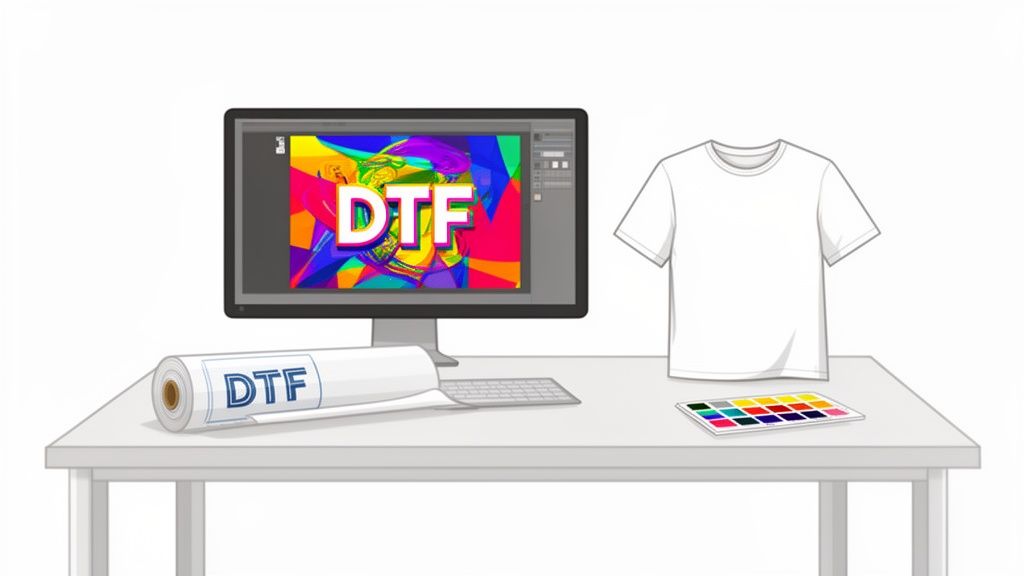
Printing on a t-shirt is more than just putting ink on fabric. It's about creating a wearable piece of art, a walking billboard for a brand, or a personal statement. Among all the ways to get a design onto a shirt, Direct-to-Film (DTF) transfers have emerged as the go-to method for anyone serious about professional, long-lasting results. This technique nails the sweet spot, delivering vibrant, full-color designs on a huge range of fabrics with detail and durability that used to be hard to come by.
A Quick Look at Your Options
Before we dive deep into DTF, it helps to see how it stacks up against other popular methods. Each technique has its place, but understanding the pros and cons is key to choosing the right one for your project.
T-Shirt Printing Method Quick Comparison
| Method | Best For | Vibrancy | Fabric Versatility | Durability |
|---|---|---|---|---|
| DTF Transfers | Full-color, detailed graphics on any fabric. Small to large runs. | Excellent | High (Cotton, poly, blends) | Excellent |
| Screen Printing | Simple designs with few colors. Large bulk orders. | Good | Moderate | Very Good |
| DTG Printing | Complex, multi-color designs on cotton. On-demand prints. | Good | Low (Best on cotton) | Good |
| Heat Transfer Vinyl | Bold, simple text and shapes. Small custom jobs. | Good | High | Good |
As you can see, DTF really shines when it comes to versatility and vibrancy, which is why we’re focusing on it. It’s the modern workhorse for today’s apparel decorators.
Why DTF Transfers Are a Game-Changer
DTF isn't just another printing method; it's a practical solution that bridges the gap between quality and efficiency for both startups and established shops. Unlike older techniques that box you in with fabric limitations or hefty setup costs, DTF gives you the freedom to create without compromise.
Here’s what makes it stand out in the real world:
- Unmatched Versatility: This is the big one. You can press stunning, full-color designs onto cotton, polyester, blends, and even tricky materials like denim. It doesn't matter if the shirt is black, white, or neon green—the white ink underbase makes sure your graphics are bold and opaque every time.
- Incredible Durability: When applied correctly, our DTF transfers are tested to handle 100+ washes without cracking, peeling, or fading. That's the kind of quality that builds a loyal customer base and gets you repeat business.
- Cost-Effective for Any Batch Size: DTF is perfect for running a single sample or knocking out a small order without the punishing setup costs of screen printing. This flexibility lets you test new designs with almost no financial risk.
For businesses trying to squeeze every bit of value out of their materials, grouping multiple designs on one sheet is a massive advantage. This is where our Auto-build gang sheet builder really shines for ease of use and cost-effectiveness. It automatically arranges your artwork to minimize waste, which directly lowers your cost per print and saves you a ton of time.
Think of this guide as your roadmap. We’re moving from prepping your digital file all the way to pressing the final garment, explaining how each step impacts your product’s quality and your business’s bottom line. Let's get you set up for success from the very first press.
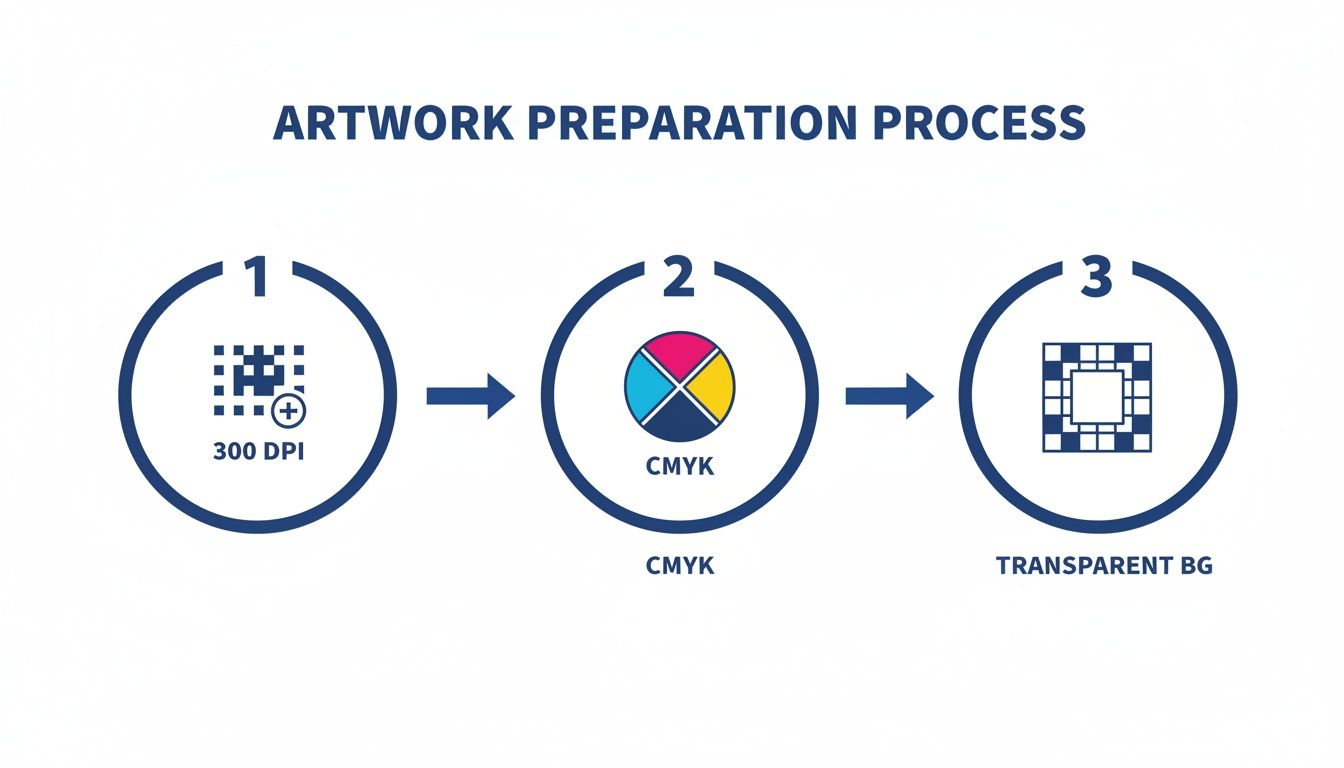
Getting Your Artwork Ready for a Perfect Print
A killer design can fall completely flat if the digital file isn't set up the right way. The magic of a great printed t-shirt starts long before the heat press even warms up; it begins with prepping your artwork to professional standards. Nailing these details is what separates a sharp, vibrant final product from a blurry, disappointing one.
The very first checkpoint for any pro print job is resolution. Your artwork needs to be created at 300 Dots Per Inch (DPI). This is the industry standard for a reason—it guarantees that when the design is printed, it stays crisp and clear without any pixelation. If you try to print a low-resolution file, like a 72 DPI image you grabbed from a website, it will almost always come out looking fuzzy and amateur.
File Setup Essentials
Beyond just resolution, a few other file settings are critical for getting the colors and finish you have in your head. Following these steps ensures your digital design translates perfectly into a physical transfer.
- Your Color Profile Matters: Always, always set up your files in the CMYK (Cyan, Magenta, Yellow, Key/Black) color profile. Your computer screen displays colors in RGB (Red, Green, Blue), but professional printers run on CMYK inks. Designing in CMYK from the start gives you a much more accurate preview of how the final printed colors will look.
- Embrace Transparency: For a clean print that doesn't have a clunky background box around it, your design file absolutely must have a transparent background. Saving your artwork as a PNG or TIFF file is the best way to preserve that transparency, making sure only your actual design elements get printed.
Forgetting to remove the background is a super common mistake that instantly cheapens the look of a custom shirt. A transparent background means the design's edges are perfectly clean, letting the graphic blend seamlessly with the t-shirt fabric. You can dive deeper into creating awesome graphics in our complete guide to custom heat transfer designs.
Maximize Your Prints and Minimize Your Costs
Once your individual designs are looking perfect, it's time to start thinking like a pro to maximize your efficiency and cut down on costs. Instead of ordering dozens of small, individual transfers, the smartest and most cost-effective method is arranging multiple designs onto one big sheet, known as a gang sheet.
A gang sheet lets you fit logos, neck tags, pocket designs, and full-size graphics all onto a single transfer film. You pay for the sheet, not for each individual design, which dramatically lowers your cost-per-print. This is the single best strategy for boosting your profit margins when printing on t-shirts.
This approach is a game-changer for small businesses and e-commerce sellers who need to produce a variety of designs without breaking the bank. But let's be honest, manually arranging all those designs to fit perfectly can be tedious and incredibly time-consuming.
Here's a look at how an automated tool makes this whole process a breeze.
This is exactly where our Auto-build gang sheet builder comes in handy for ease of use and cost-effectiveness. It automatically and intelligently arranges your uploaded artwork to cram the maximum number of designs onto the sheet, eliminating wasted space and saving you money. This tool turns a complex layout headache into a simple, efficient step, making sure you get the most value out of every single order.
The Heat Press Workflow From Transfer to Tee
With your perfectly prepared artwork and high-quality DTF transfers in hand, it’s time for the best part: the heat press. This is where your digital design becomes a real, wearable product. Getting this stage right is what creates a durable, professional-looking shirt that feels as good as it looks.
The process isn't just about cranking up the heat; it’s a careful balance of temperature, time, and pressure. Mastering this "golden triangle" is what separates inconsistent, amateur prints from the reliable, sellable stuff. Every fabric, from sturdy cotton to slick polyester, needs slightly different settings to make sure the transfer’s adhesive bonds perfectly without wrecking the garment.
This stage is critical, but it's also where your business can really shine. T-shirt revenue in the United States is projected to hit $5.53 billion, and the average person buys 2.8 t-shirts each year. That consistent demand makes custom apparel a fantastic market. Brands that can deliver quality prints that last 100+ washes are the ones that will capture this market.
Setting Up for Success: The Pre-Press
Before you even think about laying down your transfer, the first mandatory step is the pre-press. It's a quick but vital action: press the blank t-shirt by itself for about 5-10 seconds. This does two essential things—it zaps any lingering moisture out of the fabric and smooths out wrinkles, giving you a perfectly flat surface for your design.
Skipping this is a common mistake that leads to hazy-looking prints or bad adhesion. Any moisture trapped in the fibers can turn to steam during the press, messing with the transfer's bond and killing the final quality.
Pro Tip: For fabrics that tend to scorch or get shiny marks (like certain polyesters or blends), slip a Teflon sheet or parchment paper between the heat platen and the shirt. Do this for both the pre-press and the main press. This protective layer helps spread the heat evenly and prevents direct contact from damaging sensitive materials.
Mastering the Application Process
Once your shirt is prepped, the application itself is straightforward but demands precision. Good alignment is everything for a professional look, especially for logos or chest pieces. A simple trick is to fold the shirt in half vertically and give it a light press to create a center crease. Bam—an instant guideline for perfect placement.
Getting your artwork file ready is the foundation for this whole stage.
As you can see, a high-res file, the right color mode, and a transparent background are non-negotiable for a professional DTF transfer.
With your transfer perfectly placed, it’s time to press. Settings can vary, but here’s a solid starting point for the most common fabrics:
- 100% Cotton: 300-320°F for 10-15 seconds with medium pressure.
- Polyester & Blends: 280-300°F for 8-12 seconds with medium pressure.
For a deeper dive into the specifics, check out our complete guide on how to use a heat press machine.
The Peel and the Finishing Press
After that first press, what you do next depends on your transfer type. Our transfers are hot-peel, which is a huge time-saver for production. It means you can peel the clear film carrier right off, immediately after the press opens, while the shirt is still hot. This lets you move from one shirt to the next without waiting for anything to cool down.
Once the film is gone, there’s one last step that will take your print quality to the next level: a finishing press. Place a protective sheet over the exposed design and press it again for another 5-7 seconds. This second press works wonders. It helps embed the ink deeper into the fabric's weave, giving it a much softer feel and seriously boosting its wash durability. It also knocks down any shine from the adhesive, leaving the print with a premium, matte finish that feels like part of the shirt—not a sticker sitting on top of it.
Selecting the Right Blanks and Fabrics
The garment you choose is just as important as the design itself. A killer graphic on a scratchy, ill-fitting shirt isn't going to impress anyone or build a loyal customer base. Think of the blank t-shirt as your canvas—its material, weight, and construction have a massive impact on the final look, feel, and perceived value of your product.
Making the right call starts with understanding the core fabric options and how they play with DTF transfers. Each material brings something different to the table, making it suitable for everything from premium brand merch to high-performance athletic wear.
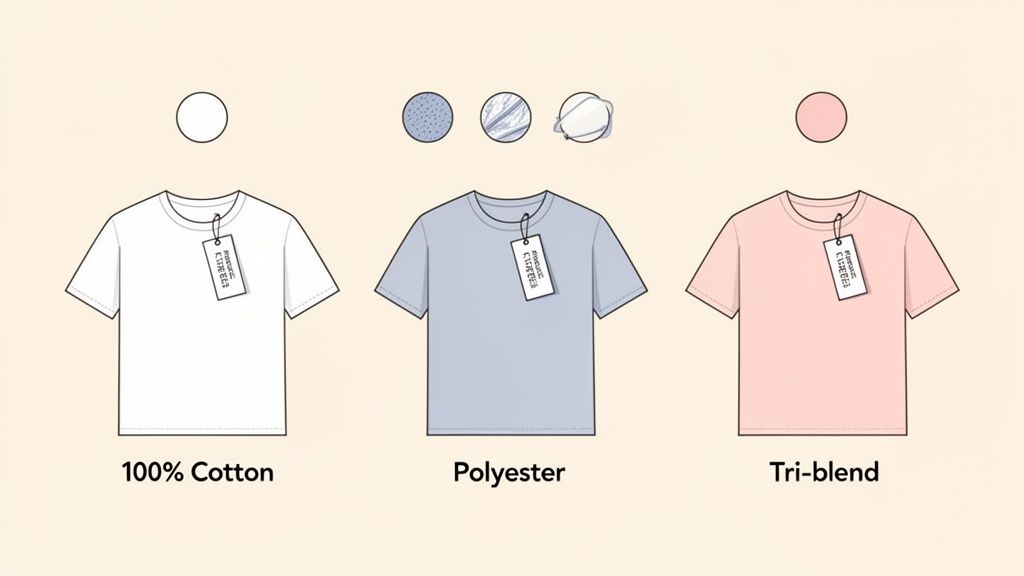
The Big Three Fabric Types
When you're sourcing blank apparel, you’re almost always going to run into three main categories: cotton, polyester, and blends. Knowing what makes each one tick will help you match the perfect shirt to your project's goals.
-
100% Cotton: The undisputed classic. Cotton is soft, breathable, and gives DTF transfers an incredible surface to bond to, resulting in unbelievably vibrant prints. It's the go-to for retail brands, band merch, and anyone aiming for that traditional, high-quality feel.
-
100% Polyester: This is your workhorse fabric. Known for its durability, moisture-wicking properties, and resistance to shrinking, polyester is the top choice for athletic apparel, team jerseys, and workwear where performance is non-negotiable.
-
Blends (50/50 and Tri-Blends): These fabrics are the best of both worlds. A 50/50 blend (cotton/polyester) gives you the softness of cotton with the durability of polyester. Tri-blends throw rayon into the mix, creating an exceptionally soft, lightweight shirt with a subtle heathered look that's hugely popular for premium lifestyle brands.
One of the biggest wins for DTF transfers is their versatility across all these materials. You can dive deeper into this in our guide covering what fabrics can be used with DTF transfers. This flexibility is a game-changer, letting you offer a huge range of products without ever having to switch up your printing method.
Why Fabric Color Is No Longer a Barrier
With older printing methods, getting a bright design to show up on a dark shirt was a real headache. Colors looked dull and muddy because the fabric color would bleed through the ink. This is exactly where modern DTF technology completely changes the game.
Every single DTF transfer from Lion DTF is printed with a solid, opaque white underbase layer. This layer sits behind your color design, acting like a perfect primer. When you press that transfer onto a black, navy, or dark green shirt, the white base guarantees your colors will pop with the exact same vibrancy as they would on a white tee.
This breakthrough means you can design with total freedom, without worrying about your garment color palette. It opens up your creative possibilities and your product catalog, empowering you to offer a full spectrum of apparel colors to your customers.
Details That Define Quality
Beyond the fabric type, a few other details separate a basic tee from a premium one. Paying attention to these small things will elevate your brand and help you justify a higher price point.
Garment Weight (GSM) GSM, or Grams per Square Meter, tells you how dense the fabric is.
- Lightweight (Under 150 GSM): Thinner and more breathable. Great for summer or fashion-forward fits.
- Midweight (150-180 GSM): This is the sweet spot and the most common choice. It’s a perfect balance of durability and comfort for everyday wear.
- Heavyweight (Over 180 GSM): Thicker, more durable, and often used for streetwear or workwear to create a premium, structured feel.
Fit and Construction How a shirt is built directly impacts how it wears and lasts. Look for features like side-seamed construction, which offers a more tailored, flattering fit than cheaper, tube-knit shirts. Also, check for little things like a tear-away tag, which makes it incredibly easy for you to add your own custom branding.
Choosing the right blank isn't just a creative choice; it's a strategic business decision. When you understand these fabric and construction details, you can source garments that not only look and feel amazing but also perfectly align with your brand's quality and your customers' expectations.
How to Fix Common T-Shirt Printing Problems
Even with the best gear and flawless artwork, things can still go wrong when you're pressing a t-shirt. Don't sweat it—every single pro has been there. Troubleshooting is just part of the game, and knowing how to spot and fix the most common issues will save you a ton of time, money, and frustration.
Most printing headaches trace back to just a few things: your heat press settings, the shirt itself, or how you're applying the transfer. Let's dig into the usual suspects and get them sorted out so you can get back to making perfect prints.
Why Your Transfer Isn't Sticking
This is the big one. It's easily the most common problem people run into. You press the shirt, peel the film, and the design either lifts right off with it or looks like it's barely hanging on for dear life. Before you start blaming the transfer, take a hard look at your process.
Nine times out of ten, a transfer that won't stick comes down to one of three culprits:
- Not Enough Pressure: Your heat press has to clamp down with firm, even pressure to melt the adhesive into the fabric. "Medium" pressure feels different on every machine, so if a transfer fails, crank the pressure up a notch and try again.
- Fabric Coatings: Some blank apparel, especially performance polyester, comes with a factory-applied moisture-wicking or water-repellent coating. This invisible shield can stop the transfer's adhesive from grabbing on. A solid pre-press can sometimes burn it off, but if the problem keeps happening, you might need to switch to a different garment brand.
- Wrong Temp or Time: If your press is too cool, the adhesive never fully activates. Too hot, and you can scorch the adhesive or the garment. Always start with the recommended settings for your specific fabric and only make small adjustments from there.
The bottom line is consistency. When you’re dialing in your settings, every failed print is wasted material and money. This is where planning ahead with a tool like our Auto-build gang sheet builder becomes a lifesaver. You can pack a bunch of small logos or test designs onto one sheet, letting you sacrifice a few tiny prints to perfect your settings without ruining a full-size, expensive graphic. Its ease of use makes this process both fast and cost-effective.
Preventing Fading and Cracking After Washing
There's nothing worse than a print that looks amazing right off the press but cracks or peels after a single wash. That's a business killer, right there. This problem is almost always caused by an incomplete press. If the adhesive isn't fully cured and bonded with the fabric fibers, it's going to break down fast in the laundry.
The solution is usually a simple finishing press. After you peel the carrier film, cover the design with a protective sheet and press it again for another 5-7 seconds. This final step is crucial—it pushes the ink deep into the fabric weave, which massively improves wash durability and gives the print a much softer, more professional feel.
This is especially critical in high-volume markets. The Asia Pacific region is dominating the custom t-shirt game, with China alone pulling in $6 billion in revenue. Businesses thriving in these huge e-commerce markets simply can't afford quality control issues. Using reliable hot-peel transfers engineered for durability and locking them in with a proper finishing press is non-negotiable for anyone serious about competing. You can learn more about global trends in the t-shirt printing industry.
Achieving Consistent Logo Placement
When you’re running a big batch of shirts, getting the logo in the exact same spot every time is what separates the pros from the amateurs. Just "eyeballing it" is a recipe for a pile of inconsistent, frustrating rejects.
Here are a few tools and tricks the pros use to nail placement every single time:
- T-Shirt Rulers/Guides: These alignment tools are a fantastic investment for any shop. They come with markings for different shirt sizes and necklines, helping you center your transfer perfectly.
- Laser Alignment Systems: For high-volume operations, a laser system is the ultimate upgrade. It projects grid lines right onto your heat press platen, giving you unbeatable speed and pinpoint accuracy.
- The "Four-Finger" Rule: A classic low-tech trick for a standard chest print is to place the top of the design about four fingers down from the collar. It’s a decent starting point if you're in a pinch, but dedicated tools will always give you more precise, repeatable results.
Keeping Your Custom T-Shirts Looking New
A great print deserves to stay looking great for a long time. When you give your customers clear, simple care instructions, you're not just protecting their new favorite shirt—you're reinforcing the professional quality of your work. Happy customers with apparel that lasts are the ones who come back for more.
The secret to making a print last isn't complicated. It really comes down to minimizing the two biggest enemies of custom tees: heat and friction. High temperatures from the washer and dryer can break down the transfer's adhesive, and all that tumbling and rubbing can cause the ink to crack or fade way too soon.
Simple Steps for Lasting Vibrancy
Sharing these specific guidelines is a pro move that makes sure the apparel you create stays looking sharp. It's a small touch, but it makes a huge difference in customer satisfaction and builds real trust in your brand.
Here are the definitive care instructions you can pass right along to your customers:
- Turn It Inside-Out: This is the easiest and most effective way to protect the print. It prevents the design from rubbing against other clothes, zippers, and buttons during the wash cycle, dramatically cutting down on friction.
- Wash in Cold Water: Always use a gentle cycle with cold water. Hot water is the enemy of the transfer's adhesive bond and can cause peeling over time.
- Use a Mild Detergent: Stick to the basics. Harsh detergents, bleach, and even fabric softeners can be too aggressive, damaging the ink and dulling the design's vibrant colors.
The absolute best method for drying? Hang it to dry or lay it flat. Air drying completely avoids the high heat and tumbling action of a machine dryer, which is hands-down the number one cause of print damage and shirt shrinkage.
How to Iron a Printed T-Shirt
If a shirt absolutely must be ironed, you have to do it the right way to avoid a melted mess.
Always turn the t-shirt inside-out first. Use a low to medium heat setting, and never, ever place a hot iron directly onto the printed graphic. It will destroy the transfer in an instant.
Common Questions About Printing on T-Shirts
When you're just starting out, it feels like there are a million questions. That's totally normal. Getting the right answers from the get-go can save you a ton of time, frustration, and wasted materials, letting you skip right to the fun part: making awesome products.
Here are a few of the questions we see pop up all the time.
What Is the Cheapest Way to Print a Bunch of Small Designs?
Hands down, the smartest way to handle multiple small graphics is with a DTF gang sheet.
This is where you arrange all your different logos, pocket designs, or neck tags onto one big transfer film. Instead of paying for each little design separately, you just pay for the total sheet area. The cost savings are massive, especially for small businesses.
It's a game-changer when you've got an order with lots of different art. You just consolidate everything into one efficient print run. Our Auto-build gang sheet builder makes this ridiculously easy, automatically packing your images together for maximum cost-effectiveness. No waste, just pure profit, and its ease of use saves you time.
Can I Just Use a Home Iron Instead of a Heat Press?
Look, I get the temptation, especially for a one-off project. But if you want to create professional, sellable apparel, using a home iron is a hard no.
The magic of a good DTF transfer comes down to three things: precise temperature, even pressure, and consistent timing. An iron can't deliver any of those reliably.
You'll end up with hot spots and uneven pressure, which is a guaranteed recipe for a print that peels, cracks, and fades after the first wash. A quality heat press isn't just a tool; it's a non-negotiable investment if you're serious about your craft.
How Do I Make Sure My Printed Colors Look Right?
Getting your colors to pop starts with your digital file. Always—and I mean always—design your artwork in a CMYK color profile. This is the standard that professional printers use, so what you see on your screen will be a much closer match to the final printed product.
Of course, your print partner is the other half of the equation. Working with a provider who invests in top-tier color-matching technology and premium inks is critical for getting vibrant, true-to-life results. If you have a specific brand color you absolutely need to nail, ordering a small sample first is the best way to sign off on it before a big run.
Why Are DTF Transfers So Much Better for Dark T-Shirts?
The secret sauce is the white ink underbase. With every DTF transfer, an opaque layer of white ink is printed behind your color graphic. This layer acts like a perfect primer, completely blocking the dark fabric from peeking through and making your design look muddy.
When you press the transfer, the design sits right on top of the fabric, looking incredibly bright and totally opaque. It's a level of vibrancy that other methods, like sublimation (which only works on light polyester), just can't touch on dark garments.
Ready to create stunning, durable custom apparel with ease? The team at Lion DTF Transfers provides vibrant, hot-peel transfers that are tested for 100+ washes and ship in just 1-2 business days. Start your order today!