


Before you can nail that perfect press, you’ve got to get your supplies in order. This isn’t just about having a transfer and a shirt on hand; it's about setting up your workspace for a smooth, frustration-free process that leads to a professional-looking final product. Getting everything ready beforehand is the secret to avoiding those common headaches.
Gathering Your Supplies for a Perfect Press
Think of this as your pre-flight checklist. Taking a few minutes to gather your toolkit is what separates a clean, centered design from a crooked, scorched mess that peels after the first wash. We’ve all been there, and trust me, preparation is everything.
The whole DIY apparel world has absolutely exploded. The global market for iron-on transfer sheets hit $1.21 billion in 2024 and is on track to reach $2.19 billion by 2033. That growth comes from small businesses and creators just like you turning cool ideas into wearable art. It’s a testament to how accessible this whole process has become. You can dive deeper into the numbers by checking out the full market analysis on marketintelo.com.
Your Essential Toolkit
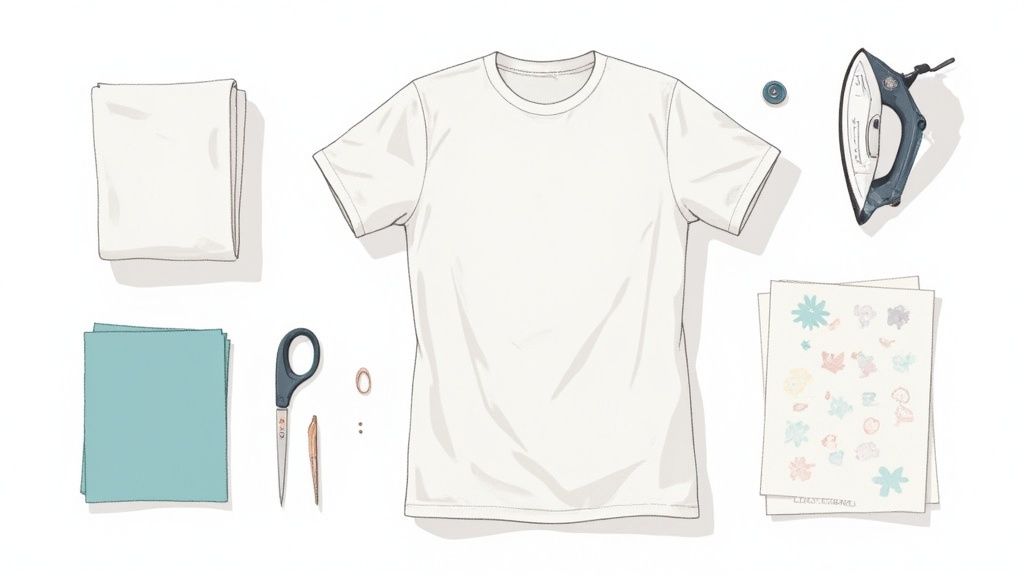
To get that flawless, store-bought look, you'll need a bit more than just your iron and a tee. Here are the must-haves that really make a difference:
- Your Chosen Garment: The fabric choice is key. Natural fibers like 100% cotton are perfect because they handle high heat like a champ. Polyester and poly-blends are also great options, but do yourself a favor and double-check the care tag to make sure it can take the heat.
- DTF Transfers: The main event! Whether you're working with a single design or a full sheet of them, have them ready to go. Our Auto-build gang sheet builder makes it easy to get multiple designs printed at once, saving you time and money.
- Heat Source: You've got two main options here: a standard household iron (make sure the steam is OFF) or a dedicated heat press. Honestly, a heat press is the way to go for consistent temperature and pressure, which means more reliable, professional results every time.
- A Firm, Flat Surface: Your ironing board isn't going to cut it for this job—it’s too padded and wobbly. You need something solid, like a sturdy wooden table or a heat-safe countertop, to get the firm, even pressure needed for a strong bond.
- Protective Sheet: This is non-negotiable. Grab a Teflon sheet or even a plain piece of parchment paper. It creates a protective barrier between the heat source and your garment, preventing any scorching or shiny marks.
Tools for Efficiency and Precision
If you're looking to streamline your workflow, especially when juggling multiple designs, planning your layout is a massive time and money saver.
Pro Tip: Using our Auto-build gang sheet builder lets you cram multiple designs onto a single sheet. It's an incredibly smart way to get all your transfers printed at once, slashing material waste and saving you money right from the start.
Getting Your Fabric Ready for a Perfect Bond
Trying to press a transfer onto unprepared fabric is a recipe for disaster. Think of it like trying to stick a decal on a dirty window—it's just not going to last. Taking a few minutes to prep your garment is the single biggest thing you can do to make sure your design looks professional and doesn't peel, crack, or warp after the first wash.
First things first: you absolutely have to pre-wash and dry your garment. Brand new clothes are often coated with sizing, starches, or other chemicals from the factory. This stuff creates an invisible barrier that stops the transfer's adhesive from grabbing onto the fabric fibers, which is a major cause of peeling later on. Plus, washing pre-shrinks the material, so your design won't get all distorted and wrinkly.
Create the Perfect Pressing Surface
Once your garment is clean and totally dry, the next job is to get rid of every last bit of moisture and any wrinkles. This is where a quick pre-press makes all the difference.
Just use your heat press or iron to press the area where the design will go for about 5-10 seconds. You might see a little puff of steam—that's the hidden moisture escaping, and that’s a good thing! It means you're creating a perfectly smooth, dry, and flat surface for the transfer. Honestly, this one little step can cut down on bubbling issues by up to 70%.
A few extra minutes of prep isn't wasted time; it's an investment. It guarantees your transfer sticks right and survives dozens of washes, protecting the time and money you put into the project.
As the textile transfer paper market keeps growing—it's forecasted to hit $1,546.3 million by 2035—getting these basics right is what separates the pros from the amateurs. You can see more data on the textile transfer paper market on futuremarketinsights.com.
Handling Your Designs with Care
If you're using a gang sheet to get the most bang for your buck (maybe with a handy tool like our Auto-build gang sheet builder), you have one small extra step. It’s a super cost-effective way to order, but it means you'll need to cut out your individual designs.
Before you get anywhere near the heat press, you need to neatly separate each transfer from the sheet.
- Use sharp scissors or a craft knife. A dull blade can chew up the edges of the film and mess with the application. You want clean, crisp cuts.
- Leave a small, clear border around the design. Don't stress about cutting perfectly along the ink. A tiny margin is totally fine and actually makes the transfer easier to handle.
- Store any unused transfers flat in a cool, dry spot. A folder or a sleeve works great to keep dust and moisture off the adhesive.
It's tempting to rush through the cutting, but taking your time prevents a piece of a neighboring design from accidentally getting pressed onto your garment. By following these steps—wash, pre-press, and cut—you've set the stage for a vibrant, permanent bond that's built to last.
Applying Heat With an Iron or a Heat Press
This is where the magic happens. Whether you’re using a standard household iron or a dedicated heat press, the goal is the same: consistent heat and even pressure. Nailing these two elements is the secret to creating a permanent, professional-looking bond that actually lasts.
With your fabric prepped, you're ready for the main event. The infographic below recaps the essential workflow we just covered—Wash, Press, Cut—which sets the stage for a perfect application.
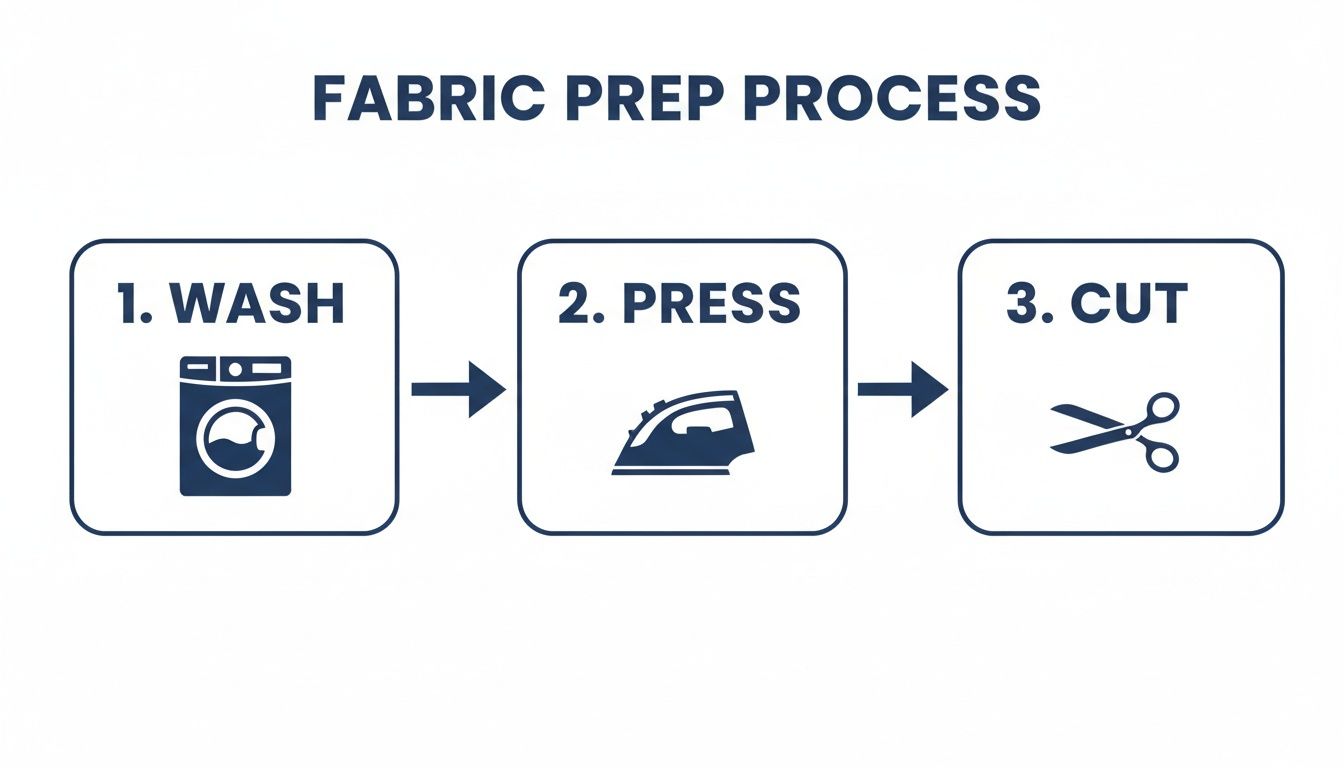
This simple foundation is non-negotiable for getting your garment ready to be the perfect canvas for your design.
Using a Household Iron
You can absolutely get fantastic results with a regular iron, but the technique is key. The biggest mistake I see people make is using a padded ironing board. It's just too soft and won't give you the firm resistance needed for a good bond.
Instead, find a heat-safe, hard surface like a wood table or countertop. Just lay a towel down first to protect it.
Before you start, make sure your iron is completely empty of water and the steam function is turned OFF. Steam is the enemy of a good transfer; it introduces moisture that can completely ruin the adhesive.
Set your iron to the cotton/linen setting, which is usually the highest heat available. Once it’s hot, here's what to do:
- Apply firm, even pressure. Don't be shy—use your body weight to press down hard on the iron.
- Keep it moving. Avoid letting the iron sit in one spot. Move it slowly and constantly over the entire design for about 30-45 seconds.
- Cover every inch. Pay extra attention to the corners and edges of your design. These are always the first spots to start lifting if they don't get enough heat.
Using a Heat Press for Precision
For anyone looking for consistent, professional-grade results every single time, a heat press is a total game-changer. It takes all the guesswork out of the process by giving you precise control over temperature, pressure, and time—the three pillars of a perfect press.
While every machine has its quirks, a great starting point for most DTF transfers is 300-320°F (149-160°C) with medium-to-firm pressure for 10-15 seconds.
Quick tip: Always place a Teflon sheet or a piece of parchment paper between the heat plate and your transfer. This is a non-negotiable step that protects both your garment and your heat press platen from any potential issues. It's a simple habit that saves a lot of headaches.
The settings below offer a solid starting point for the most common fabrics you'll encounter.
Recommended Heat Press vs Home Iron Settings
| Fabric Type | Heat Press Temperature | Heat Press Time | Pressure | Home Iron Setting |
|---|---|---|---|---|
| 100% Cotton | 280°F | 10seconds | Medium-Firm | Cotton/Linen (High) |
| Polyester | 240-250°F | 7-10 seconds | Medium | Synthetic/Polyester |
| 50/50 Blends | 260-270°F | 10 seconds | Medium | Cotton/Blend |
| Tri-Blends | 260-270°F | 10 seconds | Light-Medium | Synthetic/Low |
Keep in mind that different fabrics require slight adjustments. Cottons are very forgiving and work well in that standard range. Polyesters and blends, on the other hand, are more sensitive to high heat and can scorch easily. For these, it's always wise to lower the temperature and shorten the press time. Learning how to master your heat press machine is the best way to perfect your technique across all kinds of materials.
If you're pressing a lot of designs, especially if they're coming from a jam-packed gang sheet made with our cost-effective Auto-build gang sheet builder, a heat press will make your workflow infinitely faster and more reliable. It’s the tool you need for achieving that flawless, store-bought finish every single time.
The Art of the Perfect Peel
You’ve pressed your design and everything looks great, but don't get ahead of yourself—the job isn't quite finished. That final, satisfying reveal of a crisp design perfectly bonded to the fabric all comes down to this next part. The peeling process is every bit as crucial as the heat application and can absolutely make or break your project.
First things first, you need to know what kind of transfer you're working with. They generally fall into three categories based on when you peel the film: hot, warm, or cold peel. While some vinyls are hot peel, the vast majority of high-quality DTF transfers, including the ones from our Auto-build gang sheet builder, are cold peel.
Patience is a Virtue (and a Requirement)
With a cold peel transfer, patience isn't just a suggestion; it's your most valuable tool. When we say "cold," we mean the garment and transfer need to cool down completely to room temperature. Don't even think about touching that film until it is.
This cooling period is when the magic happens. The adhesive, which melted during the press, now has a chance to solidify and create a permanent, vice-like grip on the fabric's fibers. Peeling too early is the #1 rookie mistake and the fastest way to ruin your work, leading to lifted edges, cracked ink, and a patchy transfer. You've come too far to rush this.
The cooling process isn't just a best practice; it's a chemical necessity. Allowing the adhesive to fully cure is what ensures maximum durability and a clean release, leaving behind nothing but your vibrant design.
So, how do you know when it’s truly ready? The garment should feel cool to the touch all over, with zero residual warmth from the press.
Techniques for a Flawless Peel
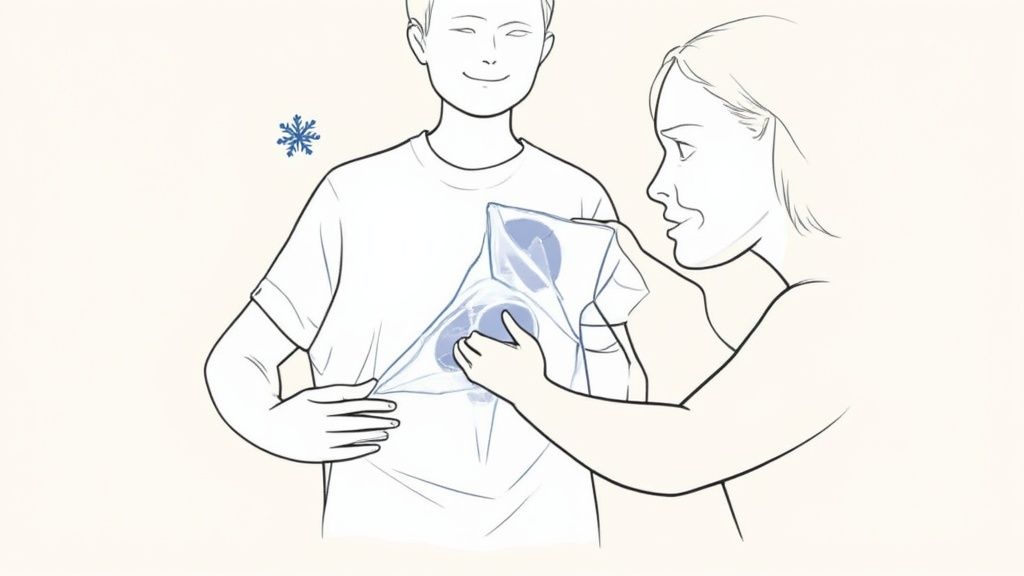
Once you’re positive everything has cooled, you can use a few tricks to speed up the process and guarantee an even temperature drop. One of the simplest and most effective is to lay the garment flat on a cool, hard surface like a clean countertop or a tile floor. This surface acts as a heat sink, drawing out the warmth quickly and consistently across the entire design.
When you're finally ready for the big reveal, your technique matters. Don’t just rip the film off like a bandage. For clean, crisp lines every single time, do this instead:
- Start at a corner. Gently pick at one corner of the clear film to get things started.
- Pull low and smooth. Keep your pulling angle low, almost parallel to the shirt. Avoid pulling straight up, as this can stretch the fabric and put unnecessary stress on the design.
- Use a confident, steady motion. A smooth, even pull is what you're after. This will release the film cleanly, leaving the ink perfectly bonded right where it belongs.
If you see any part of the design lifting with the film, stop immediately. Lay the film back down, cover it with your protective sheet, and give it another press for 5-7 seconds. Let it cool completely all over again before you try peeling. This one little troubleshooting step can easily save your entire project.
Washing Instructions for Maximum Durability
You’ve pressed the perfect design, and your custom garment looks incredible. But the real test? That comes after the first, tenth, and fiftieth wash. Getting the long-term care right is what separates a shirt that looks great for a month from one that becomes a favorite for years.
A few simple rules will protect your work, keep the colors popping, and prevent any peeling or cracking down the road.
First things first: patience is everything. You absolutely have to wait at least 24-48 hours before that initial wash. This gives the adhesive time to fully cure and lock into the fabric fibers for good. It's the easiest step to follow but also the most common one people skip—don't let that be you! Rushing it can compromise the transfer's bond from day one.
The Best Practices for Washing
Once your garment has had a day or two to cure, keeping it pristine is all about building good habits. The goal is to protect the design from friction and heat, which are the two biggest culprits behind a faded or damaged transfer.
- Turn It Inside Out: This is non-negotiable. Turning your garment inside out shields the design from rubbing against other clothes in the wash, which is the number one cause of premature wear and tear.
- Use Cold Water: Always, always wash your custom apparel in cold water. Hot water can slowly soften the adhesive over time, making it vulnerable to peeling. Stick to a gentle cycle to be extra safe.
- Avoid Harsh Chemicals: Skip the bleach and aggressive detergents. A simple, mild detergent is all you need to get the job done without breaking down the inks and adhesive that make your design so vibrant.
Think of these three steps as your design's first line of defense.
Drying for Durability
How you dry your garment is just as important as how you wash it. The intense, concentrated heat of a tumble dryer is the ultimate enemy of an iron-on transfer, slowly cooking the adhesive with every cycle until it fails.
Key Takeaway: Air-drying is your best friend. Seriously. Hang your garment up or lay it flat to dry. This simple switch completely avoids the damaging heat of a machine, adding years to the life of your transfer.
The good news is that today's transfer technology is incredibly resilient. Modern materials can achieve 99% wash-fastness even after 50 cycles, which is a massive improvement from the 60% fastness that was common back in the 1990s. This just goes to show how much of a difference proper care makes. You can read more about the evolution of textile transfer paper on futuremarketinsights.com.
For a complete guide to getting it right every time, be sure to check out our official page on pressing and shirt care instructions. Follow these tips, and your custom gear will look as fresh as the day you pressed it.
Got Questions About Your Iron-On Transfers? We’ve Got Answers.
Even when you follow the instructions to a T, sometimes things just don’t go as planned. It’s easy to get frustrated when your design isn’t cooperating, but don't sweat it—most of the common hiccups are surprisingly easy to fix with a few small tweaks.
We're going to walk through the most common issues we hear about and give you clear, actionable advice to get your project back on track. The good news is that the heat transfer world has come a long way. This market, which is expected to be a $1.6 billion industry by 2025, has seen some serious innovation. Early manual methods had failure rates as high as 40%, but today's materials have brought that number down to under 5%. That's a huge leap in reliability. You can dive deeper into the heat transfer market on businessresearchinsights.com.
Why Is My Transfer Peeling or Lifting at the Edges?
This is, without a doubt, the number one question we get. Almost every time, the culprit is one of three things: not enough pressure, uneven heat, or peeling the film off too soon. When a design lifts at the corners, it's a sure sign it never got the solid bond it needed to stick.
If you're using a standard household iron, ditch the ironing board. It's just too soft and spongy. Instead, find a hard, heat-safe surface like a countertop (just put a towel down first to protect it) and really lean into it. Use your body weight to get that firm, even pressure.
For those of you with a heat press, take a look at your pressure settings. You might need to dial it up to a "medium-firm" setting to get the job done right. Lastly, and this is a big one, patience is key with cold peel transfers. The garment must be completely cool to the touch before you even think about pulling that film away.
Can I Use an Iron-On Transfer on Any Fabric?
While DTF transfers are incredibly versatile, they aren't a magic solution for every single material out there. Your best results are always going to come from fabrics that can handle some serious heat without melting or scorching.
Here are your safest bets:
- 100% Cotton: This is the gold standard. It takes heat like a champ and gives the adhesive a perfect surface to grab onto.
- Polyester: Works like a charm, but you'll often want to use a lower temperature to avoid that weird shine or any scorching marks.
- Poly-Cotton Blends: These are fantastic, too, giving you the best of both worlds from each fiber.
You'll want to steer clear of delicate synthetics like nylon, rayon, or spandex, as they can melt under the heat. Super-textured fabrics like heavily ribbed knits or fleece can also be a challenge because the adhesive can't make full, even contact. When in doubt, always do a quick test on a small, hidden spot first.
What Is the Difference Between Iron-On Vinyl and DTF Transfers?
They both use heat to get onto the shirt, but that's about where the similarities end. The way they are made and how they feel on the final product are completely different, and it's a key thing to understand.
Your traditional iron-on is usually Heat-Transfer Vinyl (HTV). This is a solid sheet of colored vinyl that you cut your design out of. When you press it, that whole piece of vinyl sticks to the shirt, and it feels like a distinct layer sitting on top of the fabric.
Direct-to-Film (DTF) transfers, like the ones you can design with our Auto-build gang sheet builder, are a whole different ballgame. We print eco-friendly inks onto a special film. When you press it, only the ink itself moves over to the garment, and you peel the film away. The result is a super soft, flexible design that feels like it’s actually part of the fabric, giving it a much more premium feel and way better durability in the wash.
Is It Really Necessary to Pre-Wash My Shirt?
Yes. 100% yes. This is one step you absolutely should not skip, ever. Brand new clothes often come coated with sizing agents, starches, or other chemicals from the factory. You can't see them, but they create a barrier that stops the transfer's adhesive from getting a good grip on the fabric fibers.
Pre-washing also takes care of any initial shrinking. If you put a design on a new, unwashed shirt, it's probably going to shrink a bit the first time you wash it. When that happens, your perfectly applied transfer will end up looking puckered and distorted. It’s a simple step that prevents a ton of future headaches. If you're still wondering if DTF transfers can be ironed on effectively, getting these prep steps right is what makes all the difference.
Ready to start creating your own professional-looking custom gear? The Lion DTF Auto-build gang sheet builder makes it incredibly easy and affordable to get all your designs printed on a single sheet, ready for you to press.