


So, you've got your DTF transfers and you’re wondering if you can just use a standard household iron to get the job done. The short answer is yes, you can technically iron on DTF transfers.
But the honest, more practical answer is a bit more complicated. While it's tempting to grab the iron for a quick DIY project, getting a professional, long-lasting print is a whole different ballgame compared to using a heat press. The real challenge comes down to consistency.
The Honest Take on Ironing DTF Transfers
We get it. The idea of using a simple household iron is appealing—it’s right there in your laundry room, it costs nothing extra, and it feels like an easy fix for a one-off shirt or a fun personal project. It's definitely a viable option if you’re just experimenting, but it’s crucial to set the right expectations from the get-go.
The whole process hinges on two critical elements: consistent temperature and even pressure. This is where an iron falls short. A heat press is engineered from the ground up to deliver precise, edge-to-edge heat and perfectly uniform pressure across the entire transfer, all at once. An iron, on the other hand, has hot spots and cool spots by design, and you have to rely on guesswork and your own strength to apply pressure. That's a recipe for an uneven application.
You can dig deeper into the science of how the adhesive bonds by checking out our guide on what DTF transfers are and how they work.
Why Consistency is Everything
This lack of control is the number one reason iron-on DTF applications are so much more likely to fail. If one part of the transfer doesn't get enough heat or pressure, the adhesive won't fully melt and bond with the fabric fibers. The result? A print that might look okay at first but starts to show problems after just a few washes.
Some of the most common issues we see with iron-on attempts include:
- Peeling Edges: The perimeter of the design is the toughest spot to press with enough even force, making it the first place to lift.
- Cracking or Flaking: This usually means the adhesive layer didn't cure properly because the heat wasn't consistent.
- A Faded Look: Not enough heat can stop the vibrant ink layer from setting correctly, leaving you with a dull finish.
A household iron can definitely reach the 300°F to 320°F needed for DTF, but maintaining that temperature evenly across a large design is the real problem.
Ultimately, while you can make it work with an iron for a personal project that doesn't need to last forever, a heat press is the non-negotiable standard for anyone producing professional, sellable products. It’s the only way to guarantee a vibrant, durable finish that your customers will love.
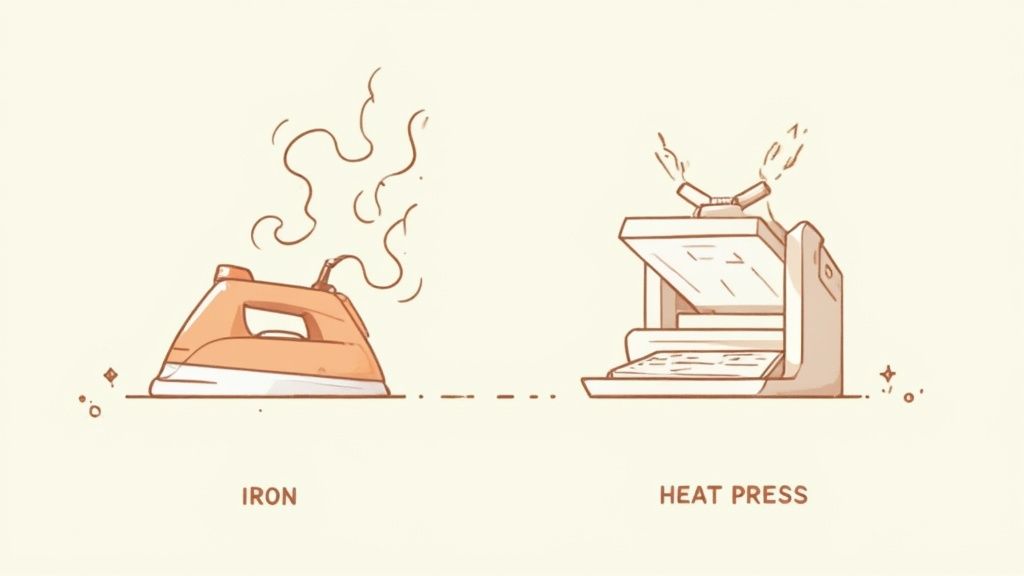
Iron vs Heat Press at a Glance
To make it simple, here’s a quick breakdown of how a household iron stacks up against a proper heat press for applying DTF transfers.
| Feature | Household Iron | Heat Press |
|---|---|---|
| Temperature Control | Inconsistent, with hot and cool spots across the plate. Difficult to regulate. | Precise and digitally controlled for consistent, edge-to-edge heat. |
| Pressure | Uneven and manually applied. Relies entirely on user strength. | Uniform, adjustable pressure applied evenly across the entire transfer. |
| Best For | Hobbyists, one-off personal projects, or quick emergency applications. | Small businesses, professional apparel decorators, and anyone selling their products. |
| Durability | Lower. Prone to peeling and cracking after a few washes due to uneven bonding. | High. Creates a permanent bond that withstands dozens of washes without issue. |
| Efficiency | Slow and tedious, requiring you to press the design in multiple small sections. | Fast and efficient, pressing the entire design in a single, timed application. |
As you can see, the right tool makes all the difference. While an iron is accessible, a heat press delivers the quality, durability, and efficiency needed for any serious project.
How to Apply DTF Transfers With a Household Iron
So, you’ve decided to go for it with a household iron. While we’ll always recommend a heat press for the best results, you can still get a decent application for a small, personal project if you know what you're doing. This is more than just ironing a shirt—it’s a specific technique that requires patience and the right setup.
First things first, your workspace. An ironing board is a no-go; it's too soft and will absorb all the pressure you need to apply. Find a hard, flat, heat-resistant surface instead. A sturdy table or even a clean spot on the floor with a thin towel or heat-resistant mat underneath works much better.
Setting Up for Success
Before you do anything else, you need to get your iron ready. This part is absolutely critical, so don't skip it.
- Turn Off Steam: Make sure the steam function on your iron is completely off and the water tank is empty. Steam is moisture, and moisture is the enemy of a solid DTF bond.
- Set to High Heat: Crank your iron up to the highest setting, usually labeled "Cotton" or "Linen." This should get you into the 300°F to 320°F range necessary to properly activate the DTF adhesive.
- Grab Your Tools: You'll need a protective layer between the iron and the transfer. A sheet of parchment paper or a Teflon sheet is perfect for this—it prevents the plastic film from melting all over your iron.
Once your iron is hot, take a moment to pre-press your garment for about 10-15 seconds. This quick step is a game-changer. It gets rid of any hidden moisture and flattens out wrinkles, giving you a perfect canvas for your transfer.
The Application Process
Alright, now for the main event. Carefully position your DTF transfer on the garment, ink-side up. Once you’re happy with the placement, cover it with your parchment paper or Teflon sheet.
Here’s the key: don't slide the iron around like you’re trying to get wrinkles out. Instead, you’re going to press down firmly, one section at a time. Use both hands and your body weight to apply heavy, consistent pressure to one spot for 15-20 seconds. Don't move the iron at all during this time.
Insider Tip: Think of your iron as a mini heat press. The goal is pure downward force. Any sliding motion can smudge the design or cause the transfer to shift, ruining the application.
After pressing the first section, lift the iron completely and move it to an adjacent area, making sure to slightly overlap the spot you just pressed. Repeat this process methodically until the entire transfer has been covered. Pay extra attention to the edges, as they're the most common point of failure. For a medium-sized design, this could take a couple of minutes. To get more in-depth guidance on application, you can read our beginner tips for pressing DTF transfers on t-shirts.
Cooling and Peeling the Film
Once you've pressed the entire design, the next step is the most important: let it cool down completely. This is called a "cold peel," and it’s non-negotiable if you want a clean result. If you try to peel the film while it's still warm, you'll likely pull the design right off with it.
After a few minutes, once the film is cool to the touch, you can start peeling. Begin at a corner and pull the film back slowly and smoothly, keeping it low against the garment. If you notice any part of the design starting to lift with the film, stop right away. Just lay the film and protective sheet back down, re-press that specific area for another 10 seconds, and let it cool completely again before trying to peel.
Why a Heat Press Delivers Professional Results
While you can use an iron for a quick one-off project, anyone serious about creating custom apparel relies on a heat press. It all boils down to one word: control.
A durable, professional-looking finish that you can actually sell comes from getting three variables just right—temperature, pressure, and time. A heat press is engineered to nail all three with dead-on precision, every single time.
This is what separates a fun DIY experiment from a commercial-quality product that builds a brand. A heat press gives you consistent, edge-to-edge heat across the entire design. When you lock it down, it applies perfectly uniform pressure, forcing the DTF adhesive to melt evenly and bond deep into the fabric fibers.
The result is a soft, flexible print that feels like it’s part of the shirt, not just sitting on top. This deep molecular bond is what gives the transfer its incredible durability, letting it survive dozens of washes without cracking, peeling, or fading.
The Unforgiving Reality of Uneven Application
A household iron, with its random hot spots and complete reliance on guesswork and muscle, just can't compete. The pressure you apply will inevitably be uneven, and the temperature across the soleplate is all over the place. These inconsistencies create weak spots in the adhesive bond before you even start.
A recent durability study put this to the test, and the numbers don't lie. A staggering 65% of iron-applied transfers showed cracking or peeling after only 10 washes, with 88% failing by the 20-wash mark.
In sharp contrast, heat-pressed transfers were still going strong, with 85% maintaining their integrity after 20 washes. It’s pretty clear proof that the right equipment is non-negotiable for creating products that last.
A heat press isn't just a piece of equipment; it's an investment in your brand's reputation. It guarantees that the first shirt you sell is just as durable as the hundredth.
The diagram below breaks down the manual steps you have to take to try and mimic a heat press with an iron.
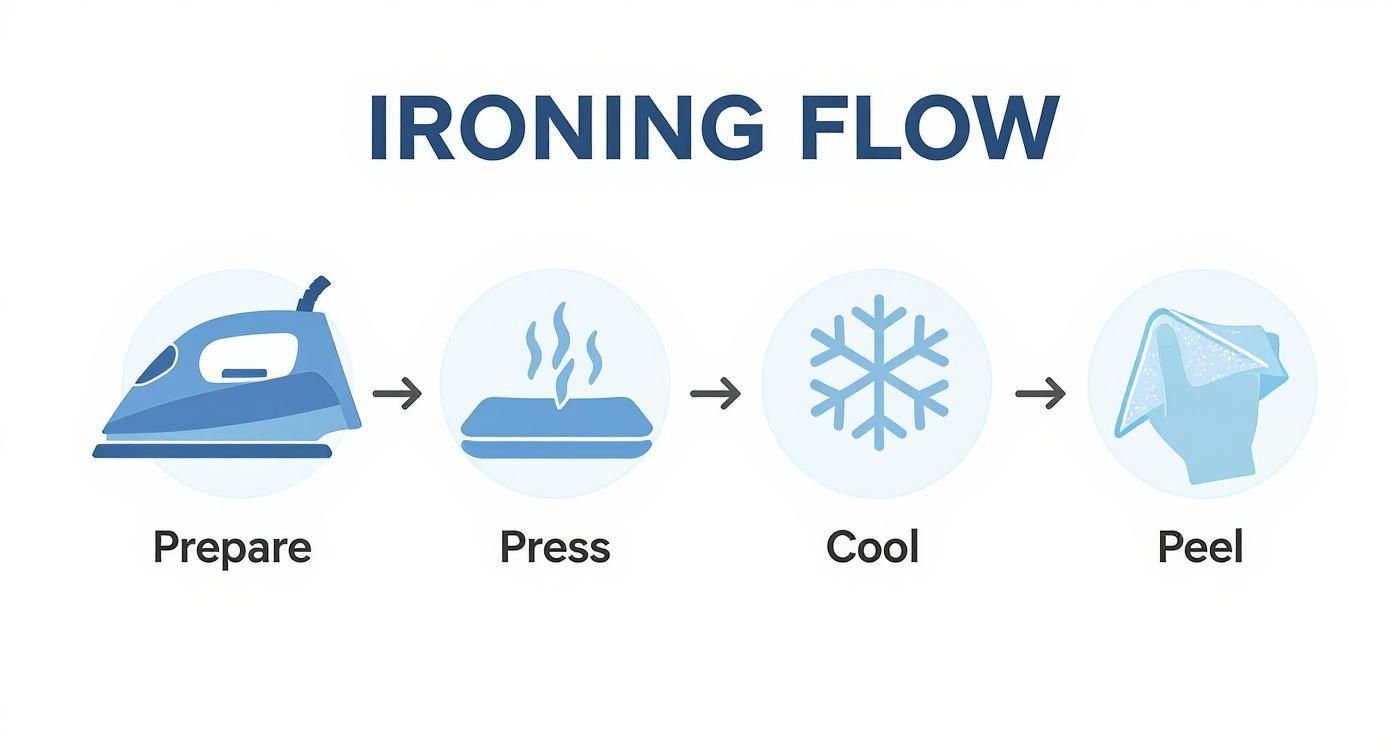
As you can see, the process introduces so many opportunities for error that a single, controlled press from a machine completely eliminates.
Efficiency and Cost Effectiveness in Production
Beyond the quality boost, a heat press is a game-changer for your workflow. Pressing an entire design in a single 15-second clamp-down is worlds faster than spending several minutes carefully ironing a design section by section. When you have orders to fill, that speed is everything.
This efficiency goes hand-in-hand with saving money. Our Auto-build gang sheet builder, for instance, lets you pack multiple designs onto one sheet, which massively drops your cost per print. Its ease of use makes preparing your files simple and quick, maximizing cost-effectiveness.
By combining the low cost of ganged transfers with the sheer speed of a heat press, you can scale your operation without breaking a sweat. The press quickly pays for itself. For a deeper look, check out our guide on why a heat press is essential for DTFs.
Troubleshooting Common DTF Iron-On Problems
Even when you follow the instructions perfectly, applying a DTF transfer with a household iron can sometimes throw you a curveball. Don't sweat it—most of these issues are easy to fix and offer a great lesson for your next project. Let's walk through how to diagnose and solve the most common frustrations.
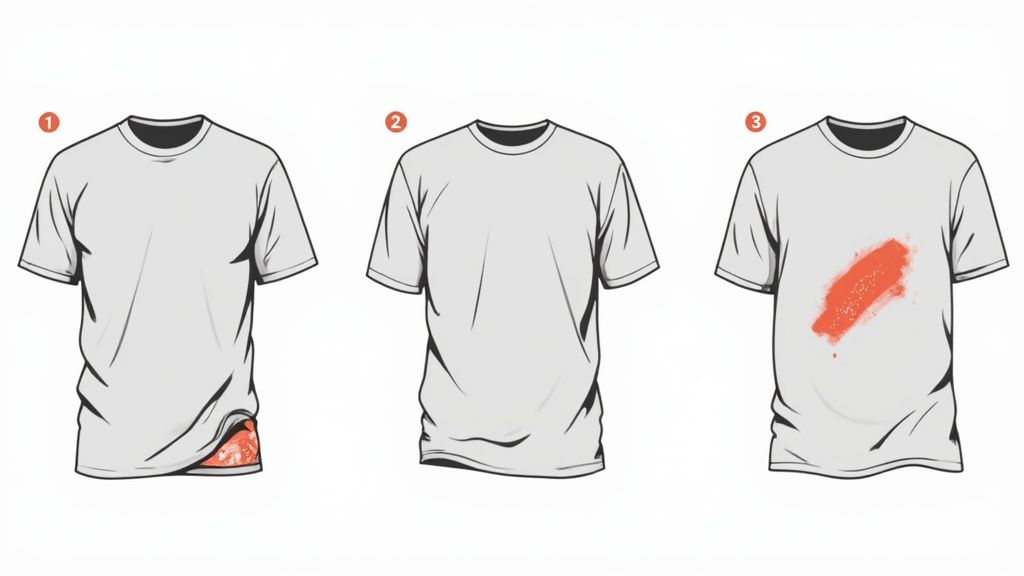
One of the biggest complaints we hear is about the edges of the design peeling up, either right away or after the first wash. This is almost always a pressure problem. A standard iron just doesn't deliver the same force across its entire surface, and the outer edges are notorious for getting less pressure than the center.
Fixing Peeling Edges and Cracking Prints
If you're dealing with lifting edges, you can usually salvage the print. Just lay your garment back on a hard, flat surface. Cover the design with a sheet of parchment paper, and use the very tip of your hot, dry iron to apply focused, heavy pressure directly onto that peeling spot for a good 10-15 seconds. This often gets the adhesive hot enough to re-bond properly.
Now, if you see the entire print cracking after just one trip through the laundry, the real culprit is a mix of not enough heat and not enough pressure from the get-go. This means the adhesive never fully melted and bonded with the fabric. Unfortunately, widespread cracking is tough to repair and really highlights why a heat press is the gold standard for creating durable, long-lasting custom apparel.
These common iron-on problems reinforce a simple truth: an iron gets the job done in a pinch, but a heat press delivers consistency. The issues you're troubleshooting are virtually nonexistent with a proper heat press.
Dealing with Fading and Press Marks
Did your bold, bright design come out looking dull or faded? This is a classic sign of low temperature. If the iron wasn't hot enough, the ink layer couldn't cure correctly, leaving you with a washed-out look. Always double-check that your iron is cranked up to its highest setting (like Cotton/Linen) and that the steam is completely off.
Another headache is that shiny, rectangular outline—or "press mark"—left on the shirt around your design. This happens when the iron's heat and pressure alter the fabric's texture, and it's especially noticeable on polyester and poly-blends. Using a pressing pillow or placing a soft towel under the garment can sometimes help soften these marks, but this is another problem that a heat press, with its controlled and even pressure, largely avoids.
When you're ready to ditch the troubleshooting and get perfect results every time, remember that a heat press pays for itself in efficiency. Our Auto-build gang sheet builder lets you pack multiple designs onto a single sheet, which drops your cost-per-print and makes upgrading to a heat press an even smarter move. Its ease of use helps streamline your process, making production highly cost-effective.
Save Big and Print Smart with DTF Gang Sheets
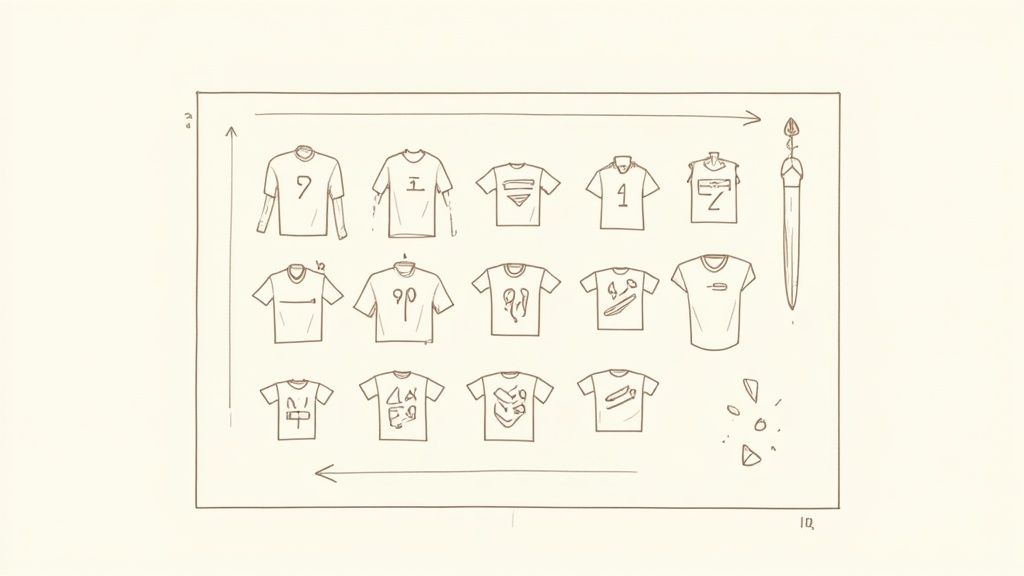
Whether you’re just getting started with a household iron or you’re running a full-blown operation with a heat press, being smart about your costs is how you win. This is exactly where DTF gang sheets come in—they are an absolute game-changer for anyone looking to be more efficient and keep more money in their pocket.
So, what is a gang sheet? It’s simply a large sheet of DTF transfer film packed with multiple designs instead of just one. You can fit designs for different shirts, logos for hats, sleeve prints, or even small pocket graphics all onto a single sheet. This simple change drastically cuts your cost per print, making every project more profitable.
The Power of Batching Your Designs
Instead of ordering a dozen small, individual transfers and paying for each one, you can combine them all into a single, cost-effective order.
Imagine you've got designs for three different t-shirts and a couple of logos for tote bags. By placing them all on one gang sheet, you only pay for the film and the printing service once. It's a much smarter way to work.
This strategy is brilliant for:
- Small Businesses: You can knock out multiple small customer orders without wasting an inch of material.
- Hobbyists: Get a huge variety of designs for your personal projects without a massive upfront investment.
- Brand Owners: Print your main logos, custom neck tags, and cool sleeve hits all at the same time.
Honestly, the money you save on materials by optimizing your transfer sheets is significant. That cash can go right back into other parts of your business. For a lot of people, these savings are what justify upgrading to a professional heat press sooner rather than later.
Making the Whole Process Effortless
Building a perfectly optimized gang sheet used to be a real headache. It meant spending tedious hours in design software, manually arranging every little piece to maximize space. We knew there had to be a better way.
To make this process completely seamless, our Auto-build gang sheet builder does all the heavy lifting for you.
You just upload all your individual art files, and the tool automatically nests them into the most efficient, space-saving layout possible. It completely eliminates waste and makes sure you get the absolute most value out of every square inch of film. The ease of use makes it incredibly cost-effective.
This tool is perfect whether you're a seasoned pro or just trying to figure out if DTF transfers can be ironed on for your next project. It makes professional-level efficiency easy for everyone.
A Few Common Questions About Ironing DTF Transfers
When you're first getting started, it’s natural to have questions about using a household iron for DTF transfers. You absolutely can get it done without a professional heat press, but getting the little details right makes all the difference. Here are some quick answers to the most common questions we hear.
What Iron Setting Should I Use for DTF?
Crank that iron up to its highest setting. On most household irons, this is going to be the “Cotton” or “Linen” option. That's the sweet spot you need to hit the 300-320°F temperature range that properly activates the DTF adhesive.
Before you start, make sure the steam function is turned completely off. Go ahead and empty the water reservoir, too—any moisture is just asking for trouble and can ruin the bond. Always, always place a protective layer like parchment paper or a Teflon sheet between the iron and the transfer film. It's the only way to prevent a melted, sticky mess.
Can I Fix a DTF Transfer That's Already Peeling?
You can definitely give it a shot, and it often works, but success really hinges on why it started peeling in the first place.
If you notice a corner or edge lifting, lay the garment flat on a hard, heat-resistant surface. Cover the design with your parchment paper and use the tip of your hot iron to press down on just the peeling area. Apply firm pressure for another 10-15 seconds. This can sometimes be enough to reactivate the adhesive and stick it back down for good.
Just remember, peeling is usually a symptom of an application issue—most likely uneven heat or not enough pressure the first time around. This fix might just be a temporary patch, which is exactly why a heat press is the gold standard for a bond that lasts.
Does the Fabric Type Matter When I'm Using an Iron?
Absolutely. The fabric you're working with makes a huge difference, especially with the limited control of a home iron. For the best, most predictable results, stick with stable and non-stretchy fabrics like 100% cotton or a solid 50/50 cotton/poly blend. These materials are forgiving and can handle the high heat required without scorching easily.
I'd steer clear of trying to iron transfers onto delicate, heat-sensitive fabrics like 100% polyester or super-stretchy stuff like spandex. A household iron just can’t offer the precise temperature control needed, and you risk melting or damaging the garment. That’s where a heat press really shines, giving you the exact settings needed to work with a much wider range of materials safely.
Key Takeaway: An iron is perfect for sturdy, forgiving fabrics like cotton. For anything more delicate or stretchy, the precise control of a heat press becomes non-negotiable for getting it right without ruining the garment.
How Long Do I Need to Press With an Iron?
This isn't a quick, one-and-done press. Since an iron only heats a small area at a time, you have to work in sections. Plan on pressing each part of your design for a solid 15-20 seconds.
The key here is firm, steady pressure. Use your body weight to really lean into it. Whatever you do, do not slide the iron around like you’re getting wrinkles out of a dress shirt. Lift the iron completely after each press, move it to the next section, and make sure you slightly overlap the area you just pressed. This helps eliminate any cold spots in the adhesive. For a standard t-shirt graphic, be prepared to spend a few minutes carefully pressing the entire design.
No matter which application method you choose, the real secret to saving money and getting more out of every project is planning. The Lion DTF auto-build gang sheet builder is designed to make that part effortless. Its ease of use and cost-effectiveness are unmatched, as it helps you fit as many designs as possible onto a single sheet, which dramatically cuts down your cost per print and makes every project that much more profitable.