


When you get your hands on a heat press, the goal is to get the perfect combination of temperature, time, and pressure for whatever you're working on. For Lion DTF transfers, nailing these settings is what gives you a vibrant, durable print that feels awesome and holds up wash after wash.
Your First Press From Unboxing to Perfect Prints
Popping open the box of a new heat press can be a little intimidating, but trust me, the journey from setup to your first great-looking custom shirt is faster and more rewarding than you think. This first phase is all about getting comfortable with your machine. Think of it as building the foundation for all the cool projects you're about to create.
First, let's get to know the key players. You don’t need to be an engineer, but understanding what each part does makes the whole process less of a mystery.
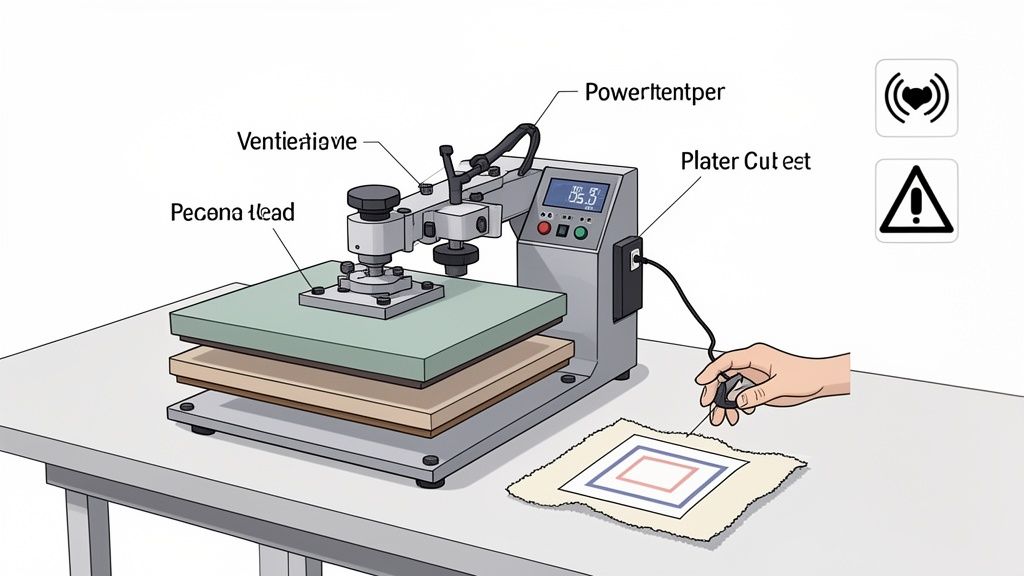
- The Upper Platen: This is the hot plate on top. It’s what brings the heat and applies the pressure to your transfer.
- The Lower Platen: This is the silicone-padded base where you'll lay your shirt. A platen protector is a great investment to keep it clean and help garments slide on and off smoothly.
- The Digital Controller: This is your command center. It's where you’ll dial in the exact temperature and time for your press.
- The Pressure Knob: Usually located on the top or back, this knob is how you adjust the clamping force of the press.
Powering Up Safely and Preparing for Heat
Once you know your way around the machine, it's time to plug it in. I can't stress this enough: plug your heat press into a dedicated 20-amp outlet if you can. It helps prevent a tripped breaker, which is the last thing you want mid-press.
Flip the power switch and use the digital controller to set your target temperature. While it’s heating up, make sure your workspace has some decent airflow. The process is safe, but good ventilation is always a smart move in any workshop.
Pro Tip: Before you even think about pressing a real garment, do a "dry run." Let the press get fully up to temp, then open and close it a few times. This little trick helps you get a feel for the mechanics and ensures everything is working right after its journey to your shop.
The Importance of a Test Press
Now for what I consider the most critical step for any beginner: the test press. Never, ever use a brand-new, expensive hoodie for your first try. Grab an old t-shirt, a piece of scrap fabric, or anything similar to what you plan to press on.
A test press does two incredibly important things:
- It builds your confidence. You get to go through the entire motion without worrying about messing up a customer’s order or a piece you care about.
- It helps you dial in the pressure. What feels like "medium" pressure on one machine can feel totally different on another. A test press lets you physically feel the resistance and tweak the pressure knob until it locks down securely without feeling like you're wrestling an alligator.
This is also the perfect moment to get familiar with your transfers. If you’re prepping for a big job with lots of different designs, our Auto-build gang sheet builder is a game-changer for ease of use and cost-effectiveness. This tool automatically arranges your graphics onto a single sheet, saving you a ton of time and material costs. You can print one large sheet, snip off a small design for your test, and keep the rest ready to go.
By mastering these first few steps, you're not just learning the basics—you're building a solid, reliable workflow that will help you create flawless custom apparel with your Lion DTF transfers time and time again.
Dialing In Your Perfect DTF Settings
The real magic behind a print that’s vibrant, durable, and feels great isn’t just the machine itself—it’s the recipe. Nailing the perfect balance of temperature, time, and pressure is what separates a beginner's press from a professional, long-lasting product. Get one of these wrong, and the whole thing falls apart.
Think of it like cooking. Too much heat scorches the fabric. Not enough time, and the transfer won’t stick for the long haul. The wrong pressure leaves you with a patchy, uneven mess. Getting these three elements just right is the fundamental skill you need to master.
The heat press market is booming, valued at USD 1.5 billion in 2024 and expected to hit USD 2.8 billion by 2033. While cool features like auto-open are helpful, they can't replace the need to dial in your settings correctly. For a standard t-shirt, a great starting point is pressing at 315°F for about 12 seconds. When paired with high-quality, wash-tested inks like ours, this formula delivers 99% wash-fastness, according to 2024 data.
The Pre-Press: Don't You Dare Skip It
Before you even think about laying down that beautiful DTF transfer, there's a step you absolutely cannot skip: the pre-press. Garments, especially anything with cotton, love to hold onto moisture from the air. Trying to press a transfer onto a damp shirt is a surefire way to get poor adhesion.
A quick pre-press for just 5-10 seconds does two critical things: it evaporates that hidden moisture and smooths out the fabric, creating a perfect canvas. Honestly, skipping this is the single most common mistake I see beginners make. It's the culprit behind countless pressing failures, including that dreaded "ghosting" or hazy outline around the design. A simple pre-press can eliminate ghosting in up to 85% of prints.
What Does "Medium Pressure" Actually Feel Like?
One of the most confusing instructions out there is "use medium pressure." What does that even mean? It’s less about a specific number and more about the physical feel of your machine.
A good medium-firm pressure means you have to use some real effort to lock the handle down. It shouldn't be a massive struggle, but it needs to feel solid and secure. If you can close it with just two fingers, your pressure is way too light.
Here's a quick way to check: grab a few pieces of regular printer paper and place one at each of the four corners of your bottom platen. Clamp the press down. Now, try to pull the papers out. If any of them slide out easily, your pressure is uneven and needs to be adjusted. This little trick ensures heat and force are distributed equally across the entire design.
Lion DTF Hot-Peel Transfer Pressing Guide
To get consistently perfect transfers every single time, you need to build solid modern quality assurance processes into your workflow. That process starts with using the right settings for the right fabric.
Here's a quick-glance guide with our recommended starting points. Remember, though, it's always a smart move to do a quick test press on a scrap piece if you're working with a new type of garment.
| Fabric Type | Temperature (°F) | Time (Seconds) | Pressure | Peel Type |
|---|---|---|---|---|
| 100% Cotton | 280°F | 10 Seconds | Medium-Firm | Hot Peel |
| 50/50 Cotton/Poly | 270°F - 280°F | 10 Seconds | Medium | Hot Peel |
| 100% Polyester | 240°F - 250°F | 7-10 Seconds | Medium | Hot Peel |
| Tri-Blends | 260°F - 280°F | 10 Seconds | Light-Medium | Hot Peel |
The great thing about Lion DTF transfers is their versatility and simple hot-peel application, which really streamlines your process. For a deeper dive into settings for more unique materials, be sure to check out our complete guide on heat press settings for DTF. It's a fantastic resource for fine-tuning your technique.
The Complete Pressing Workflow Step by Step
Theory is one thing, but actually putting it to work on a real project is where you really learn the ropes. Let's pretend you just scored an order for a batch of custom tees for a local coffee shop. This is the perfect chance to walk through the entire pressing workflow, from a single blank shirt to a finished stack of pro-quality gear.
The goal is to get a rhythm going and build a system you can repeat. Once you nail it down, you can churn out dozens of shirts without ever skimping on quality. We'll cover everything from getting the shirt perfectly straight to achieving that soft, barely-there feel that separates a good print from a great one.
Garment Preparation and Alignment
Your first move is always the pre-press. Get the t-shirt onto the lower platen, making sure the collar seam hangs just off the edge. This little detail is a game-changer; it stops the thick collar from creating an area of uneven pressure.
Now, let's get it straight. Nothing screams "I'm new to this" like a crooked logo. A simple but bulletproof trick is the "armpit-to-armpit" method. Gently pull the shirt taut to find the vertical center line running down from the middle of the collar. You can also fold the shirt in half and give it a quick 2-second press to create a faint centerline to use as your guide.
Once you’re happy with the placement, pre-press the shirt for 5-10 seconds. This smooths out wrinkles and zaps any moisture, leaving you with a perfect, flat canvas for your transfer.
Transfer Placement and the First Press
With your shirt prepped and ready, it's time for the main event. Grab your DTF transfer. If you're doing a big run, having your designs laid out on a gang sheet is a massive time-saver. You can maximize your cost-effectiveness by using our Auto-build gang sheet builder to fit as many designs as possible onto a single sheet.
Carefully position the transfer on the shirt. A good rule of thumb for a standard chest logo is to place the top of the design about three to four fingers' width down from the collar. Use that centerline you made earlier to make sure it's dead center.
Key Takeaway: Always cover your transfer and garment with a Teflon sheet or a piece of parchment paper. This protective layer is non-negotiable. It stops any ink from getting onto your upper platen and shields the fabric from direct, intense heat.
Now, lock it down. Clamp the press with that firm, even pressure we talked about. For Lion DTF Transfers, the goal is a deep, permanent bond. Our tests show that pressing for 10 seconds at 280°F with firm pressure gives you an incredible 98% adhesion rate. Stick to these numbers, and you’ll sidestep the wrinkles and misalignments that can plague new users.
The Peel and Post-Press Finish
The second that timer goes off, open the press. With our hot-peel transfers, there's no waiting around. Immediately and confidently peel the film away from the garment. I like to start from a corner and pull smoothly and diagonally across the design. The result should be a crisp, vibrant print with all the ink left right where it belongs: on the shirt.
But hold on, we're not quite done. This last step is the secret sauce for maximum durability and that premium hand-feel.
Cover the exposed design with your Teflon sheet one more time and press it again for just 3-5 seconds. We call this a "post-press" or "curing press."
This quick final press does two crucial things:
- It locks in the design. This is what ensures your print can stand up to over 50 commercial washes without cracking, peeling, or fading.
- It softens the feel. The post-press pushes the ink deeper into the fabric's fibers, giving it a much softer, more integrated feel instead of just sitting on top of the material.
After that final press, your shirt is officially done. By following this workflow—prepare, align, press, peel, and post-press—you’re building a systematic process that delivers consistent, professional results every time. For more in-depth guidance, check out our article covering additional tips and tricks for pressing DTF transfers on t-shirts.
Unlock Production Efficiency with Gang Sheets
Once you move past one-off hobby projects and start thinking like a business, efficiency is everything. Printing a single design is fine now and then, but if you're serious about custom apparel, gang sheets are how you scale up, cut costs, and seriously speed up your workflow.
A gang sheet is just a large transfer sheet packed with multiple designs. Instead of printing one logo at a time, you can fit dozens of different graphics—chest pieces, sleeve hits, neck tags, you name it—onto a single sheet. This simple change in approach is a game-changer. It immediately drives down your cost per print and sets you up for an assembly-line pressing process.
Maximize Value with the Auto-Build Gang Sheet Builder
The real magic of a gang sheet is using every last square inch of that film. Wasted space is wasted money, period. This is where a smart tool becomes non-negotiable. Forget about painstakingly arranging files in Photoshop; our intuitive Auto-build gang sheet builder handles all the heavy lifting for you, ensuring ease of use and maximum cost-effectiveness.
You just upload all your individual design files, and the tool’s algorithm automatically nests them together in the most efficient layout possible. It rotates and places each image to eliminate empty space, making sure you get the absolute most value out of your sheet.
Here’s a peek at how the Auto-build tool intelligently arranges different designs to max out a gang sheet.

This automated placement means you cram more designs onto each sheet, which directly translates to a lower cost for every single transfer you press. For a small business, those savings add up fast.
From Sheet to Shirt: An Efficient Workflow
When your gang sheet arrives, your job is to turn that big roll into a tidy stack of ready-to-press transfers. This is where you can build an incredibly efficient system. Don't just cut out designs as you need them—process the entire sheet at once.
- Create a Cutting Station: Set up a clean, well-lit area with a good pair of scissors or, even better, a rotary cutter and a self-healing mat.
- Organize by Design: As you cut the transfers apart, group them into organized piles. Put all the front logos in one stack, all the sleeve designs in another, and so on.
- Set Up Your Pressing Line: Arrange your stacks of transfers and blank garments right next to your heat press. Now you can work in batches, pressing all the front designs first, then all the sleeves.
This assembly-line method is way faster than pressing one complete shirt at a time. It minimizes wasted movement and helps you get into a steady, productive rhythm. To learn more about optimizing your production, you can explore our in-depth article on the benefits of DTF gang sheets for your business.
Troubleshooting Common DTF Pressing Problems
Even when you follow every step perfectly, a heat press can sometimes throw you a curveball. Don't worry—most common DTF pressing problems are surprisingly easy to fix once you know what you’re looking for. Think of this as your diagnostic guide to getting back on track and producing flawless prints, every single time.
Why Your DTF Transfer Isn't Sticking
One of the biggest frustrations is a transfer that just won't stick properly, especially around the edges. Before you start cranking up the temperature, the first thing to check is your pressure. If your pressure is too light, the adhesive on the back of the transfer simply can't form a strong enough bond with the fabric's fibers.
Another huge culprit behind adhesion issues is hidden moisture. If you skipped the pre-press, the steam created during the press can interfere with the transfer process, leading to peeling corners and a weak bond.
Here's your quick diagnostic checklist:
- Not Enough Pressure: Lock the press down. Does it feel firm and require a bit of effort? If it closes too easily, you need to increase the pressure and try again.
- Forgotten Pre-Press: Always pre-press your garment for 5-10 seconds. This removes moisture and creates a perfectly smooth, dry surface for the transfer to grip.
- Wrong Temperature: Double-check your settings against the fabric type. Polyester needs a much lower temperature than cotton, and too much heat can ruin both the garment and the transfer itself.
Uneven pressure is another sneaky problem. An old or worn-out lower platen pad can develop low spots, causing parts of your design to get less pressure than others. A quick way to test this is by placing a piece of paper in each of the four corners of your press and clamping it down. If you can easily pull one of the papers out, your pressure is definitely uneven.
Solving Dull Colors and Faded Prints
What if the transfer sticks, but the colors look dull, faded, or just not as vibrant as they did on the film? This issue almost always points back to one of three things: temperature, time, or the quality of your materials.
If your heat press temperature is too low, it can't properly activate the inks, leaving them looking lackluster. On the flip side, if the temperature is too high, you can actually scorch the inks, which also results in a faded appearance.
Expert Insight: The post-press is your secret weapon for vibrant, durable colors. A quick 3-5 second final press after peeling the film pushes the ink deeper into the fabric fibers. This not only enhances color saturation but also dramatically improves washability.
Sometimes, the issue isn't the press but the prep work. If you've used a gang sheet to print multiple designs, make sure each one is cut cleanly. The quality of your prints starts with a well-organized layout, which is where using our Auto-build gang sheet builder really pays off by optimizing placement for ease of use and consistency.
Common Heat Press Problems and Solutions
When you're in the middle of a project, the last thing you want is a surprise issue. This table is your quick-glance guide to diagnosing and fixing the most frequent heat press headaches so you can get back to printing.
| Problem | Potential Cause | Solution |
|---|---|---|
| Transfer Edges Peeling | Insufficient pressure or moisture in the garment. | Increase press pressure. Always pre-press the garment for 5-10 seconds to remove moisture. |
| Dull or Faded Colors | Temperature is too low or too high. | Verify the correct temperature for your fabric and transfer type. Perform a post-press for 3-5 seconds to boost vibrancy. |
| Ghosting or Hazy Outline | Transfer film shifted during pressing. | Use heat-resistant tape on the corners. Open and close the press smoothly, not aggressively. |
| Uneven Adhesion | Worn out lower platen pad causing pressure spots. | Test with the "four corner paper" method. Replace the pad if pressure is uneven. |
| Ink Not Sticking at All | Drastically incorrect temperature or pressure. | Double-check all settings from scratch—temperature, time, and pressure—for your specific material. |
Remember, a methodical approach is key. Instead of changing everything at once, adjust one setting at a time to pinpoint the exact cause.
Eliminating Ghosting and Hazy Outlines
Seeing a faint, hazy outline around your design—a phenomenon known as "ghosting"—is incredibly frustrating. This usually happens when the transfer film shifts slightly as you open or close the press.
To prevent this, make sure your movements are smooth and deliberate. Don't slam the press shut or let it pop open aggressively. Using heat-resistant tape to secure the corners of your transfer can be a simple but highly effective fix, especially when working with slippery fabrics like polyester.
A proper pre-press is also crucial here, as it stops the fabric from shrinking or shifting due to moisture loss during the main press. By addressing these common issues, you'll be well-equipped to handle any problem that comes your way and keep your production running smoothly.
Your Heat Press and DTF Questions Answered
Once you start getting the hang of your heat press, you'll naturally start having more questions. That's a great sign—it means you're moving past the basics and are ready to really dial in your technique.
Let's dig into some of the most common questions we hear from people who are serious about getting professional-quality results with their heat press.
Can I Just Use a Regular Iron Instead of a Heat Press?
Look, while you can technically stick some heat transfer materials on a shirt with a home iron, it’s a hard "no" for professional DTF transfers. An iron just can't deliver the two things that are non-negotiable for a print that lasts: consistent, even heat and uniform pressure.
Household irons are notorious for hot spots and cool spots. It's also physically impossible to apply the kind of firm, even pressure needed to correctly bond the DTF adhesive deep into the fabric fibers. Using an iron is a surefire way to get peeling, cracking, and a design that looks rough after the first wash. If you want results that you can sell, a quality heat press is an essential investment.
How Do I Stop Getting Press Marks on My Garments?
Ever pull a shirt off the press and see that faint rectangular outline from the platen? Those are press marks, and they tend to show up more on certain fabrics like polyester or dark-colored cotton.
Pro Tip: One of the easiest ways to fight press marks is to use a heat press pillow or a piece of foam inside the shirt. This raises the actual print area just enough so the edges of the platen don't clamp down so hard on the surrounding fabric.
Also, double-check that your pressure isn't cranked up too high. You need it to be firm, but going overboard will only make the marks worse. A quick, two-second post-press with a Teflon sheet covering the design can also help relax the fabric fibers and make any lingering marks disappear.
What Kind of Maintenance Does My Heat Press Need?
A well-maintained press is a reliable press. The great news is that the basic upkeep is super simple and takes almost no time at all.
- Keep That Upper Platen Clean: After you’re done pressing for the day, give the platen a quick wipe-down with a soft, dry cloth while it's still warm (not scorching hot!). This gets rid of any stray bits of ink or adhesive that could mess up your next project.
- Protect Your Lower Platen: Using a lower platen protector is a smart move. It keeps your silicone pad clean from stray ink and makes it way easier to slide garments on and off smoothly.
- Check Your Pressure From Time to Time: Every so often, do the "four corner paper test" to make sure your pressure is still perfectly even across the whole platen.
Putting in this tiny bit of effort will seriously extend the life of your machine and protect your garments. When you have a big order lined up using transfers from our Auto-build gang sheet builder, the last thing you need is a dirty machine slowing you down or ruining your prints. It's designed for ease of use and cost-effectiveness, and a clean machine ensures you get the most out of every sheet.
Ready to create stunning, durable custom apparel without the headache? The Lion DTF Transfers Auto-build gang sheet builder and our premium hot-peel transfers are designed to give you professional results every single time.