


Heat press shirt printing is all about using a special machine to lock a design onto a garment with heat and pressure.It's become the go-to method for so many custom apparel shops because it’s versatile, budget-friendly for small runs, and delivers those full-color, super-detailed graphics that look completely professional. Honestly, this technique is the backbone of the modern custom t-shirt game.
Building Your Foundation for Flawless DTF Printing
Jumping into heat press printing is exciting, but getting the foundation right is what separates a fun hobby from a real, profitable business. It’s not just about having a press. It's about understanding how your equipment, your garments, and your transfers all work together to create apparel that not only looks incredible but also holds up wash after wash.
The demand for this stuff is blowing up. The global market for multifunction heat presses hit $0.5 billion in 2024 and is still climbing, mainly because the clothing industry can't get enough personalized t-shirts, hoodies, and team gear. This growth just goes to show how essential this equipment has become.
To get started on the right foot, you need a few key pieces of gear. This isn't just a shopping list; it's the core of a professional setup that will save you headaches down the road.
Essential Gear for Your DTF Heat Press Setup
| Item | Why It's Critical | Pro Tip |
|---|---|---|
| Heat Press | Provides the consistent heat and pressure needed for a permanent bond. An iron just won't cut it. | Invest in a model with a digital timer and temperature display. Accuracy is everything. |
| DTF Transfers | The quality of your transfer dictates the vibrancy, stretchability, and durability of the final print. | Order a sample pack first to test colors and feel before committing to a large order. |
| Teflon Sheet | Protects your garments from direct heat, prevents scorching, and gives the print a smooth, semi-matte finish. | Keep it clean! Any dust or debris on the sheet can get pressed into your design. |
| Heat-Resistant Tape | Secures your transfer in place, preventing it from shifting during pressing, which causes "ghosting." | A little goes a long way. Use small pieces on the corners, away from the ink. |
| Lint Roller | Removes any loose fibers or dust from the garment before pressing, ensuring a clean surface for the transfer to adhere to. | A quick roll right before you press is a non-negotiable step for a flawless finish. |
Having these items ready to go will make your entire workflow smoother and your results far more consistent.
Choosing the Right Heat Press
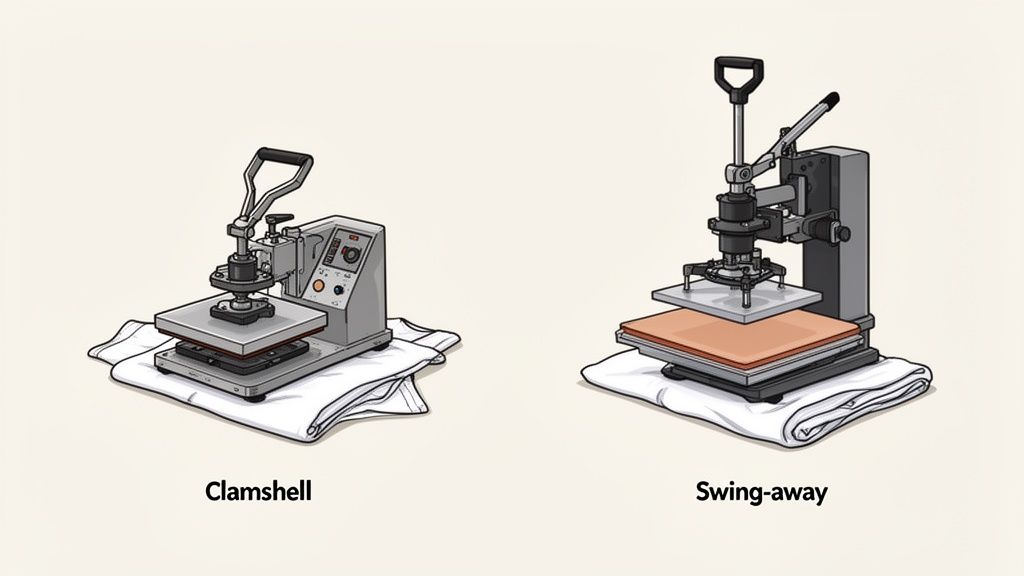
Your heat press is the heart of your entire operation. I know those budget options are tempting, but if you want professional quality, investing in a reliable machine with even heat and consistent pressure is a must. The two main styles you'll see are clamshell and swing-away models.
- Clamshell Presses: These are space-savers, making them perfect for smaller shops or home setups. The top platen lifts straight up, which makes them quick and efficient for standard t-shirt jobs.
- Swing-Away Presses: With these, the top platen swings completely out of the way. This gives you a clear, open view of your workspace, which is a lifesaver when you're lining up transfers on bulky items like hoodies without torching your knuckles.
If you want to go deeper on how these machines work, check out our guide on why a heat press is essential for DTFs. A good press is what guarantees your transfers bond perfectly every single time, stopping that dreaded peeling and cracking later on.
The Importance of Garment and Transfer Quality
The gear is only half the battle. What you press onto and what you press with are just as important for creating a product that feels premium.
When it comes to fabrics, not all are created equal. 100% cotton is a great, forgiving place to start, but you’ll inevitably work with blends. Polyester and poly-cotton blends can be tricky because they’re sensitive to heat and can cause "dye migration"—that’s when the shirt’s dye bleeds into your transfer ink, discoloring it. This is where the quality of your Direct-to-Film (DTF) transfers really shows.
High-quality, vibrant hot-peel DTF transfers are engineered to apply quickly and cleanly across different fabrics. They help minimize the risk of scorching or printing errors, making your job a whole lot easier. Starting with a better transfer is the simplest way to guarantee a better result.
This is also where you can get strategic with your ordering. Instead of buying single designs, using an Auto-build gang sheet builder lets you cram multiple designs onto one sheet. This approach is insanely cost-effective, slashes your per-print cost, and boosts your profitability right from the start. It’s the secret weapon for making small-batch printing smart and scalable.
Preparing Your Designs and Ordering for Profitability
The quality of a finished shirt is decided long before you ever turn on your heat press. Seriously. A perfect print starts with a properly prepped design file—it's the blueprint for the entire process. Getting this step right is the secret to avoiding frustrating mistakes and making sure your transfers look as sharp on fabric as they do on your screen.
Think of your design file like the foundation of a house. If the foundation is weak—low resolution, wrong file type, or a rogue background you didn't see—the whole thing will look amateur. No amount of pressing magic can fix a bad file.
The Non-Negotiables of Design Prep
Before you even think about ordering, your artwork has to meet a few critical standards. These aren't just friendly suggestions; they're essential for getting the crisp, vibrant results that keep customers coming back.
First off, resolution is king. Your design absolutely must be created at 300 DPI (dots per inch). If you use a lower resolution, like the standard 72 DPI for web images, your print will come out looking blurry and pixelated. Starting your canvas at 300 DPI ensures every line stays sharp and every detail is crystal clear.
Second, your artwork needs a transparent background. Unless you actually want a big, solid box printed behind your design, that background has to go. The best file formats for the job are PNG, PSD, or AI because they all support transparency. A JPEG, on the other hand, will automatically slap a white background on there, which will 100% show up in your final transfer.
Key Takeaway: Always, always double-check your export settings. A simple mistake like saving as a JPEG instead of a PNG can ruin an entire batch of transfers. That costs you time and money. It's a tiny step that makes a massive difference.
Turning Ordering into a Profit Strategy
Once your designs are print-ready, it's time to order your transfers. This is where you can shift your mindset from just buying supplies to making a strategic move that directly boosts your bottom line. Ordering designs one by one is easy, sure, but it's also the most expensive way to do it. The real secret successful shops use is maximizing every single square inch of film they buy.
This is where gang sheets come in. A gang sheet is one large sheet of DTF film where you can arrange—or "gang"—multiple designs. Instead of paying per design, you pay for the whole sheet. This lets you cram logos, sleeve hits, neck tags, and full-size graphics all into a single order, which drastically cuts your cost-per-print and pumps up your profit margins on every shirt. And with an Auto-build gang sheet builder, the process is easier than ever.
For a deeper dive into what makes a transfer truly print-ready, check out our full guide on DTF ready-to-press transfers. It covers all the technical nitty-gritty.
Maximize Your Value with an Auto-Build Gang Sheet Builder
Building a gang sheet used to be a pain, requiring design software and a lot of manual dragging and dropping. Not anymore. Our Auto-build gang sheet builder was designed to make this process incredibly simple and efficient, putting profitability within everyone's reach.
The tool lets you upload all your prepped designs straight onto a digital canvas. From there, you can easily resize, rotate, and duplicate them to fill every bit of available space. The goal here is to leave as little empty film as possible, turning what would have been wasted space into more inventory for your shop. This cost-effective approach is a huge advantage.
By taking a few extra minutes to build a proper gang sheet, you completely change the ordering game. You’re no longer just buying a transfer; you’re investing in a sheet of pure profit potential. It’s this easy-to-use and cost-effective approach that allows small shops and independent makers to compete with the big guys, making professional-grade printing more accessible than ever.
Mastering the Perfect DTF Transfer Application
Alright, you've got your designs sorted and the transfers are in your hands. This is where the magic really happens—the part where a great design becomes a great shirt. Getting this stage right is all about locking in a solid process. A reliable workflow doesn't just make your products look professional; it saves you from the kind of simple mistakes that eat up time and inventory.
It all starts with getting the garment ready. It's a small step, but it makes a massive difference in how that transfer holds up.
Garment Prep: The Unskippable First Step
Before a transfer even gets near the fabric, your shirt needs a quick but crucial pre-press. So many people skip this, thinking it’s a waste of time, but it’s the single best way to avoid adhesion problems down the road.
Trust me on this: every garment, especially cotton, is holding onto a surprising amount of moisture. If you press a transfer onto a slightly damp shirt, you're just creating steam that pushes the adhesive away from the fibers. It's a recipe for a failed press.
A quick 5-10 second pre-press at your application temperature solves two problems at once. It zaps that hidden moisture and smooths out any wrinkles, giving you a perfectly flat, dry surface that’s ready for your design.
The infographic below shows the simple three-step journey from a design file to a perfectly arranged, ready-to-press sheet.
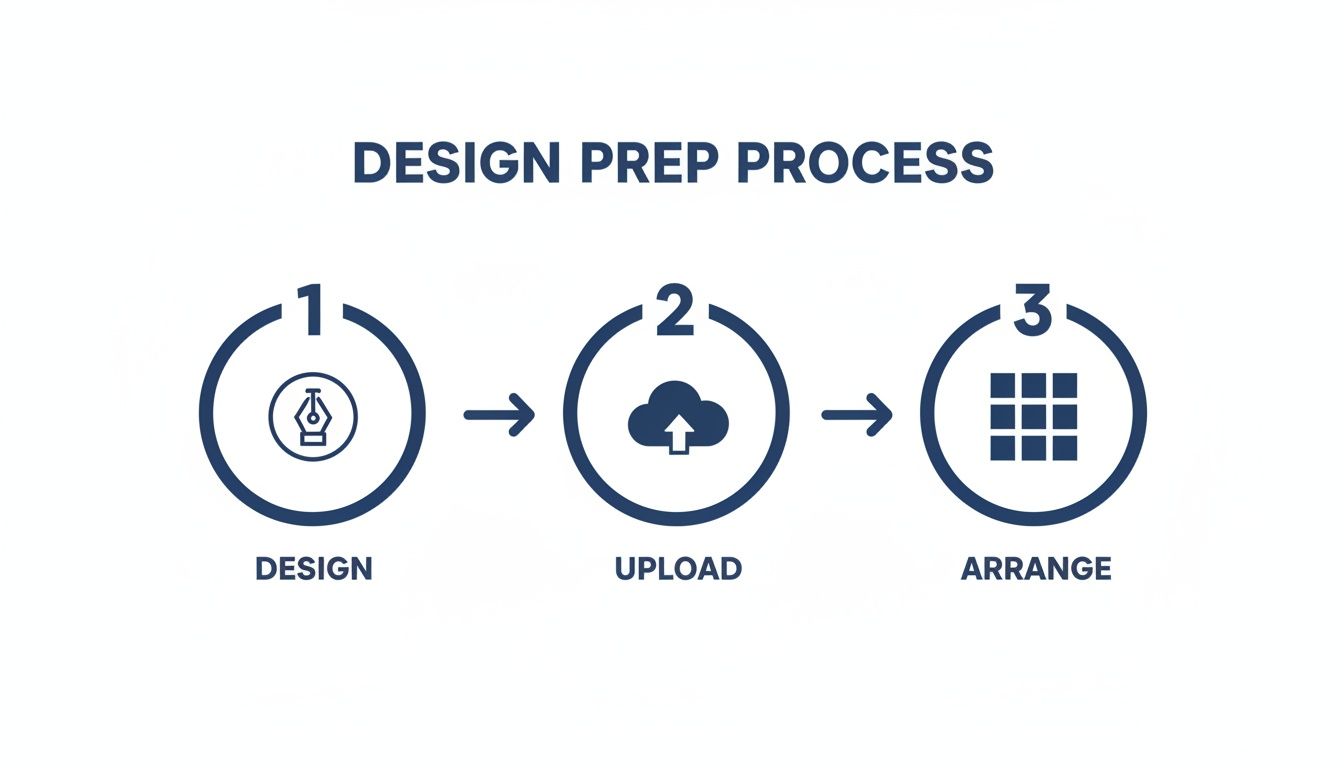
This workflow is all about getting efficient before you even turn on the heat press. Using tools like our Auto-build gang sheet builder simplifies the design arrangement stage, making it fast and cost-effective.
Nailing the Perfect Transfer Placement
Once the shirt is pre-pressed and flat, the next challenge is getting that transfer positioned just right. Nothing screams "amateur" faster than a crooked or off-center graphic. Luckily, getting professional-looking placement is pretty simple once you have a system.
For a standard front chest print on a t-shirt, a solid rule of thumb is to place the top of the design 2.5 to 3.5 inches down from the bottom of the collar. This spot just looks right—it sits naturally on the chest without feeling like it’s choking the wearer or sitting too low.
Pro Tip: For consistency across a whole batch of shirts, use a T-shirt alignment tool or even just a ruler. In a pinch? The "three-finger rule" works great. Just place three fingers horizontally below the collar to find your starting point. It's a quick way to keep every shirt in an order looking identical.
Need to place graphics on other items? Here are a few go-to measurements:
- Full Front on Hoodies: Aim for about 3-4 inches below the neckline. Just make sure your design clears the top of the front pocket.
- Left Chest Logo: Line up the center of the logo with the inside edge of the collar, usually 7-9 inches down from the shoulder seam.
- Back of Shirt (Yoke): Place the top of the design roughly 4 inches down from the back collar.
Dialing in Your Heat Press Settings
With your transfer perfectly positioned and held in place with heat-resistant tape, it’s time to press. The right mix of time, temperature, and pressure is everything. While the perfect settings can vary a tiny bit depending on your press and the specific garment, our tested recommendations will get you great results almost every time.
- Temperature: We recommend 300-325°F (149-163°C) for most cotton, polyester, and poly-cotton blends.
- Time: A 10-15 second press is all you need.
- Pressure: Go for medium to firm pressure. You want enough force to really bond the adhesive, but not so much that you're crushing the fabric's fibers.
Think of these as your starting point. You might need to tweak them slightly for unique fabrics. For a deep dive into settings for all kinds of materials, check out our detailed guide on heat press settings for DTF. It’s a resource I keep handy for tackling any garment that comes through the shop.
The Peel and Final Press: Locking in Durability
This is the moment of truth. Our transfers are a hot peel, which means you get to pull that film off immediately after the press opens. Don't wait. Peeling it while it's still hot is way faster and leaves behind a much softer finish.
To get a clean peel, grab a corner of the film and pull it back smoothly in one continuous motion. Keep the angle low, almost parallel to the shirt. Avoid yanking it straight up, as this can pull up the edges of your freshly pressed design. The transfer should release perfectly, leaving the vibrant print behind.
But you're not done yet. Don't skip the final press! This is the secret to making sure your print lasts. Cover the design with a Teflon sheet or parchment paper and press it again for just 5-7 seconds. This second press cures the ink completely, pushes it deeper into the fabric, and gives it that soft, matte finish that makes it feel like it’s part of the shirt. This is what ensures it’ll survive wash after wash without cracking or peeling.
Troubleshooting Common Heat Pressing Problems
Even with a dialed-in process, you're going to have a press that just doesn't go right. It happens to all of us, whether you're just starting out or have pressed thousands of shirts. The trick is knowing how to spot the problem and fix it fast without wasting a good garment.
Most of the time, the culprit is one of the big three: temperature, time, or pressure. Getting this trio perfect is the foundation of a great press. If one is even slightly off, it can cause everything from peeling designs to scorched fabric.
Transfers Not Sticking Completely
This is probably the most common headache you'll run into. You go to peel the film, and bits of the design are still stuck to it, or the whole thing just lifts right off the shirt. Don't panic. The fix is usually simple.
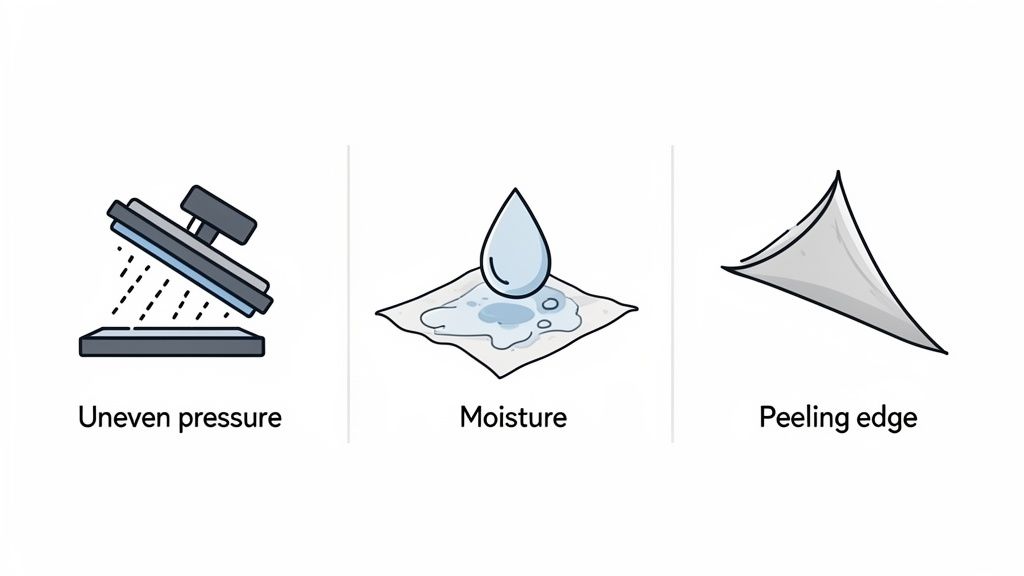
- Uneven or Weak Pressure: This is the number one cause, hands down. If your press isn't clamping down with firm, even force, the adhesive just can't grab onto the fabric fibers. Check your pressure knob and make sure your platen is sitting perfectly level.
- Moisture in the Garment: Remember that pre-press? This is why it's so important. Any moisture hiding in the fabric turns to steam under the heat, literally pushing the transfer away from the shirt. A quick 5-10 second pre-press is non-negotiable.
- Temperature Is Too Low: If your heat press is running cool, the adhesive won't melt the way it needs to. Double-check that your machine is properly calibrated and set to the recommended 300-325°F for our DTF transfers.
Lifting Edges After Peeling
It's a frustrating moment: the main design looks perfect, but the sharp corners or thin lines start to lift as you peel. This is a dead giveaway that the bond is weak right where it needs to be strongest.
This almost always comes down to your peeling technique. Our transfers are a hot peel, which means you need to pull the film away the moment the press opens. Pull it smoothly at a low angle—almost parallel to the shirt—to keep those edges locked down. If you yank the film straight up, you risk pulling on the design before the adhesive has fully set.
Pro Tip for a Quick Fix: If you see an edge lifting, stop right there. Don't peel it any further. Lay the film back down, cover it with your Teflon sheet, and give it another press for 5-7 seconds. That little extra shot of heat and pressure is often all it takes to save the print.
Discoloration or Scorching on Fabric
Ever press a bright white design on a red poly tee, only to see it turn pink a few hours later? That's dye migration, a classic issue where dye from the polyester "bleeds" up into the transfer ink. This is almost always caused by too much heat. For polyester and poly-blends, stick to the lower end of our temp range, around 285-300°F, to keep those fabric dyes from activating.
Scorching, on the other hand, is that faint, press-shaped outline left on the garment. It’s common on fabrics that are sensitive to heat. Using a protective Teflon sheet is your best line of defense, as it puts a buffer between the fabric and the direct heat of the platen.
Sometimes, you might find the issue isn't your process at all, but the transfers you're using. Low-quality transfers with inconsistent adhesive can cause endless problems. By using a trusted supplier and tools like our Auto-build gang sheet builder, you get cost-effective prints and the consistency you need to minimize these errors from the get-go. It ensures you’re starting with a quality product every single time.
Scaling Your Production and Caring for Your Apparel
Once you’ve nailed the process for a single shirt, the real fun begins. Now it’s time to figure out how to work faster, smarter, and more profitably. The jump from hobbyist to a serious business owner is all about optimizing your workflow and thinking about the customer’s experience long after their package arrives. This is where you build a reputation for quality that keeps people coming back.
The opportunity here is massive. The custom t-shirt printing market, driven hard by accessible tech like DTF, exploded from USD 7.22 billion in 2023 and is projected to hit USD 10.49 billion by 2030. This isn't just a trend; it's a global demand confirming that scaling your heat press operation is a solid business move.
Making that transition from one-off prints to batch production is where efficiency becomes your best friend.
Optimizing Your Workflow for Growth
Scaling up isn't just about buying more gear. It's about shaving seconds off every step and eliminating wasted movement. Think about your workspace like an assembly line. Is everything you need within arm's reach? A well-organized station means you’re not constantly walking back and forth to grab supplies.
Consider these practical ways to tighten up your workflow:
- Batch Your Tasks: Instead of pressing one shirt from start to finish, group your actions. Pre-press an entire stack of ten shirts at once. Then, move on to aligning and taping all ten transfers. Finally, press them one after another. Getting into a rhythm like this is way more efficient than repeating every single step for each garment.
- Set Up for Comfort: Position your heat press at a comfortable height so you aren't hunched over all day. Keep your transfers, tape, and finishing sheets organized and easy to grab. A smooth setup reduces physical strain and mental fatigue, which means you can work longer and stay focused.
- Pre-Cut Your Transfers: When your order arrives, take a few minutes to cut your designs from the gang sheet. Having a stack of ready-to-press transfers means you can just grab and go, keeping the momentum going during a busy production run.
Once you've really mastered the craft, you might even think about how to start a clothing line, turning your printing skills into a full-fledged brand. Efficiency is what will make that leap a successful one.
Maximizing profitability at scale starts long before you even turn the press on. Using our Auto-build gang sheet builder is a perfect example. By fitting multiple designs onto a single sheet, you slash your cost-per-print, which is absolutely crucial for protecting your margins as you grow.
Ensuring Longevity with Proper Garment Care
The final piece of the puzzle—and maybe the most critical—is what happens after the sale. The durability of your print is a direct reflection of your brand's quality. Providing clear, simple washing instructions is a professional touch that ensures your hard work actually lasts.
A shirt that cracks or peels after a few washes can kill your reputation. On the flip side, a well-cared-for shirt becomes a walking advertisement for your business. Including a small care card or a note on your packaging adds huge value and shows your customers that you stand behind your product.
Here’s a straightforward care instruction template you can use:
- Turn Inside-Out: Always wash the garment inside-out to protect the print from rubbing against other clothes.
- Wash Cold: Use cold water on a gentle cycle. Hot water can start to break down the transfer adhesive over time.
- Tumble Dry Low: Dry on a low heat setting. For the absolute best results, hang it to dry. High heat is the number one enemy of a long-lasting print.
- No Ironing on the Print: If you have to iron the garment, make sure it's turned inside-out and use a low setting.
By providing these simple instructions, you empower your customers to keep their apparel looking great. That builds trust and gives them every reason to order from you again.
Common Questions About DTF Heat Pressing
Even when you've got your process dialed in, questions pop up. And when you're in the middle of a big run, you need answers that are quick, clear, and get you back to pressing. We’ve pulled together some of the most common questions we get about heat press shirt printing to help you troubleshoot on the spot and sharpen your skills.
Think of this as your go-to guide for those "what do I do now?" moments. Nailing these little details is often what separates a wasted shirt from a flawless print.
Can I Use a Regular Iron Instead of a Heat Press
It might seem like a good idea for a quick one-off project, but trust us on this one: don't use a household iron for DTF transfers if you want them to last. An iron just can't provide the two things that are absolutely essential for a good press: consistent temperature and even pressure.
Irons have notorious hot spots and can't apply pressure evenly, which means the DTF adhesive won't bond correctly across the entire graphic. That's a recipe for peeling, cracking, or fading after just a wash or two. A quality heat press isn't just a tool; it's an investment in professional, durable results.
Why Is My White DTF Ink Staining the Garment
That dreaded pinkish or grayish stain on your white ink is almost always a classic case of dye migration. It happens when you press a light-colored transfer onto a dark polyester or poly-blend shirt at a temperature that’s too high. The heat essentially turns the fabric dye into a gas, which then seeps into and permanently stains your transfer ink.
Luckily, it's preventable. Here's what to do:
- Turn Down the Heat: For polyester and blends, drop your heat press temp to the lower end of the scale, somewhere around 275-300°F.
- Press for Less Time: Keep your press time shorter, usually around 10-12 seconds.
- Start with Quality Transfers: High-quality transfers often come with a special blocker layer built in specifically to fight dye migration on those tricky fabrics.
How Do I Know What Pressure to Use on My Heat Press
Figuring out the right pressure—usually medium to firm for DTF—can feel like a guessing game at first. But there’s a simple trick the pros use to get it right every time, often called the "paper test."
Just take a single sheet of regular printer paper, place it under one corner of your platen, and clamp the press down. Now, try to pull the paper out. If it slides right out with no effort, your pressure is way too light. If you can't get it out at all without ripping it, you've gone too far. The sweet spot is when you feel some real tension on the paper, but you can still just barely slide it out.
Consistent, even pressure is everything. It makes sure every single part of your design, from the big blocky letters in the middle to the finest lines on the edge, gets the force it needs to bond for good.
What Makes a DTF Transfer Hot Peel
When you see "hot peel," it's all about the specific recipe used for the DTF transfer’s adhesive powder and inks. They’re formulated so you can rip that film carrier off the second the heat press pops open, while the shirt is still piping hot. For anyone doing production runs, this is a massive time-saver.
Unlike cold peel transfers that force you to wait around for everything to cool down, hot peel lets you pull the finished shirt off the platen and immediately load the next one. That kind of efficiency is a game-changer when you're trying to scale up your heat press shirt printing and get orders out the door faster.
Ready to streamline your workflow and maximize profitability? With the Lion DTF Transfers Auto-build gang sheet builder, you can easily arrange multiple designs to lower your costs and get professional-quality prints every time. Start building your custom gang sheet today!