


So, what exactly is DTF printing? At its simplest, it’s a method for creating a vibrant, full-color graphic that can be heat-pressed onto just about any fabric. Think of it as a high-end, ridiculously durable “sticker” for clothing that lets you create intricate designs on materials like cotton, polyester, and even leather, blowing past the limitations of older printing techniques.
What Is DTF Printing and Why Is It So Popular?
At its core, Direct-to-Film (DTF) printing is a two-step process. First, we print a design onto a special PET film using water-based inks. A fine adhesive powder is applied to the wet ink and then melted, creating a transfer that's ready to go. From there, you just apply it to your garment with a standard heat press for a flexible, tough, and brilliant graphic.
This whole approach sidesteps a lot of the usual headaches in the apparel world. Screen printing? You’d need a different screen for every single color, which means a ton of setup time and cost. DTF prints complex, full-color designs in one clean pass. It also runs circles around Direct-to-Garment (DTG) printing by working on a much bigger range of fabrics, including those tricky dark polyesters that DTG just can’t handle.
The Core Components of DTF
The real magic behind DTF comes from three key ingredients working together. Once you get how they interact, it’s easy to see why the process is so versatile.
- DTF Printer and Inks: You need a specialized inkjet printer loaded with CMYK and white textile inks. That white ink is the secret sauce—it lays down an opaque base layer so your colors seriously pop, even on a black hoodie.
- PET Film: This isn't your standard plastic film. It’s a coated sheet specifically designed to hold the ink perfectly and then release it cleanly onto the fabric when you press it. No mess, no fuss.
- Adhesive Powder: After the design is printed, this fine polyurethane powder gets sprinkled over the wet ink. When you melt it, it creates a powerful adhesive layer that bonds the design right into the fabric fibers.
This combination makes DTF a powerhouse for everyone from small Etsy shops to massive print-on-demand operations. Its growth is no accident; the global DTF market was valued at around USD 2.72 billion and is only getting bigger, all thanks to the huge demand for custom gear. You can discover more insights about the DTF printing market growth and its impact.
Key Takeaway: DTF printing removes the old barriers. You can now print a single t-shirt with a complex, multi-color design just as easily as you can print a thousand of them, all without crazy setup fees. It’s made professional on-demand printing a reality for everyone.
To make things even more efficient, you can arrange a bunch of different designs onto one large sheet of film, which we call a gang sheet. Our Auto-build gang sheet builder makes this a breeze, automatically laying out your artwork to cut down on waste and slash your cost per print. That kind of accessibility and efficiency is exactly why DTF has become the go-to for so many custom apparel creators.
How the DTF Printing Process Works Step by Step
Ever wonder how a digital file becomes a durable, vibrant print on a t-shirt? Understanding the journey of a DTF transfer reveals just how straightforward and effective this method really is. It’s a lot like creating a professional-grade decal that's designed to permanently fuse with fabric, but without all the complex steps you see in screen printing or weeding vinyl.
The whole thing starts with your digital design. Once your artwork is ready to go, it’s sent over to a specialized DTF printer, and the magic begins.
This diagram breaks down the simple, linear flow of the process—from printer to film and, finally, onto the fabric itself.
As you can see, each step builds directly on the last one to create a transfer that’s ready to press in just a few seconds.
Step 1: Printing the Design on PET Film
First things first, the design is printed onto a special carrier sheet known as PET (polyethylene terephthalate) film. The printer puts down the full-color CMYK (cyan, magenta, yellow, and black) layer first. Right after that, it prints a perfectly aligned layer of white ink directly over the top.
That white base is the real game-changer here. It acts as an opaque foundation, making sure your design’s colors pop with true brilliance, whether you’re pressing it onto a white tee or a black hoodie.
Step 2: Applying the Adhesive Powder
While the ink is still wet on the film, it’s time for the powder. The entire printed sheet gets a coating of a fine, granular thermoplastic polyurethane (TPU) adhesive powder. This powder is clever—it only sticks to the wet ink, completely ignoring the blank parts of the film.
Think of it like sprinkling glitter on wet glue; the powder adheres exactly where your design is. Any extra is shaken off, leaving a clean transfer that's perfectly powdered and ready for the next phase. This powder is the secret ingredient behind the print’s incredible durability and washability.
The adhesive powder is what turns the printed ink into a permanent transfer. When melted, it creates a powerful, flexible bond that fuses the design directly into the fabric's fibers, ensuring it won't crack or peel.
Step 3: Curing the Transfer
Next up, the powdered film needs to be cured. It's passed through a controlled heat source—usually a small conveyor oven or a heat press hovering just above the film. The heat melts the adhesive powder, transforming it from a grainy texture into a smooth, even layer of glue covering the entire design.
Once it's cured, the transfer is stable, dry to the touch, and ready to be stored or pressed right away. You’re now holding a professional, ready-to-go DTF transfer. This is where you can really appreciate the efficiency of the system; shops can print hundreds of these transfers to have on hand for on-demand application.
Step 4: Pressing and Peeling
The final step is getting that transfer onto the garment. The cured transfer is placed on the fabric and pressed with a heat press using a specific temperature and pressure for just a few seconds. The heat reactivates the adhesive, bonding the ink right into the fabric fibers. For precise instructions, check out our guide on heat press settings for DTF.
After pressing, you let the garment cool for a moment. Then comes the most satisfying part: the "cold peel." The PET film is peeled away, leaving only the crisp, vibrant, and permanent design on the shirt. What you’re left with is a soft, durable print that feels great and is ready to wear.
Comparing DTF Printing To Other Customization Methods
Choosing the right printing method can feel like a maze. With so many options out there, each with its own pros and cons, how do you know which one is right for your project?
DTF has exploded in popularity, but it’s crucial to see how it stacks up against the old guards: Direct-to-Garment (DTG), screen printing, and heat transfer vinyl (HTV). Each one has its sweet spot. DTG offers that super-soft feel on 100% cotton, and screen printing is still the undisputed king for massive bulk orders. Understanding where DTF fits in is the key to making a smart decision.
And this isn't just hype. The numbers show a massive shift in the industry. Globally, over 7.2 billion DTF prints were produced in a recent period, marking a nearly 30% year-over-year increase. It’s clear that apparel decorators are embracing this technology at a rapid pace. You can dig into the specifics by reading the full research about DTF printing market trends and see the data for yourself.
To help you decide, let's break down how DTF compares to the other major players in the custom apparel world.
Printing Method Comparison DTF vs DTG vs Screen Printing
Every printing method has its place, but they are not created equal. This table gives you a quick, side-by-side look at the big three, helping you see where each one shines and where it falls short.
| Feature | DTF Printing | DTG Printing | Screen Printing |
|---|---|---|---|
| Fabric Compatibility | Excellent (Cotton, poly, blends, leather, nylon) | Limited (Primarily cotton or high-cotton blends) | Good (Cotton, poly, blends, but requires special inks) |
| Design Complexity | Unlimited colors, photos, and fine details | Unlimited colors and gradients | Limited colors, high setup cost per color |
| Feel on Garment | Smooth, flexible, sits on top of the fabric | Very soft, breathable, ink soaks into fibers | Can be thick, especially with multiple colors |
| Durability | High, excellent wash resistance and stretchability | Good, but can fade over time with improper care | Excellent, very durable for long-term wear |
| Ideal Order Size | Small to medium runs (1-500+ pieces) | Small runs and one-offs | Large bulk orders (100+ pieces) |
As you can see, DTF fills a unique gap, offering the color freedom of DTG with the fabric versatility of screen printing, all without the high setup costs. It's the go-to for vibrant, detailed designs on almost any material.
DTF vs Direct to Garment (DTG) Printing
People often mix up DTF and DTG because they both use inkjet technology to create full-color prints. The real difference is how the ink gets on the shirt. DTG prints directly into the fabric fibers, while DTF prints onto a film that’s then heat-pressed onto the fabric.
That one difference changes everything.
- Fabric Versatility: DTF is the hands-down winner. It works on cotton, polyester, blends, canvas—even tricky stuff like leather. DTG, on the other hand, really only works well with cotton or garments with a very high cotton content.
- Feel and Finish: Because DTG ink sinks into the fabric, the print feels incredibly soft and breathable. A DTF print sits on top of the material, giving it a smooth, durable finish that feels more like a high-end screen print than a sticker.
- Color Vibrancy: DTF uses a white ink underbase, which guarantees that your colors will be bright and punchy on any color garment. With DTG, the shirt color can sometimes subtly show through, making colors appear less vibrant on dark fabrics.
DTF vs Screen Printing
Screen printing has been the industry workhorse for decades, and for good reason. It’s incredibly durable and becomes extremely cheap per shirt when you’re printing hundreds or thousands of the same design.
But screen printing’s biggest strength is also its biggest weakness: simplicity. A separate screen has to be burned for every single color in a design. That means high setup costs and long lead times. Trying to screen print a photorealistic image with dozens of colors would be a logistical and financial nightmare.
DTF printing completely eliminates setup costs per color. A design with one color costs the exact same to produce as a design with a hundred colors. This makes it a game-changer for small businesses and on-demand creators who need complex, vibrant graphics without a huge upfront investment.
This is exactly why DTF has become so popular. You can affordably print just one full-color shirt—something that would be impossible with screen printing.
DTF vs Heat Transfer Vinyl (HTV)
Heat Transfer Vinyl (HTV) is a staple for crafters and is perfect for simple, one-color graphics like names and numbers on jerseys. The process involves cutting a design from a sheet of colored vinyl and pressing it onto the fabric. While it’s great for basic text and shapes, it quickly becomes a headache with anything more complex.
Layering multiple colors of vinyl is tedious, bulky, and makes it tough to get everything lined up perfectly. DTF, on the other hand, prints the entire full-color design in a single, lightweight transfer. This makes it far better for detailed logos, intricate illustrations, and photos. You get professional quality without all the weeding and layering that makes complex HTV projects so frustrating.
To make things even easier and more affordable, you can combine multiple designs onto one sheet. Our Auto-build gang sheet builder streamlines this process, helping you fit as many designs as possible onto your film to drastically reduce your cost per print. This makes DTF not just higher quality, but also surprisingly cost-effective.
Getting Your Designs Ready for Print
Taking an idea from your screen to a finished shirt is easier than you might think. But the secret to a perfect DTF transfer all comes down to the quality of your digital artwork. Nailing a few simple guidelines ensures what you see in your design file is exactly what you get on the fabric—sharp lines, vibrant colors, and no weird surprises.
Before you can bring anything to life, your art file needs to be prepped correctly. Seriously, this is the most critical step. The quality of your source file has a direct impact on how good the final print will look.

Essential Artwork Guidelines for Flawless Prints
Think of your artwork file as the blueprint for your transfer. If the blueprint is blurry, the final product will be, too. To dodge common issues like pixelation or that dreaded white box around your design, your file has to meet three key standards.
-
High Resolution (300 DPI): Your image absolutely needs to be created at 300 Dots Per Inch (DPI). This is the gold standard for high-quality printing and guarantees your design will come out crisp and clear. If you grab a low-res image off a website, it's going to look blurry and pixelated when printed.
-
Transparent Background: This one is non-negotiable. Your design must be saved on a transparent background. If it's not, the printer will create a solid box of color (usually white) around your artwork, and that box will end up pressed right onto your garment.
-
The Right File Format: The best formats for DTF printing are PNG, PSD, and AI. PNGs are fantastic because they handle transparent backgrounds perfectly. Vector files like AI are even better, as they can be scaled to any size without losing an ounce of quality.
Getting these details right is everything. For a deeper dive, check out our guide on DTF ready-to-press transfers to make sure your files are print-perfect every single time.
Maximizing Your Value with Gang Sheets
One of the smartest moves you can make with DTF is using gang sheets. A gang sheet is just a large sheet of transfer film where you arrange a bunch of different designs to be printed all at once. It's an incredibly cost-effective way to order because you pay for the film you use, not for how many designs are on it.
By fitting multiple logos, sleeve hits, neck tags, and full-size graphics onto a single sheet, you can slash your cost per print. This is the secret weapon for small businesses and brands looking to squeeze every bit of profit out of a run.
Instead of ordering one transfer at a time, you can pack a 22" x 24" sheet (or bigger) with dozens of different images. This is perfect for knocking out multiple small orders, stocking up on your best-sellers, or printing logo variations without having to place a separate order for each one.
Using an Auto-Build Gang Sheet Builder
Let's be real—manually arranging designs on a gang sheet can be a pain. You have to meticulously place every image to minimize wasted space, and it can feel like a frustrating game of Tetris.
That's where our Auto-build gang sheet builder changes the game. This tool completely streamlines the process, making it dead simple for anyone, regardless of their design skills.
Here’s how it works:
- Upload Your Designs: Just upload all your print-ready files (like PNGs) into the builder.
- Let the Tool Do the Work: The builder automatically analyzes the size and shape of each design and arranges them on the film for you, packing them in to fit as many as possible.
- Review and Order: You get a live preview of your finished gang sheet. Once it looks good, you can approve it and place your order with total confidence.
Using an automated tool like this doesn't just save you a ton of time; it ensures you’re getting the absolute best value for your money. It takes all the guesswork out of the equation, making professional DTF printing efficient and surprisingly affordable.
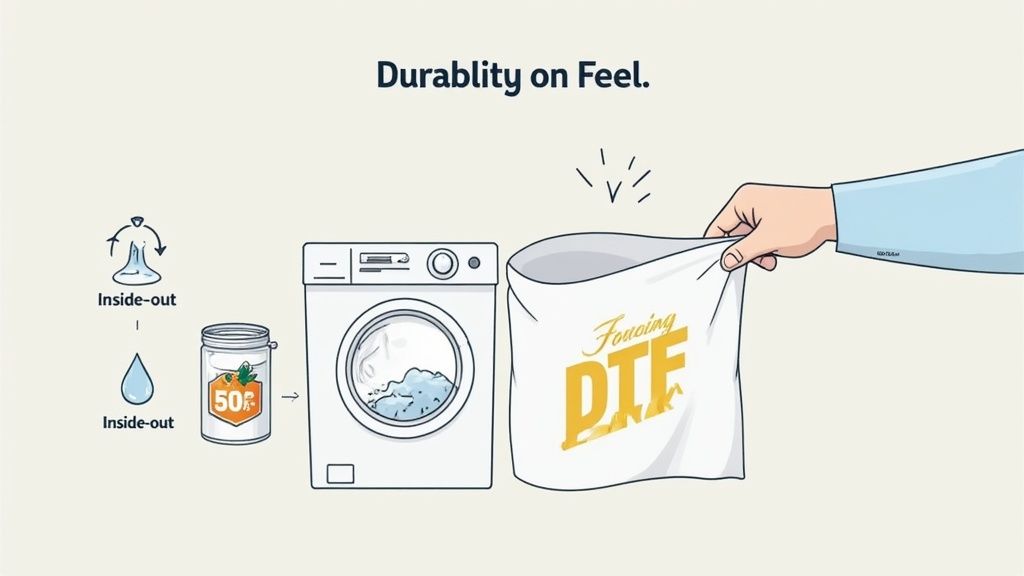
Understanding the Durability and Feel of DTF Prints
Two questions come up more than any others when you’re talking about custom apparel: “How does it feel?” and “How long will it last?” A great design is only as good as its wearability and lifespan. Luckily, DTF printing nails both, delivering a final product that not only looks fantastic but is built to go the distance.
The secret to a DTF print's vibrant, punchy look starts at its foundation. Every design is backed by a solid, opaque layer of white ink. This base layer works like a perfect primer on a canvas, stopping the shirt's color from muddying the design. It ensures every hue—from bright yellows to deep reds—pops with incredible intensity, no matter what color fabric it’s on.
How Does a DTF Transfer Feel?
When you run your hand over a DTF print, you’ll notice it’s smooth and surprisingly lightweight. It’s a world away from the thick, plastic-like feel of older heat transfer vinyl. A DTF transfer is thin and integrates nicely with the fabric. While it sits on top of the fibers instead of soaking in like DTG, the result is a soft-hand feel that's genuinely comfortable to wear all day.
This flexibility is a massive advantage. The print is engineered to stretch right along with the fabric, which means it moves with the garment instead of fighting against it. This natural elasticity is what prevents the cracking and peeling that plagues lower-quality prints, especially on things like activewear or fitted tees. To get a better sense of it, you can check out our guide on what DTF transfers feel like.
Built to Last Through Countless Washes
Durability is where DTF really pulls ahead of the pack. Thanks to a powerful thermoplastic adhesive that locks the ink to the fabric, these transfers are incredibly tough. Industry-standard wash tests back this up, confirming that a high-quality DTF transfer can handle 50+ wash cycles without any significant fading, cracking, or peeling.
A DTF print’s longevity comes directly from its construction. The combination of flexible, specially formulated inks and a powerful adhesive creates a permanent bond that can honestly outlast the garment itself when cared for properly.
This impressive resilience makes DTF a reliable choice for just about anything. Think staff uniforms that see daily abuse or merchandise for brands that need to maintain a reputation for quality. It just holds up.
Simple Care for Long-Lasting Vibrancy
The best part? You don't need a complicated care routine to keep these prints looking sharp. Just a few simple habits can keep your designs looking brand new for years to come.
Follow these best practices to get the most life out of your prints:
- Wash Inside Out: Turning your garment inside out before washing is the easiest win. It minimizes friction and protects the print’s surface from zippers, buttons, and other clothes.
- Use Cold Water: Always wash on a cold, gentle cycle. Hot water can stress both the fabric and the print's adhesive over time.
- Tumble Dry on Low: If you use a dryer, stick to a low-heat setting. Even better, hang the garment to air dry to really preserve its integrity.
- Avoid Direct Ironing: Never, ever iron directly over the DTF print. If you need to iron the garment, turn it inside out first.
By following these simple steps, you ensure every custom piece you create remains a vibrant, durable, and comfortable favorite.
Answering Your Top DTF Printing Questions
Alright, so we've covered the what and the how. But you probably still have a few questions rolling around in your head. That's totally normal. This section is all about giving you direct, no-fluff answers to the most common things we hear from creators, small business owners, and anyone just starting out with custom apparel.
Think of it as the final check-in to make sure you're feeling confident before you kick off your next project. We'll get into the specifics of how these prints actually feel, what gear you really need, and where DTF truly shines.
What Does a DTF Print Feel Like on a Shirt?
This is usually the first thing people ask. The "hand," or feel, of a DTF print is surprisingly soft, smooth, and flexible. It’s way thinner and lighter than that traditional heat transfer vinyl, which can sometimes feel like a thick, plasticky shield sitting on the shirt.
While the design does sit on top of the fabric—unlike DTG, which dyes the fibers themselves—it blends in incredibly well. The transfer is engineered to stretch right along with the material. This not only stops it from cracking but also makes it feel more natural and comfortable to wear. The end result is a premium finish that’s barely noticeable, making it perfect for everyday gear that needs to feel as good as it looks.
Can You Use a Home Iron for DTF Transfers?
Great question, and an important one, especially for the DIY crowd. While you technically could try using a home iron, we strongly discourage it if you want professional, lasting results. It all comes down to two things: consistent heat and even pressure.
A home iron is terrible at both. Its surface has hot and cool spots, and it's impossible to apply the same amount of pressure across a whole design by hand. This almost always leads to a few common disasters:
- Peeling Edges: The adhesive won't bond right where the iron was cooler or you didn't press hard enough.
- Cracking After Washing: A weak bond will fall apart the first time it goes through the laundry.
- Scorched Fabric: A hot spot on the iron can easily burn your garment or the transfer itself.
Key Insight: A quality heat press isn't just an accessory; it's an essential tool for DTF. It delivers the precise temperature and uniform pressure needed to cure the adhesive, creating a permanent bond that will last wash after wash.
How Cost-Effective Is DTF Printing?
DTF printing is incredibly cost-effective, especially for small-to-medium orders with complex, multi-color designs. This is one of the main reasons it has become so popular. Unlike screen printing, there are no setup fees per color. A full-color photograph costs the exact same to print as a simple one-color logo.
This pricing model makes on-demand printing super affordable for small businesses and startups. You can cut your costs even more by using gang sheets, which let you cram multiple designs onto a single sheet of film. By printing logos, neck tags, and various graphics all at once, you pay for the sheet, not for each separate design.
Our Auto-build gang sheet builder was designed specifically to help you squeeze every bit of value out of this, automatically arranging your files to minimize waste and drop your cost per print. It makes DTF one of the most budget-friendly ways to produce top-tier custom apparel.
What Are the Best Uses for DTF Printing?
The versatility of DTF makes it a killer choice for a huge range of projects. Because it can stick to pretty much any fabric and reproduce vibrant, full-color designs, the creative possibilities are endless.
Here are just a few areas where DTF really shines:
- Small Businesses & E-commerce Brands: Perfect for creating custom tees, hoodies, tote bags, and hats with detailed designs without having to order massive quantities.
- Corporate & Team Apparel: The go-to for putting logos on polyester polos, performance wear, and team jerseys where methods like DTG just wouldn't work.
- Promotional Merchandise: Quickly and affordably produce high-quality branded gear for events, trade shows, or marketing campaigns.
- Crafters & DIY Makers: Lets hobbyists get professional-grade results on all sorts of materials, from cotton and canvas to denim and even leather.
Since it blows past the fabric limitations of other methods, DTF has become the default solution for almost any custom product you can think of. It gives creators the power to say "yes" to more projects, knowing they can deliver a stunning and durable product every time.
Ready to bring your designs to life with unmatched color and durability? The team at Lion DTF Transfers makes it simple. Use our powerful auto-builder, upload your files, and receive premium, ready-to-press transfers shipped in as little as one business day. Start your order today!