


If you're serious about custom printing tee shirts, you need a method that delivers professional-grade results without the old-school headaches. Direct-to-Film (DTF) transfers are that modern solution. It’s the sweet spot where the rich, vibrant finish of screen printing meets the full-color freedom of digital printing, making it the best choice for most apparel projects.
Why DTF Transfers Are a Game Changer for T-Shirt Printing
Ever felt boxed in by the steep setup costs of screen printing or the fabric limitations of other print methods? DTF is the answer you've been looking for. It's a genuine leap forward, giving creators and businesses the power to produce top-tier custom garments without breaking the bank.
Instead of messing with inks directly on the shirt, your design is first printed onto a special film. That film is then heat-pressed onto the fabric. It's a straightforward process that completely sidesteps the common hurdles of apparel printing and opens up a world of possibilities.
Unmatched Durability and Feel
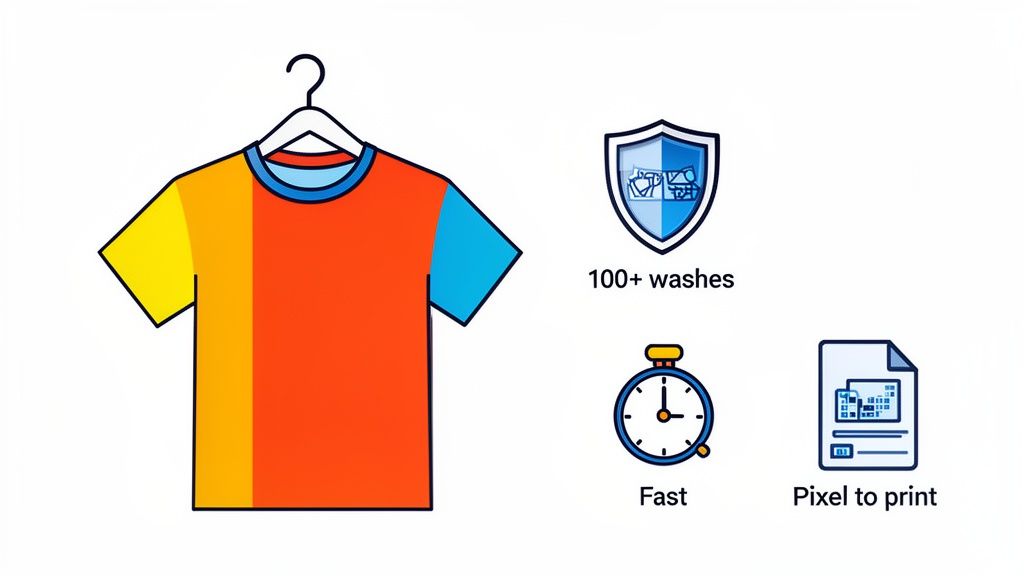
One of the first things you'll notice about DTF transfers is their incredible resilience. These prints are engineered to handle the grind of daily wear and repeated washing. In fact, our transfers are tested to last over 100 washes without cracking, peeling, or fading. The goal is a finished product that doesn't just look great on day one but maintains its quality for years.
On top of that, the transfers have a soft, flexible feel that moves right along with the fabric. No more stiff, heavy prints that feel like a plastic shield on your chest. A properly applied DTF transfer truly becomes part of the garment.
The Power of Simplicity and Speed
Forget messy inks, tedious screen prep, or long setup times. With DTF, your workflow is simple: design, order, and press. This is a massive advantage for small businesses and independent creators who need to produce amazing shirts without a steep learning curve or a warehouse full of equipment.
That efficiency also means serious speed. At Lion DTF, we can have your transfers printed and shipped out in just 1–2 business days. This lets you hit tight deadlines and react quickly when a design takes off.
Key Takeaway: DTF printing kicks down the traditional barriers to professional apparel decoration. It gives you the speed, durability, and vibrant color that allows anyone with a heat press to compete with large-scale print shops.
This blend of quality and accessibility is fueling some major industry growth. The global custom t-shirt printing market was valued as high as $7.01 billion in 2025, with projections showing it could rocket past $18 billion by 2034. Digital methods like DTF are the engine behind this expansion, perfectly meeting the demand for personalized, high-quality gear. You can dive deeper into the trends shaping the custom apparel market and see its impressive growth for yourself.
Cost-Effectiveness at Any Scale
Whether you're making a single shirt or a thousand, DTF offers a cost-effective path forward. One of the smartest ways to maximize your savings is by using a gang sheet, which lets you fit multiple designs onto a single sheet of film.
Our Auto-build gang sheet builder makes this process incredibly easy. It automatically arranges your artwork to minimize waste and slash your cost per print. This is a lifesaver for orders with a mix of designs, like front logos, sleeve hits, and neck tags—all combined on one efficient sheet.
Preparing Your Artwork for Flawless DTF Prints
A killer t-shirt design can fall flat if the file isn't set up for success. While that sounds technical, preparing your artwork for custom printing tee shirts is pretty straightforward once you get the hang of it. Honestly, getting this part right is the difference between a shirt that looks professionally made and one that just screams "blurry, homemade project."
The foundation of any great print is the quality of the source file. You can have the most brilliant idea, but if it's saved as a low-quality image you snagged off the web, the final print will show every single pixelated flaw. This is where a few key details make all the difference.

The Non-Negotiables: Resolution and File Type
First up, let's talk resolution. For any DTF printing, your artwork absolutely must be 300 DPI (dots per inch). Think of DPI as the density of information in your image. A 72 DPI image, which is standard for web stuff, might look fine on your screen, but it will come out looking fuzzy and jagged when printed on a shirt. A 300 DPI file packs in enough detail to produce those sharp, clean lines and vibrant colors we're all after.
Just as important is the file format. The industry standard here is a PNG file with a transparent background. A JPEG file, for example, will always have a solid background (usually white), which means you’ll get a clunky white box printed around your design. A transparent PNG ensures that only your actual artwork gets printed, giving it a clean, professional look that melts right into the shirt.
What to Do When Your File Isn't Perfect
So, what if your logo is a fuzzy JPEG you downloaded from your own website? Don't sweat it—this is a super common problem. This is where a little bit of outside help can be a lifesaver.
A lot of creators and small business owners aren't graphic designers, and that's totally fine. If you have a low-resolution file, a vectorization service can convert it into a scalable, high-quality format. This process basically redraws your artwork using mathematical lines instead of pixels, meaning it can be resized to any dimension without losing an ounce of quality. Your idea goes from a blurry concept to a perfectly print-ready file. For a deeper dive into how designs translate across different materials, checking out a guide to custom fabric printing services can be really helpful.
Optimizing Your Designs for Gang Sheets
When you're prepping multiple designs, thinking ahead can save you a good chunk of money. The goal is to maximize your print area, and this starts with having clean, ready-to-upload files for each and every piece of artwork. Before you even think about opening our Auto-build gang sheet builder, make sure each design—whether it’s a chest logo, a sleeve graphic, or a neck tag—is its own separate, high-resolution PNG file.
Pro Tip: When you save your files, name them something useful. Instead of "logo_final_v2.png," try something like "Front-Logo-4inch.png" or "Sleeve-Design-Red.png." This simple habit makes organizing your files in the gang sheet builder way faster and helps you avoid costly mix-ups.
This level of organization makes building your gang sheet a breeze. You can quickly upload your perfectly prepped files and let the builder arrange them for maximum efficiency, knowing that each one will print exactly as you intended. To see how others are crafting their prints, you can get inspired by these custom heat transfer designs. With properly prepared files, you're not just hoping for a good result; you're ensuring it.
Once your artwork is print-ready, it's time to order your transfers. But this isn't just another step in the process; it's a strategic move that has a huge impact on your bottom line. Ordering smart is what separates the hobbyists from the profitable businesses in the custom printing tee shirts game.
The secret to keeping production costs low is maximizing every single square inch of the film you pay for. And the best tool for that job is, without a doubt, the gang sheet.
The Power of the Gang Sheet
So, what is a gang sheet? Think of it as one large DTF transfer sheet that holds multiple designs—often a mix of different ones—all arranged together. Instead of ordering each design separately and paying individual prices, you load them all onto one sheet and just pay for the total film area. This simple change in approach can slash your cost per print.
Let's walk through a real-world scenario. Imagine you’re stocking up for a local market. You need:
- 25 of your main chest logos for a new shirt design
- 25 smaller logos for the sleeves
- 25 branded neck tags to give your apparel that pro-level finish
Ordering these as three separate items would be slow and expensive.
This is exactly where a gang sheet saves the day. You can place all 75 of those individual designs onto a single sheet. By consolidating them, you could easily cut your transfer costs by 50% or more compared to buying them one by one. Our Auto-build gang sheet builder makes this incredibly easy and cost-effective. That's cash you can put back into marketing, higher-quality blank shirts, or just keep as profit.
By treating your transfer film like valuable real estate, you shift from simply buying supplies to making a calculated investment in your inventory. Every dollar saved on production is a dollar earned when you sell the final product.
This strategy changes everything. Ordering is no longer just a necessary expense; it becomes a powerful way to build a more profitable and scalable apparel business.
Choosing Your Best DTF Ordering Method
To help you decide which approach is right for your project, here’s a quick breakdown of the options we offer at Lion DTF.
| Ordering Method | Best For | Key Benefit | Lion DTF Service |
|---|---|---|---|
| Gang Sheet Builder | Print shops, brands, and makers needing multiple designs or high quantities. | Maximum cost-effectiveness by minimizing wasted film. | Auto-Build Gang Sheet |
| Ready-to-Press Designs | Quick one-off projects, testing new concepts, or personal use. | Convenience and speed. No file prep needed. | Pre-made DTF Designs |
| By Size | Simple orders for a single design at a specific dimension (e.g., 25 chest logos). | Straightforward ordering when you don't need to mix designs. | Order by Size |
While ordering by size or using pre-made designs has its place, the gang sheet builder is the undisputed champion for anyone serious about profitability and efficiency.
Using an Auto-Build Gang Sheet Builder
Manually arranging dozens of different designs to fit perfectly on a sheet sounds like a tedious puzzle. And honestly, it is. That's why we built our Auto-build gang sheet builder—it does all the heavy lifting for you, ensuring you get the most value from every order.
The process couldn't be simpler:
- Upload Your Files: Just add all your print-ready PNG files. That includes the chest logos, sleeve hits, and neck tags from our example.
- Enter Quantities: Tell the builder how many of each design you need. In our scenario, you'd type "25" for each of the three files.
- Let the Builder Work: In seconds, the software intelligently arranges everything, fitting your designs together like a game of Tetris to minimize wasted space.
This tool completely removes the guesswork and human error from creating an efficient layout. It makes sure you're not paying for empty film, which is the whole point. For a deeper dive into this tool, you can learn more about our DTF gang sheet builder and see just how much it can streamline your workflow.
Beyond Production Cost Savings
A well-packed gang sheet does more than just save you money on transfers; it helps you build a smarter business. When your cost-per-print is lower, you gain a serious competitive edge. You can offer better prices, run promotions without killing your margins, or just enjoy a healthier profit on every sale.
This efficiency also lets you test new designs without a big financial risk. Got a new idea you're not sure will sell? Just add a few copies to a gang sheet you're already ordering for a proven bestseller. It's a low-stakes way to see what your customers respond to before you commit to a big batch.
Of course, great products are only half the battle. To really grow your business, you also need to master the art of taking pictures of clothes to sell online. Combining cost-effective production with killer product photography is the winning formula for any e-commerce apparel brand.
Your Step-by-Step Heat Pressing Guide
Alright, you’ve got your DTF transfers, and now it’s time for the most satisfying part: turning that print into a professional, wearable product. This is where the magic happens, but it’s less about sorcery and more about precision.
Nailing the heat pressing stage is what ensures your custom printed tee shirts have the durability, soft feel, and vibrant look you’re aiming for. It all comes down to three things: temperature, time, and pressure. Get this trio right, and you’re golden. Even a small mistake can lead to poor adhesion or a scorched shirt, so consistency is your best friend here.
Setting Up Your Heat Press For Success
Before you even think about putting a transfer on a shirt, your press needs to be properly calibrated.
For most cotton and cotton/poly blends, the sweet spot for temperature is somewhere between 240-280°F. Always let your press preheat completely and stabilize at that target temp before you start your run.
Next, set your pressure to medium-firm. So, what does that feel like? When you lock the press down, you should feel solid resistance, but you shouldn't have to wrestle it closed. If it clamps with zero effort, the pressure is too low. If you have to put your whole body into it, it's way too high.
Once your temp and pressure are dialed in, set your timer for 7-10 seconds. That’s the standard duration for the first press.
The Perfect Pressing Workflow
With your settings locked in, it’s all about creating a simple, repeatable routine for every single shirt. This helps eliminate mistakes and guarantees a high-quality application every time.
- The Pre-Press is Non-Negotiable. Always start by pressing the empty shirt for 5-7 seconds. This is a critical first step. It zaps any lingering moisture and flattens out wrinkles, creating a perfect canvas for the transfer.
- Position and Press. Carefully place your DTF transfer onto the shirt, design side up. Make sure it’s centered and straight. Once you’re happy with the placement, cover it with a Teflon sheet or parchment paper and press for the full 10 seconds.
- Master the Hot Peel. As soon as the timer goes off, open the press. While the shirt is still hot on the platen, grab a corner of the film and peel it back in one smooth, confident motion. This "hot-peel" technique is what gives the print that signature soft, matte finish we’re all after.
Pro Tip: When you peel, pull the film low and parallel to the shirt instead of yanking it straight up. This little trick dramatically reduces the chance of lifting any ink and ensures a super clean release.
The Final Press For Ultimate Durability
Your design is on the shirt, but don't stop there. This last step is what locks it in for good, helping the ink fully bond with the fabric so it can handle dozens of washes.
Just cover the exposed design with a sheet of parchment paper and press it again for another 5-7 seconds. This quick second press melts the ink just enough to push it deeper into the fabric, which improves both the feel and the longevity of the print. For a deeper dive into the ideal settings for different materials, check out our complete guide to heat press settings for DTF.
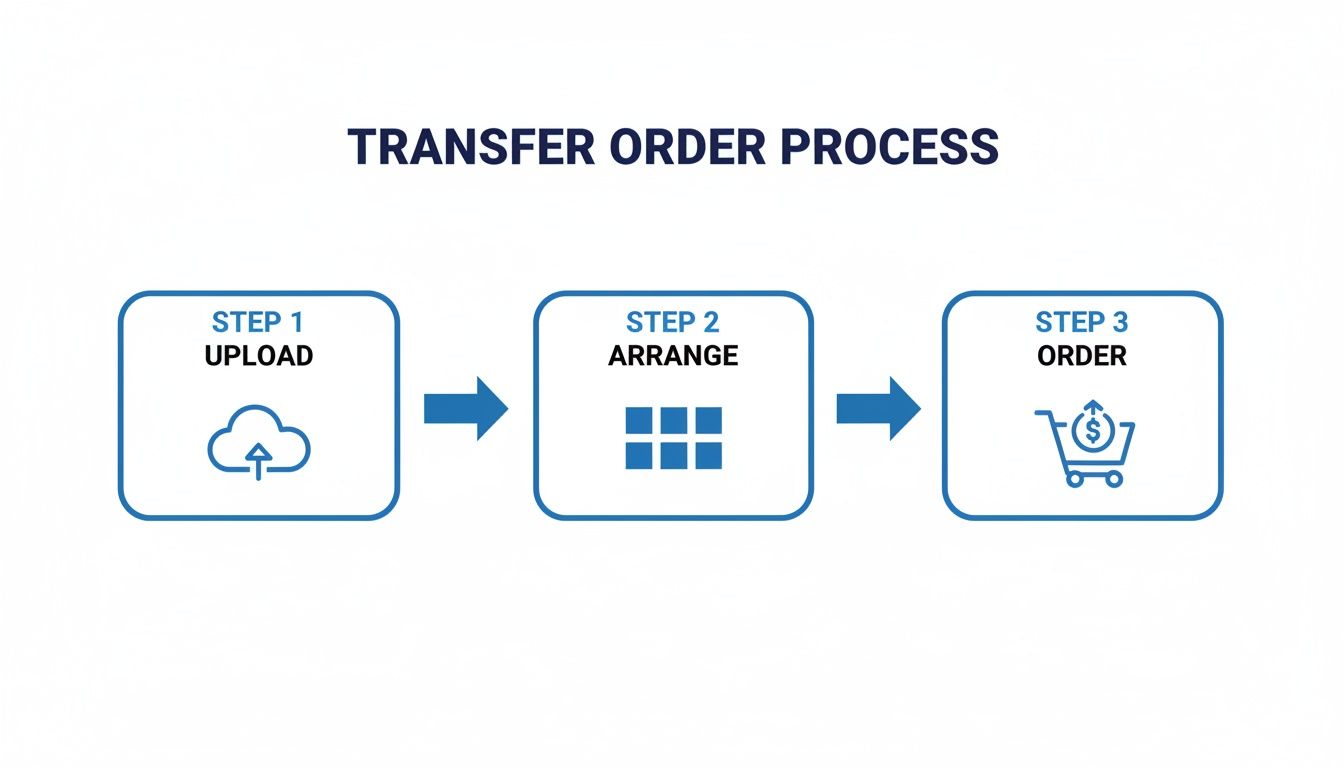
The process for ordering your transfers is just as straightforward. This diagram shows the simple three-step flow: upload your files, arrange them on the sheet, and place your order.
Troubleshooting Common T-Shirt Pressing Issues
Even when you follow every step to the letter, the world of heat pressing can throw you a curveball. There’s nothing more frustrating than pulling a shirt off the press only to see a design that’s peeling, looks faded, or just doesn't feel right.
The good news? Nearly every problem has a simple, logical solution, and it almost always comes back to the core trio: time, temperature, and pressure. Think of this as your quick-reference guide for diagnosing and fixing the most common issues you'll run into. Getting these details right will save you a ton of wasted transfers and blank tees.
Why Isn't My Transfer Sticking Properly?
This is hands-down the most frequent frustration, but the fix is almost always straightforward. If your transfer is peeling up with the film or just won’t grab onto the fabric, it's almost certainly one of two things.
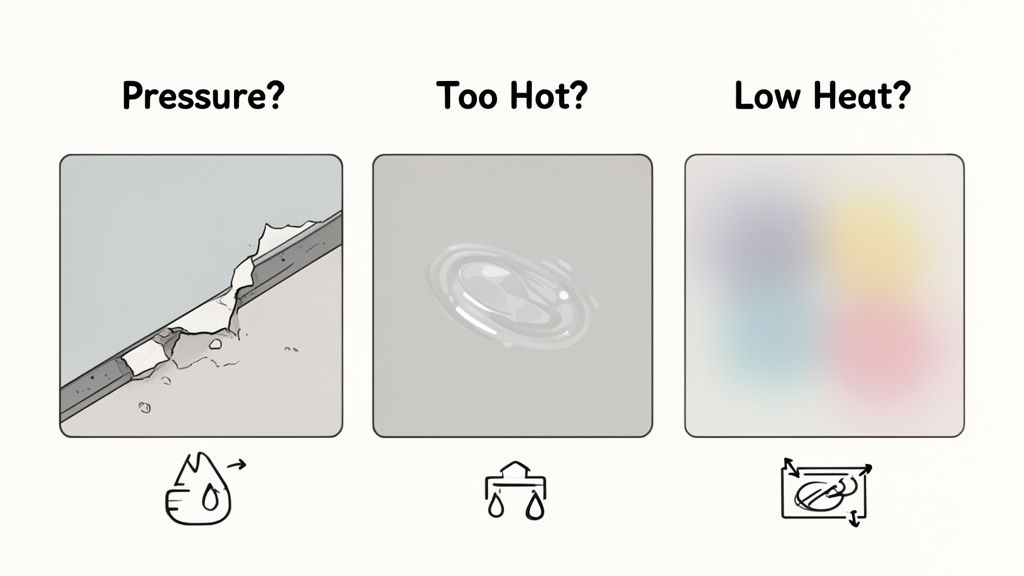
First, check your pressure. Not enough pressure is the number one cause of adhesion failure. The transfer's adhesive needs to be physically pushed into the fabric's fibers, and that just can’t happen if the press is too loose. It should take a firm, intentional pull to lock down that heat press handle.
The second likely culprit is temperature. If your heat press isn't hot enough, the adhesive on the back of the transfer simply won't activate correctly. Double-check that your press is set to the recommended 240-280°F and that it’s had plenty of time to fully preheat. Keep in mind that the temperature readout on a machine can sometimes be off, especially on older or budget models.
Correcting Faded or Scorched Designs
On the flip side, you might press a shirt and find the colors look dull, faded, or even a little burnt. This is a classic sign that your heat press is running too hot. Too much heat can scorch both the fabric and the pigments in the DTF ink, leaving you with a disappointing, washed-out look.
To fix this, just dial back your press temperature by 5-10 degrees at a time until you find that sweet spot. You're aiming for just enough heat to activate the adhesive without frying the ink or the garment. This is especially critical when you're working with heat-sensitive fabrics like polyester or certain blends.
Key Insight: Consistent results come from a consistent process. Always pre-press your garment to remove moisture and wrinkles, then do a final 5-second press with parchment paper after peeling to fully cure the design. These two simple habits prevent a massive number of common pressing errors.
Solving Inconsistent Application and Peeling Edges
Ever press a design where the center looks perfect but the edges are lifting? That points directly to uneven pressure distribution across your heat press platen. This can happen for a few different reasons.
- Obstructions: Things like seams, collars, zippers, or pocket edges can stop the press from closing evenly, creating low-pressure spots. Use a pressing pillow to elevate the print area so these obstructions don't get in the way.
- Worn Out Platen: Over time, the lower platen on a heat press can get warped or compressed, which leads to inconsistent pressure.
- Improper Placement: Make sure your garment is laid out completely flat and centered on the platen for every single press.
Another thing that can cause inconsistent results is just a chaotic workspace. When you're rushing to prep multiple designs, it's easy to make mistakes. Using our Auto-build gang sheet builder helps streamline your prep by organizing all your designs efficiently on one sheet. This makes it way easier to manage your workflow and focus on getting a perfect press every time. By eliminating that frantic search for individual transfers, you can maintain the consistency needed for truly professional-quality custom printing tee shirts.
Got Questions About DTF Transfers? We've Got Answers.
Jumping into the world of custom apparel always brings up a few questions. To help you get clear, practical answers, we’ve put together some of the most common things people ask us about making custom tees with DTF transfers. This is all about giving you the confidence to get your projects done right.
How Do I Make Sure My Colors Look The Same on The Shirt as They Do on My Screen?
This is a big one, and for good reason. What you see on a glowing screen (RGB) will almost always look a little different than ink on a shirt. It's just the nature of the two mediums.
But here's the good news: at Lion DTF, we've invested heavily in color-matching technology to get our prints incredibly close to your original file.
For the best results, always design your artwork in an RGB color profile and save it as a high-resolution 300 DPI PNG file. If you’re working on a project for a corporate brand that requires a specific Pantone color, just reach out to our support team. We can walk you through the best way to get the closest possible match for those critical jobs.
What's The Real Benefit of The Auto-Build Gang Sheet Builder?
In a word? Massive cost savings. Instead of paying a separate price for every single design you need—the front graphic, the sleeve hit, the neck tag—you only pay for the total area of the film. For anyone running a business, this is a total game-changer for profitability.
Our Auto-build gang sheet builder takes it a step further by automatically and intelligently packing all your different designs together. It minimizes wasted space on the film, which directly slashes your cost-per-print. It’s hands-down the smartest, most efficient way to order multiple designs at once.
By packing your designs tightly onto a single sheet, the builder makes sure you get the maximum value from every square inch you buy. This is absolutely crucial for protecting your profit margins on every shirt you sell.
Can I Just Use a Home Iron to Apply Lion DTF Transfers?
We get this question a lot, but we have to be blunt: please don't. We strongly advise against using a home iron for applying DTF transfers. For our transfers to achieve their incredible durability and survive 100+ washes, they need a very specific combination of precise heat and evenly distributed pressure to cure properly.
A home iron just can't deliver that. It creates hot spots, uneven pressure, and inconsistent temperatures. Using one will almost guarantee a failed application, leading to peeling, cracking, and a print that just won't last. A quality heat press isn't just a suggestion; it's an essential tool for creating professional custom printing tee shirts.
What Kinds of Fabrics Can I Press These DTF Transfers Onto?
One of the best things about DTF is its incredible versatility. These transfers work beautifully on just about any fabric you'd want to print on.
This includes all the heavy hitters:
- 100% Cotton: The classic choice for most t-shirts.
- 100% Polyester: Perfect for performance wear and athletic gear.
- Cotton/Poly Blends: The go-to for super-soft tees, hoodies, and sweatshirts.
But it doesn't stop there. DTF also works great on materials like canvas for tote bags or denim for jackets. Unlike a lot of other printing methods, DTF applies perfectly to both light and dark garments without any special pre-treatment, making it a flexible solution for pretty much any apparel project you can dream up.
Ready to create some stunning, professional-quality custom apparel? At Lion DTF Transfers, we provide the tools, the transfers, and the support to make it happen. Check out our Auto-builder, browse ready-to-press designs, and see how easy it is to bring your vision to life.