


Custom DTF transfers are the modern secret weapon for creating incredible, full-color designs that you can heat press onto almost any fabric. Think of them as a professional-grade, super-durable "sticker for fabric" that can handle anything from a simple logo to a complex, photo-realistic image—all without the crazy setup costs of old-school methods.
Why Everyone Is Talking About Custom DTF Transfers
If you've spent any time in the custom apparel world, you’ve definitely heard the buzz around Direct-to-Film, or DTF. This technology has quickly become a favorite for everyone from small Etsy shop owners to big-name brands, and for good reason. It perfectly bridges the gap between quality, versatility, and cost—something other printing methods have always struggled with.
Unlike screen printing, which demands separate screens for every single color and comes with hefty setup fees, DTF lets you print unlimited colors in one go. That means a complex, super-detailed graphic is just as easy to produce as a simple one-color logo.
The Power of On-Demand Printing
One of the biggest wins with custom dtf transfers is that they are completely on-demand. In the past, creating custom apparel meant you had to commit to huge, risky inventory orders. If a design didn't take off, you were stuck with boxes of unsold shirts and a major hit to your wallet. DTF completely flips that model on its head.
This approach gives creators massive flexibility, allowing you to:
- Test New Designs: Got a new t-shirt idea? Order just a handful of transfers to see if it's a hit. If it sells out, you can easily order more.
- Reduce Waste and Risk: You only print what you sell. This completely removes the financial headache of unsold inventory.
- Fulfill Orders Fast: With no long setup process, you can press a shirt and have it out the door in record time.
That kind of agility is an absolute game-changer for small businesses and e-commerce stores trying to stay competitive in a fast-moving market.
Unmatched Versatility and Detail
DTF isn't just flexible from a business standpoint; it's also incredibly versatile in what it can do. While methods like Direct-to-Garment (DTG) printing are often stuck working only with 100% cotton, DTF transfers stick beautifully to a huge range of materials.
This technology works seamlessly on cotton, polyester, nylon, leather, and blends, opening up a world of creative possibilities far beyond just t-shirts. You can decorate hoodies, hats, bags, and even jackets with the same vibrant, high-quality finish.
The growth here is impossible to ignore. Custom DTF transfers popped up in the mid-2010s and quickly became a massive part of the global direct-to-film printing market, which was valued at around USD 2.7 billion in 2024. This boom is all thanks to its ability to deliver full-color, on-demand prints without the high barrier to entry, making it perfect for today's e-commerce world. You can learn more about the growth of the direct-to-film printing market and see just how big this trend has become.
On top of all that, getting started has never been easier or cheaper, especially with tools designed to give you the most bang for your buck. For instance, our Auto-build gang sheet builder lets you pack multiple designs onto a single sheet for maximum cost effectiveness. This kind of efficiency makes professional-quality custom apparel accessible to literally everyone.
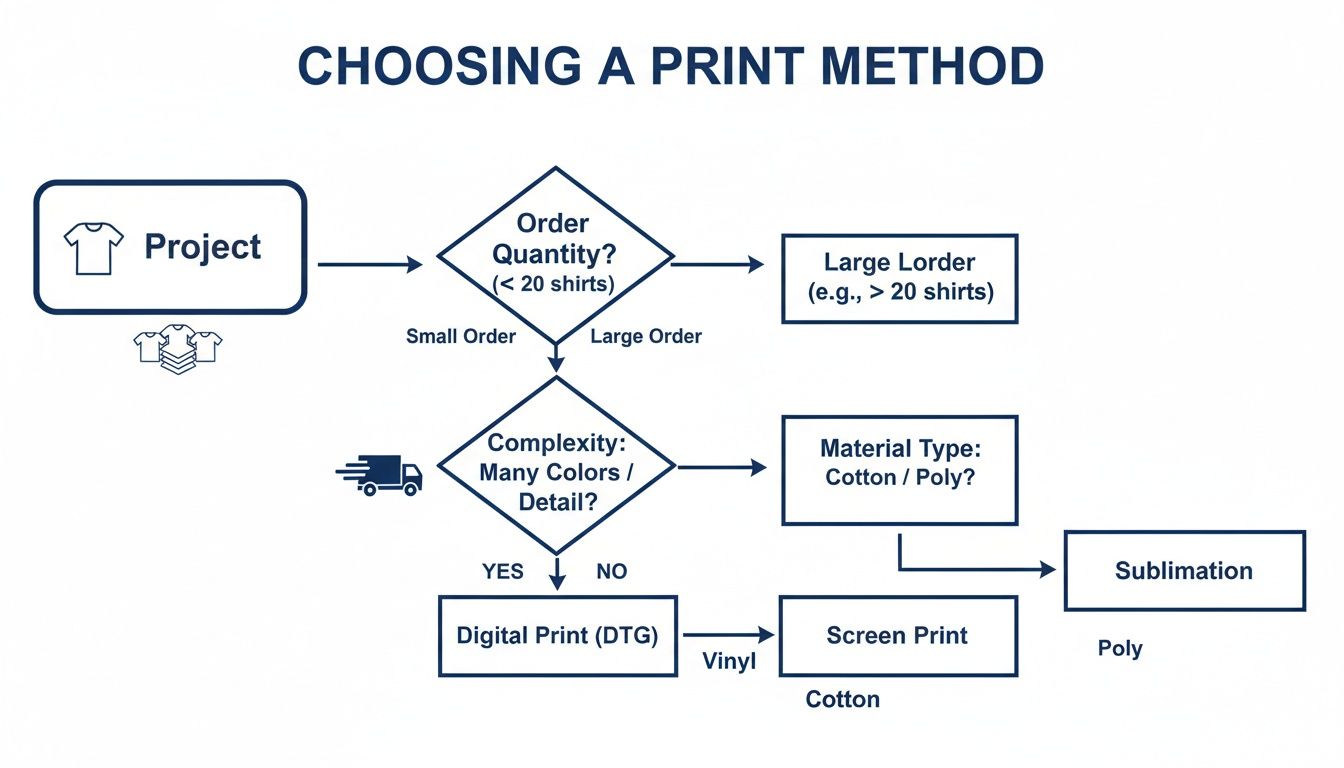
How DTF Stacks Up Against Other Print Methods
Choosing the right way to decorate a shirt can feel like you're navigating a maze of acronyms and confusing technical jargon. When you invest in custom DTF transfers, you're picking a method that pulls the best features from its competitors while dodging many of their biggest headaches.
Let’s break down how DTF actually compares to the other big players in the custom apparel game.
DTF vs Screen Printing
For decades, screen printing has been the undisputed workhorse of the industry, and for good reason. It’s fantastic for cranking out huge quantities of simple, limited-color designs at a really low cost per shirt. Think of a 5,000-piece order for a charity 5K with a one-color logo—screen printing is the clear champion in that arena.
But its strength in bulk orders is also its biggest weakness. Every single color in a design needs its own meticulously prepared screen. That means high setup costs and long lead times, making it completely impractical for small runs or designs with lots of colors, gradients, or photographic details.
This is exactly where DTF shines. With DTF, there are no color limits and no setup fees tied to screens. Printing a single, photo-realistic design is just as easy as printing 100 simple logos. For small businesses, brands testing out new merch, or anyone needing complex graphics in smaller batches, DTF is the obvious winner.
DTF vs Heat Transfer Vinyl (HTV)
Heat Transfer Vinyl (HTV) is a go-to for hobbyists and for creating simple, one-color text or basic shapes. The process involves cutting a design from a sheet of colored vinyl and then "weeding" away all the excess material by hand before pressing it. It’s great for personalizing a single jersey with a name and number, but it quickly becomes a huge bottleneck for anything more complex.
The weeding process is notoriously slow and tedious, especially for detailed designs. And while you can layer multiple colors of vinyl, it adds a ton of labor, creates a bulky feel, and opens the door for alignment issues.
DTF transfers completely eliminate the weeding process. The design is printed in full color onto the film, and that's it—no picking, no peeling away tiny pieces. You simply press the entire ready-to-go transfer, saving hours of manual labor and ensuring perfect, multi-color results every single time.
DTF vs Direct-to-Garment (DTG)
Direct-to-Garment (DTG) printing is probably the closest cousin to DTF. It works a lot like a paper inkjet printer, but for fabric, applying ink directly onto the shirt. DTG is incredible for producing soft, breathable, full-color prints, but it's really only at its best on 100% cotton garments.
Its limitations are pretty significant, though. DTG really struggles with polyester and other synthetic fabrics because the inks are designed to bond with natural fibers. Printing on dark garments also requires a chemical pre-treatment step, which adds extra time, cost, and complexity to the workflow. You can dive deeper into this topic in our comparison of DTF vs DTG printing.
DTF, on the other hand, is a universal soldier. Since the design is printed on a film and then applied with a heat-activated adhesive, it works beautifully on a massive range of materials:
- 100% Cotton and Ringspun Cotton
- 100% Polyester and Performance Wear
- Cotton/Poly Blends (50/50, Triblends)
- Nylon and even some hard surfaces
This incredible fabric versatility gives DTF a huge advantage, letting you decorate everything from standard tees to team jerseys and corporate outerwear with one simple, reliable process.
To make things even clearer, here’s a quick side-by-side look at how these methods compare on the factors that matter most.
DTF Transfers vs Other Methods At a Glance
| Feature | Custom DTF Transfers | Screen Printing | Heat Transfer Vinyl (HTV) | Direct-to-Garment (DTG) |
|---|---|---|---|---|
| Best For | Full-color, detailed designs on any fabric, any quantity. | High-volume orders with simple, limited-color graphics. | One-off names, numbers, and simple text/shapes. | Soft, full-color prints on 100% cotton garments. |
| Color Limits | Unlimited colors, gradients, and photos at no extra cost. | Limited; each color adds significant cost and setup time. | Limited to available vinyl colors; layering is difficult. | Unlimited colors, great for photos. |
| Setup Costs | None. Print one or one thousand with no setup fees. | High. Screens must be created for each color. | Low. Just the cost of the vinyl material. | Minimal. Requires pre-treatment for dark garments. |
| Feel on Shirt | Soft, lightweight, and flexible with great stretch. | Can be heavy, especially with multiple colors. | Can feel thick and stiff, especially when layered. | Very soft and breathable as ink soaks into fibers. |
| Fabric Versatility | Excellent. Works on cotton, polyester, blends, nylon & more. | Good. Best on cotton but works on blends. | Good. Different vinyls for different fabrics exist. | Poor. Primarily for 100% cotton; struggles with poly. |
| Durability | Excellent. Rated for 50+ washes without cracking or peeling. | Excellent. Very durable when cured properly. | Good, but can crack or peel over time, especially if layered. | Good, but can fade over time with washing. |
As you can see, each method has its place. But for all-around versatility, vibrant color, and ease of use across a huge range of fabrics and order sizes, DTF is hard to beat. It truly offers a modern solution that fits the needs of today's custom apparel creators.
How to Order and Maximize Your Print Value
So, you're sold on the power of custom DTF transfers. Now what? The next step is figuring out how to order them in a way that gets you the most bang for your buck without sacrificing an ounce of quality. Getting this part right is the difference between good results and incredible results, all while keeping your costs lean.
It all starts with your artwork. High-quality prints come from high-quality files, period. For the sharpest, most vibrant results, your designs need to be in a format that holds onto every last detail, like a PNG, AI, or PDF.
Most importantly, your file must have a transparent background. This is a non-negotiable. Unlike printing on paper, any white you see in your design file will be printed as white ink on the transfer. If you only want your logo or graphic to show up on the shirt, everything else around it has to be transparent.
The Secret to Cost-Effective Printing: The Gang Sheet
Want to know the single best way to slash your per-print cost? Use a gang sheet.
Think of a gang sheet as one big canvas that you can fill with as many designs as you can fit. Instead of ordering ten small logo transfers individually, you can arrange all ten—plus a few neck tags and maybe some sleeve hits—onto one sheet.
This is a total game-changer for efficiency. You pay for the sheet, not for each individual design on it. This simple move can drastically cut your costs, especially when you're printing smaller graphics. We break down the whole strategy in our guide on how to use DTF gang sheets to maximize profitability.
The magic of the gang sheet is that it eliminates wasted space. Every square inch of the film you pay for can be filled with your artwork, turning what would have been empty margins into valuable, press-ready designs.
To make this dead simple, we built an Auto-build gang sheet builder to do the heavy lifting for you. Just upload your different design files, and our user-friendly tool automatically arranges them in the most cost-effective layout possible. No more manual tetris—just less waste and more prints for your money.
Our tool's smart nesting algorithm makes sure every bit of space is used, which translates directly to a lower cost-per-design for you.
Preparing Your Artwork for Flawless Results
Besides transparency, the resolution of your file is mission-critical. A low-resolution image will look pixelated and blurry when it’s printed. No amount of printing magic can fix a fuzzy source file.
To avoid this, stick to these best practices:
- Resolution: Always aim for 300 DPI (dots per inch). This is the gold standard for professional printing and ensures your designs come out sharp and clean.
- File Type: Use PNG files for any design that needs a transparent background. For vector art, AI (Adobe Illustrator) or PDF files are perfect because you can scale them to any size without losing quality.
- Color Mode: Make sure your files are set to CMYK color mode. This is the mode used for printing, whereas RGB is for digital screens. Submitting an RGB file can cause unexpected color shifts in the final print.
For anyone running an on-demand business, the economics here are tough to beat, especially for smaller, multi-color jobs where traditional methods just aren't cost-effective. The beauty of DTF is that it dramatically cuts down on the setup costs and inventory risk that come with screen printing. This is a huge advantage for e-commerce brands and promo companies that frequently handle orders under 100 units.
This structure allows shops to turn a profit on small-batch orders that would otherwise be impossible. If you're looking for ways to fulfill orders, exploring print-on-demand platforms can also streamline your operations and add value.
By mastering your artwork prep and using tools like our Auto-build gang sheet builder, you'll be set up to order custom DTF transfers that are both stunningly high-quality and surprisingly affordable.
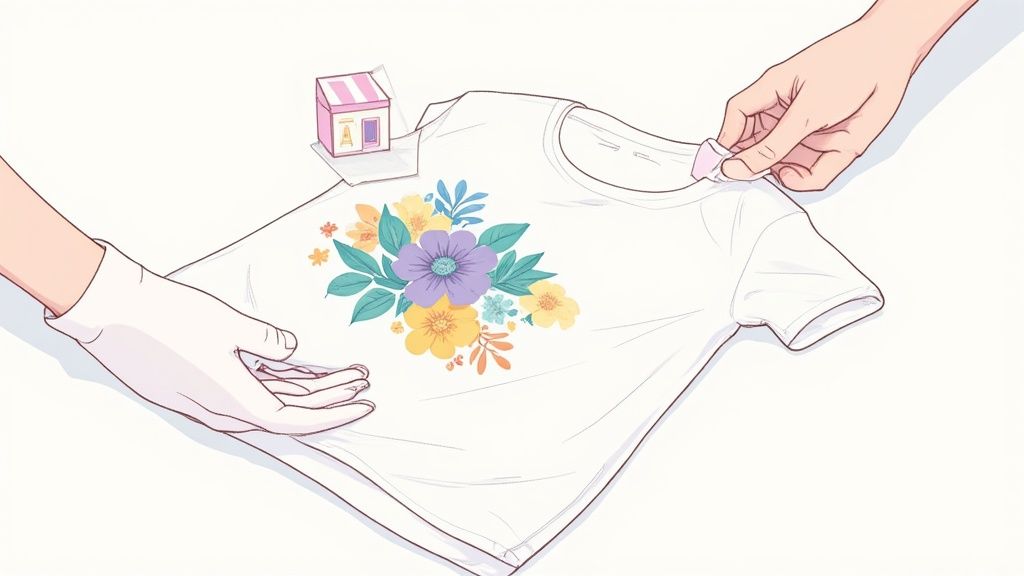
Applying Your DTF Transfers for Professional Results

You’ve nailed the design, and your vibrant, ready-to-press custom dtf transfers have arrived. Now for the best part: watching your creation come to life on the garment. Getting this step right is everything if you want a professional, durable finish that looks like it belongs on a retail rack.
Think of it like baking a cake. You can have the best ingredients in the world, but if your oven is too hot or you pull it out too soon, you know what happens. The same rule applies here—the right mix of temperature, pressure, and time is the secret recipe for a perfect press.
The Crucial Pre-Press Step
Before you even think about laying down your transfer, you have to prep the garment. Every fabric, especially cotton, holds a surprising amount of moisture and has sneaky wrinkles that can totally ruin your application.
A quick pre-press solves both problems in one shot. Just place your shirt on the heat press and press it for 5-7 seconds at your target temperature. This little step steams out the moisture and gives you a perfectly flat, smooth canvas for your design. Skip it, and you’re asking for bad adhesion and an ugly, bubbly finish.
The Main Press and Placement
Alright, your shirt is prepped and ready. Time to position your transfer. Carefully place the DTF film on the garment, making sure the glossy side is facing up. If you're a stickler for perfection, grab a ruler or a T-square to get it perfectly centered and straight.
Once you’re happy with the placement, you’re ready for the main event. While settings can vary a bit depending on the fabric, here’s a solid starting point for most cotton and poly-blends:
- Temperature: 240-280°F
- Time: 10 seconds
- Pressure: Medium to firm
Always cover the transfer with a Teflon sheet or some parchment paper. This protects both the transfer and your heat press platen. After the timer goes off, lift the handle and move the garment to a cool, flat surface to rest. For a deeper dive into settings for different materials, check out our in-depth guide to heat press settings for DTF.
The Peel and Final Press
This next part is where the magic really happens, but it demands a little patience. DTF transfers are either hot peel or cold peel. Just like they sound, hot peel films can be removed right away, but cold peel films need to cool down completely to room temperature before you touch them.
Trying to rip a cold peel transfer off while it's still warm is probably the #1 mistake we see. It almost always results in the design lifting right off the shirt. Seriously, wait until the transfer is cool to the touch before peeling the film.
When it's ready, peel the film back slowly and smoothly at a low angle. If you see any part of the design starting to lift, stop right there. You can just put it back on the press for another 5-7 seconds to help the adhesive fully bond.
After you've successfully peeled the film, your design is on the shirt! But we're not quite done. For maximum durability, do one last press. Place your parchment paper or Teflon sheet back over the design and press it for another 5-10 seconds. This final step locks the ink into the fabric fibers, gives it a soft, matte finish, and makes sure it will survive dozens of washes. Follow these steps, and you'll get flawless results every single time.
Understanding the Technology Behind the Transfer
To really get why custom DTF transfers work so well, it helps to look under the hood. It’s not just a single piece of material; it’s a smart system of layers working together to deliver the durability and incredible color that makes this method a game-changer. Think of it as a perfect harmony between the film, ink, and adhesive.
It's a bit like building a high-performance sandwich. Every layer has a critical job, and they all need to work together perfectly. If you remove one of the key ingredients, the whole thing falls apart.
The Key Ingredients of a DTF Transfer
It all starts with a special PET (polyethylene terephthalate) film. This isn't just some random plastic sheet. It’s engineered with a special coating that grabs onto the ink just long enough but is designed to let go cleanly when you press it onto the garment. This film is the foundation, carrying your design from the printer all the way to the shirt.
Next up is the ink. DTF printers use vibrant, water-based pigment inks in a CMYK+White setup. That white ink layer is absolutely essential. It goes down first, creating a solid underbase for the colors. This is the secret to getting designs that stay bright and opaque, even on black or dark-colored fabrics. Without it, your colors would just sink into the fabric and look dull.
The final piece of the puzzle is the hot-melt adhesive powder. After the design is printed, this super-fine powder is spread evenly over the wet ink. It cleverly sticks only to the printed areas. When heated, it melts and becomes the powerful bonding agent—the "glue"—that permanently fuses your design to the fabric fibers during the heat press.
Cold Peel vs Hot Peel Films
Not all PET films are made the same, and the biggest difference you'll run into is between cold peel and hot peel types.
A cold peel film means you have to let it cool down completely after pressing before you pull the backing off. This gives the adhesive time to fully set and bond with the fabric, which usually results in a very smooth, matte finish that lots of people love.
On the other hand, hot peel films are made to be peeled away almost immediately after the heat press opens up. This can give the transfer a slightly glossier finish and, more importantly, can seriously speed up your production workflow. For shops cranking out high volumes, that time saving is huge.
The choice between hot and cold peel often comes down to your shop's workflow and the final look you're going for. Both produce excellent, long-lasting results when you follow the instructions.
The DTF world is always evolving. Recent market reports show that cold peel films dominated revenues in 2024, mostly because they're so user-friendly and work well with a huge range of fabrics. This makes them a go-to for smaller shops producing low-volume custom dtf transfers. You can discover more insights about the direct-to-film printing market to see how these trends are shaping the industry.
Regardless of which film type you prefer, our Auto-build gang sheet builder makes the setup process a breeze, ensuring you get the most cost-effective layouts every time.
Got Questions About Custom DTF Transfers? We've Got Answers.
Jumping into the world of custom apparel always brings up a few questions. As you get ready to kick off your next project with custom DTF transfers, you want to be sure you have all the facts straight. We've gathered up the most common questions we hear and laid out clear, simple answers to help you move forward with total confidence.
Think of this as your go-to guide, designed to clear up any confusion and get you that much closer to creating some seriously professional-looking gear.
What Kinds of Fabric Can I Press These On?
This is where DTF really shines and leaves other methods in the dust. Its versatility is probably its biggest superpower, letting you print on a massive range of materials that other methods just can't touch. You're definitely not stuck with just cotton t-shirts here.
DTF works like a dream on all the usual suspects, including:
- Cotton and Ringspun Cotton: The go-to classic for tees and everyday wear.
- Polyester: Absolutely perfect for athletic gear, team jerseys, and performance wear.
- 50/50 and Tri-Blends: The secret sauce for those soft, modern-fit hoodies and t-shirts everyone loves.
- Nylon and Leather: A great option for jackets, bags, and other unique items that need a custom touch.
This kind of flexibility gives you the creative freedom to take your product line way beyond basic apparel. It’s a huge leg up on methods like Direct-to-Garment (DTG), which is pretty much limited to 100% cotton.
How Well Do DTF Transfers Hold Up?
Durability is a major deal for anyone creating or selling custom apparel, and for good reason. You need designs that last. When applied correctly with a decent heat press, a high-quality DTF transfer is built to handle wear, tear, and countless trips through the laundry.
A properly cured DTF transfer can easily survive 50-100 washes—often outlasting the garment itself—without cracking, peeling, or fading away. The ink and adhesive create a strong yet flexible bond with the fabric's fibers, making sure the design stretches and moves right along with the garment.
Pro Tip: For the best, longest-lasting results, always wash the garment inside out in cool water and tumble dry on low heat. This simple routine makes a huge difference in keeping your prints looking sharp for years.
Taking these small care steps goes a long way in protecting the quality and color of your custom designs, which keeps your investment safe and your customers happy.
Do I Need a Special Kind of Heat Press?
This question comes up all the time, but the answer is refreshingly simple: nope. You don’t need some special, proprietary heat press to apply custom dtf transfers. Any standard, good-quality heat press will do the job perfectly.
Whether you're working with a clamshell model or a swing-away press, you’re all set. The important thing isn't the type of press, but its ability to deliver on two critical points:
- Consistent, even heat across the entire heating element.
- Firm, consistent pressure to make sure the adhesive bonds correctly to the fabric.
We strongly recommend you don't even think about using a home iron. An iron just can't deliver the steady temperature and heavy pressure required for a professional, durable application. Trying to use one will almost always lead to peeling transfers and a whole lot of frustration.
Is There a Minimum Order?
This is one of the best things about working with DTF and a huge reason it's a favorite for small businesses, startups, and e-commerce brands. For the most part, there are no high minimum order quantities (MOQs) to worry about.
This incredibly low barrier to entry is a total game-changer. You can order just a single transfer to test a new design or make a one-of-a-kind gift. Or, you can order a single gang sheet, which lets you pack multiple different designs together to get the most bang for your buck.
This on-demand flexibility makes DTF perfect for:
- Startups wanting to test product ideas without a massive upfront cost.
- Sample runs to check colors and sizing before committing to a big production run.
- One-off custom jobs for events, teams, or just for fun.
Being able to order exactly what you need, right when you need it, means you'll never get stuck with a pile of unsold inventory again. To make it even more efficient, our Auto-build gang sheet builder helps you squeeze as many designs as possible onto a single sheet, slashing your per-design cost and maximizing every dollar.
Ready to create stunning, durable apparel with ease? The team at Lion DTF Transfers is here to make it happen with vibrant, hot-peel transfers that ship in just 1–2 business days. Build your custom gang sheet and experience professional quality today!