


Think of transfer iron-on sheets as a way to give your fabric a high-tech, permanent tattoo. They're the bridge that takes a design from your computer screen and bonds it directly onto a piece of apparel, all with a little bit of specialized ink, adhesive, and heat. This simple but powerful method has made custom clothing a reality for just about everyone.
How Do Transfer Iron On Sheets Actually Work?
So, how does a digital idea become a tangible, wearable piece of art? It’s a pretty clever process.
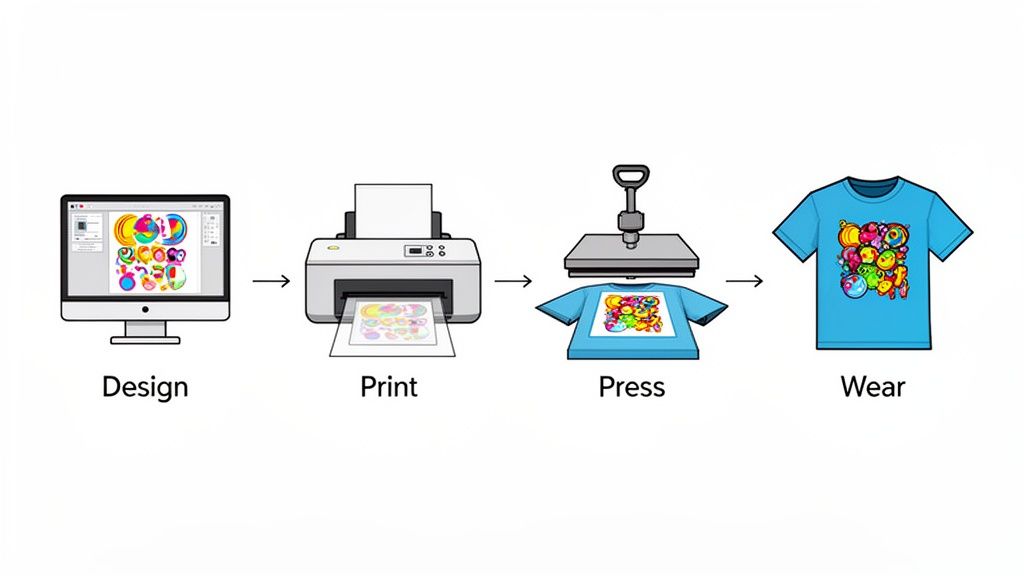
First, your design isn't printed directly onto the garment. Instead, it’s printed onto a special carrier film, which acts as a temporary home for the ink. The real magic happens with the heat press.
When you apply the right amount of heat and pressure, the adhesive layered on the back of the ink activates and creates a permanent bond, fusing the design right into the fabric's fibers. After it cools, you just peel away the film, and you're left with a vibrant, soft, and surprisingly durable graphic. It completely sidesteps the messy, complicated setups of old-school screen printing.
The Evolution From Craft Hobby To Pro-Grade Tool
The whole world of iron-on transfers has come a long, long way. A lot of us got our start with those basic craft-store sheets you could feed through a home inkjet printer. They're fun for a one-off project, but they often lack the durability and color punch needed for anything you'd want to sell. The industry saw that gap and raced to fill it.
This push for better quality led to the rise of professional-grade technologies, with Direct-to-Film (DTF) transfers quickly becoming the industry favorite for small businesses and major brands alike. The reasons are pretty clear.
An Overview of Modern Transfer Sheet Technologies
To get a better sense of what's out there, it helps to see how the different technologies stack up. While basic vinyl and inkjet sheets have their place, professional options like DTF have really changed the game for commercial use.
| Transfer Type | Best For | Key Feature |
|---|---|---|
| Direct-to-Film (DTF) | Professional apparel, all fabric types | Full-color, no-weed prints with a soft feel |
| Screen Print Transfers | Bulk orders with simple, bold designs | Classic, durable ink feel; cost-effective at scale |
| Heat Transfer Vinyl (HTV) | Simple graphics, names, and numbers | Great for solid colors and specialty finishes (glitter, foil) |
| Printable HTV | Full-color vinyl designs | Combines vinyl durability with full-color printing |
As you can see, DTF really hits the sweet spot for versatility and quality, which is why it has become the go-to for so many modern print shops and apparel brands.
The Growing Demand For Quality You Can Feel
This massive shift toward technologies like DTF is all about the soaring demand for high-quality, on-demand custom apparel. The global DTF printing market was valued at USD 2.72 billion in 2024 and is expected to hit USD 3.92 billion by 2030. That growth is fueled by e-commerce shops, small businesses, and creators who need a reliable way to produce stunning apparel without breaking the bank.
If you want to get into the nitty-gritty of the tech, you can learn more about what DTF transfers are and how they’re empowering creators everywhere.
This market explosion points to one undeniable trend: creators and businesses are ditching limited, hobby-level methods for professional, scalable options that deliver consistent, top-shelf results every single time.
For any business trying to ride this wave, efficiency is everything. Instead of printing designs one by one, services like our Auto-build gang sheet builder let you pack multiple designs onto a single sheet. This approach is a game-changer for your bottom line, slashing your per-print cost and maximizing profits without ever compromising on quality.
When you're diving into the world of transfer iron on sheets, it feels a lot like picking the right tool for a job. Each type has its own strengths, weaknesses, and ideal purpose, and the one you choose will make or break the final look, feel, and durability of your apparel. Getting a handle on these differences is the first real step toward creating custom gear that looks genuinely professional.
The three biggest players on the field are Heat Transfer Vinyl (HTV), screen printed transfers, and of course, the fan-favorite: Direct-to-Film (DTF) transfers. Each one brings something unique to the table, but one has definitely pulled ahead as the leader in versatility and quality.
Heat Transfer Vinyl (HTV): A Solid Choice for Simple Designs
Heat Transfer Vinyl, or HTV, is the go-to for a ton of crafters and people just starting out. Picture it as a sheet of colored plastic that you cut into a shape, stick on a shirt, and press. It's fantastic for single-color designs—think names and numbers on jerseys or bold, simple logos. HTV also opens the door to some cool specialty finishes like glitter, foil, and holographic effects, which makes it a fun option for specific projects.
But HTV has some serious limitations. The process of "weeding"—where you meticulously pick out all the excess vinyl around your design—is a huge time sink. It gets borderline impossible with intricate artwork. On top of that, if you want to layer multiple colors, you're looking at a multi-step process that often leaves the design feeling thick and heavy on the shirt.
Screen Printed Transfers: The Traditional Powerhouse
Screen printed transfers are basically the pre-made cousins of old-school screen printing. Instead of printing plastisol inks directly onto a shirt, they're printed onto special release paper. This lets you store the transfers and press them onto garments later. They give you that classic, durable screen-printed feel and are super cost-effective if you're doing a huge run of the same exact design.
The big catch here is the setup cost and complexity. Every single color in your design needs its own screen, which gets expensive fast for multi-color jobs or small batches. This method really only makes sense for high-volume orders with just a few colors, not the kind of on-demand, full-color printing that today's brands thrive on.
DTF Transfers: The Modern Gold Standard
This is where Direct-to-Film (DTF) comes in and changes the game. It has quickly become the top choice for businesses and creators who demand total flexibility and pro-level results. Unlike HTV, DTF prints full-color, photorealistic designs—we're talking gradients, tiny details, and unlimited colors—directly onto a film. And the best part? There is zero weeding involved, which saves an incredible amount of time and effort.
DTF transfers shine exactly where the other methods struggle:
- Fabric Versatility: They stick beautifully to pretty much anything—cotton, polyester, blends, canvas, even denim—no matter what color the garment is.
- Soft Feel: The final print is lightweight, flexible, and has a soft-hand feel that becomes part of the fabric instead of sitting on top like a stiff decal.
- Incredible Detail: From super-fine line art to vibrant photos, DTF nails every detail with amazing clarity and spot-on color.
If you want to get deeper into how these technologies compare, check out our guide on the difference between DTF and Heat Transfer Vinyl.
To give you a clearer picture, let's break down how these three stack up side-by-side.
Comparing Transfer Methods: DTF vs. HTV vs. Screen Print Transfers
| Feature | DTF Transfers (Lion DTF) | Heat Transfer Vinyl (HTV) | Screen Printed Transfers |
|---|---|---|---|
| Fabric Compatibility | Excellent. Works on cotton, poly, blends, canvas, leather, and more, regardless of color. | Good. Best on cotton and poly, but some specialty vinyls exist. Can be tricky on some fabrics. | Good. Primarily for cotton and poly blends. Less versatile than DTF. |
| Detail & Color | Unlimited colors, gradients, and photorealistic detail. Perfect for complex art. | Limited to solid colors. Layering is required for multi-color designs, which adds bulk. | Limited colors. Each color adds cost and complexity due to screen setup. Gradients are difficult. |
| Feel on Garment | Very soft, lightweight, and flexible. Blends into the fabric. | Can feel thick and stiff, especially with layered colors. Sits on top of the fabric. | Soft, but can be thick depending on the ink deposit. Generally a classic, durable feel. |
| Durability | Excellent. Rated for 100+ washes without cracking or fading. | Good, but can be prone to cracking or peeling over time, especially on detailed designs. | Excellent. Very durable and long-lasting, similar to traditional screen printing. |
| Best For... | Small businesses, brands, and print shops needing on-demand, full-color, high-detail prints on any fabric. | Hobbyists, crafters, and simple one-color designs like names and numbers on jerseys. | High-volume, single-design orders with limited colors where cost-per-print is the main factor. |
| Setup / Labor | Almost none. No weeding required. Just print and press. | High. Requires cutting and tedious weeding for every single design. | High initial setup. Requires screen creation for each color. |
Ultimately, while HTV and screen printed transfers still have their place for certain niche jobs, it's clear that DTF offers a complete solution. It pulls together the best of all worlds: vibrant color, a soft feel, unmatched versatility, and incredible efficiency.
The DTF market is exploding for a reason. One of the key drivers is hot-peel film, which is a cornerstone of what we do here at Lion DTF. The global DTF printing market was valued at USD 2.72 billion in 2024, and a huge part of that is thanks to the superior adhesion of these films—it's how we can confidently guarantee that 100+ wash durability. With the market projected to hit USD 4.56 billion by 2032, it’s obvious that this efficient and durable technology is the future of apparel decoration.
While HTV and screen printed transfers are great for specific, limited uses, DTF provides a comprehensive solution that combines vibrant color, a soft feel, unmatched versatility, and incredible efficiency.
That efficiency gets a massive boost when you use tools built for profitability. Our Auto-build gang sheet builder, for example, lets you pack multiple designs onto a single transfer sheet. This makes it ridiculously cost-effective to produce a mix of logos, tags, and graphics all at once, crushing the old barriers of minimum orders and making professional printing accessible to everyone.
Your Step-By-Step Guide to a Perfect Press Every Time
Applying transfer iron-on sheets can feel a little tricky at first, but I promise it's a straightforward process that quickly becomes second nature. Think of it like a simple recipe: get the time, temperature, and pressure right, and you’ll get a perfect result every single time. We've broken it all down into four easy stages to take you from a blank shirt to a finished product that looks totally professional.
This visual guide shows just how different the workflows are for various transfer types. You can really see the simplicity of modern methods like DTF compared to the old-school ways.
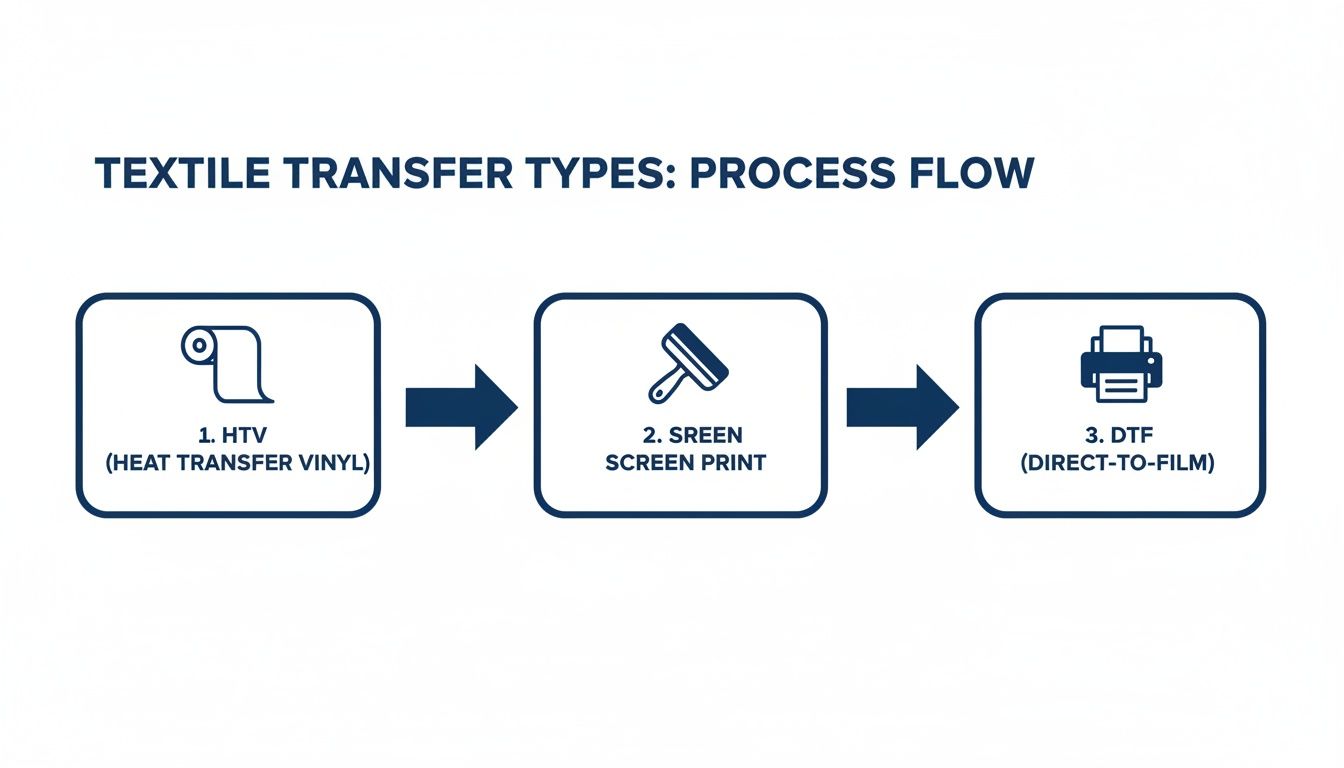
As the infographic shows, HTV involves a lot of cutting and weeding, and screen printing requires a whole complex setup. Then there's DTF—a direct print-and-press workflow that cuts out a ton of time and labor.
Stage 1: Prepare Your Workspace and Garment
Before you even think about pressing, you need to get everything prepped. First thing's first: set your heat press to the right temperature for your specific transfer. For Lion DTF transfers, that’s usually somewhere between 240-280°F, though it can vary a bit depending on the fabric.
While the press is heating up, get your garment ready. Here’s a pro-tip that makes a huge difference: always pre-press your garment for about 5-6 seconds. This quick step zaps out any hidden moisture and smooths out wrinkles, giving you a perfectly flat, dry surface for the transfer. It’s the secret to a stronger bond and helps prevent bubbling or peeling down the road.
"A successful application requires three items—time, temperature and pressure. It is very unlikely you will be able to obtain the pressure needed while you use an iron."
Look, a home iron might get you by for a one-off craft project, but it just can't deliver the consistent heat and even pressure needed for a durable, professional finish. Research shows that improper pressure is one of the main reasons transfers fail after just a few washes. For the kind of 100+ wash durability our transfers offer, a heat press isn't just a suggestion—it's essential.
Stage 2: Position Your Design
Okay, your garment is pre-pressed and looking perfectly flat. Now it’s time to place your design. Carefully lay the transfer sheet onto the fabric, making sure the printed side is facing down and the clear film is facing up. Take a second to measure and make sure it’s centered and straight. Nobody wants a crooked logo.
If you want to be extra precise, a t-shirt alignment tool is your best friend. Or, you can just fold the shirt in half vertically to create a center crease to use as a guide. Once you’re happy with the placement, a little heat-resistant tape on the corners can keep the transfer from shifting when you close the press.
Stage 3: Master the Press
It’s go-time. Place a protective sheet, like Teflon or parchment paper, over the transfer. This acts as a barrier, protecting both your garment and the heat press platen from getting gunked up with ink.
Now, close the press and apply firm, even pressure for the recommended time. For our DTF transfers, this is usually 7-10 seconds. Getting the time, temperature, and pressure just right is the magic formula for a perfect application. To dive deeper into these settings, check out our complete guide on how to use a heat press machine correctly.
Stage 4: The Final Peel and Cure
Once the timer buzzes, open the press and carefully remove the garment. Our transfers are hot-peel, which means you can peel the clear film off right away while it’s still warm. Use a smooth, confident motion, starting from a corner and pulling diagonally across the design. The artwork should be left behind, perfectly bonded to the fabric.
For the final touch that really locks in the design and boosts durability, a lot of pros do a second press. Just place your protective sheet back over the exposed design and press it again for another 5-7 seconds. This final cure helps the ink settle deep into the fabric fibers, giving it that soft feel and long-lasting quality we all want.
How DTF Gang Sheets Transform Profitability
For any small business, hobbyist, or growing apparel brand, profitability isn't just a metric—it's the fuel that keeps you going. The biggest headache has always been managing costs while still producing the kind of high-quality, full-color designs that customers actually want. This is where the DTF gang sheet completely flips the script on the economics of custom apparel.
Think about it like baking cookies. You wouldn't bake one single cookie at a time on a huge tray, would you? Of course not. You'd fill that tray to make the most of your oven space and energy. A gang sheet applies that exact same simple logic to printing transfer iron on sheets. It’s one large sheet of DTF film where you arrange, or "gang up," multiple designs to be printed all at once.
This single strategy shatters the old barriers that made custom printing feel so restrictive. You're no longer paying for each individual design; you're paying for the total area of the film. This is made incredibly easy with tools like our Auto-build gang sheet builder, which optimizes your designs to be as cost-effective as possible.
The Power of Maximizing Every Inch
The real magic of a gang sheet is just how ridiculously efficient it is. Instead of ordering just a chest logo, you can fill the sheet with that logo, plus sleeve designs, neck tags, and even graphics for completely different jobs. This approach slashes waste and sends your cost-per-print plummeting.
The gang sheet method is the single most effective strategy for making custom apparel profitable at any scale. It turns wasted space into pure profit, allowing small businesses to compete with larger operations on price without sacrificing quality.
What makes this even better is that DTF printing has no minimum order quantities. Whether you need one incredibly detailed design or a hundred different logos for a client, you can fill a sheet and get exactly what you need. Our user-friendly Auto-build gang sheet builder streamlines this process, so you can easily and quickly create cost-effective orders for any project size. This kind of flexibility is perfect for testing new products, creating one-off custom pieces, or knocking out small-batch orders without a fuss.
Introducing the Auto-Build Gang Sheet Builder
Let's be honest, manually arranging dozens of images to fit perfectly on a sheet can feel like a frustrating game of Tetris. That's why we created our Auto-build gang sheet builder. This super simple tool does all the heavy lifting for you, making the whole process incredibly easy and cost-effective.
Here’s how it works:
- Upload Your Designs: Just drag and drop all the graphics you need, no matter their size or shape.
- Let the Tool Work: Our smart software automatically arranges your images onto the sheet, rotating and nesting them to squeeze out every bit of empty space.
- Maximize Your Value: The builder ensures you get the absolute most out of every square inch you pay for, giving you the lowest possible cost for each individual transfer.
This tool is a total game-changer. It removes the guesswork and technical skill needed for manual layout, putting powerful, profit-boosting technology right at your fingertips. It’s where efficiency and creativity finally meet.
Thriving in the On-Demand Economy
The explosion of e-commerce has put a ton of pressure on creators to offer unique, high-quality products with seriously fast turnarounds. The global e-commerce market rocketed to USD 1.19 trillion in 2024, and this online retail boom is a perfect match for the strengths of DTF. It's no surprise the DTF printing market is projected to climb from USD 2.72 billion in 2024 to USD 3.92 billion by 2030. You can find more data on this booming market over at GlobeNewswire.
Providers like Lion DTF, with our 24-hour printing and online Auto-build gang sheet builder, are perfectly positioned to serve this demanding market. The ability to quickly produce a huge variety of full-color designs on a single sheet gives e-commerce sellers the agility they need to jump on trends and fill orders without being stuck with piles of expensive inventory. It’s just a smarter, more scalable way to build a profitable apparel business.
Solving Common Problems and Proper Care Instructions
Even with the best gear, every creator hits a snag now and then. Getting a perfect press is a bit of a science, but when things don't go as planned, the fix is usually pretty simple. Let's walk through the most common issues you'll run into with transfer iron on sheets and I'll give you clear steps to get back on track.
After we tackle those pressing problems, we’ll dive into the essential care instructions to make sure your creations—and your customers' apparel—stay looking sharp for the long haul.
Troubleshooting Common Transfer Issues
Most of the time, application errors boil down to three things: temperature, pressure, or time. If your transfer is peeling, not sticking right, or looks faded, one of these is almost always the culprit.
Problem 1: The Transfer Isn't Sticking Properly
This is the big one, especially for beginners. You press the design, peel back the film, and parts of the transfer lift right off with it or just feel loose on the fabric.
- The Cause: In 90% of cases, this is a pressure problem. A standard home iron or a poorly calibrated heat press just can't deliver the consistent, firm pressure needed for the adhesive to truly bond with the fabric fibers. It could also be from the wrong temperature or skipping a pre-press to get moisture out of the garment.
- The Solution: First, double-check your heat press settings. For our Lion DTF transfers, you're aiming for 260-280°F with medium-to-firm pressure. Always pre-press the garment for 5-6 seconds to create a dry, flat surface. If it's still not sticking, crank up the pressure before you start messing with the temperature.
Problem 2: The Colors Look Dull or Muted
Your design looked amazing on the screen, but after pressing, the colors just don't have that same pop. They look faded or washed out.
- The Cause: This usually happens if your temperature is too high. Too much heat can actually scorch the ink and dull the colors, especially on sensitive fabrics like polyester. It might also be a sign of low-quality transfers that don't have a solid white underbase.
- The Solution: Try lowering your heat press temperature in 5-10 degree increments. And make sure you're using high-quality transfers with a bright white ink layer—this acts like a primer, making the colors pop on any garment, light or dark.
Preserving Your Prints With Proper Care
Getting a perfect press is only half the battle. Proper after-care is what ensures those prints last through dozens of washes without cracking, fading, or peeling. Sharing these instructions with your customers adds serious value and shows them you stand behind your quality.
Following proper wash and care instructions is the secret to unlocking the full potential of high-quality transfers. Our prints are tested for 100+ wash durability, but that longevity depends on treating the garment correctly after the press.
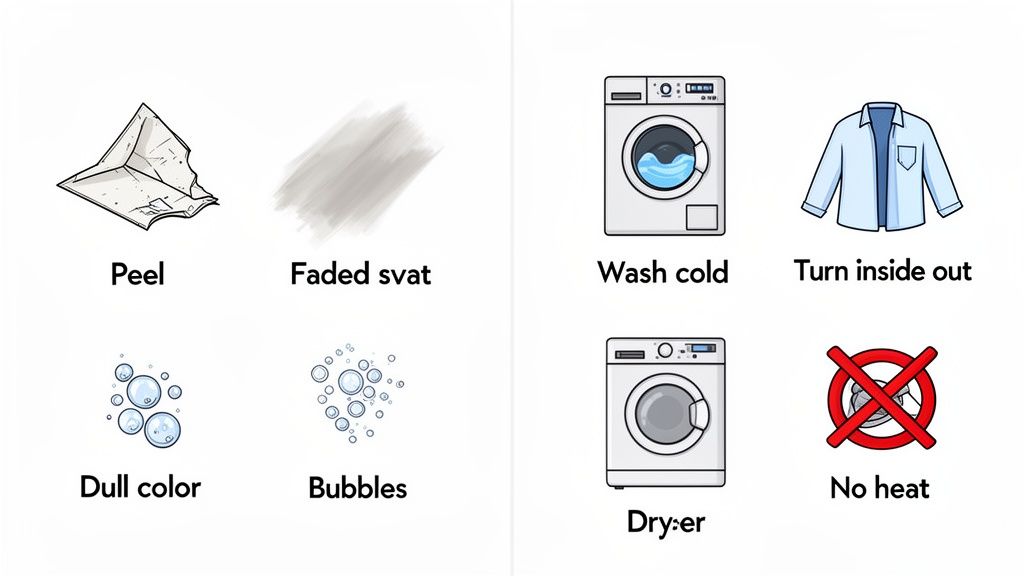
Here are the golden rules for garment care:
- Wait Before Washing: Always wait at least 24 hours after pressing before that first wash. This gives the adhesive and ink crucial time to fully cure and lock into the fabric.
- Turn Inside Out: This is the most important step, hands down. Washing the garment inside out minimizes friction on the print, protecting it from rubbing against other clothes.
- Use Cold Water: Always wash on a cold, gentle cycle. Hot water can soften the transfer's adhesive over time, which eventually leads to peeling or cracking.
- Go Easy on the Detergent: Stick with a mild detergent. Avoid bleach and harsh fabric softeners like the plague, as they can break down the ink and adhesive.
- Hang Dry When Possible: The intense heat of a tumble dryer is the number one enemy of custom prints. For best results, just hang the garment up to air dry. If you absolutely have to use a dryer, use the lowest heat or a no-heat tumble setting.
- Never Iron Directly on the Print: If the garment needs ironing, turn it inside out and use a low heat setting. Make sure you avoid the design area completely.
By mastering both the application and the after-care, you'll ensure every piece you create is a testament to quality that lasts.
Got Questions About Iron On Transfers? We've Got Answers.
As you start diving into the world of transfer iron on sheets, you’re bound to have a few questions. It happens to everyone. This section tackles the most common things we hear from creators, shop owners, and weekend crafters alike. Our goal is to get you pressing with complete confidence.
Can I Just Use My Home Iron for These Transfers?
Look, for a small, one-off project for yourself, you can technically use a regular iron. But we really don't recommend it for anything you plan to sell or want to last. A home iron just can't deliver the consistent, even heat and pressure needed for a professional bond.
You’ll end up with parts of the design that didn’t stick right, which leads to peeling and cracking after the first wash. A quality heat press is the only tool that guarantees the right temperature and pressure to properly cure the adhesive. It's what gives our DTF transfers their famous 100+ wash durability. A heat press isn't just a suggestion—it's essential.
What Exactly Is a Gang Sheet and Why Is It Cheaper?
Think of a gang sheet as buying in bulk. It's one large sheet of transfer film where you can arrange, or "gang up," multiple designs. Instead of paying for a bunch of small, individual transfers, you just pay for the total area of the film. This is, hands down, the most cost-effective way to order.
You can fit all sorts of things on one sheet—chest logos, sleeve hits, neck tags, and your main front or back graphics.
The gang sheet is the smartest way for any business to order transfers. You use every single square inch of the film, which drops your cost-per-print way down and boosts your profit on every garment you sell.
Our Auto-build gang sheet builder makes this ridiculously easy. Just upload your designs, and the tool automatically nests them together to maximize the space, ensuring you get the absolute best price for each print.
What Kind of Files Do You Need for My Designs?
For the sharpest lines and most vibrant colors, vector files are always king. We're talking .AI, .EPS, or .PDF. If you don't have those, a high-resolution .PNG with a transparent background works great, too.
The magic number for resolution is 300 DPI (dots per inch). Anything less and you risk a fuzzy, pixelated print. If you're stuck with a file that isn't quite ready, our team at Lion DTF can help out with design and vectorization services to get it perfect.
How Is DTF Different From Sublimation?
This is a big one. The main difference is fabric and color compatibility. Sublimation is a process where the ink actually dyes the fibers of the fabric. Because of that, it only works on light-colored, high-polyester-count garments. It's completely invisible on cotton or anything dark.
DTF (Direct-to-Film), on the other hand, is the universal soldier of apparel printing. It works on pretty much anything—cotton, polyester, blends, canvas, you name it—and in any color. Since DTF printing uses a layer of white ink as a base, your colors pop with incredible vibrancy and opacity, even on a black t-shirt. That’s something sublimation just can't do.
Ready to see what truly professional, durable, and vibrant custom apparel looks like? The team at Lion DTF Transfers is here to help you get it done right. Our transfers are built to last and make your designs shine.
Give our super-simple Auto-build gang sheet builder a try and see just how affordable your next big idea can be.