


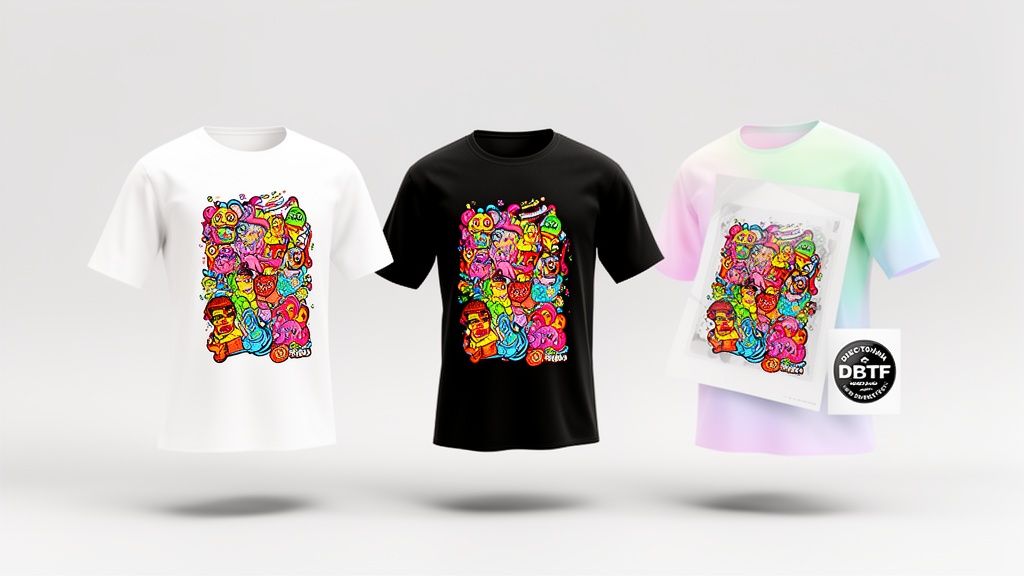
Heat transfer printing is a slick way to get custom designs onto t-shirts. Instead of pushing ink directly through a screen, this method uses a heat press to apply a pre-printed design from a special film. This means you can press full-color graphics, complex gradients, and tiny details all in one go. It's a fantastic solution for small businesses and creators who want vibrant, tough-as-nails results without sinking a ton of cash into setup costs.
Why Modern Heat Transfers Are a Game Changer
If you’ve ever hit a wall with traditional apparel printing, you know the headaches. High minimum orders, messy multi-color setups, and being told you can't print on certain fabrics—it’s frustrating. Modern heat transfer printing on t shirts, especially with Direct-to-Film (DTF) technology, cuts right through that noise. This isn't just another printing method; it's a ticket to creative freedom for everyone from boutique e-commerce brands to weekend DIY warriors.
This tech lets you produce professional, full-color designs on demand, whether you need a single shirt or a hundred. The whole process is refreshingly simple, letting you focus on your designs instead of getting tangled up in technical messes.
Accessibility and Affordability
The biggest win here is accessibility. High-quality custom apparel is no longer just for the big players with deep pockets and massive equipment. Now, anyone with a heat press can get seriously impressive results.
Tools like our Auto-build gang sheet builder are at the heart of this shift. They make the process ridiculously cost-effective by letting you pack multiple designs onto a single sheet, which slashes waste and your cost per print. That’s what makes small-batch printing not just doable, but profitable.
The real power of DTF transfers is their versatility. You can press a complex, photo-realistic image on a cotton tee, a polyester hoodie, or even a denim jacket—all using the same transfer and a simple heat press.
This kind of flexibility opens up entirely new product lines and creative avenues that used to be too complicated or expensive to even consider. You can offer a much wider range of custom products without having to invest in different printing setups for every type of fabric.
A Growing Market Opportunity
The demand for custom apparel is blowing up. The custom t-shirt printing market is on track to hit USD 8.89 billion by 2026, all thanks to new tech making small-batch printing affordable for everyone from schools to e-commerce sellers. This growth points to a huge opportunity for creators and businesses wanting to jump into the apparel game. You can dig into the numbers and see the potential yourself over on PR Newswire.
This guide is built to skip the fluff. We’re going to walk through the practical, real-world steps to master the DTF workflow, from prepping your files to the final press. Our goal is to give you the know-how to create awesome, durable t-shirts that look and feel amazing. For a deeper dive into the method, check out our guide on DTF transfers and see what they can do for your projects.
Setting Up Your Workspace for Success
 A professional-quality print is born long before you ever hear the beep of a heat press timer. Getting your workspace dialed in with the right tools and materials is what sets the stage for flawless heat transfer printing on t shirts. This isn't just about ticking boxes on a checklist; it's about understanding why each piece of gear is critical for getting those durable, vibrant results your customers expect.
The heart of any serious print setup is a reliable heat press. While a home iron might seem like a good place to start, it just doesn't deliver the consistent temperature and even pressure that DTF transfers need to cure properly. For anyone serious about quality, investing in a real heat press isn't just a suggestion—it's non-negotiable.
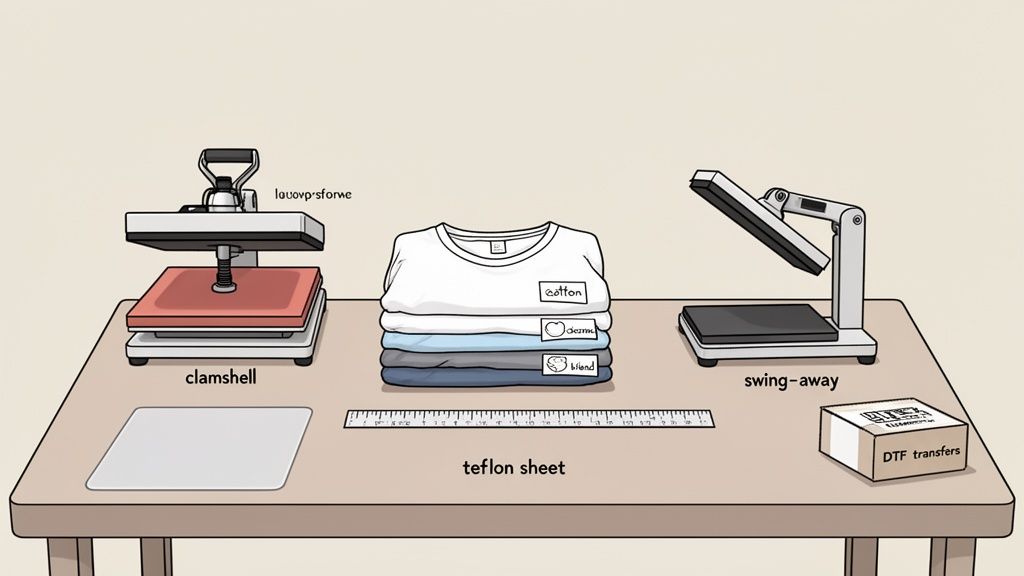
Choosing Your Heat Press
Your choice of heat press really boils down to two things: your workspace and your workflow. There are a couple of main styles you'll see out there, and each has its own pros.
- Clamshell Press: This is probably the most common style you'll see. It opens and closes like, well, a clamshell, which makes it a fantastic space-saver. It's perfect for standard t-shirt jobs in smaller shops or home setups where every square foot is precious.
- Swing-Away Press: With this design, the heated top platen swings completely out of the way. This gives you a wide-open, unobstructed view of the bottom platen, making it a breeze to lay out garments and transfers. It's especially useful for thicker items like hoodies and greatly reduces the risk of burning your knuckles.
Whichever you choose, make sure it has accurate temperature controls and distributes pressure evenly across the entire platen. Those two factors are the absolute keys to a perfect press.
Sourcing Quality T-Shirts And Transfers
Remember, your final product is only as good as its weakest link. That means the quality of your blank tees and your DTF transfers is absolutely paramount.
When it comes to shirts, the fabric blend makes a huge difference. 100% cotton feels great and breathes well, but it can be a nightmare with shrinkage. We've found that cotton/polyester blends, like a 65/35 poly/cotton mix, often hit the sweet spot, giving you durability with far less shrinkage. And a quick pro tip: always give your garments a quick pre-press to zap any moisture and smooth out wrinkles before applying the transfer.
The transfers themselves are just as important. Working with a trusted supplier means you get prints that are vibrant, accurate, and built to last. For instance, we rigorously test our own Lion DTF transfers to ensure they hold up for over 100 washes without cracking or fading. That's the kind of reliability that builds a brand.
The smartest way to order transfers is to group multiple designs onto a single sheet. Our Auto-build gang sheet builder makes this dead simple, automatically nesting your artwork to maximize every inch of film and slash your costs. It's how small-batch printing becomes seriously profitable.
Essential Accessories For Precision
A few inexpensive tools can make a massive difference in your day-to-day workflow, taking your prints from "good" to "great."
First up, you absolutely need a Teflon sheet or cover. You place this between the heat platen and your transfer to stop any ink from sticking to the press and to protect the shirt from scorching. It's a cheap piece of insurance.
Alignment is another area where pros stand out. A simple t-shirt alignment tool or even just a ruler helps you nail the placement every single time—centered, straight, and consistent. It's that kind of detail that customers notice. Lastly, a roll of heat-resistant tape is a lifesaver for holding transfers in place on awkward items like hats or sleeves, so nothing shifts when you close the press.
Preparing Your Artwork for Flawless Prints
The final quality of your heat transfer is a direct reflection of your digital file. It's that simple. A blurry, low-resolution image will only ever produce a blurry, low-resolution print, no matter how great your heat press is.
Honestly, getting your artwork right from the very start is the single most important step for achieving those crisp, vibrant, and professional results everyone's after. Before you even think about pressing, your digital design needs to meet a few non-negotiable standards. Think of them less as suggestions and more as the foundation for a high-quality DTF transfer. Nail this part, and you'll save yourself from costly reprints and a ton of frustration down the line.
Mastering The File Requirements
Let's break down the three pillars of a print-ready file for DTF transfers. Get these right, and your designs will translate perfectly from your screen to the shirt.
- Resolution is King: Your artwork absolutely must have a resolution of at least 300 DPI (Dots Per Inch) at the final print size. That 72 DPI image you grabbed from the web might look fine on your monitor, but it will look pixelated and fuzzy once it’s on a shirt. Always, always start with a high-resolution canvas.
- Transparent Backgrounds are a Must: Unless a solid background is part of your design, your file needs a transparent background. This is what ensures only your artwork gets printed, without any weird white or colored boxes showing up. You'll need to export your final file as a PNG, PDF, or TIFF to make sure that transparency is preserved.
- Color Mode Matters (But Maybe Not How You Think): While old-school printing often screams for CMYK, modern DTF printers use advanced RIP software that expertly converts RGB files. Designing in RGB actually gives you access to a wider, more vibrant range of colors on-screen. So, stick with that and let the pros handle the conversion.
Remember, the goal is to give the printer the best possible information to work with. Clean lines, high resolution, and proper file formatting are your responsibility. The printer's job is just to replicate that quality faithfully.
To efficiently create diverse and high-quality designs for your heat transfers, you might explore resources dedicated to finding the best AI photo generator to jumpstart your creative process.
Maximizing Value With Gang Sheets
Once your artwork is perfected, the next step is to start thinking about production efficiency. This is where gang sheets completely change the game for businesses. A gang sheet is just a large sheet of DTF film where you arrange multiple designs to be printed all at once. Instead of paying per design, you pay for the sheet, which can dramatically lower your cost per print. You can make this process incredibly simple and cost-effective by using our Auto-build gang sheet builder.
The global heat transfer printing market has exploded, reaching USD 4,214.8 million in revenue by powering the custom apparel boom. Methods like DTF allow for intricate, full-color prints on all sorts of fabrics with minimal setup, making it perfect for the small-batch runs that e-commerce and social media have made so popular.
This is a screenshot of our Auto-build gang sheet builder, which makes this process incredibly simple.
As you can see, the tool lets you upload a bunch of designs and automatically nests them to maximize every square inch of the film, which means less waste and more money in your pocket.
The Power of Automated Tools
Let's be real: manually arranging dozens of designs on a gang sheet is tedious. You have to worry about spacing, rotation, and fitting everything together like a complex puzzle. This is where automation becomes an invaluable asset for any growing business.
Our Auto-build gang sheet builder was designed specifically to solve this problem. You just upload all your prepared PNG files, and the software instantly arranges them for optimal spacing and minimal waste. This not only saves you a huge amount of design time but also ensures you're getting the absolute best value for your money.
For those looking to create standout graphics, our guide on custom heat transfer designs offers valuable insights and inspiration. This level of ease and cost-effectiveness makes scaling your business more achievable than ever.
Mastering the Perfect Press Application
Alright, you've got your artwork dialed in and your transfers are ready. This is the moment of truth—where your digital design becomes a real, wearable product. The pressing stage is a quick dance of heat, pressure, and timing. Getting it right is what separates an okay shirt from a professional one that you can't wait to sell.
This is the hands-on part where you really start to build muscle memory. Let's walk through the whole process, from prepping the shirt to that final, satisfying peel.
Before we dive in, remember that a flawless press starts with a flawless file.
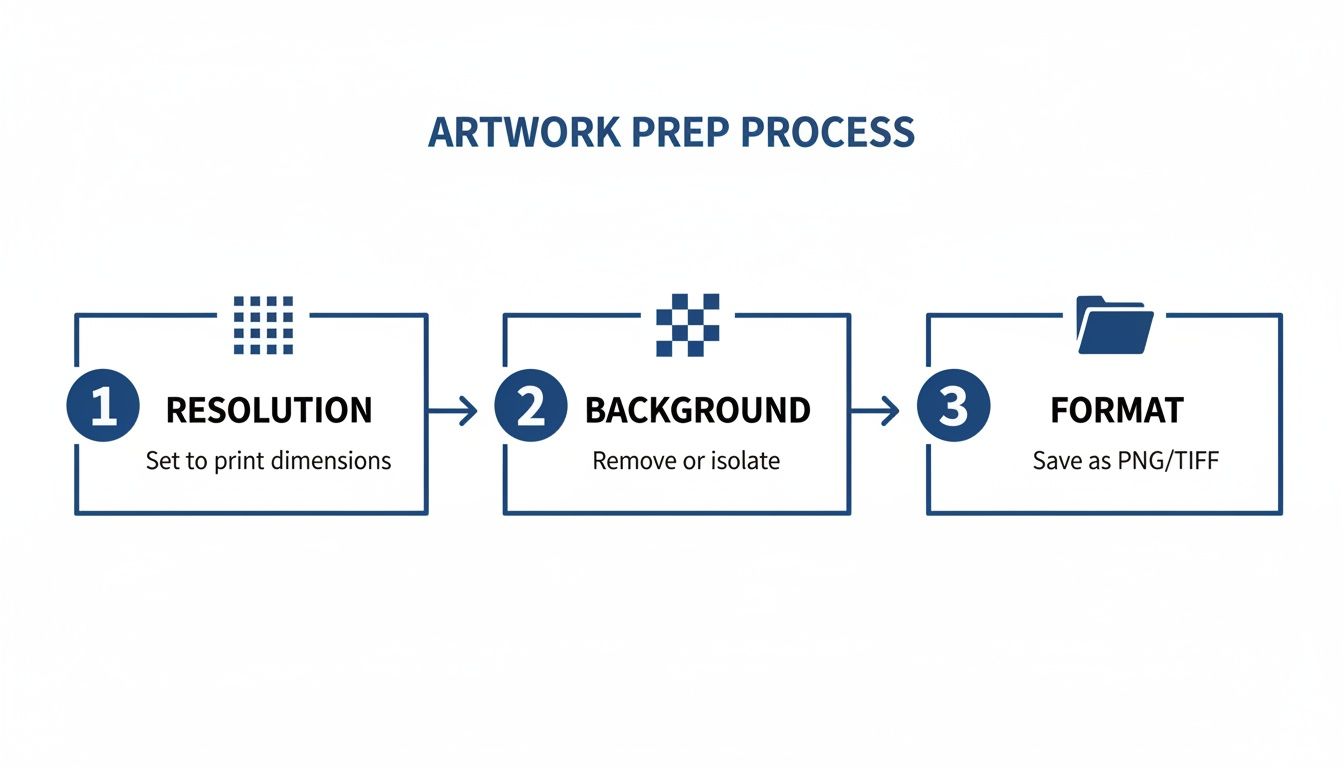
This visual just hammers home the point: start with a high-resolution file, a clean transparent background, and the right format. Nail this, and the rest gets a whole lot easier.
Don't Skip the Pre-Press
Before you even think about laying down that transfer, your first move is always to pre-press the t-shirt. Just lay the blank shirt flat on your heat press and give it a quick press for about 5-10 seconds. It seems simple, but this step does two critical things.
First, it zaps any hidden moisture out of the fabric. Cotton and poly blends love to hold onto humidity, which turns into steam under heat and can absolutely wreck your transfer's adhesion. Second, it smooths out every wrinkle, giving you a perfectly flat canvas to work on.
Positioning and Alignment
With the shirt pre-pressed and ready, it's time to place your DTF transfer. This is where precision really pays off. A crooked design screams amateur, so use a t-shirt alignment tool or even just a simple ruler to get it perfectly centered and straight.
A good rule of thumb for a standard chest print is to place the top of the design about three to four fingers down from the collar. Seriously, take your time here. Once that press closes, there are no do-overs.
Pro Tip: To really streamline your workflow, arrange multiple designs on gang sheets using an Auto-build gang sheet builder. This lets you print a bunch of graphics at once, which saves a ton of material and makes pressing multiple shirts way more efficient.
Once it's positioned, cover the transfer with a Teflon sheet or a piece of parchment paper. This little protective layer is your best friend—it stops any ink from sticking to the hot platen and protects the fabric from scorching.
Dialing in Temperature, Time, and Pressure
The heart of a perfect press is getting that magic trio of settings right: temperature, time, and pressure. These can change depending on the fabric and the specific transfers you're using. For our Lion DTF transfers, we typically recommend a temperature hovering around 240-280°F.
- Time: You're looking at a press time of about 7-10 seconds. Any less, and the adhesive might not fully activate. Any more, and you're risking damage to the fabric or ink.
- Pressure: Stick with medium to firm pressure. The goal is to get that heat applied evenly across the entire transfer, pushing the ink right into the fabric's fibers.
Getting these settings right is non-negotiable for durability. For a more detailed guide on different fabric types, check out our post on heat press settings for DTF.
Understanding Hot Peel vs. Cold Peel
After the timer buzzes, the next step is peeling off the carrier film. This is where you'll run into two main types of transfers: hot peel and cold peel.
Cold peel transfers mean you have to wait. The shirt and transfer need to cool down completely before you can remove the film. It works, but it can be slow and clunky, especially if you're trying to crank out a big order.
Hot peel transfers, like the premium ones we produce, are built for speed. You can peel the film away instantly after the press opens, while the shirt is still hot. Not only does this massively speed up your production time, but it often gives the print a softer, more integrated feel because the ink melts right into the fabric. Just peel in one smooth, confident motion.
Troubleshooting Common Pressing Problems
Even when you do everything right, things can still go sideways. Knowing how to fix common issues is what makes you a pro.
- Uneven Adhesion or Peeling Edges: This is almost always a pressure problem. Make sure your heat press is applying even pressure across the entire platen. If you're using a clamshell press, sometimes the thick seams of collars can get in the way, so be sure the actual design area is lying perfectly flat.
- Scorched Fabric: Seeing a slight yellowing on white or light-colored shirts? Your temperature is probably too high or you're pressing for too long. Drop the temp by 5 degrees and try again. And remember, that Teflon sheet is great insurance against scorching.
- Dull or Faded Colors: This usually means your temperature is too low or your press time is too short. The adhesive and inks need enough heat to fully activate and show their true vibrancy. Double-check your settings against the recommendations for your specific transfers.
Once you get a feel for these little adjustments, you'll have the confidence to tackle any project and know that every t-shirt you make is up to a high standard of quality.
Final Touches That Ensure Durability
When that heat press timer finally buzzes, don't think you're done. You've just reached the finishing touches—the small steps that take a decent transfer and make it a durable, professional-grade product that feels great to the touch. The real secret weapon here is a simple post-press.
This final, quick press, usually just 5-7 seconds, is what elevates the durability and feel of your heat transfer printing on t shirts. It does two critical things: first, it fully cures the ink and adhesive, pushing them deeper into the fabric's fibers for a bond that won't give up. Second, it knocks down that initial glossy look, giving the design a softer, more matte finish that looks like it's part of the shirt, not just sitting on top of it.
The Critical Post-Press for a Softer Hand
So, you've just peeled the carrier film off your DTF transfer. Before you fold it and add it to the "done" pile, give it one more quick press. Just place a Teflon sheet, parchment paper, or a dedicated finishing sheet over the design and press it again briefly.
This little extra step is what gets you that coveted "soft hand" feel that customers immediately notice. It smooths everything out, truly integrates the design with the garment, and dramatically improves its longevity. This is how you make sure your prints can handle the reality of repeated washing and drying. It's a tiny detail that makes a massive difference in quality.
Performing a Thorough Quality Check
Before a single t-shirt is ready to be shipped or handed to a customer, it needs a quick but careful quality check. This is your last chance to catch any imperfections and make sure every single piece meets your standards.
Get into the habit of a consistent inspection routine. Look at the print under good lighting, and check it out from a few different angles to spot any issues that might not be obvious at first glance.
- Check the Edges: Run your finger gently around the entire perimeter of the design. Are the edges completely flat against the fabric? Any sign of lifting or peeling is a red flag for poor adhesion.
- Verify Color Accuracy: Pull up your original digital file and compare it to the finished print. While minor shifts can happen, the colors should be vibrant and true to the design. If it looks dull, you might have an issue with your press settings.
- Look for Flaws: Scan the surface of the transfer for any cracks, bubbles, or pinholes. A perfect print should be completely smooth and solid from one side to the other.
A systematic quality check isn't just about finding mistakes; it's about building brand trust. When customers know they can count on you for flawless products every time, they become repeat customers. Think of it as your final line of defense against sending out subpar work.
Providing Clear Customer Care Instructions
The durability of a print doesn't just come down to your process—it also depends on how the customer takes care of it. One of the best things you can do for your work and your customer satisfaction is to provide clear, simple wash and care instructions.
This small gesture helps reinforce the 100+ wash durability claim that comes with high-quality DTF transfers. When you educate your customers on proper care, you minimize the risk of them accidentally ruining the print, which ultimately protects your reputation.
Here’s a simple set of instructions you can include with every order:
- Turn the garment inside out before washing.
- Machine wash cold with a mild detergent.
- Avoid using bleach or fabric softeners.
- Tumble dry on a low-heat setting or hang to dry for best results.
- Do not iron directly on the design.
These final touches—the post-press, the quality check, and the care instructions—are what truly separate the amateurs from the pros. They are the small efforts that guarantee a durable, high-quality product your customers will be happy to wear for years. And when you're ready to scale, producing multiple high-quality designs efficiently is key; using a tool like our Auto-build gang sheet builder makes it easy to maintain these professional standards across all your orders.
Got Questions About Heat Transfer Printing?
It's totally normal to have questions when you're getting the hang of a new process. When it comes to heat transfer printing on t shirts, a few common ones always seem to pop up. Nailing down the answers is the fastest way to build confidence and sidestep those frustrating little mistakes.
Think of this as your quick-reference guide to the most practical concerns. Let's get them sorted so you can print like a pro.
DTF Transfers vs. Traditional Vinyl (HTV)
So, what’s the real difference between DTF transfers and the heat transfer vinyl (HTV) you might be used to? It really comes down to three things: detail, feel, and your time.
DTF (Direct-to-Film) is a game-changer for complex artwork. It prints unlimited colors, photo-realistic gradients, and super fine details all in a single, lightweight layer. The final print feels soft and moves with the fabric. HTV, on the other hand, makes you cut designs from solid-colored sheets. If your design has multiple colors, you have to layer each piece of vinyl on top of the other, which can leave you with a thick, stiff, and heavy graphic.
For anything beyond a simple one-color logo, DTF is way more efficient. It’s a single press. A multi-color HTV job? You’re looking at multiple cuts, tedious weeding, and several rounds with the heat press. That adds a ton of time and complexity to your workflow.
Can I Get Away With Using a Home Iron?
Look, it's tempting to grab a home iron for a quick project, but for anything you want to sell or have last, it's a hard no. A standard iron just can't provide the two things a DTF transfer absolutely needs: consistent heat and calibrated pressure.
That patchiness is exactly why prints applied with an iron start peeling, cracking, or fading after only a couple of washes. A dedicated heat press is a non-negotiable investment if you want the transfer's adhesive to permanently fuse with the fabric fibers. It’s the only way to get that durable, professional finish your customers are paying for.
How Do I Get My Colors to Look Right on the Shirt?
Making sure the colors on the final t-shirt match what’s on your screen is a classic challenge. It’s all because screens use RGB light to show color, while printers use CMYK inks to make it.
For the best possible results, always design your files in the RGB color space. Don't worry about converting them yourself. Modern DTF printers are driven by powerful RIP software that does an amazing job converting RGB to CMYK while keeping the colors bright and accurate. The real key, though, is working with a print partner who has their color-matching dialed in. They calibrate their equipment to ensure what you see on screen is as close as possible to what comes out on the film.
Getting color right isn't about guesswork; it's about trusting a calibrated workflow. When your print provider obsesses over their color science, you can relax knowing your brand colors will be spot-on, every single time.
Once your shirts look perfect, it's time to show them off. Presenting and marketing your custom apparel is a skill in itself. For great ideas on making your finished products look amazing to buyers, Explore product presentation tips on their blog.
Why Is Pre-Pressing So Important?
Don't skip the pre-press! This simple 5-10 second step is one of the most critical parts of the entire process. Pre-pressing does two crucial things: it gets rid of wrinkles and, more importantly, it removes hidden moisture from the fabric.
Any moisture trapped in the cotton or poly fibers will turn into steam when you press the transfer. That steam gets in the way of the adhesive, leading to a weak bond that will peel or fail down the road. By creating a perfectly smooth, dry surface, you're guaranteeing a flawless, permanent bond. It’s a tiny step that makes a huge difference in the quality and longevity of your print.
At Lion DTF Transfers, our goal is to help you get professional results without the hassle. We offer premium hot-peel transfers and tools like our Auto-build gang sheet builder to make sure you get the most out of every order.