


DTF transfer sheets are basically your secret weapon for creating pro-level custom apparel. Think of them as the next evolution of iron-on transfers, but with way better quality, insane detail, and a much softer feel right out of the box. They show up at your door ready to press.
What Exactly Are DTF Transfer Sheets?
Imagine printing a photorealistic, full-color design—gradients, super-fine lines, and all—and then applying it to a cotton tee, a polyester hoodie, or even a denim jacket in a matter of seconds. That’s the magic of DTF (Direct-to-Film) transfers.
This method has blown up for a reason. It solves a ton of the headaches that come with older printing techniques, making it a go-to for everyone from Etsy shop owners to major apparel brands.
The whole thing works because of three key ingredients working together:
- Specialized Inks: These aren't your desktop printer inks. They're vibrant, water-based pigment inks engineered to deliver brilliant colors that absolutely pop, especially on dark fabrics.
- PET Film: This is a specially coated film designed to hold the ink perfectly in place until you're ready to press it onto the garment.
- Adhesive Powder: This is where the real magic happens. After printing, a fine layer of hot-melt adhesive powder is applied. When you heat it up, this powder creates an incredibly strong yet flexible bond between the ink and the fabric fibers.
The Science Behind the Simplicity
The process itself is pretty straightforward. Your design gets printed onto the PET film, coated with the adhesive powder, and then cured. What you get is a finished, ready-to-go transfer sheet.
When you're ready to create, you just place the sheet on your garment and apply heat with a heat press. The heat activates the adhesive, permanently locking the ink into the fabric. Once it cools down, you peel the film away, and you're left with a flawless, stretchy, and seriously durable design.
This simple application is what makes DTF so accessible. You can create professional-grade custom apparel without needing a massive, complicated setup. To get a deeper look at the fundamentals, check out our complete guide on what DTF transfers are and how they work.
This blend of quality and ease of use is fueling its explosive growth. The global market for Direct-to-Film printing was valued at $2.72 billion in 2024 and is on track to hit $3.92 billion by 2030. That kind of growth tells you just how many creators and businesses are choosing DTF for its reliable, outstanding results.
Why DTF Transfers Outperform Other Methods
When it’s time to get your designs onto fabric, the options can feel a bit overwhelming. You’ve got traditional screen printing, the craft-friendly heat transfer vinyl (HTV), and the high-tech direct-to-garment (DTG) printing. While each has its place, DTF transfer sheets consistently come out on top in the areas that matter most, making them the go-to choice for creators who refuse to compromise.
The biggest win for DTF is its incredible versatility. Unlike DTG, which gets finicky with polyester or dark fabrics unless you go through a whole pre-treatment ordeal, DTF just works. Cotton, polyester, blends, denim, canvas—you name it, the results are consistently brilliant.
This adaptability completely removes creative roadblocks. You can offer a much wider range of products without needing a different setup for every material. It all comes down to three core components working in perfect harmony.
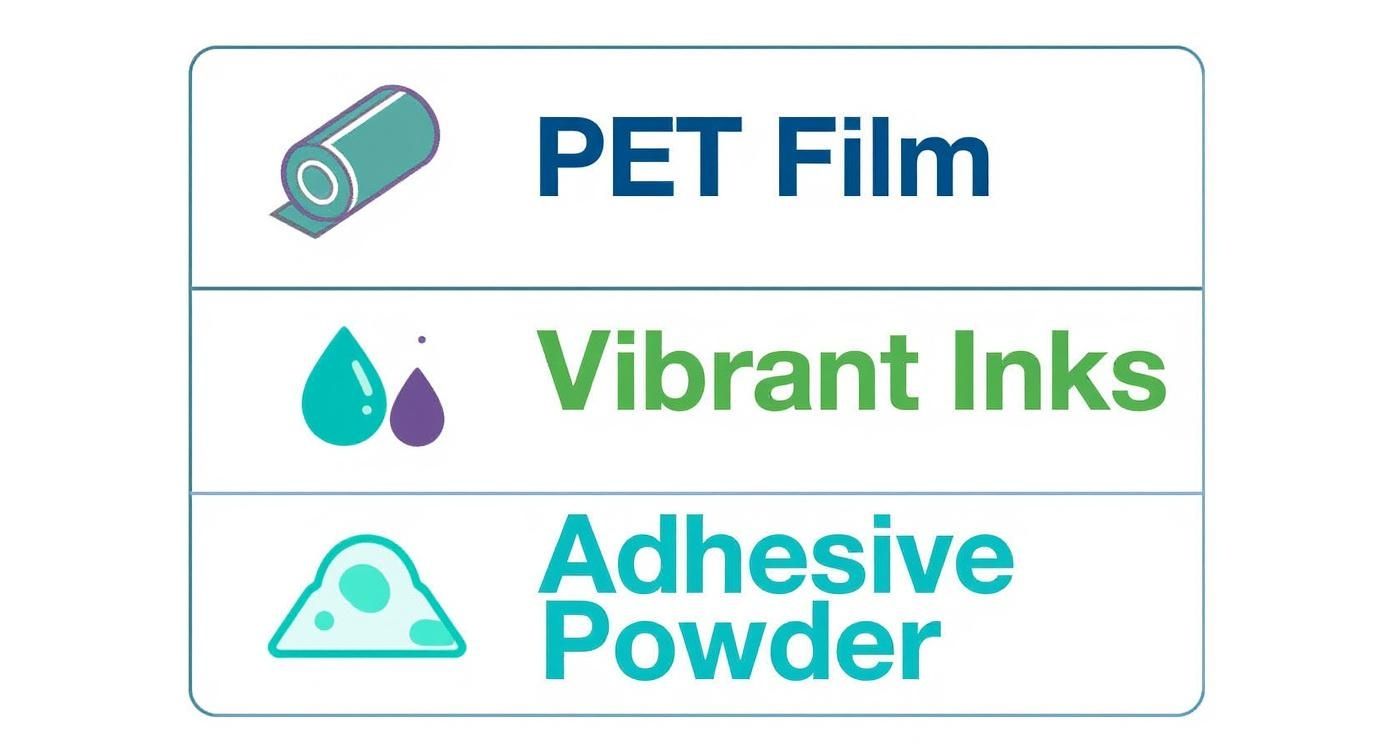
The magic trio—PET film, vibrant inks, and adhesive powder—combines to create a transfer that’s not only durable and vivid but also incredibly easy to apply.
Unmatched Vibrancy and Feel
One of the first things people notice about DTF is how vibrant the colors are, especially on dark garments. Screen printing often needs a thick, heavy under base to make colors pop, which can leave the design feeling stiff. DTF uses a thin, precise white ink layer only where it's needed, letting the colors shine without weighing down the fabric.
The final print has a remarkably soft feel and awesome stretchiness. It’s a world away from HTV, which can feel like a plastic sticker sitting on top of the shirt. DTF transfers actually bond with the fibers, so the design stretches and moves with the garment without cracking or peeling.
Cost Effectiveness at Any Scale
For small businesses and independent creators, DTF has been a total game-changer. It lowers the barrier to entry for professional-grade custom apparel, something that used to require a massive investment in screen printing equipment.
Key Takeaway: DTF completely does away with the costly setup fees and time-consuming screen prep of screen printing. This makes it insanely cost-effective for small runs, one-off samples, or highly detailed, multi-color designs that would be way too expensive otherwise.
This financial accessibility means you can finally produce full-color, photorealistic designs in small batches without breaking the bank. For a deeper dive into how the costs stack up, check out our detailed comparison of DTF vs. screen print transfers.
When you move into larger jobs, efficiency is everything. Getting the most out of your materials is key to protecting your profit margins. That’s where tools like our Auto-build gang sheet builder become essential, automatically arranging designs to cut down on waste and make sure every inch of your DTF transfer sheets is put to good use for ultimate cost-effectiveness.
DTF Transfers vs. Other Printing Methods
So, how does DTF really stack up when you put it side-by-side with the alternatives? This table breaks down the core differences and shows exactly where DTF pulls ahead of the competition.
| Feature | DTF Transfers | Screen Printing | HTV (Vinyl) | DTG (Direct-to-Garment) |
|---|---|---|---|---|
| Fabric Compatibility | Excellent (Cotton, poly, blends) | Good (Best on cotton) | Good (Depends on vinyl type) | Poor (Mainly cotton) |
| Color Vibrancy | Excellent (Vibrant on all colors) | Good (Requires underbase) | Good (Limited by vinyl color) | Fair (Fades on darks) |
| Durability | Excellent (50+ washes) | Excellent (Can crack over time) | Good (Can peel or crack) | Fair (Prone to fading) |
| Feel & Stretch | Soft and very stretchy | Can be thick and stiff | Stiff plastic feel | Very soft, no feel |
| Best For | Full-color, small to large runs | Large runs, simple designs | Simple logos, names, numbers | One-offs, cotton-only |
As you can see, DTF consistently delivers on durability, feel, and fabric compatibility, making it the most well-rounded and reliable choice for a huge range of projects.
How to Maximize Value with a Gang Sheet
Working smarter isn't just about saving time—it's about making every dollar work harder for you. For anyone using DTF transfer sheets, the secret to better profitability is something called a gang sheet.
Imagine you need to print a few different designs: a big logo for the back of a shirt, a small one for the pocket, maybe a sleeve graphic, and a handful of custom neck tags. Instead of printing each one on a separate sheet, a gang sheet lets you group—or "gang"—all of them onto one single, large transfer sheet. This is a total game-changer for your cost per print.
By packing multiple jobs into one print run, you slash material waste. You're paying for the space you use, not for how many individual designs you have. Think of it like carpooling for your graphics; you fit more into one trip, making the whole process cheaper and way more efficient.
Print Smarter, Not Harder
The logic is simple: the more designs you can fit onto a single sheet, the less you pay for each one. This approach is perfect for handling diverse orders, creating sample packs, or just stocking up on your most popular graphics without having to commit to huge, single-design print runs.
You could easily fit the designs for five different t-shirts, three hats, and a dozen small branding tags all on one sheet. For a small business, this completely changes the economics of custom apparel. Our Auto-build gang sheet builder is designed for this exact purpose, providing an easy-to-use platform to maximize your cost-effectiveness.
A well-planned gang sheet is the single most effective way to lower your material costs and boost your profit margins. It turns DTF printing from a one-off task into a streamlined production line.
This kind of efficiency is a big reason why the DTF industry is growing so fast. The market for DTF ink, which is what brings these transfers to life, is expected to hit USD 4.56 billion in 2024 and keep growing at a 9.6% CAGR through 2031. That surge points directly to printers using their gear more effectively, with gang sheets driving much of that high-volume production. You can find more details in the full market report to see how these trends are shaping the industry.
Effortless Optimization with an Auto-Build Tool
Trying to arrange designs on a gang sheet by hand can be a real headache. It feels like a high-stakes game of Tetris as you try to nest different shapes and sizes to avoid empty space. One wrong move, and you're wasting expensive film.
This is exactly where our Auto-build gang sheet builder steps in to make the process painless.
Forget spending hours in your design software, nudging graphics around. Our tool does all the heavy lifting. Just upload your individual design files, tell it how many of each you need, and the builder automatically arranges them for the tightest possible fit. This ease of use is a core feature, designed to save you time and boost your cost-effectiveness.
Here’s a look at how our builder can neatly organize different designs to squeeze the most out of every square inch.
This automated nesting guarantees you get the absolute most value from every single sheet you order, saving you both time and money. It's the key to making your projects more profitable.
Using a builder is a huge step toward professional-level efficiency. By automating the layout, you can get back to what actually matters—creating killer designs and growing your business. To really nail this process, it helps to know the common mistakes and best practices. Check out our guide on how to use DTF gang sheets to maximize profitability to get the most out of every print job.
Your Step-by-Step Pressing Guide
Alright, you've got your custom dtf transfers sheets and your designs are lined up. Now comes the best part: bringing it all to life. Applying a DTF transfer is pretty straightforward, but a little precision is what separates an okay result from a truly professional one. Let's walk through the exact steps to get a flawless, durable print every single time.
With your heat press warmed up, you're just a few seconds away from turning that blank garment into something special. The real secret here is consistency—follow these steps, and you'll get a perfect bond between the ink and the fabric. You can peel it instantly hot or wait to completely cool down and peel it cold.
Preparing for a Perfect Press
Before you even think about placing that transfer, a little prep work goes a long, long way. This first stage is all about creating a clean, flat surface, which is absolutely critical for an even application and a bond that lasts.
-
Set Your Heat Press: Get your press dialed in. For cotton and poly-blends, the sweet spot is between 240-280°F . But always double-check the recommendation for your specific garment—you don't want to scorch anything.
-
Adjust the Pressure: You're aiming for firm, even pressure. It should take a bit of muscle to close, but you shouldn't be wrestling with the machine. Think of it like a solid handshake—strong and confident.
-
Pre-Press the Garment: Lay your shirt on the press and give it a quick press for 5-7 seconds. This simple step does two huge things: it irons out any wrinkles, and more importantly, it steams out any hidden moisture in the fabric that could mess with your transfer's adhesion.
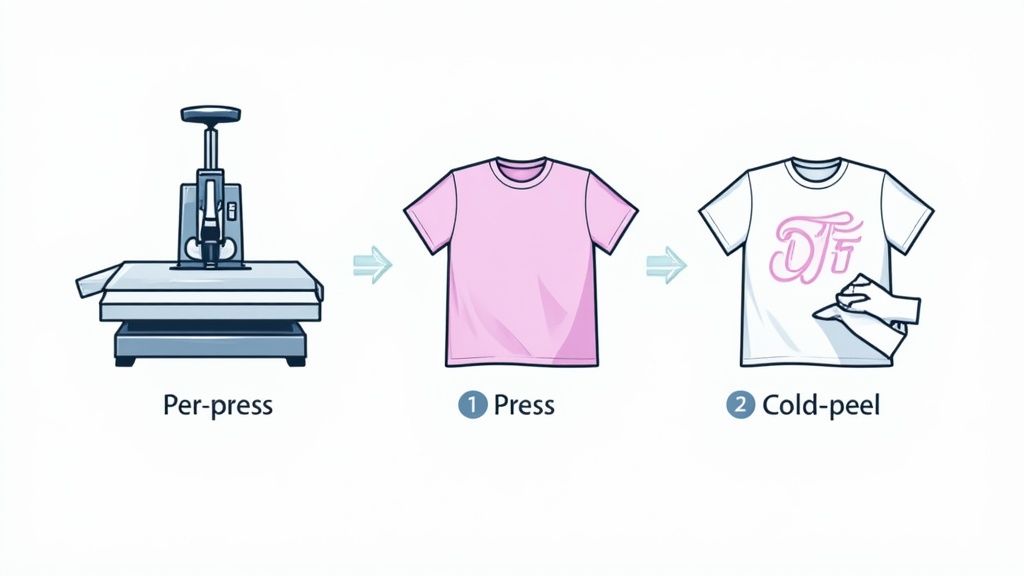
The Application and Peel
With your garment prepped, you're ready for the main event. Getting the placement right and being patient with the peel are the final touches that make the design look exactly how you pictured it. Seriously, don't rush this part.
-
Position Your Transfer: Carefully place the DTF transfer sheet on the garment with the design facing down. Use the collar and seams to help you get it centered and straight. If you're worried about it shifting, a little heat-resistant tape can be your best friend here.
-
Press the Transfer: Cover the transfer with a Teflon sheet or some parchment paper. This protects both the print and your heat press platen. Now, press the garment for 10 seconds with that medium to firm pressure we talked about.
-
Master the Hot Instant Peel: This step is non-negotiable. As soon as the timer dings, peel the transfer by grabbing a corner and peel the film back at a low angle. Waiting to peel it is the #1 mistake people make, and it can cause the design to lift or even tear. You may peel it cold and it is occasionally recommended for extra fine artwork on certain fabrics. Then, let it cool down completely, all the way to room temperature. Once it's cool, grab a corner and peel the film back slowly, smoothly, and at a low angle.
The Finishing Touch for Maximum Durability
You could stop right after the peel, but if you want to take your print from great to truly professional, there's one more quick step. This little trick doesn't just make the design last longer; it also makes it feel better.
Pro Tip: After you've peeled the film, put the garment back on the press. Cover the design with parchment paper or your Teflon sheet and press it again for another 5-7 seconds. This final press locks the ink deep into the fabric fibers, seriously boosting its wash durability and giving the design a much softer, more integrated feel.
And that's it. This simple process is all it takes to get commercial-quality results with your dtf transfers sheets. By sticking to these steps, you'll ensure every print comes out vibrant, tough, and perfectly applied. If you used our Auto-build gang sheet builder to pack a sheet full of designs, you can now move on to the next one with total confidence.
You’ve done it. You pressed the perfect design, and it looks incredible—crisp, vibrant, and exactly what you were going for. So, how do you keep it looking that way?
Proper care is the secret sauce. With just a little attention, your DTF transfers are incredibly tough and can easily outlast the garment itself, holding up through 50+ wash cycles without cracking, peeling, or fading. It’s not complicated, but a few simple rules make all the difference.
Best Practices for DTF Garment Care
To keep those designs looking brilliant, the key is to be gentle during washing and drying. Here’s what we tell all our clients:
- Turn It Inside Out: This is the easiest win. Before throwing it in the wash, turn the garment inside out. This simple step protects the transfer from rubbing against other clothes.
- Wash in Cold Water: Always use a cold water setting. Hot water can soften the transfer’s adhesive over time and lead to premature wear.
- Use a Mild Detergent: Stay away from harsh detergents, bleach, and especially fabric softeners. Those chemicals are designed to break things down, and they'll do the same to your ink and adhesive.
- Tumble Dry on Low (or Hang Dry): High heat is the enemy of any printed apparel. If you use a dryer, set it to tumble dry on low. For maximum longevity, your best bet is to just hang the garment to air dry.
Follow these guidelines, and you can confidently tell your customers how to care for their new favorite shirt. They'll appreciate it, and your work will look great for years to come.
Troubleshooting Common Pressing Issues
Even the pros run into a hiccup now and then. The good news is that most pressing issues are easy to fix and usually come down to a small adjustment in your heat press settings or technique.
Here are a few common problems and their quick fixes.
Q: Why isn't my transfer sticking to the shirt properly?
A: Nine times out of ten, this is a pressure or temperature issue. First, double-check that your heat press is set correctly (somewhere between 240-280°F). More often than not, though, the real culprit is not enough pressure. You should feel some real resistance when you close the press.
Also, don't forget the pre-press! Pressing the blank garment for 5-7 seconds is crucial for removing hidden moisture. Trapped steam is a bond-killer.
Key Insight: If parts of your design are lifting when you peel, it’s almost always because the garment wasn’t fully cool. Patience is everything here. Let it cool all the way down to room temperature before peeling for a flawless release every single time.
Q: My colors look a little faded after pressing. What went wrong?
A: Faded or dull colors are usually a sign of too much heat or too much pressure. If the heat is too high, it can literally scorch the ink. Try lowering your temperature by 5-10 degrees. If the pressure is cranked up too high, it can squeeze the ink layer too thin during the press. Back off the pressure just a bit for a much more vibrant result.
Perfecting your technique ensures every item you create from your DTF transfers sheets is professional-grade. This applies whether you're pressing a single custom piece or a massive batch you put together with our Auto-build gang sheet builder.
Got questions about DTF transfers? You're not alone. When you're diving into the world of custom apparel, a few queries are bound to pop up. We’ve pulled together the most common ones we hear every day to give you clear, straight-to-the-point answers.
Think of this as your quick-start guide to making sure your next project is a success.
What Kinds of Fabric Can I Press DTF Transfers On?
One of the best things about DTF is just how versatile it is. You can press these transfers onto a huge range of fabrics and get fantastic results every time. We're talking 100% cotton, 100% polyester, cotton/poly blends, and even trickier materials like canvas, denim, and certain treated leathers.
This incredible flexibility makes DTF the go-to choice for just about any project—t-shirts, hoodies, hats, tote bags, you name it. It doesn’t matter if the fabric is light or dark, either.
How Well Do DTF Transfers Hold Up in the Wash?
When they’re pressed correctly, our DTF transfers are built to last. They’re rated to handle over 50 wash cycles without cracking, peeling, or fading. In most cases, the print will actually outlive the garment it’s pressed on.
The secret sauce is following the right application and care instructions. Wash inside-out in cold water and tumble dry on low. That’s it. Do that, and your designs will stay looking sharp for years.
Important Takeaway: The durability of a DTF print comes down to two things: a solid heat press application and proper aftercare. Get those two steps right, and you're guaranteed a professional product that lasts.
Do I Need a Special Kind of Heat Press?
Nope, nothing fancy required here. Any standard clamshell or swing-away heat press will get the job done beautifully. The only things that matter are consistent temperature and even pressure across the entire design.
Just don't try to use a home iron. It’s a recipe for disappointment. An iron just can’t provide the consistent heat and heavy pressure needed for the transfer's adhesive to permanently bond to the fabric fibers.
Is There a Minimum Order for Custom DTF Sheets?
This is a huge advantage of DTF—there are absolutely no minimums. You can order a single gang sheet if that's all you need. This makes it perfect for testing a new design, creating a one-of-a-kind gift, or running a small batch for your online store.
This approach gives you total creative freedom without the waste. Our Auto-build gang sheet builder is specifically designed to help you pack as many designs as possible onto a single sheet, making every order incredibly cost-effective. You can mix and match different images and logos to get the absolute best value per print.
Ready to create some incredible, long-lasting custom apparel without the headache? The team at Lion DTF Transfers is here to make sure you get professional results on every single order. From our super simple Auto-build gang sheet builder to our lightning-fast turnaround times, we've got the tools you need to bring your ideas to life.