


Framing a t-shirt is a fantastic way to turn a piece of clothing you love into wall art. The whole process is pretty straightforward: you prep the shirt, mount it on a backing, and pop it into a frame. It's a simple project that can transform a cherished memory into a unique piece of decor.
The key is choosing the right frame and using acid-free materials to protect the fabric so it lasts for years.
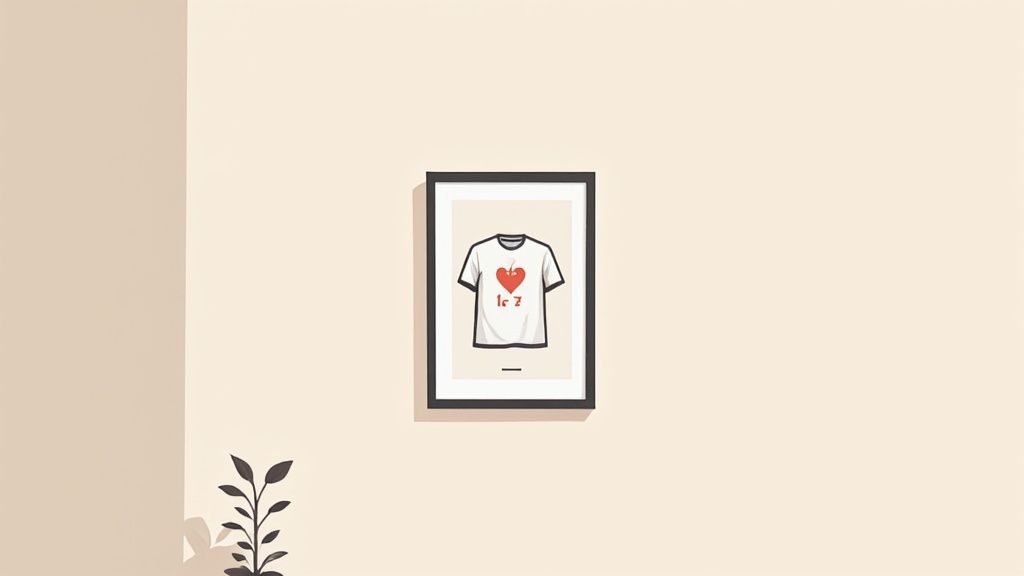
Turn Your Favorite T-Shirts Into Wall Art
That favorite concert tee or the custom-printed shirt you designed holds real memories, and it deserves better than being tucked away in a dark drawer. This guide is your starting point for transforming that apparel into one-of-a-kind wall art.
We'll walk through how to pick the right shirts for framing—ones with bold graphics or special meaning—and explore the two most popular ways to do it.
You'll get a clear idea of the sleek, modern look you can achieve with flat framing versus the cool, three-dimensional depth of a shadow box. Proper preservation is super important, especially for those vibrant custom prints you might have created yourself. If you're designing shirts specifically for display, using our Auto-build gang sheet builder is an easy and cost-effective way to get stunning results.
Why Framing T-Shirts Is So Popular
The trend of displaying apparel isn't just for serious collectors anymore. It’s part of a massive market—the global custom t-shirt printing industry was valued at around $8.17 billion and is still climbing. This growth is driven by everything from event merch and corporate branding to pop culture fandoms, making custom shirts a popular item to preserve and display.
Framing is more than just decoration; it’s a way to tell a story. Whether it’s a souvenir from a marathon, a vintage band tee, or a shirt you designed yourself, framing it honors the memory attached to it.
For those creating shirts specifically for display, using a service like our Auto-build gang sheet builder is both easy and cost-effective. It ensures you get high-quality DTF prints that are definitely worthy of being framed.
While framing t-shirts has its own unique quirks, many of the core principles are the same as for any other fabric project. This comprehensive DIY guide to framing textile artwork is a great resource for general techniques. By the end of this section, you'll have the confidence to choose the perfect method for your project.
Gathering Your T-Shirt Framing Toolkit
Getting a professional-looking result when you frame a T-shirt really comes down to having the right tools before you even start. It’s not just about making the job easier; the right supplies are what protect your shirt for the long haul, preserving the fabric and print for years to come.
Your first big decision is the frame itself. A standard poster frame is perfect for that clean, flat look, especially if you have a bold graphic that needs to be the star of the show. But if you want something with more depth and drama, a shadow box is the way to go. It gives you room to artfully fold the shirt or even include other keepsakes like concert tickets or photos.
Choosing Archival-Quality Materials
The materials that actually touch your shirt are just as critical as the frame. To prevent that dreaded yellowing and fabric breakdown over time, you absolutely have to use acid-free supplies. This isn't just a suggestion—it's non-negotiable for true preservation.
- Foam Core or Mat Board: An acid-free foam core is your best friend here. It acts as an insert, giving the shirt structure and a smooth, wrinkle-free finish. You want something firm enough to hold the shape but slim enough to fit comfortably inside the frame.
- Adhesives and Fasteners: Step away from the Scotch tape. Standard tapes will damage the fabric over time. Instead, grab some acid-free double-sided fabric tape for flat mounting. If you’re using a shadow box, a handful of rust-proof stainless steel pins are perfect for securing the shirt to the backing without leaving stains or creating noticeable holes.
- Protective Glazing: Look for frames that come with UV-protective acrylic or glass. Think of it as sunscreen for your shirt. It’s a must-have to stop the vibrant colors of your DTF prints from fading when exposed to sunlight.
For small businesses and creators looking to frame their custom apparel, locking in that print quality from the very beginning is key. Our Auto-build gang sheet builder makes it simple and affordable to produce brilliant, durable prints that are absolutely frame-worthy.
Essential Tools for the Job
Beyond the main framing components, a few key tools will make the assembly process a whole lot smoother and give you much cleaner results. You probably have some of these lying around the house already.
| Tool | Purpose | Why It's a Must-Have |
|---|---|---|
| Rotary Cutter & Self-Healing Mat | For precisely cutting the foam core to the exact dimensions you need. | A sharp rotary cutter gives you a much cleaner edge than scissors ever could, preventing any jagged or compressed foam. |
| Measuring Tape & Ruler | To make sure your shirt is perfectly centered and all your cuts are dead straight. | Accuracy is everything. Guessing your measurements is a surefire way to end up with an off-center or crooked display. |
| Iron & Ironing Board | To get every last wrinkle and crease out of the T-shirt before you start framing. | A smooth, flat shirt is the foundation of a professional-looking framed piece. Don't skip this. |
The Classic Flat Frame Method
For that clean, gallery-style display that puts the spotlight right on your shirt's design, the flat frame method is your go-to. This approach gives you a sleek, professional look that fits in any room, turning a favorite tee into a piece of modern art. It’s all about creating a smooth, wrinkle-free canvas that lets the graphic do all the talking.
First things first: prep is everything. Before you even think about the frame, your shirt needs to be perfectly clean and free of wrinkles. A quick wash and dry will get you started, but the real secret weapon here is a hot iron. Taking a few extra minutes to press out every last crease will make a huge difference in how sharp the final product looks.
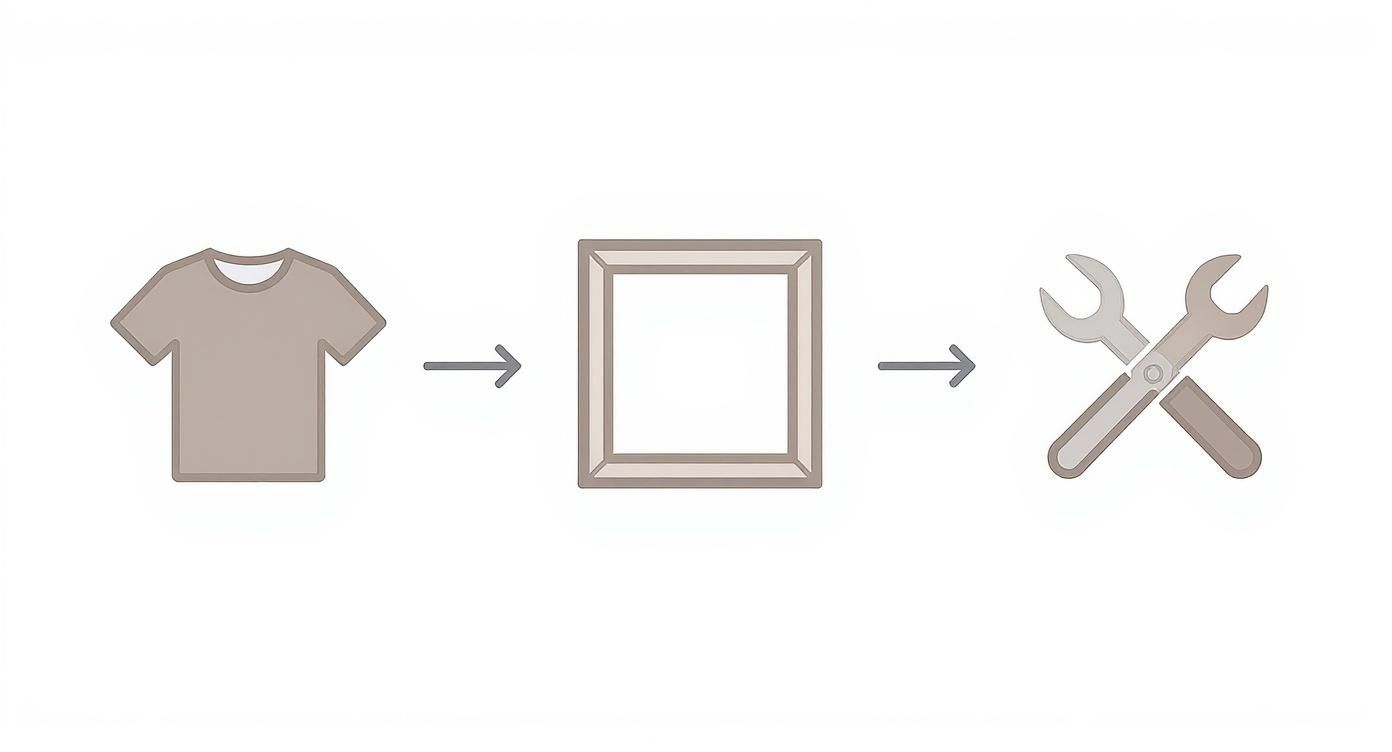
As you can see, the process is straightforward—moving from the shirt to the frame with the right tools in between. Each piece plays a part in getting that polished, professional result.
Creating the Perfect Fit
With your shirt prepped, it's time to give it some structure. This is where acid-free foam core is non-negotiable. Without it, the shirt will inevitably sag and wrinkle inside the frame over time.
Lay your ironed shirt flat and measure the part you want to display—usually the main graphic on the front. Cut a piece of foam core to those exact dimensions. The idea is to create an insert that fits snugly inside the shirt, pulling the fabric taut and making a perfectly flat surface for the display.
Carefully slide the foam core insert inside the shirt, making sure to center the design perfectly on the board. This is your chance to get everything aligned just right before moving on.
Folding and Mounting the Shirt
Once the insert is in place, flip the shirt over. You’ll be left with all the extra fabric, like the sleeves and the bottom hem, which you need to manage. The key here is to fold everything neatly and tightly against the back of the foam core.
- Fold the sleeves first: Bring them in toward the center, creating crisp, straight lines along the sides of the foam core.
- Next, fold the bottom up: Pull the bottom of the shirt up and over the foam core, keeping the fabric smooth and tight.
- Secure the fabric: Use acid-free double-sided tape to stick the folded fabric to the back of the foam core. This locks everything in place and stops any shifting once it’s in the frame.
A common mistake is cutting the foam core too small. You want the board to be large enough to fill out the shoulders and torso completely. This prevents that "droopy shoulder" look and keeps the entire graphic perfectly flat and visible.
The basic steps of choosing the right frame and making sure your display is centered are pretty universal. While framing T-shirts has its own quirks, the core principles are a lot like those in this detailed guide on how to frame posters.
Finally, place your mounted shirt onto the frame’s backing board, check that it's centered one last time, and secure it in the frame. The result is a sharp, clean display that looks like you had it professionally done.
Creating Depth With The Shadow Box Method
When you really want to make a statement, a standard flat frame just won't cut it. That's where the shadow box method comes in. It gives your T-shirt a three-dimensional quality that adds serious visual impact, turning a simple garment into a true centerpiece.
This approach is perfect for heavier items like jerseys or for when you want to build a mini-exhibit that tells a complete story. Unlike a flat frame that presses the shirt flat, a shadow box embraces its shape. You get to play with how the fabric is arranged, creating interesting folds and highlights that catch the eye and give the display a dynamic feel.
Two Core Techniques For Shadow Box Framing
You’ve got two solid options here, and your choice really boils down to the final look you're going for: crisp and structured or something a bit more organic.
- Mounting on a Foam Core Insert: Think of this as a hybrid technique. You’ll start by wrapping the shirt around a custom-cut piece of acid-free foam core, just like you would for a flat frame. But instead of putting it in a shallow frame, you place the entire mounted shirt inside the deeper shadow box. This makes the shirt pop out from the backing, creating a clean, floating effect with sharp, defined edges.
- Pinning Directly to the Backing: If you want a more relaxed and authentic look, this is the way to go. You’ll fold and pin the T-shirt directly onto the fabric-covered backing of the shadow box itself. This lets you create a more natural drape, showing off the shirt's texture and weight. It’s ideal for a softer, less rigid appearance that feels a little more lived-in.
Whichever path you choose, the right fasteners are non-negotiable. Always use rust-proof stainless steel pins. They’re strong enough to hold everything securely without staining or damaging the fabric over time—a small detail that makes a huge difference down the road.
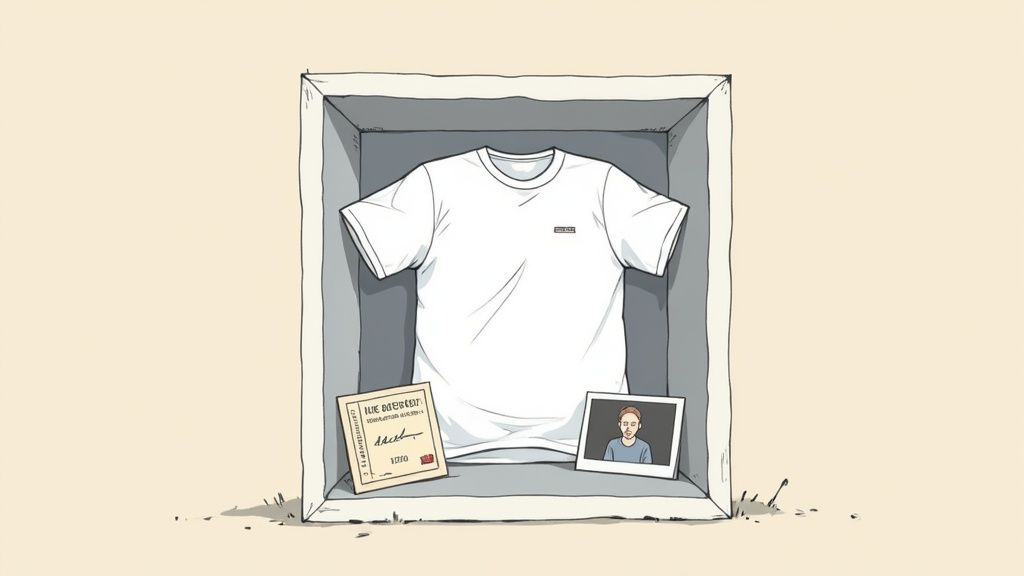
Telling a Richer Story with Memorabilia
One of the best things about a shadow box is the extra real estate it gives you. This is your chance to turn a framed shirt into a curated collection of memories.
The shadow box turns your project into a time capsule. It's not just about the shirt; it's about the experience connected to it. By adding related items, you create a much richer and more personal narrative.
Think about what else helps tell the shirt's story. You could include things like:
- Concert ticket stubs or backstage passes
- Photos from the event
- Medals or race bibs from a competition
- Embroidered patches or collectible buttons
- Signed memorabilia or autographs
Before you start pinning, lay everything out inside the box to find a composition that feels balanced and compelling.
For small businesses, this method is a fantastic way to create memorable displays for events or corporate milestones. Imagine framing a company retreat shirt along with photos and awards. When you're producing these high-quality custom prints, our Auto-build gang sheet builder provides an incredibly easy and cost-effective way to get designs that are perfect for framing.
Preserving Your Custom Printed Shirts
Framing a T-shirt isn't just a cool way to decorate a room; it’s an act of preservation. This is especially true when you're working with custom apparel rocking a vibrant DTF (Direct to Film) print. Your goal is to lock in that fresh-off-the-press look for the long haul.
Protecting your investment from the elements is everything.
The biggest enemy of your framed shirt is something we see every day: sunlight. The ultraviolet (UV) rays beaming down are notorious for breaking down the pigments in both the fabric and the ink, causing fading that you just can't reverse. That’s why choosing a frame with UV-protective glass or acrylic is one of the most critical decisions you'll make. Think of it as a powerful sunscreen for your shirt, blocking out up to 99% of harmful UV rays while keeping your design perfectly clear.
The Importance Of Archival-Quality Materials
Beyond the glass, every single material that touches your shirt matters. Standard paper, cardboard backing, and common adhesives all contain acids. Over time, these acids will slowly leach into the fabric, causing it to turn yellow and become brittle.
This is exactly why using exclusively acid-free materials is non-negotiable for anyone serious about framing a shirt for long-term display.
This rule applies to every component:
- The backing board the shirt is mounted on.
- The foam core insert you might use to give the shirt structure.
- Any matting you add for a more polished, decorative finish.
- The tape or pins used to hold the fabric in place.
When you've invested time and money into a custom shirt, the last thing you want is for it to slowly degrade from the inside out. Choosing archival-quality, acid-free supplies is the only way to guarantee the materials themselves don't become the source of the damage.
Creating a Healthy Environment Inside the Frame
Here’s another pro tip: create a small buffer between the shirt and the glass. When fabric is pressed directly against the glazing, it can trap tiny amounts of moisture. This can lead to mildew or even cause the print to stick to the surface over time.
Using spacers or a mat board creates this essential air gap, promoting circulation and protecting the shirt's texture and the integrity of the print. For a deeper dive into maintaining your prints, you can find a ton of info in our guide on proper shirt care and pressing instructions.
For all the creators and small businesses out there aiming to produce shirts worthy of this level of care, the whole process really starts with a superior print. Our Auto-build gang sheet builder gives you a remarkably simple and cost-effective way to produce high-quality, durable custom prints that are absolutely perfect for framing.
Common Questions About Framing T-Shirts
Even with a perfect plan, a few questions always pop up when you're learning how to frame a T-shirt. Let's tackle some of the most common hurdles you might face, so you can finish your project looking like a pro.
One of the biggest hang-ups is sizing. What do you do if your shirt is huge or unusually small? The trick is to choose a frame that’s slightly larger than the shirt's main graphic, not the entire shirt itself. This gives you plenty of room to neatly fold and secure the extra fabric behind the foam core, preventing that crammed, unprofessional look.
Handling delicate or vintage fabrics is another frequent concern. Older shirts can be fragile, so it's smart to avoid adhesives entirely. Instead, try using rust-proof stainless steel pins inside a shadow box. They'll secure the fabric with minimal impact. For a truly ancient tee, you might even consider hand-stitching it to an acid-free backing board for a super secure, but totally reversible, mount.
Handling Specific Challenges
What about those stubborn wrinkles that just won't budge? For deep-set creases in cotton or blended fabrics, a good steam iron or a handheld steamer is your best friend. If the shirt has a delicate print, like a DTF transfer, always iron it from the reverse side. You can also place a pressing cloth over the graphic to shield it from direct heat.
And how long can you actually expect that print to stay vibrant once it's framed? When you use the right materials, like UV-protective glass and acid-free backing, a high-quality DTF transfer is incredibly resilient. You can get the full rundown on their durability in our guide on how long DTF transfers last. It’ll give you peace of mind that your art will look great for years to come.
A common mistake is rushing the prep work. Seriously, taking an extra 15 minutes to properly iron the shirt, measure everything twice, and perfectly center the design is the single most important thing you can do for a polished result.
Preserving a Global Phenomenon
The care you put into framing a shirt reflects its true value—not just sentimental, but cultural. With the global T-shirt industry projected to hit a value of $330 billion and roughly 2 billion shirts sold every year, it’s obvious they're more than just clothes. According to market research from Technavio.com, this massive scale is exactly why preserving them as art has become so important for collectors and fans.
At the end of the day, framing your T-shirt is about celebrating a memory. By knowing how to tackle these common issues, you can make sure your final piece is a flawless tribute to the story it tells.
At Lion DTF, we believe your cherished designs deserve the best start. For custom prints that are vibrant, durable, and absolutely frame-worthy, our Auto-build gang sheet builder offers an incredibly easy and cost-effective solution to bring your ideas to life.