


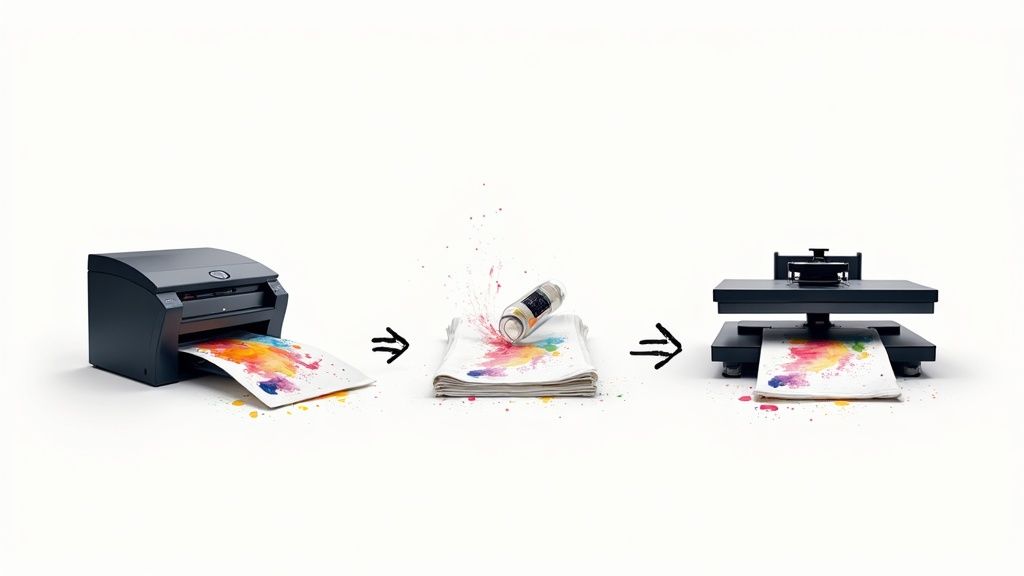
DTF printing for shirts is all about printing a design onto a special kind of film, then pressing it onto the fabric with heat. This technique creates vibrant, durable, and detailed graphics that work on a huge range of materials—cotton, polyester, you name it—making it a go-to choice for custom apparel.
What Is DTF Printing and How Does It Work?
Think of it like creating a super high-quality, ultra-durable sticker that’s made specifically for fabric. That's pretty much the core idea behind DTF, or Direct-to-Film, printing. It’s a method that has quickly become a favorite for both creators and businesses who need professional-grade custom gear without the messy, complicated setup of older methods.
The real magic of DTF printing is in its unique approach. The printing and the garment are kept separate until the very last step, which is exactly what gives DTF its awesome versatility and pop.
The Core DTF Process
So, how does a digital file become a permanent part of a shirt? The process itself is surprisingly straightforward, but every step needs to be precise to get that flawless result.
Here’s a quick breakdown of how it all comes together:
- Printing onto Film: First, a special inkjet printer lays down your design directly onto a sheet of clear PET film. A critical base layer of white ink is printed behind the colors, which is the secret to making the design look bright and bold, even on a black shirt.
- Applying the Adhesive: While the ink is still wet, a fine polymer powder is sprinkled evenly across the whole design. This powder is the glue—it’s a powerful adhesive that will bond the ink to the fabric fibers later on.
- Curing the Transfer: Next, the film is run through a curing oven or placed under a heat press. This melts the powder, turning it into a smooth, even layer that's ready to be applied.
- Pressing onto the Shirt: Finally, the cured film is positioned on the shirt and pressed using a heat press. The combination of heat and pressure activates the adhesive, permanently locking the ink into the garment. After it cools for a moment, the film is peeled away, leaving just the stunning, soft-to-the-touch design.
Why DTF Is Gaining Popularity
DTF printing really solves a lot of the headaches that come with other apparel decoration methods. It gives you the full-color detail of DTG (Direct-to-Garment) printing, but it works on a much wider variety of materials, including tricky ones like polyester and blends that DTG often struggles with.
The global market for Direct-to-Film (DTF) printing was valued at USD 2.72 billion in 2024 and is expected to grow significantly. This rapid adoption really highlights its effectiveness and appeal in the custom apparel industry.
This growth is fueled by its ability to produce incredibly durable prints that resist cracking and fading, often outlasting the shirt itself. And for businesses that need to produce a bunch of different designs, the efficiency is a game-changer. Our Auto-build gang sheet builder, for instance, lets you pack tons of logos and graphics onto a single film, which cuts down waste and makes the dtf printing shirt process way more cost-effective. You can learn more about the projected growth in the custom apparel industry.
Choosing The Right Method For Your Custom Shirts
Jumping into the world of custom shirts can feel like a maze. You've got all these different printing methods, and each one claims to be the best. While DTF printing for shirts is incredibly versatile, the "best" choice really comes down to what you're making—your design, how many you need, your budget, and the feel you're going for. It’s less about finding a single winner and more about finding the right tool for your specific job.
So, let's skip the generic pros and cons list and talk about real-world situations. This will give you a much clearer idea of when DTF is the clear champion and when another technique might just be a better fit.
When DTF Printing Is Your Best Bet
Picture this: You’re an Etsy seller about to drop a new collection of t-shirts. You’ve got ten different intricate, full-color designs, and you want to offer them on both cotton tees and some polyester blend hoodies. To start, you only need about five of each. This is a textbook case where DTF printing shines.
Why? Because DTF handles high-detail, full-color graphics without charging you a setup fee for every single color. You can cram all those different designs onto one sheet using our Auto-build gang sheet builder, which makes small, varied orders ridiculously cost-effective. Plus, the ability to press onto almost any fabric means you can launch that whole product line—from cotton to poly—without juggling different print methods.
This kind of flexibility is a huge reason why digital printing is taking off. The custom t-shirt market is already massive, valued at over USD 6 billion, and it's expected to more than double by 2032. Screen printing still has its place, of course, but the explosive growth in DTF and DTG signals a major shift toward more agile, on-demand printing solutions. You can dig deeper into these market trends and growth projections in recent industry reports.
Comparing DTF to Other Popular Methods
To really make a smart decision, you need to see how DTF printing for shirts stacks up against the other big players. Each one has its own strengths and is built for different kinds of projects.
-
Screen Printing: This is the old-school workhorse, perfect for large runs of simple designs. Need 1,000 one-color shirts for a company picnic? Screen printing is almost always your most budget-friendly option. But its high setup costs (you need a separate screen for each color) make it a poor choice for small orders or designs that look like a photograph.
-
Direct-to-Garment (DTG): Think of DTG as an inkjet printer for fabric. The ink soaks right into the fibers, giving it a super soft feel. It’s fantastic for one-off prints with tons of detail on 100% cotton shirts. The catch? It really struggles with polyester and can look faded on dark garments if you don't nail the underbase.
-
Heat Transfer Vinyl (HTV): HTV is basically like cutting shapes out of colored vinyl and ironing them on. It's the go-to for simple, bold graphics—like names and numbers on the back of a jersey. The downside is that it's just not built for complex, multi-color images, and the final result can feel thick and plasticky.
Key Takeaway: DTF printing basically bridges the gap between all these other methods. It gives you the full-color detail of DTG, durability that's on par with screen printing, and works on way more fabrics than both of them—all without painful setup costs or material headaches.
For a side-by-side look, this table breaks down the key differences to help you decide.
DTF vs Other Printing Methods at a Glance
Choosing a print method can be tough, but seeing the key features laid out side-by-side makes it much easier. This table compares the four most popular methods to help you figure out which one aligns with your project's goals.
| Feature | DTF Printing | Screen Printing | DTG Printing | Heat Transfer Vinyl (HTV) |
|---|---|---|---|---|
| Best For | Small to large runs with complex, multi-color designs. | Very large runs (100+) with simple, limited-color designs. | One-off or small orders with photorealistic detail. | Simple text, numbers, and basic shapes. |
| Design Complexity | Excellent; handles photorealistic images and gradients with ease. | Limited; each color adds significant cost and setup time. | Excellent; great for photos and intricate artwork. | Poor; not suitable for complex or multi-color designs. |
| Fabric Compatibility | Very high; works on cotton, polyester, blends, and more. | Good; best on cotton but can work on blends. | Limited; primarily for 100% cotton, struggles on poly. | High; works on a wide variety of fabrics. |
| Feel on Shirt | Soft and flexible, sits on top of the fabric. | Can be heavy, depending on the number of ink layers. | Very soft and breathable; ink soaks into the fabric. | Can feel thick and stiff, like a plastic layer. |
| Durability | Excellent; highly resistant to cracking, peeling, and fading. | Excellent; very durable and long-lasting when cured properly. | Good; can fade over time with repeated washing. | Good; can sometimes peel or crack at the edges. |
At the end of the day, picking the right method is all about matching the tech to your goals. For creators and businesses who need flexibility, killer color, and cost-effective production for a variety of orders, the DTF printing shirt method is a seriously powerful and reliable solution.
Preparing Your Artwork for a Perfect Print
The magic behind a great dtf printing shirt happens long before you ever turn on the heat press. Think of it this way: the quality of your final custom shirt is a direct reflection of the quality of your digital artwork. It’s a lot like photography—a sharp, high-resolution photo will always look incredible when printed, but a blurry, pixelated image will only get worse.
Getting your artwork right is the single most important step you can take. It’s like a pre-flight checklist that prevents common headaches like fuzzy edges, off-brand colors, and details that just don't pop. Taking a few minutes to prep your files correctly will save you from the frustration (and cost) of a reprint.
The Non-Negotiable Rule: High Resolution
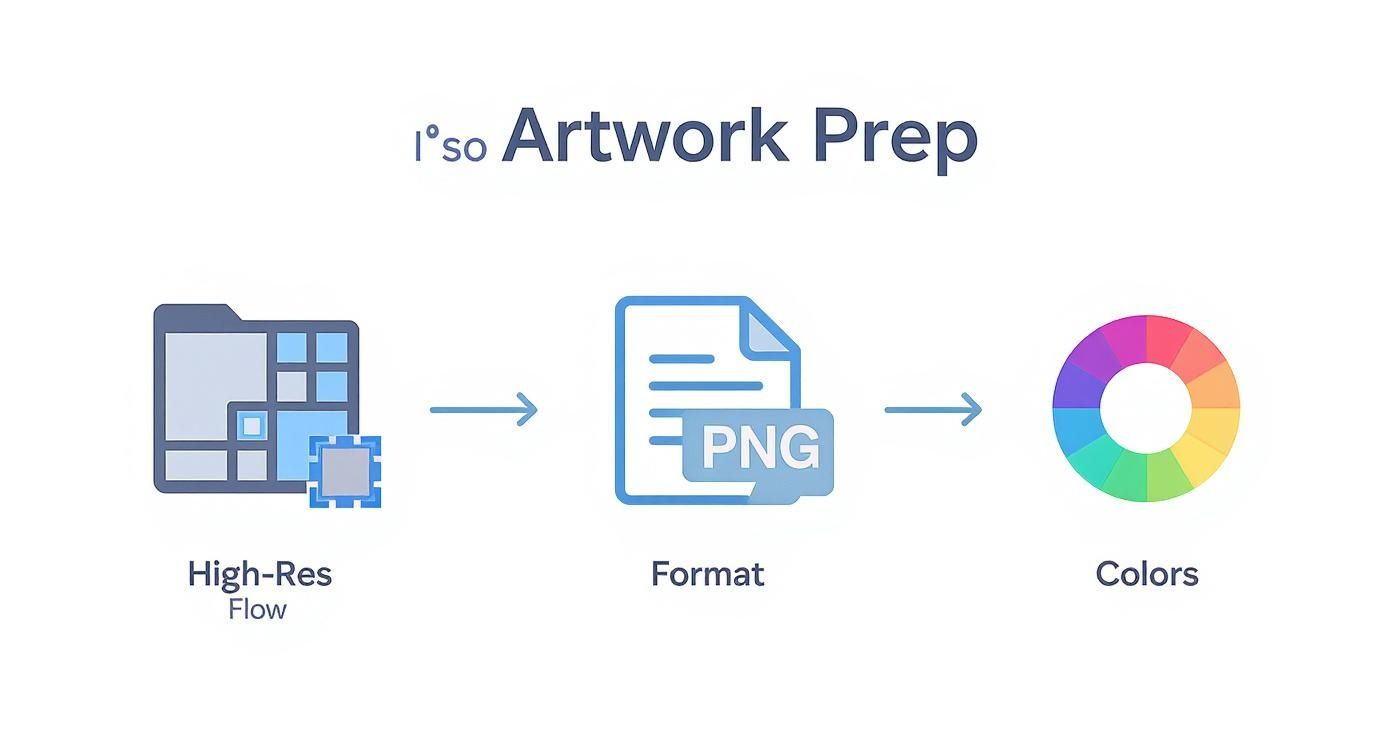
When it comes to artwork for DTF, resolution is king. We absolutely require files to be at a minimum of 300 DPI (dots per inch). This number tells you how many pixels are packed into each inch of your image. More pixels mean a sharper, crisper print. Simple as that.
Submitting a low-resolution file, like a 72 DPI image you grabbed from a website, is like asking a printer to make a beautiful poster from a tiny thumbnail. The printer has to stretch those few pixels to fill the space, and the result is always blurry, blocky, and completely unprofessional. Always, always start with a high-quality source file.
Choosing the Best File Format and Color Mode
The type of file you send us is also a huge deal. For DTF printing, the gold standard is a PNG file with a transparent background. Why transparent? Because it ensures we only print your design—not an ugly white or colored box around it.
You’ll also want to make sure your artwork is created and saved in RGB color mode. While other print methods often use CMYK, our DTF printers are specifically calibrated to translate RGB colors into vibrant, accurate shades on the film. Sticking to these specs prevents weird color shifts and keeps things looking clean and professional.
Key Takeaway: A 300 DPI PNG file with a transparent background saved in RGB color mode is the perfect recipe for a successful DTF print. This combo guarantees your design is sharp, clean, and color-accurate.
Essential Design and Layout Considerations
Beyond the technical stuff, a few design best practices can really elevate your final product. Super fine lines and tiny text can be tricky, so it’s always a good idea to keep text at a reasonable size to make sure it’s perfectly legible after printing.
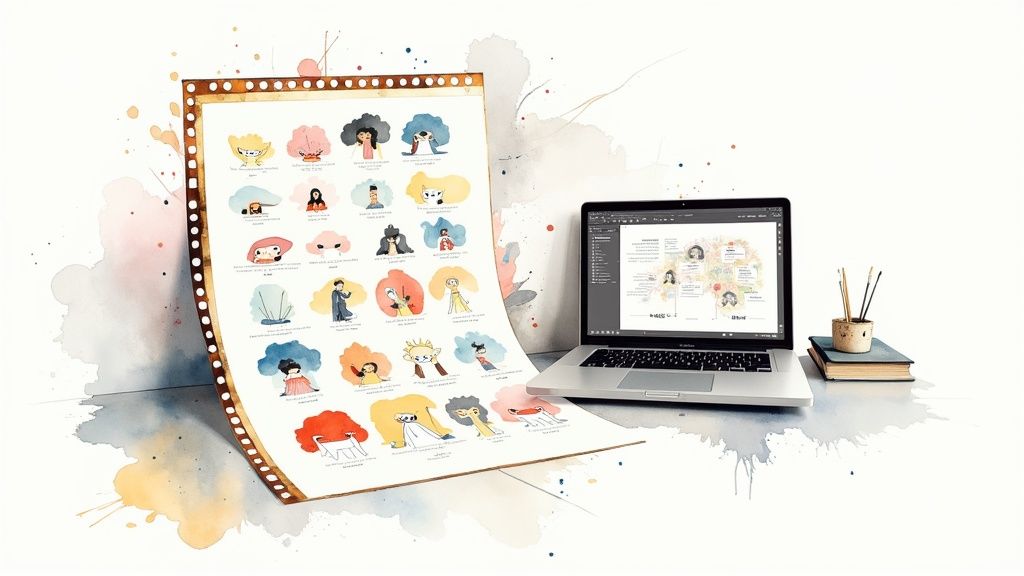
Now, if you have a bunch of different designs, uploading them one by one is a slow and expensive way to do things. This is where arranging your art efficiently comes into play. Our Auto-build gang sheet builder completely simplifies this process by automatically arranging your designs to maximize every inch of space on the film. This not only makes ordering a breeze but also seriously boosts your cost-effectiveness by fitting more prints onto a single sheet.
If you're new to this whole process, checking out a guide on how to create your own t-shirt designs can give you a great foundation for getting your files print-ready from the start.
How to Apply DTF Transfers for Lasting Results
So, you’ve got your DTF transfers in hand—this is where the fun really starts. We’re going to walk through how to apply them like a pro, turning that blank shirt into a piece of custom apparel that looks like it came straight from a high-end shop. The process itself isn't complicated, but getting the details right is what separates a good print from a great one that lasts.
Let's get one thing straight right away: you need a quality heat press. A home iron just can't deliver the consistent, even pressure and stable temperature needed for the adhesive to properly fuse with the fabric. For a durable, professional-grade dtf printing shirt, using a heat press is non-negotiable.
Pre-Pressing and Positioning Your Design
Before you even think about laying down that transfer, the first move is always a quick pre-press. Just place your shirt on the heat press and press it for about 5-7 seconds. This little step is a game-changer; it wicks out any trapped moisture and smooths out wrinkles, giving you a perfectly flat, dry canvas for your design.
With the shirt prepped, it's time to position your DTF transfer. Take a moment to get it perfectly centered and straight. You can use a t-shirt alignment tool if you have one, but eyeballing it works too. Just remember to take your time—once it’s pressed, there's no turning back.
Dialing In Your Heat Press Settings
The magic of a solid application comes down to three things: temperature, pressure, and time. Nailing these settings ensures the adhesive melts just right and bonds permanently to the garment. The ideal settings can shift a bit depending on your specific heat press and fabric, but here are some solid starting points that we use all the time.
But before you even get to the press, your artwork needs to be spot-on. This workflow shows the essentials.
Starting with a high-resolution file, saving it as a PNG, and using the right RGB color mode are the building blocks. Getting these steps right guarantees the physical transfer looks just as sharp as your digital design.
For most cotton and poly/cotton blends, try these settings first:
- Temperature: 240-280°F
- Time: 10 seconds
- Pressure: Medium to firm
If you're working with polyester, you’ll want to drop the temperature a bit to avoid scorching the fabric. Aim for around 240-250°F. And always, always cover your transfer with a Teflon sheet or parchment paper. It protects both the print and your heat press platen from any mishaps.
The Peel and the Final Press
Once that first press is done, it's time to peel away the carrier film. Our transfers are hot-peel, which is a huge plus. It means you can peel the film right after the press opens, which really speeds up your workflow compared to cold-peel transfers that make you wait around for the shirt to cool.
The secret to making your prints last? A quick post-press. After you've peeled the film, cover the design again with parchment paper and press for another 5-7 seconds. This locks the design deep into the fabric fibers, seriously boosts washability, and gives the print a softer, more natural matte finish.
This two-press method is how you create a dtf printing shirt that not only looks professional but can handle dozens of washes without cracking, peeling, or fading. It’s this kind of quality and durability that's fueling massive growth in the custom apparel world. To give you an idea, the direct-to-garment market—a close cousin to DTF—was valued at USD 3.2 billion in 2025 and is projected to hit USD 9.1 billion by 2035. That’s a clear sign that people want high-quality personalized gear. You can learn more about the projected growth in the custom apparel industry.
Save Time and Money with a Gang Sheet Builder
If you're running a business, efficiency is everything. When it comes to creating a bunch of different DTF printing shirt designs, ordering each one separately is a slow and expensive way to work. The secret to smarter, more cost-effective printing is something we call a "gang sheet."
Think of a gang sheet as one big canvas of DTF film where you can arrange multiple designs. Instead of paying for a small logo print, then another medium one, and a third large one, you can combine them all onto a single sheet for one flat price. This simple move dramatically drops your cost per print by making sure you use every last inch of film.
What Makes a Gang Sheet a Game Changer
For small brands, Etsy sellers, and anyone making promotional gear, gang sheets are a lifesaver. They give you the flexibility to test out new designs, print different sizes of the same logo, or create a whole collection of graphics without having to buy a huge inventory of any single transfer.
This approach shatters the high per-piece costs that usually come with small, diverse orders. It turns the dtf printing shirt process from a one-off task into a streamlined system, letting you maximize your budget and your creativity all at once.
Effortless Layout with an Auto-Build Tool
Trying to manually arrange dozens of designs onto a sheet can feel like a frustrating game of Tetris. You have to rotate, nest, and squeeze every graphic just right to avoid wasted space, which can burn hours in design software. This is exactly where our Auto-build Gang Sheet Builder comes in to make your life easier.
Our tool automates that entire puzzle. You just upload all your image files, and the smart algorithm takes over from there. It perfectly nests different shapes and sizes together, turning what would have been empty space into valuable real estate for more prints. This automation means you get more transfers for your money without any of the manual layout headaches.
The best part? This intelligent arrangement makes professional printing more accessible and affordable than ever. It empowers creators to produce a wide variety of high-quality transfers at a fraction of the old-school cost, helping them grow their brands faster.
If you prefer to set up your sheets by hand, check out our guide on how to create a DTF gang sheet in Canva for some extra tips.
Keeping Your DTF Printed Shirts Looking Brand New
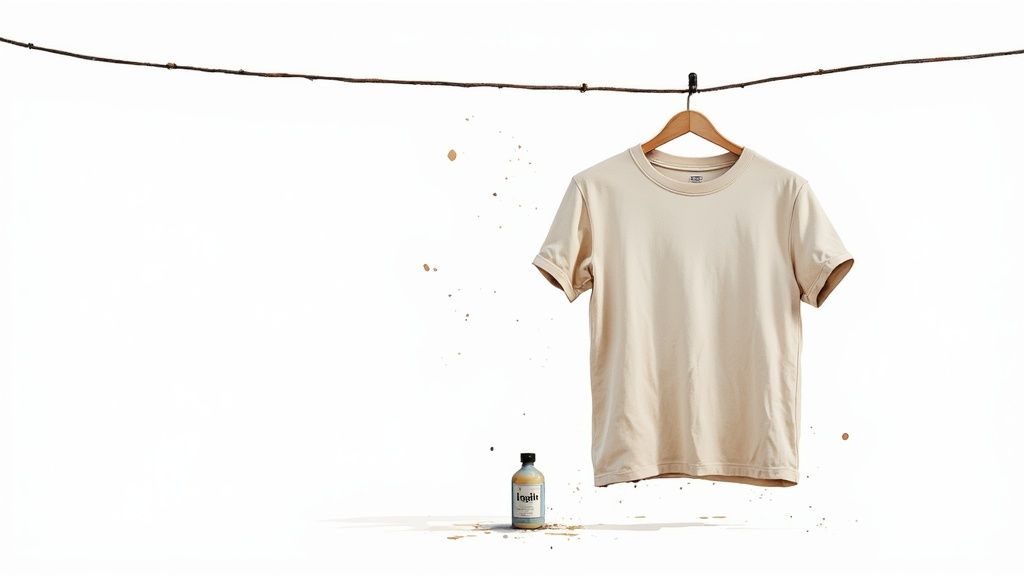
That new DTF printing shirt isn't just another piece of clothing—it's wearable art. And like any quality print, a little care will go a long way in keeping it looking sharp and feeling great. A few simple habits will protect your investment and make sure the design looks just as good as the day it was pressed.
The great thing about DTF transfers is their built-in durability; they're made to handle dozens of washes without fading. Still, every custom print has two main enemies: high heat and harsh friction. If you can minimize both, you’ll dramatically extend the life of your shirt.
Simple Washing Best Practices
The laundry is where your print faces its biggest challenge. These easy steps will protect the adhesive and lock in the colors, keeping your shirt looking fresh for the long haul.
Here are the non-negotiable rules for washing DTF-printed apparel:
- Turn It Inside Out: This is the easiest win. Before you toss it in the wash, turn the shirt inside out. This simple flip creates a protective shield, preventing the print from rubbing against other clothes, zippers, or buttons.
- Wash in Cold Water: Always stick with cold water. Hot water is the enemy of the adhesive that bonds the print to the fabric. Over time, it can soften the transfer and lead to cracking or peeling.
- Use a Mild Detergent: Go for a gentle detergent and skip the bleach and fabric softeners altogether. Harsh chemicals can break down the inks and weaken the print's integrity.
Making these small adjustments a part of your routine is the best way to safeguard the quality and soft feel of your print.
Drying and Ironing Instructions
Just like in the wash, high heat is a problem in the dryer—only worse. The concentrated heat from a tumble dryer can cause serious, irreversible damage to a DTF print.
While tumble drying on a low-heat setting is an option, air drying is the gold standard for making your print last. Just hang the shirt or lay it flat to dry. This completely removes any risk of heat damage and helps the garment keep its original shape and fit.
If you need to iron the shirt, never let a hot iron touch the DTF print directly. The best approach is to turn the shirt inside out and iron the reverse side. You can also place a sheet of parchment paper over the design before pressing to keep it smooth and flawless.
Want to dive deeper into how long your prints can last with proper care? Check out our guide on how long DTF transfers last. Following these instructions is the key to getting the maximum life out of every custom shirt you press.
Your Top Questions About DTF, Answered
Even after you get the basics down, it's totally normal to have a few questions before you dive into your first DTF printing shirt project. To get you feeling confident, we've pulled together some of the most common questions we hear and laid out the straight answers.
How Durable Is a DTF Print Compared to Screen Printing?
DTF prints are built to last. Seriously. When you press them correctly and take care of the garment, they're incredibly resistant to cracking, peeling, and fading. In a lot of cases, a quality DTF transfer will actually outlive the shirt it's on.
The flexibility and toughness of a DTF print are right up there with a high-quality screen print. The real advantage often comes with multi-color designs, where DTF can hold its vibrancy better through dozens of washes. This makes it a fantastic choice for creating custom apparel that really stands up to wear and tear.
Can I Use a Home Iron for DTF Transfers?
It might be tempting for a one-off project, but we strongly advise against using a home iron. A heat press is absolutely essential for professional results, and it all comes down to two things an iron just can't deliver: consistent temperature and even pressure.
A regular iron has hot and cool spots, and you can't possibly apply the firm, uniform pressure needed to properly fuse the DTF adhesive into the fabric. Using an iron almost guarantees a print that will start peeling off after just a wash or two. If you want that durable, store-quality finish, a heat press is non-negotiable.
How Does the Auto-Build Gang Sheet Builder Reduce Costs?
Our Auto-build gang sheet builder is all about saving you money by making the most of every inch of film. Instead of paying for each design one by one, you get to pack multiple logos, graphics, and designs onto a single large transfer sheet.
The software’s smart algorithm automatically nests your images as tightly as possible, virtually eliminating wasted space between designs. This means you get way more prints for the price of one sheet, which drastically lowers your cost for each individual transfer. It's the most wallet-friendly way to go for anyone needing a mix of graphics.
This kind of efficiency is a game-changer for small businesses, Etsy sellers, and brands that need to produce a variety of items without a huge upfront cost.
What Kinds of Fabric Can I Use DTF On?
One of the biggest wins for the DTF printing shirt method is its incredible versatility with fabrics. It works beautifully on a huge range of materials, even ones that other methods struggle with.
You can confidently press DTF transfers onto:
- 100% Cotton
- 100% Polyester
- Cotton/Poly Blends (50/50, 60/40, etc.)
- Tri-Blends
- Canvas and Denim
- Even some leathers and nylon
Unlike DTG printing, which is pretty much limited to cotton, the DTF process sticks perfectly to both natural and synthetic fibers. This makes it the go-to choice for almost any apparel or fabric project you can dream up.
Ready to create stunning, durable custom apparel with ease? At Lion DTF, we provide premium hot-peel transfers that are vibrant, easy to apply, and built to last. Use our Auto-build Gang Sheet Builder to maximize your value and bring all your designs to life.